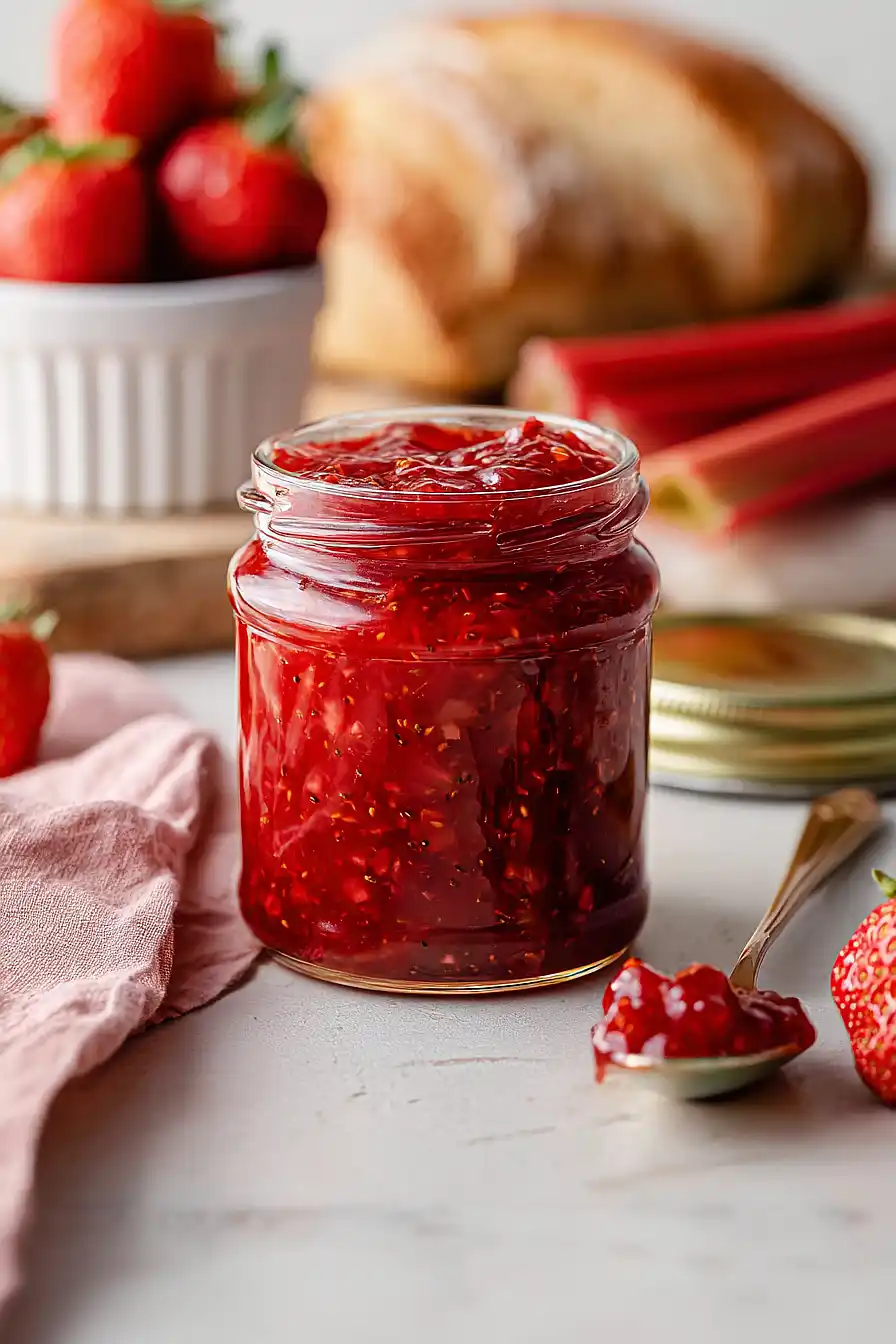
Finding a good use for spring’s bounty of rhubarb and strawberries can be tricky, especially when you want something that lasts longer than a few days in the fridge. Sure, you could bake a pie or crumble, but those don’t exactly help you enjoy the season’s flavors all year long.
That’s where this strawberry, rhubarb and vanilla jam comes in perfectly: it captures that classic spring combo in a preserve you can spread on toast any morning, it uses just a handful of pantry staples you probably already have, and the process is much easier than you might think if you’ve never made jam before.
Why You’ll Love This Strawberry, Rhubarb and Vanilla Jam
- Perfect balance of sweet and tart – The strawberries bring natural sweetness while the rhubarb adds a pleasant tanginess, creating a flavor combination that’s way more interesting than plain strawberry jam.
- Simple ingredients – You only need six basic ingredients to make this homemade jam, and most of them are probably already in your kitchen.
- No pectin required – The rhubarb naturally helps the jam set, so you don’t need to buy any special ingredients or worry about getting the pectin ratio right.
- Makes great gifts – This homemade jam is perfect for sharing with friends and family, and it tastes so much better than anything you can buy at the store.
- Seasonal cooking at its best – This recipe lets you take advantage of fresh spring produce when strawberries and rhubarb are at their peak flavor.
What Kind of Rhubarb Should I Use?
For this jam, you can use either red or green rhubarb – both will work just fine, though the red stalks will give your jam a prettier pink color. Fresh rhubarb is ideal, but if you only have access to frozen, that’s totally okay too, just let it thaw and drain off any excess liquid before using. When selecting fresh rhubarb, look for firm, crisp stalks and avoid any that feel soft or look shriveled. Make sure to trim off the leaves if they’re still attached, as they’re not edible, and cut away any brown or damaged spots on the stalks before chopping them up for your jam.

Options for Substitutions
This jam recipe has some room for flexibility, though a few ingredients are pretty important to keep:
- Rhubarb: Rhubarb is really the star here, so I’d recommend keeping it as is. If you absolutely can’t find it, you could try using all strawberries, but you’ll end up with a different jam entirely – more of a classic strawberry jam.
- Strawberries: Fresh strawberries work best, but frozen ones are totally fine if that’s what you have. Just thaw them first and drain any excess liquid before using.
- Sugar: You can reduce the sugar by about half a cup if you prefer less sweetness, but keep in mind that sugar helps with preservation and texture. Going much lower might affect how well your jam sets.
- Lemon juice: Fresh lemon juice is ideal, but bottled works in a pinch. The acid helps the jam set properly, so don’t skip this one.
- Vanilla essence: If you have vanilla extract or vanilla bean paste, either makes a great swap. Use the same amount of extract, or about 1 teaspoon of paste for a richer vanilla flavor.
Watch Out for These Mistakes While Cooking
The biggest mistake when making jam is not cooking it long enough, which leaves you with a runny syrup instead of a spreadable preserve – use the cold plate test by dropping a spoonful of jam on your frozen plate, and if it wrinkles when you push it with your finger, it’s ready.
Skipping the maceration step where the fruit sits with sugar overnight is tempting, but this process draws out the natural juices and helps the jam set properly while keeping the fruit pieces intact.
Another common error is filling the jars too full, which prevents a proper seal during the water bath process, so always leave that 1/4 inch of headspace at the top.
Finally, resist the urge to skip the resting period after removing jars from the water bath – letting them sit undisturbed for 12-24 hours allows the jam to fully set and the seal to form correctly.

What to Serve With Strawberry Rhubarb Jam?
This jam is perfect slathered on warm, buttery toast or English muffins for breakfast – it’s one of those spreads that makes mornings feel special. I love using it as a topping for plain Greek yogurt or vanilla ice cream when I want something sweet but not too heavy. It also works great as a filling for thumbprint cookies or swirled into overnight oats for a fruity kick. If you’re feeling fancy, spread some on a fresh biscuit or scone with a dollop of clotted cream for an afternoon treat that feels like you’re at a tea party.
Storage Instructions
Store: Once your jam has cooled completely, transfer it to clean glass jars with tight-fitting lids. It’ll keep in the refrigerator for up to 3 weeks, perfect for spreading on toast, stirring into yogurt, or topping your morning pancakes throughout the month.
Can: If you want to preserve this jam for longer, you can process the jars in a water bath canner for 10 minutes. Properly sealed jars will last in your pantry for up to a year, making this a great recipe to make when strawberries and rhubarb are in season.
Freeze: You can also freeze this jam in freezer-safe containers or jars, leaving about half an inch of space at the top for expansion. It’ll keep frozen for up to 6 months and thaws beautifully in the fridge overnight.
| Preparation Time | 15-20 minutes |
| Cooking Time | 50-70 minutes |
| Total Time | 65-90 minutes |
| Level of Difficulty | Medium |
| Servings | 6 cups of jam |
Estimated Nutrition
Estimated nutrition for the whole recipe (without optional ingredients):
- Calories: 1750-1850
- Protein: 4-6 g
- Fat: 0-1 g
- Carbohydrates: 440-460 g
Ingredients
- 2 lb rhubarb (trimmed and cut into 1/2-inch pieces)
- 1.5 lb strawberries (hulled and halved for better texture)
- 3.5 cups sugar (I always use Domino granulated sugar)
- 3 tbsp lemon juice
- 1/4 tsp salt
- 1 tsp vanilla bean paste (I prefer Nielsen-Massey pure vanilla extract)
Step 1: Prepare Fruit and Macerate Overnight
- 2 lb rhubarb
- 1.5 lb strawberries
- 3.5 cups sugar
Combine the trimmed rhubarb, hulled strawberries, and sugar in a large bowl, stirring gently to distribute the sugar evenly throughout the fruit.
Cover and refrigerate for 12 to 24 hours—this macerating period allows the fruit to release its natural juices and sugar to dissolve, which creates better texture and flavor development in the finished jam.
I find that starting this the night before makes the cooking process much faster and more efficient the next day.
Step 2: Prepare Jars and Equipment
While the fruit macerates, wash your jam jars thoroughly with hot soapy water and rinse well.
About 30 minutes before you plan to cook, place the clean jars in a pot of simmering water to warm them—this prevents thermal shock when you fill them with hot jam.
Place a small ceramic plate or glass dish in your freezer at the same time; you’ll use this to test the jam’s set later.
Having everything ready means you won’t rush the critical moment when the jam reaches the right consistency.
Step 3: Cook Fruit Mixture to Breaking Point
- macerated fruit mixture from Step 1
- 3 tbsp lemon juice
- 1/4 tsp salt
Transfer the macerated fruit mixture (including all the liquid that has accumulated) to a large, heavy-bottomed pot.
Add the lemon juice and salt, then bring to a boil over medium-high heat.
Once boiling, continue cooking and stirring frequently for about 10 minutes as the fruit breaks down into smaller pieces and the mixture begins to thicken slightly.
The fruit will transition from distinct pieces to a chunky sauce-like consistency.
Step 4: Cook Jam to Full Gel
- fruit mixture from Step 3
Continue cooking the fruit mixture over medium-high heat for another 22 to 25 minutes, stirring occasionally to prevent sticking and ensure even heat distribution.
The mixture should darken slightly and become noticeably thicker as water evaporates and the pectin in the fruit sets.
I like to use a candy or instant-read thermometer to check when it reaches 212°F (100°C), which indicates the proper jam consistency, but you can also rely on the visual cues and plate test.
Step 5: Test Jam Consistency and Add Vanilla
- cooked jam from Step 4
- 1 tsp vanilla bean paste
Remove the pot from heat and perform a quick set test: place a small spoonful of jam on your cold plate from Step 2 and let it cool for 30 seconds.
Push it with your finger—if it wrinkles slightly and doesn’t run back together, it’s ready; if it’s too thin, return the pot to heat for another minute or two.
Once the jam reaches the desired consistency, stir in the vanilla bean paste or extract, combining it thoroughly throughout the jam.
Step 6: Fill and Process Jars
- vanilla-infused jam from Step 5
- warm jars from Step 2
Carefully remove the warm jars from the simmering water and place them on a clean kitchen towel.
Using a clean ladle or funnel, fill each jar with jam, leaving exactly 1/4 inch of headspace at the top—this space is essential for proper sealing.
Wipe the rim of each jar clean with a damp cloth to remove any jam residue, then secure the lids tightly.
Step 7: Water Bath Canning and Cool
- filled jars from Step 6
Place the filled jars back into the pot of simmering water, ensuring they are covered by at least 1 inch of water.
Bring to a rolling boil and process for 10 minutes.
Turn off the heat and leave the jars in the hot water for 5 minutes, then carefully remove them using jar tongs and place them upright on a clean towel to cool completely at room temperature.
As they cool, you’ll hear the satisfying ‘pop’ of each lid sealing—this indicates the jam is properly preserved and shelf-stable.
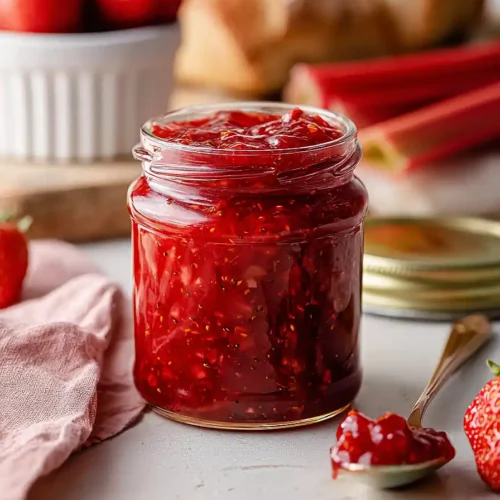
Tangy Strawberry Rhubarb Vanilla Jam
Ingredients
- 2 lb rhubarb (trimmed and cut into 1/2-inch pieces)
- 1.5 lb strawberries (hulled and halved for better texture)
- 3.5 cups sugar (I always use Domino granulated sugar)
- 3 tbsp lemon juice
- 1/4 tsp salt
- 1 tsp vanilla bean paste (I prefer Nielsen-Massey pure vanilla extract)
Instructions
- Combine the trimmed rhubarb, hulled strawberries, and sugar in a large bowl, stirring gently to distribute the sugar evenly throughout the fruit. Cover and refrigerate for 12 to 24 hours—this macerating period allows the fruit to release its natural juices and sugar to dissolve, which creates better texture and flavor development in the finished jam. I find that starting this the night before makes the cooking process much faster and more efficient the next day.
- While the fruit macerates, wash your jam jars thoroughly with hot soapy water and rinse well. About 30 minutes before you plan to cook, place the clean jars in a pot of simmering water to warm them—this prevents thermal shock when you fill them with hot jam. Place a small ceramic plate or glass dish in your freezer at the same time; you'll use this to test the jam's set later. Having everything ready means you won't rush the critical moment when the jam reaches the right consistency.
- Transfer the macerated fruit mixture (including all the liquid that has accumulated) to a large, heavy-bottomed pot. Add the lemon juice and salt, then bring to a boil over medium-high heat. Once boiling, continue cooking and stirring frequently for about 10 minutes as the fruit breaks down into smaller pieces and the mixture begins to thicken slightly. The fruit will transition from distinct pieces to a chunky sauce-like consistency.
- Continue cooking the fruit mixture over medium-high heat for another 22 to 25 minutes, stirring occasionally to prevent sticking and ensure even heat distribution. The mixture should darken slightly and become noticeably thicker as water evaporates and the pectin in the fruit sets. I like to use a candy or instant-read thermometer to check when it reaches 212°F (100°C), which indicates the proper jam consistency, but you can also rely on the visual cues and plate test.
- Remove the pot from heat and perform a quick set test: place a small spoonful of jam on your cold plate from Step 2 and let it cool for 30 seconds. Push it with your finger—if it wrinkles slightly and doesn't run back together, it's ready; if it's too thin, return the pot to heat for another minute or two. Once the jam reaches the desired consistency, stir in the vanilla bean paste or extract, combining it thoroughly throughout the jam.
- Carefully remove the warm jars from the simmering water and place them on a clean kitchen towel. Using a clean ladle or funnel, fill each jar with jam, leaving exactly 1/4 inch of headspace at the top—this space is essential for proper sealing. Wipe the rim of each jar clean with a damp cloth to remove any jam residue, then secure the lids tightly.
- Place the filled jars back into the pot of simmering water, ensuring they are covered by at least 1 inch of water. Bring to a rolling boil and process for 10 minutes. Turn off the heat and leave the jars in the hot water for 5 minutes, then carefully remove them using jar tongs and place them upright on a clean towel to cool completely at room temperature. As they cool, you'll hear the satisfying 'pop' of each lid sealing—this indicates the jam is properly preserved and shelf-stable.
