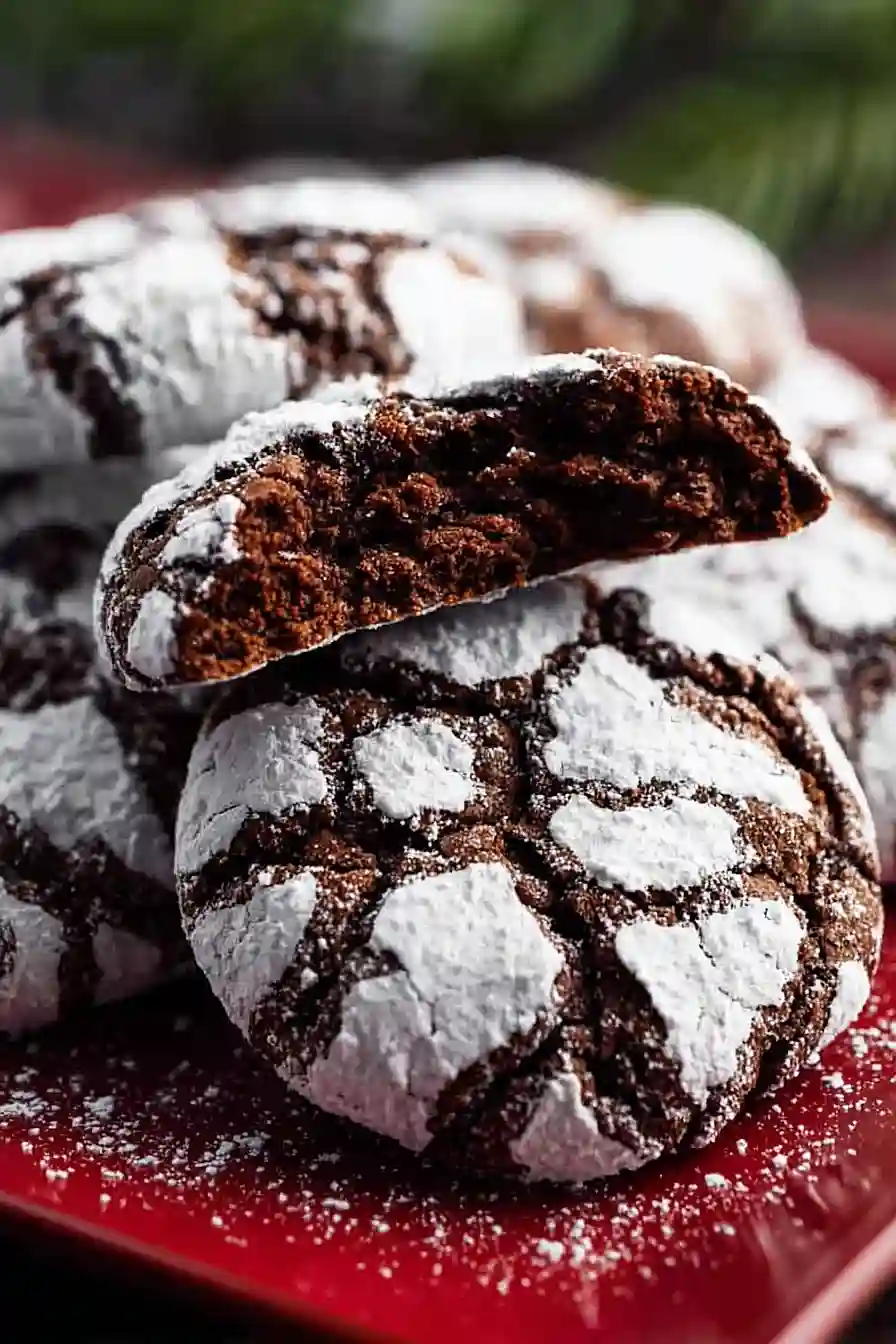
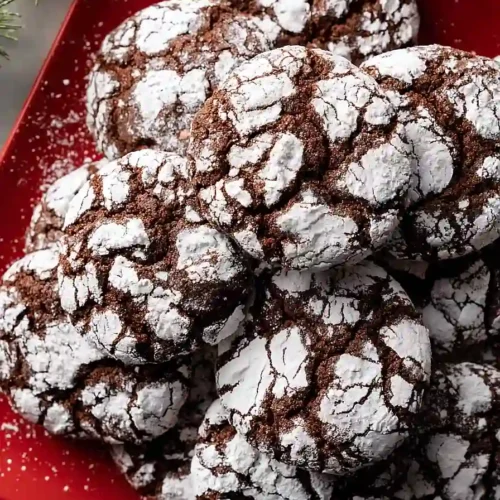
Here are my chocolate peppermint crinkle cookies, with rich cocoa powder, a punch of peppermint extract, and a coating of powdered sugar that creates those pretty cracked edges when they bake.
These cookies are a holiday favorite at our house. I love how the chocolate and peppermint combo tastes just like those candy canes we hang on the tree, and the kids always fight over who gets to roll them in the powdered sugar.

Why You’ll Love These Chocolate Peppermint Crinkle Cookies
- Perfect holiday treat – The chocolate and peppermint combo makes these cookies ideal for Christmas cookie exchanges, holiday parties, or just enjoying by the fireplace with hot cocoa.
- Beautiful presentation – These cookies look impressive with their crackled powdered sugar coating, but they’re actually simple to make and don’t require any fancy decorating skills.
- Make-ahead friendly – The dough needs to chill anyway, so you can prep it the night before and bake fresh cookies whenever you’re ready.
- Rich chocolate flavor – With a full cup of cocoa powder, these cookies deliver deep, fudgy chocolate taste in every bite that pairs perfectly with the refreshing peppermint.
- Simple pantry ingredients – You probably have most of these ingredients on hand already, making this an easy recipe to whip up without a special grocery trip.
What Kind of Peppermint Extract Should I Use?
When it comes to peppermint extract for these cookies, you’ll want to use pure peppermint extract rather than imitation if you can find it. Pure extract gives you a cleaner, more authentic mint flavor that really shines through the chocolate. That said, if imitation is all you have on hand, it’ll still work just fine – you might just need to add a tiny bit extra to get that bold peppermint punch. Start with the 2 teaspoons called for in the recipe and taste the dough before baking. If you want a stronger mint flavor, you can add another ½ teaspoon, but be careful not to go overboard or it might taste medicinal.

Options for Substitutions
These cookies are pretty forgiving when it comes to swaps, so here are some options if you need to make changes:
- Peppermint extract: If peppermint isn’t your thing, try vanilla extract for classic chocolate crinkles, or almond extract for a different flavor profile. You can also use ½ teaspoon of pure peppermint oil if that’s what you have – just use less since it’s more concentrated.
- Vegetable oil: Canola oil, melted coconut oil, or even melted butter work well here. Keep in mind that butter will give you a slightly richer flavor and a bit more spread.
- Unsweetened cocoa powder: Dutch-process cocoa will give you a darker color and milder flavor, while natural cocoa powder (what this recipe uses) has a more intense chocolate taste. Either works fine.
- All-purpose flour: You can use a 1:1 gluten-free flour blend if needed. The texture might be slightly different, but the cookies will still turn out tasty.
- Confectioners’ sugar: This is really important for that signature crinkle look, so I wouldn’t skip it. If you’re in a pinch, you can make your own by blending granulated sugar with a bit of cornstarch in a food processor.
Watch Out for These Mistakes While Baking
The biggest mistake you can make with crinkle cookies is skipping the chilling step – if your dough isn’t cold enough, the cookies will spread too much and you’ll lose those signature cracks on top, so refrigerate the dough for at least 2 hours or even overnight.
Another common error is rolling the dough balls too small, which leads to flat, crispy cookies instead of the thick, chewy texture you want – aim for balls about 1.5 inches in diameter for the best results.
When it comes to the powdered sugar coating, don’t be shy about it – roll each dough ball generously in the confectioners’ sugar and make sure your hands are dry, otherwise the sugar will dissolve and you won’t get that pretty white contrast against the dark chocolate.
Finally, resist the urge to overbake these cookies, as they should still look slightly underdone in the center when you pull them out at around 10-12 minutes, since they’ll continue to set as they cool on the baking sheet.
What to Serve With Chocolate Peppermint Crinkle Cookies?
These cookies are perfect alongside a mug of hot chocolate or a glass of cold milk for dunking. I love setting them out on a platter with other holiday treats like sugar cookies, brownies, or fudge when I’m hosting friends during the winter months. They also pair really well with a scoop of vanilla ice cream if you want to turn them into a simple dessert, or you can crumble them over peppermint ice cream for an extra minty treat. For a cozy afternoon snack, serve them with coffee or hot tea – the peppermint flavor goes especially well with chai or Earl Grey.
Storage Instructions
Store: These cookies stay soft and chewy when kept in an airtight container at room temperature for up to a week. Just make sure they’re completely cooled before storing, or the powdered sugar coating will get a bit sticky and disappear.
Freeze: You can freeze baked cookies in a freezer-safe container with parchment paper between layers for up to 3 months. Or, if you want fresh-baked cookies anytime, roll the dough into balls, coat them in powdered sugar, and freeze on a baking sheet before transferring to a bag. Bake straight from frozen, adding just a minute or two to the baking time.
Serve: Let frozen cookies thaw at room temperature for about 30 minutes before serving. They taste great cold too, especially if you like a firmer texture with your coffee or hot chocolate!
| Preparation Time | 10-15 minutes |
| Cooking Time | 10-12 minutes |
| Total Time | 4 hours 20 minutes – 24 hours 12 minutes |
| Level of Difficulty | Medium |
Estimated Nutrition
Estimated nutrition for the whole recipe (without optional ingredients):
- Calories: 3700-3900
- Protein: 42-48 g
- Fat: 120-130 g
- Carbohydrates: 600-650 g
Ingredients
For the dough:
- 1/2 tsp kosher salt
- 2 tsp peppermint extract (adds bright minty flavor)
- 1 cup cocoa powder (Dutch-process for deeper chocolate flavor)
- 2 cups all-purpose flour (I use King Arthur all-purpose)
- 2 cups sugar
- 4 large eggs (room temperature for better mixing)
- 2 tsp baking powder
- 1/2 cup vegetable oil (or canola oil)
For the coating:
- 1/2 cup confectioners’ sugar (for rolling, creates crinkled effect)
Step 1: Combine Wet Ingredients and Build Chocolate Base
- 2 cups sugar
- 1 cup cocoa powder
- 1/2 cup vegetable oil
- 4 large eggs
- 2 tsp peppermint extract
In a large bowl, whisk together the sugar, cocoa powder, and vegetable oil until well combined and slightly paste-like.
Add the room temperature eggs one at a time, whisking thoroughly after each addition to create a smooth, emulsified mixture.
Stir in the peppermint extract until evenly distributed.
This wet base is where all your chocolate and peppermint flavor lives, so make sure everything is fully incorporated before moving to the next step.
Step 2: Mix Dry Ingredients Separately
- 2 cups all-purpose flour
- 2 tsp baking powder
- 1/2 tsp kosher salt
In a separate bowl, whisk together the all-purpose flour, baking powder, and kosher salt.
This dry mixture will be incorporated into the wet base to form the dough.
I like to whisk these together to distribute the baking powder evenly—this prevents any bitter pockets of concentrated leavening in your cookies.
Step 3: Create the Dough
- wet chocolate mixture from Step 1
- dry ingredient mixture from Step 2
Add the dry ingredient mixture from Step 2 to the wet chocolate mixture from Step 1, stirring until just combined into a thick, fudgy dough.
Don’t overmix—you want a cohesive dough without overdeveloping the flour, which would make the cookies tough.
The dough will be quite rich and slightly sticky, which is exactly what you want for that signature crinkly texture.
Step 4: Chill the Dough
- dough from Step 3
Cover the dough and refrigerate for at least 4 hours, or up to overnight.
This resting period allows the flavors to meld and makes the dough much easier to handle when rolling.
Cold dough won’t spread as much during baking, which helps you achieve those signature deep crinkles on top.
Step 5: Prepare for Baking
- 1/2 cup confectioners’ sugar
Preheat your oven to 350°F and set up your workspace.
Pour the confectioners’ sugar into a shallow bowl—this is your coating station.
Have your baking sheets ready nearby so you can work efficiently once you start rolling the dough balls.
Step 6: Shape and Sugar-Coat the Cookies
- chilled dough from Step 4
- confectioners’ sugar from Step 5
Working with the chilled dough from Step 4, scoop out 2-tablespoon portions and roll them into balls.
Immediately roll each ball in the confectioners’ sugar until fully coated, then place it on your baking sheet about 2 inches apart.
The sugar coating will create those beautiful crinkles as the cookies bake and the dough expands.
Step 7: Bake and Cool
Bake at 350°F for 10-12 minutes, until the edges are set but the center still has a slight jiggle—these cookies should be fudgy, not cake-like.
Remove from the oven and let the cookies cool on the baking sheet for 5 minutes before transferring to a wire rack.
I find this 5-minute rest on the sheet helps them firm up just enough to move without breaking while staying wonderfully chewy inside.
Rich Chocolate Peppermint Crinkle Cookies
Ingredients
For the dough:
- 1/2 tsp kosher salt
- 2 tsp peppermint extract (adds bright minty flavor)
- 1 cup cocoa powder (Dutch-process for deeper chocolate flavor)
- 2 cups all-purpose flour (I use King Arthur all-purpose)
- 2 cups sugar
- 4 large eggs (room temperature for better mixing)
- 2 tsp baking powder
- 1/2 cup vegetable oil (or canola oil)
For the coating:
- 1/2 cup confectioners' sugar (for rolling, creates crinkled effect)
Instructions
- In a large bowl, whisk together the sugar, cocoa powder, and vegetable oil until well combined and slightly paste-like. Add the room temperature eggs one at a time, whisking thoroughly after each addition to create a smooth, emulsified mixture. Stir in the peppermint extract until evenly distributed. This wet base is where all your chocolate and peppermint flavor lives, so make sure everything is fully incorporated before moving to the next step.
- In a separate bowl, whisk together the all-purpose flour, baking powder, and kosher salt. This dry mixture will be incorporated into the wet base to form the dough. I like to whisk these together to distribute the baking powder evenly—this prevents any bitter pockets of concentrated leavening in your cookies.
- Add the dry ingredient mixture from Step 2 to the wet chocolate mixture from Step 1, stirring until just combined into a thick, fudgy dough. Don't overmix—you want a cohesive dough without overdeveloping the flour, which would make the cookies tough. The dough will be quite rich and slightly sticky, which is exactly what you want for that signature crinkly texture.
- Cover the dough and refrigerate for at least 4 hours, or up to overnight. This resting period allows the flavors to meld and makes the dough much easier to handle when rolling. Cold dough won't spread as much during baking, which helps you achieve those signature deep crinkles on top.
- Preheat your oven to 350°F and set up your workspace. Pour the confectioners' sugar into a shallow bowl—this is your coating station. Have your baking sheets ready nearby so you can work efficiently once you start rolling the dough balls.
- Working with the chilled dough from Step 4, scoop out 2-tablespoon portions and roll them into balls. Immediately roll each ball in the confectioners' sugar until fully coated, then place it on your baking sheet about 2 inches apart. The sugar coating will create those beautiful crinkles as the cookies bake and the dough expands.
- Bake at 350°F for 10-12 minutes, until the edges are set but the center still has a slight jiggle—these cookies should be fudgy, not cake-like. Remove from the oven and let the cookies cool on the baking sheet for 5 minutes before transferring to a wire rack. I find this 5-minute rest on the sheet helps them firm up just enough to move without breaking while staying wonderfully chewy inside.
