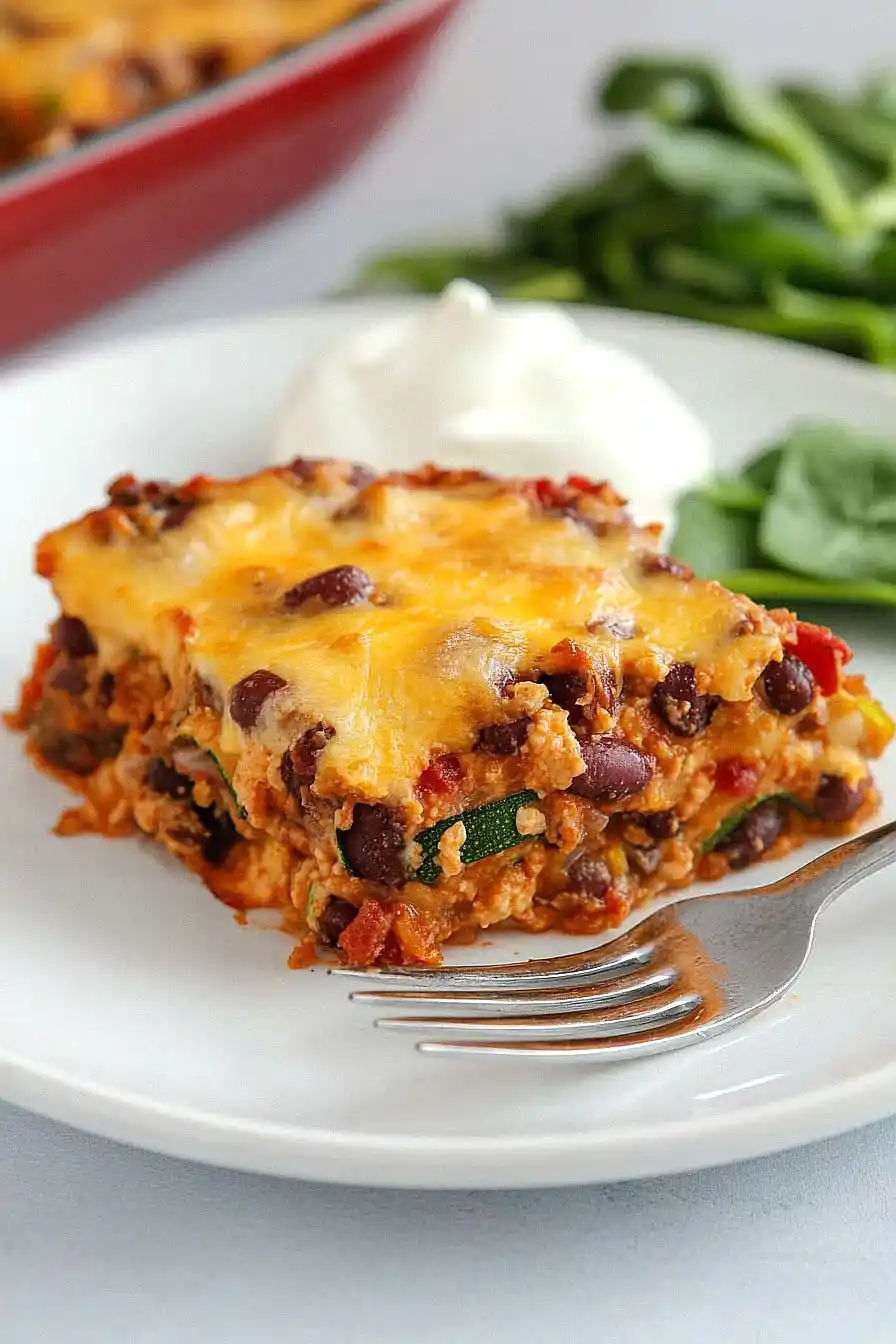
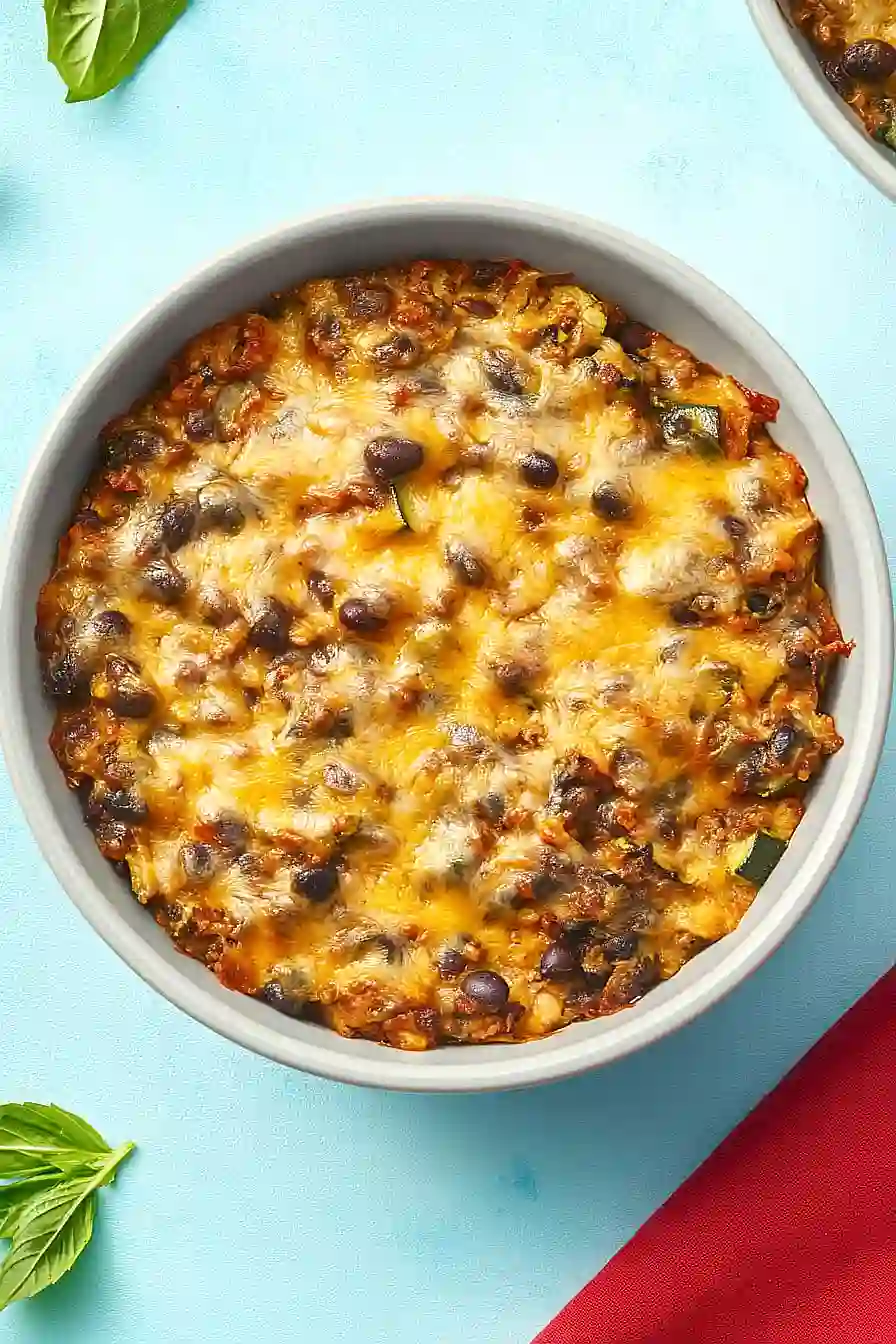
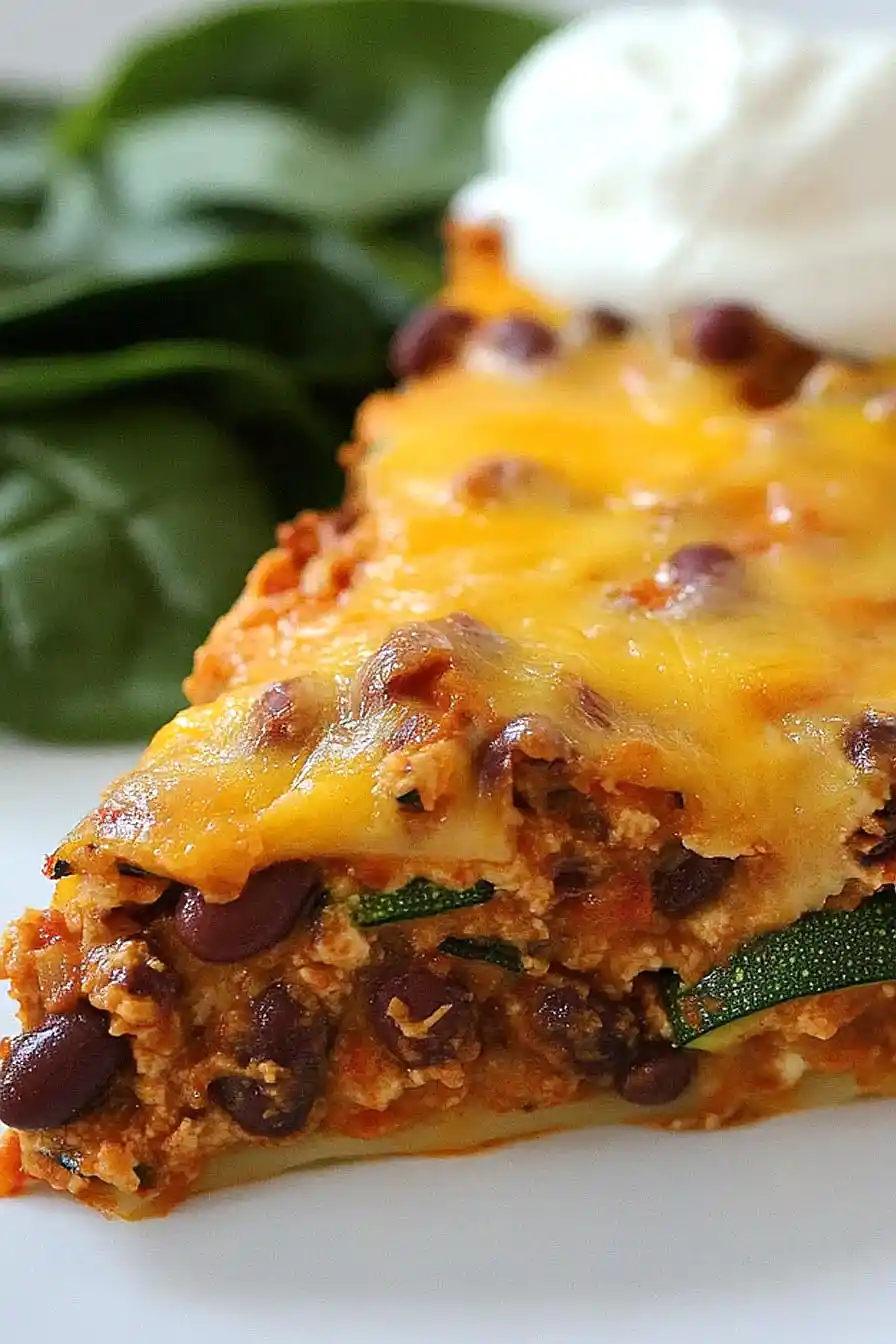
If you ask me, zucchini bean casseroles are a total game-changer.
This cozy main dish combines fresh garden zucchini with hearty beans in a comforting, home-style casserole. The tender vegetables and creamy beans blend perfectly with melted cheese and just the right mix of seasonings.
It’s layered with fresh herbs and topped with a golden crust that gets nice and crispy in the oven. The simple ingredients work together to create something that’s both filling and satisfying.
It’s a family-friendly dish that’s easy on the budget and perfect for those busy weeknight dinners.
Why You’ll Love This Zucchini Bean Casserole
- Plant-based friendly – This dairy-free casserole is perfect for vegans and those with lactose intolerance, while still delivering all the comfort of a traditional casserole.
- Quick prep time – With just 35-50 minutes from start to finish, you can have a filling family meal ready without spending hours in the kitchen.
- Budget-conscious – Using affordable ingredients like beans, zucchini, and tortillas, this recipe gives you a hearty meal that won’t break the bank.
- Customizable heat level – You can easily adjust the spiciness by changing the amount of chili powder and peppers to suit your family’s taste preferences.
- Nutritious ingredients – Packed with vegetables, beans, and plant-based protein, this casserole gives you a healthy dinner option that doesn’t sacrifice flavor.
What Kind of Zucchini Should I Use?
For this casserole, medium-sized zucchini (about 7-8 inches long) are your best bet since they’re usually more tender and have smaller seeds than larger ones. If you can only find larger zucchini at the store, that’s okay too – just be sure to scoop out the seedy center before slicing, as bigger zucchini tend to have tougher seeds that can make your dish watery. When picking your zucchini, look for ones that are firm to the touch and have smooth, unblemished dark green skin. Fresh zucchini will feel relatively heavy for their size and shouldn’t have any soft spots or wrinkled skin.
Options for Substitutions
This casserole is super adaptable and there are lots of ways to switch things up based on what you have in your kitchen:
- Black beans: You can easily swap black beans with pinto beans, kidney beans, or even chickpeas. Just make sure to rinse and drain them well.
- Zucchini: Yellow summer squash works perfectly in place of zucchini. You could also use Mexican grey squash or even sliced eggplant – just salt the eggplant first and let it sit for 30 minutes to remove excess moisture.
- Corn tortillas: While corn tortillas give the best texture, you can use flour tortillas if that’s what you have. Just know the texture will be a bit different and maybe slightly more mushy.
- Dairy-free cheese: Any plant-based cheese will work here, or you can skip it altogether and add some nutritional yeast for a cheesy flavor. If you’re not vegan, regular cheddar cheese works great too.
- Hot chili peppers: Feel free to use jalapeños, serranos, or even a dash of hot sauce instead. If you’re not into spicy food, bell peppers alone will do just fine.
- Vegan sour cream: Regular sour cream works if you’re not vegan, or try coconut yogurt as another dairy-free option. You can also skip the topping entirely.
Watch Out for These Mistakes While Cooking
The biggest challenge when making zucchini bean casserole is dealing with excess moisture – zucchini releases a lot of water during cooking, which can make your casserole soupy if not handled properly. To prevent this, try salting your sliced zucchini and letting it sit for 15-20 minutes, then patting it dry with paper towels before adding it to the dish. Another common mistake is layering the tortillas incorrectly – make sure to slightly overlap the pieces to create a proper barrier between layers, and avoid placing them directly on the bottom of the dish where they can become soggy. For the best texture, don’t overcook the vegetables during the initial sauté phase – keep them slightly crisp since they’ll continue cooking in the oven, and remember to drain and rinse your black beans thoroughly to prevent any excess liquid from making your casserole too wet.
What to Serve With Zucchini Bean Casserole?
This Mexican-inspired casserole pairs perfectly with a fresh, crisp side salad topped with lime juice and cilantro. Since the casserole is pretty hearty, I like to keep the sides simple – maybe some Mexican-style rice or quinoa to soak up any extra sauce. You can set up a little toppings bar with diced avocado, fresh pico de gallo, and extra vegan sour cream so everyone can customize their plate. For an extra pop of flavor, serve some pickled red onions or jalapeños on the side – they add a nice tangy crunch that complements the creamy casserole.
Storage Instructions
Keep Fresh: This tasty casserole will stay good in the fridge for up to 4 days when stored in an airtight container. The flavors actually get better after a day or two as everything melds together! It’s perfect for making on Sunday and having ready-to-go meals for the week.
Freeze: You can freeze portions of this casserole for up to 3 months. Just wrap it well in foil and place in a freezer-safe container. I like to freeze it in individual portions for easy weeknight dinners. Just remember that the zucchini might be a bit softer after freezing.
Reheat: To warm up your casserole, pop it in the microwave for 2-3 minutes or heat it in the oven at 350°F for about 20 minutes until heated through. If reheating from frozen, thaw overnight in the fridge first. Add a fresh sprinkle of dairy-free cheese on top while reheating to bring back that nice melty texture!
| Preparation Time | 15-20 minutes |
| Cooking Time | 20-30 minutes |
| Total Time | 35-50 minutes |
| Level of Difficulty | Easy |
Estimated Nutrition
Estimated nutrition for the whole recipe (without optional ingredients):
- Calories: 1500-1700
- Protein: 70-80 g
- Fat: 60-70 g
- Carbohydrates: 200-220 g
Ingredients
- 1 1/2 tablespoons extra-virgin olive oil
- 1 cup onion, chopped
- 1 medium green bell pepper, diced
- 1 can (28 oz) of crushed or pureed tomatoes
- 1–2 small hot chili peppers, seeded and minced (or 1 can, 4 oz, chopped mild green chiles)
- 2 teaspoons chili powder (adjust to taste)
- 1 teaspoon dried oregano
- 1 teaspoon ground cumin
- 1 can (16–20 oz) black beans, rinsed and drained
- 1 medium zucchini, sliced thinly after being quartered lengthwise
- 12 corn tortillas, torn or cut into pieces
- 8 oz cheddar-style dairy-free cheese (such as daiya)
- Vegan sour cream or cashew cream for topping (optional)
Step 1: Preheat the Oven
Begin by preheating your oven to 400°F (200°C).
This ensures the oven is hot and ready for baking once the casserole is assembled.
Step 2: Sauté Vegetables
In a large saucepan, heat a small amount of oil over medium heat.
Add the onion and sauté until it becomes translucent.
Next, add the green pepper and continue to sauté until both the onion and green pepper are soft and the onions have turned golden.
Step 3: Prepare the Tomato and Black Bean Mixture
Stir in the crushed tomatoes, seasonings, black beans, and zucchini into the saucepan with the sautéed onions and peppers.
Bring the mixture to a gentle simmer and let it cook for approximately 5 minutes, ensuring all the flavors meld together.
Step 4: Layer the Casserole
Lightly oil a 9 x 13 inch or 2-quart round casserole dish.
Begin layering the ingredients: start by placing half of the tortillas on the bottom, followed by half of the tomato-black bean mixture, and then half of the cheese.
Repeat this sequence with the remaining ingredients to create a double layer.
Step 5: Bake the Casserole
Place the layered casserole in the preheated oven.
Bake for 15 to 20 minutes, or until the cheese is melted and bubbly on top.
This will ensure the casserole is heated through and the flavors are nicely combined.
Step 6: Cool and Serve
Once baked, let the casserole stand for 5 to 10 minutes.
This rest period helps the layers firm up, making it easier to cut and serve.
Cut the casserole into squares or wedges and enjoy your delicious meal.
