Making homemade jam can feel like a daunting task, especially when you’re juggling work, family, and all of life’s other responsibilities. Between tracking down the right fruit, getting your canning supplies in order, and blocking out enough time in your schedule, it’s no wonder many of us reach for store-bought alternatives instead.
That’s why this huckleberry raspberry jam recipe has become my go-to favorite – it’s straightforward, doesn’t require any special equipment, and combines two of summer’s best berries into something that tastes way better than anything you’ll find at the grocery store.
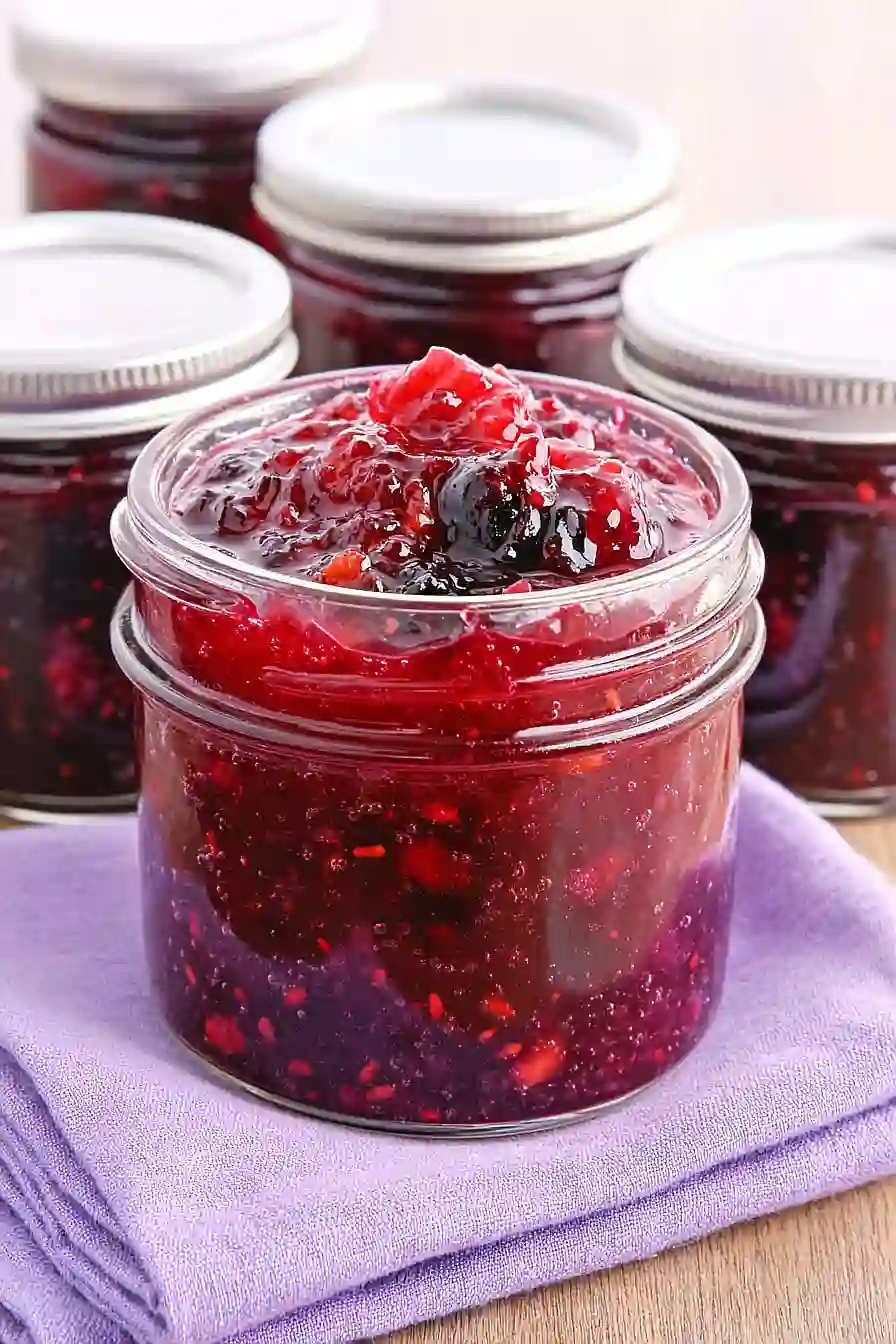
Why You’ll Love This Huckleberry Raspberry Jam
- Perfect balance of flavors – The sweet raspberries pair beautifully with tart huckleberries, creating a jam that’s not too sweet and not too tart – just right for your morning toast.
- Make-ahead convenience – While it takes time to set, most of that is hands-off waiting. The actual cooking process is straightforward and quick.
- Long-lasting homemade treat – This jam keeps well in sealed jars, letting you enjoy summer berries all year round – perfect for gifting or keeping in your own pantry.
- Simple ingredients – With just six basic ingredients, you can create a homemade jam that tastes way better than anything you’d find at the store.
What Kind of Raspberries Should I Use?
Fresh red raspberries are ideal for this jam recipe, but you can also use frozen ones if fresh aren’t in season. Red raspberries tend to have the best flavor and color for jamming, though black raspberries would work too if you want a deeper, more intense berry flavor. When picking fresh raspberries, look for plump, bright berries that aren’t mushy or moldy – they should easily pull away from their core when ripe. If you’re using frozen raspberries, thaw them completely and drain off any excess liquid before measuring, though make sure to keep all the natural juices that come out during the mashing process since they’re full of pectin and flavor.

Options for Substitutions
Making this jam but need to switch things up? Here are some helpful substitutions to keep in mind:
- Huckleberries: If you can’t find huckleberries (they can be tricky to source!), you can use blueberries instead. They have a similar size and texture, though the taste will be slightly less tart.
- MCP pectin: You can use Sure-Jell or Ball pectin in equal amounts. If using low-sugar pectin, you’ll need to reduce the sugar by half and skip the corn syrup to get the right set.
- Light corn syrup: You can replace this with honey or agave nectar. Just note that honey might add its own distinct flavor to the jam.
- Fresh lemon juice: Bottled lemon juice works fine here – just make sure it’s pure lemon juice, not from concentrate. Don’t skip this ingredient as it’s needed for safe preservation and proper setting.
- Raspberries: You can use either fresh or frozen raspberries. If using frozen, thaw and drain them first, and you might need to cook the jam a bit longer to account for the extra moisture.
Watch Out for These Mistakes While Cooking
The biggest challenge when making huckleberry raspberry jam is achieving the perfect set – using underripe berries or skipping the pectin test can leave you with runny jam that won’t spread properly. To ensure success, do a quick plate test by placing a small amount of jam on a cold plate and checking if it wrinkles when pushed with your finger after a minute in the refrigerator. Another common mistake is not thoroughly crushing the berries before cooking, which can result in large chunks and uneven texture – take time to mash them well, but avoid using a food processor which can break down the seeds and create bitter flavors. The cooking temperature is crucial too – rushing the process with too high heat can lead to scorched fruit and a burnt taste, so maintain a steady rolling boil and stir frequently to prevent sticking to the bottom of the pot. For the best flavor balance, don’t skip the lemon juice – it’s not just for safety, but also helps bring out the natural berry taste and ensures proper jelling.

What to Serve With Huckleberry Raspberry Jam?
This sweet and tart homemade jam is perfect for your morning breakfast spread! Slather it on warm, buttery toast, English muffins, or freshly baked scones for a cozy start to your day. For brunch, try spreading it on pancakes or waffles instead of syrup, or swirl it into plain yogurt with a sprinkle of granola. If you’re feeling fancy, you can also use this jam to fill thumbprint cookies or as a topping for vanilla cheesecake – the bright berry flavor really shines in baked treats.
Storage Instructions
Preserve: Once you’ve filled and properly sealed your jars, they can be stored in a cool, dark place like your pantry for up to 18 months. Just remember to check that all lids are properly sealed before storing – they should not flex when pressed in the center.
Keep Fresh: After opening a jar, keep your jam in the refrigerator and use it within 3-4 weeks. The cold temperature helps maintain the jam’s fresh berry flavor and prevents any unwanted mold growth. I like to write the opening date on the lid to keep track.
Gift: Planning to give some jars as gifts? Add a cute label with the date it was made and note that unopened jars should be stored in a cool, dark place. Once opened, remind recipients to keep it in the fridge – though with jam this good, it probably won’t last long!
| Preparation Time | 30-45 minutes |
| Cooking Time | 0-15 minutes |
| Total Time | 24 hours and 30-60 minutes |
| Level of Difficulty | Medium |
Estimated Nutrition
Estimated nutrition for the whole recipe (without optional ingredients):
- Calories: 4500-4800
- Protein: 5-10 g
- Fat: 0-5 g
- Carbohydrates: 1100-1150 g
Ingredients
- 3 1/2 cups crushed raspberries (about 7 cups fresh berries)
- 1 cup whole huckleberries
- 1/4 cup lemon juice, freshly squeezed
- 1 box mcp fruit pectin
- 1 cup light corn syrup
- 4 cups granulated sugar
Step 1: Prepare the Berries
- 3 1/2 cups crushed raspberries (about 7 cups fresh berries)
- 1 cup whole huckleberries
Mash 3 1/2 cups of raspberries until crushed, then transfer them to a large mixing bowl.
Add the whole huckleberries to the mashed raspberries without mashing the huckleberries—this keeps their texture intact for a more interesting jam.
Step 2: Combine with Lemon Juice and Pectin
- 1/4 cup lemon juice, freshly squeezed
- 1 box MCP fruit pectin
Pour the freshly squeezed lemon juice over the berry mixture and stir until everything is evenly combined.
Gradually sprinkle in the MCP fruit pectin, stirring thoroughly as you add to prevent any lumps from forming.
Step 3: Let the Mixture Rest and Stir
Allow the combined berry mixture to sit for 30 minutes.
Stir well every 5 minutes during this resting time.
This helps the pectin dissolve fully and improves the consistency of the finished jam.
I find regular stirring during this period really helps the jam set up nicely later on.
Step 4: Incorporate Sweeteners
- 1 cup light corn syrup
- 4 cups granulated sugar
Add the light corn syrup to the rested berry mixture and mix well.
Then, gradually add the granulated sugar in batches.
Stir after each addition until all the sugar is dissolved and the mixture looks glossy and thick.
Step 5: Package and Set the Jam
Scoop the jam mixture into clean containers, leaving about 1/2 inch of space at the top to allow for expansion if freezing.
Let the containers sit at room temperature for 24 hours so the jam can set properly before storing.
I always make sure to leave that little bit of space at the top to avoid messy jars later!
Step 6: Store and Enjoy
After the jam has set, store it in the refrigerator for up to six weeks, or in the freezer for up to one year.
When you’re ready to use it, thaw the jam in the refrigerator before serving.
Enjoy your homemade jam on toast, biscuits, or stirred into yogurt.
