Finding a cookie recipe that feels both classic and special enough to make over and over again isn’t always easy. Sure, you could stick with regular chocolate chip cookies, but sometimes you want something with a little more character—something that fills your kitchen with the smell of cinnamon and makes people ask for the recipe.
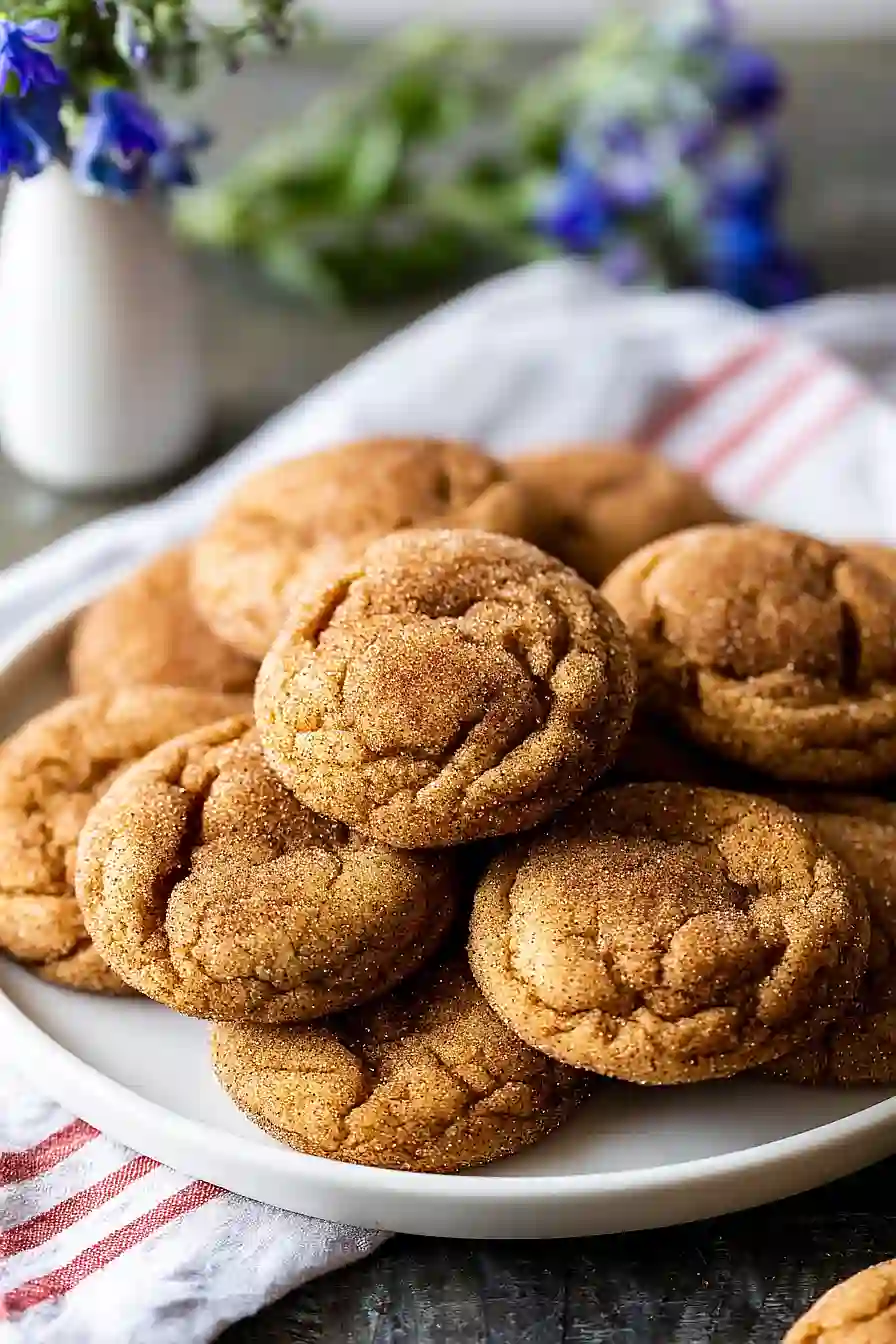
That’s exactly what these brown butter snickerdoodles deliver. They’ve got all the tangy, cinnamon-sugar goodness you expect from a traditional snickerdoodle, but the brown butter takes them to a whole new level with a rich, nutty flavor that’s seriously addictive. Plus, they’re surprisingly simple to make, even on a weeknight when you need a quick dessert win.
Why You’ll Love These Brown Butter Snickerdoodles
- Rich, nutty flavor – Browning the butter takes these classic cookies to the next level with a deep, caramel-like taste that makes them stand out from regular snickerdoodles.
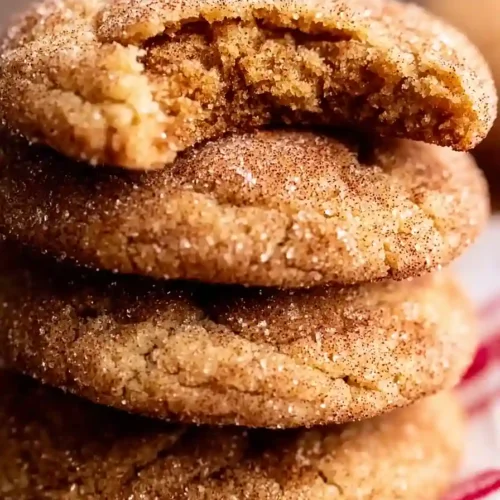
- Soft and chewy texture – The combination of brown sugar and Greek yogurt creates cookies that stay perfectly soft in the middle with those classic crackly, cinnamon-sugar coated edges.
- Perfect for any occasion – Whether you’re baking for a holiday party, a bake sale, or just because you’re craving something sweet, these cookies always impress.
- Make-ahead friendly – You can chill the dough overnight or even freeze it for later, making it easy to have fresh-baked cookies whenever you want them.
What Kind of Butter Should I Use?
For brown butter snickerdoodles, you’ll want to start with good quality unsalted butter since it’s such a key player in the recipe. European-style butter with higher fat content can give you an even richer, nuttier flavor when you brown it, but regular unsalted butter from any brand works perfectly fine. The most important thing is making sure your butter is unsalted so you can control the salt level in your cookies. When browning the butter, keep a close eye on it and watch for those golden brown milk solids at the bottom of the pan – that’s where all the nutty, caramel-like flavor comes from that makes these cookies so special.

Options for Substitutions
While these cookies are pretty straightforward, here are some swaps you can make if needed:
- Cream of tartar: This ingredient gives snickerdoodles their signature tangy flavor, so I’d recommend not substituting it if possible. But if you’re in a pinch, you can use 1 tablespoon of lemon juice or white vinegar mixed into your wet ingredients – though the flavor won’t be quite the same.
- Dark brown sugar: Light brown sugar works just fine here. You can even use all granulated sugar if that’s what you have, though you’ll lose some of that rich, molasses-like depth.
- Greek yogurt: Sour cream is a great one-to-one swap. You can also use regular yogurt, though it’s a bit thinner so your cookies might spread slightly more.
- Unsalted butter: Salted butter can work – just leave out the ¼ teaspoon of salt in the recipe to avoid over-salting.
- All purpose flour: Stick with all purpose flour for this recipe. Other flours like whole wheat or almond flour will change the texture significantly and won’t give you that classic chewy snickerdoodle cookie.
Watch Out for These Mistakes While Baking
The biggest mistake you can make with brown butter is walking away from the stove – it goes from perfectly nutty to burnt in seconds, so stay close and watch for those golden brown specks and a toasted aroma before removing it from heat.
Make sure to let your brown butter cool to room temperature before mixing it with the sugars, otherwise you’ll end up with melted, flat cookies instead of thick, chewy ones.
Skipping the chilling step is another common error that leads to cookies spreading too much in the oven – refrigerate your dough for at least 30 minutes, or even better, overnight for deeper flavor development.
Finally, don’t overbake these cookies; pull them out when the edges are set but the centers still look slightly underdone, as they’ll continue cooking on the baking sheet and stay soft in the middle.

What to Serve With Brown Butter Snickerdoodles?
These cookies are perfect on their own, but they’re even better when paired with a cold glass of milk or a hot cup of coffee. If you’re serving them for a party or gathering, set them out alongside other desserts like chocolate chip cookies or brownies for a nice cookie platter. They also make a great afternoon snack with some hot apple cider in the fall, or you can crumble them over vanilla ice cream for an easy dessert. For a cozy evening treat, try dunking them in hot chocolate – the cinnamon sugar coating pairs really well with the chocolate.
Storage Instructions
Store: Keep your snickerdoodles in an airtight container at room temperature for up to 5 days. They’ll stay soft and chewy if you toss a slice of bread in the container with them – it’s an old trick that really works!
Freeze: These cookies freeze really well, either baked or as dough. For baked cookies, layer them between parchment paper in a freezer bag for up to 3 months. You can also scoop and roll the dough balls, freeze them on a baking sheet, then transfer to a freezer bag so you can bake fresh cookies whenever a craving hits.
Enjoy: Frozen baked cookies thaw in about 30 minutes on the counter, or you can warm them in a 300°F oven for a few minutes to get that fresh-baked taste back. If you’re baking from frozen dough, just add an extra minute or two to the baking time.
| Preparation Time | 20-30 minutes |
| Cooking Time | 8-12 minutes per batch |
| Total Time | 130-210 minutes (including chilling time) |
| Level of Difficulty | Medium |
Estimated Nutrition
Estimated nutrition for the whole recipe (without optional ingredients):
- Calories: 3500-3700
- Protein: 35-40 g
- Fat: 170-190 g
- Carbohydrates: 480-510 g
Ingredients
For the dry ingredients:
- 1 tsp baking soda
- 2 tsp cream of tartar (essential for authentic snickerdoodle tang)
- 2.5 cups all-purpose flour (King Arthur all-purpose works best)
- 1/2 tsp cinnamon (freshly ground preferred for better flavor)
- 1/4 tsp salt
For the wet ingredients:
- 1 tbsp Greek yogurt (keeps cookies tender and moist)
- 1 cup unsalted butter (melted and browned, then cooled to room temperature)
- 1 tsp vanilla extract
- 1.25 cups packed brown sugar
- 1/2 cup granulated sugar
- 1 large egg (room temperature)
- 1 egg yolk (adds richness and chewiness)
For the rolling mixture:
- 2 tsp cinnamon (freshly ground for coating)
- 1/4 cup sugar
Step 1: Brown the Butter and Prepare Dry Ingredients
- 1 cup unsalted butter
- 2.5 cups all-purpose flour
- 1 tsp baking soda
- 2 tsp cream of tartar
- 1/2 tsp cinnamon
- 1/4 tsp salt
Start by browning your butter in a saucepan over medium heat, whisking occasionally until it turns a rich golden-brown color with a nutty aroma—this takes about 5-8 minutes.
While the butter cools in a bowl to room temperature (about 10 minutes), whisk together your flour, baking soda, cream of tartar, 1/2 tsp cinnamon, and salt in a separate bowl.
I like to sift these dry ingredients together to ensure the baking soda and cream of tartar are evenly distributed, which guarantees consistent rise and that signature snickerdoodle tang in every bite.
Step 2: Cream Butter and Sugars
- cooled brown butter from Step 1
- 1.25 cups packed brown sugar
- 1/2 cup granulated sugar
Once the brown butter has cooled to room temperature, combine it with the brown sugar and granulated sugar in a mixer.
Beat for about 1 minute until the mixture is light and fluffy.
This creaming step incorporates air into the dough, which helps create a tender crumb structure in your final cookies.
Step 3: Add Wet Ingredients and Build the Dough
- 1 large egg
- 1 egg yolk
- 1 tsp vanilla extract
- 1 tbsp Greek yogurt
With the mixer running, add the room-temperature egg, egg yolk, vanilla extract, and Greek yogurt.
Beat for 1-2 minutes until the mixture is smooth and fully combined.
The egg yolk adds richness and helps create a slightly chewy texture, while the Greek yogurt keeps the dough tender and moist without making it heavy.
Step 4: Combine Wet and Dry Mixtures
- wet ingredient mixture from Step 3
- dry ingredient mixture from Step 1
Slowly add the dry ingredient mixture from Step 1 to the wet ingredients in the mixer, mixing on low speed until just combined.
Don’t overmix once the flour is incorporated—overmixing develops gluten and makes cookies tough.
The dough should come together into a soft, slightly sticky mass.
Step 5: Chill the Dough
- dough from Step 4
Transfer the dough to a covered bowl and refrigerate for 2-3 hours.
This resting period allows the flavors to meld, the gluten to relax, and prevents the cookies from spreading too much during baking.
You can also chill overnight if you prefer—the dough keeps well in the fridge for up to 24 hours.
Step 6: Prepare Cinnamon-Sugar Coating and Shape Cookies
- chilled dough from Step 5
- 1/4 cup sugar
- 2 tsp cinnamon
Preheat your oven to 350°F.
While it heats, mix the 1/4 cup sugar with the 2 tsp cinnamon in a small bowl for your coating.
Working with chilled dough, scoop out 2-tablespoon portions and roll them into balls between your palms.
Roll each ball in the cinnamon-sugar mixture until fully coated, then place them on a parchment-lined baking sheet about 2 inches apart—they’ll spread slightly during baking.
Step 7: Bake and Cool
- shaped cookies from Step 6
Bake the cookies at 350°F for 8-12 minutes, until the edges are set but the centers still look slightly underbaked—they should be pale golden, not dark brown.
I find that slightly underbaking creates that perfect balance of crispy edges with a chewy center.
Let the cookies rest on the baking sheet for 5 minutes so they firm up, then transfer them to a wire rack to cool completely.
This prevents them from cooling unevenly and ensures a uniform texture throughout.
Thick Brown Butter Snickerdoodles
Ingredients
For the dry ingredients:
- 1 tsp baking soda
- 2 tsp cream of tartar (essential for authentic snickerdoodle tang)
- 2.5 cups all-purpose flour (King Arthur all-purpose works best)
- 1/2 tsp cinnamon (freshly ground preferred for better flavor)
- 1/4 tsp salt
For the wet ingredients:
- 1 tbsp Greek yogurt (keeps cookies tender and moist)
- 1 cup unsalted butter (melted and browned, then cooled to room temperature)
- 1 tsp vanilla extract
- 1.25 cups packed brown sugar
- 1/2 cup granulated sugar
- 1 large egg (room temperature)
- 1 egg yolk (adds richness and chewiness)
For the rolling mixture:
- 2 tsp cinnamon (freshly ground for coating)
- 1/4 cup sugar
Instructions
- Start by browning your butter in a saucepan over medium heat, whisking occasionally until it turns a rich golden-brown color with a nutty aroma—this takes about 5-8 minutes. While the butter cools in a bowl to room temperature (about 10 minutes), whisk together your flour, baking soda, cream of tartar, 1/2 tsp cinnamon, and salt in a separate bowl. I like to sift these dry ingredients together to ensure the baking soda and cream of tartar are evenly distributed, which guarantees consistent rise and that signature snickerdoodle tang in every bite.
- Once the brown butter has cooled to room temperature, combine it with the brown sugar and granulated sugar in a mixer. Beat for about 1 minute until the mixture is light and fluffy. This creaming step incorporates air into the dough, which helps create a tender crumb structure in your final cookies.
- With the mixer running, add the room-temperature egg, egg yolk, vanilla extract, and Greek yogurt. Beat for 1-2 minutes until the mixture is smooth and fully combined. The egg yolk adds richness and helps create a slightly chewy texture, while the Greek yogurt keeps the dough tender and moist without making it heavy.
- Slowly add the dry ingredient mixture from Step 1 to the wet ingredients in the mixer, mixing on low speed until just combined. Don't overmix once the flour is incorporated—overmixing develops gluten and makes cookies tough. The dough should come together into a soft, slightly sticky mass.
- Transfer the dough to a covered bowl and refrigerate for 2-3 hours. This resting period allows the flavors to meld, the gluten to relax, and prevents the cookies from spreading too much during baking. You can also chill overnight if you prefer—the dough keeps well in the fridge for up to 24 hours.
- Preheat your oven to 350°F. While it heats, mix the 1/4 cup sugar with the 2 tsp cinnamon in a small bowl for your coating. Working with chilled dough, scoop out 2-tablespoon portions and roll them into balls between your palms. Roll each ball in the cinnamon-sugar mixture until fully coated, then place them on a parchment-lined baking sheet about 2 inches apart—they'll spread slightly during baking.
- Bake the cookies at 350°F for 8-12 minutes, until the edges are set but the centers still look slightly underbaked—they should be pale golden, not dark brown. I find that slightly underbaking creates that perfect balance of crispy edges with a chewy center. Let the cookies rest on the baking sheet for 5 minutes so they firm up, then transfer them to a wire rack to cool completely. This prevents them from cooling unevenly and ensures a uniform texture throughout.
