If you ask me, whoopie pies are pure comfort food magic.
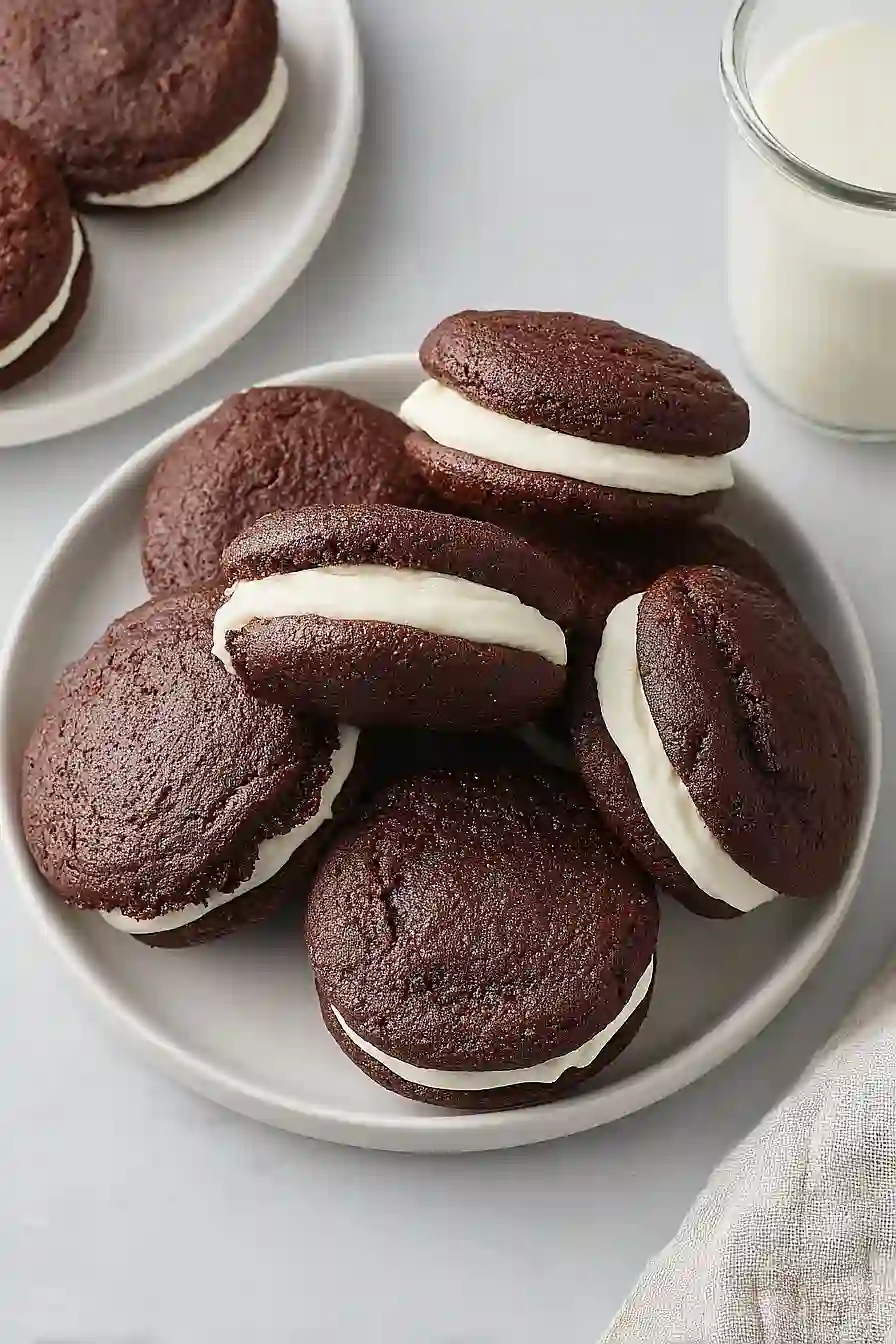
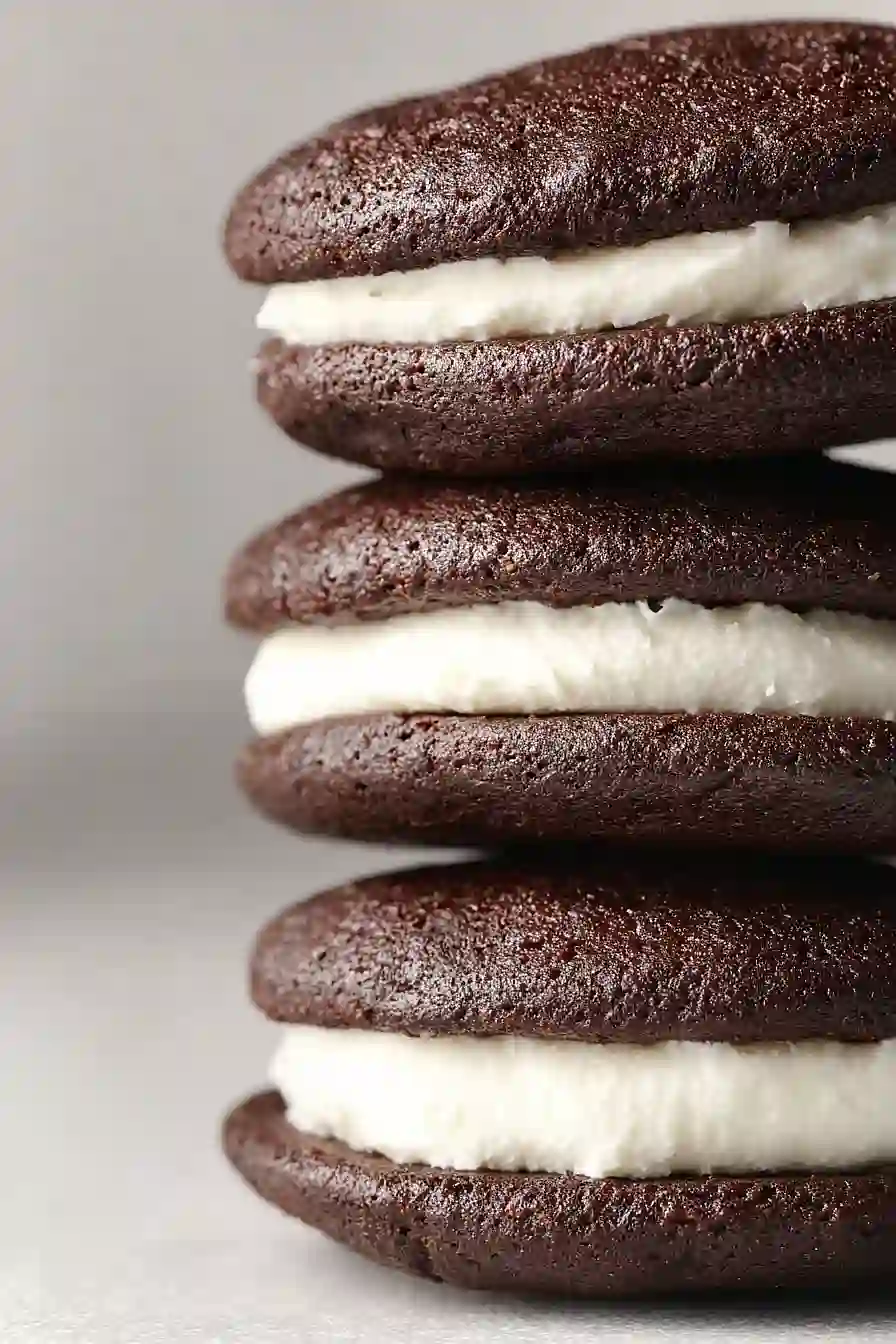
These soft sandwich cookies make a sweet treat that’s packed with nostalgia and fun. Two tender chocolate cakes come together with a fluffy, marshmallow-like filling that’s impossible to resist.
They’re made with simple ingredients you probably have in your pantry right now. The cakes stay moist and cake-like while the creamy center adds just the right amount of sweetness.
It’s a crowd-pleasing dessert that brings out the kid in everyone, perfect for lunch boxes or weekend baking projects.
Why You’ll Love These Whoopie Pies
- Soft, cake-like cookies – These aren’t your typical hard cookies – they’re pillowy soft and have that perfect tender texture that melts in your mouth.
- Rich chocolate flavor – The Dutch-process cocoa powder gives these whoopie pies a deep, chocolatey taste that’s way better than anything you’ll find at the store.
- Fluffy marshmallow filling – The homemade marshmallow creme filling is light, sweet, and perfectly complements the chocolate cookies without being too heavy.
- Quick to make – You can have these ready in under 45 minutes, making them perfect for when you need a sweet treat fast or want to impress guests without spending all day in the kitchen.
- Nostalgic comfort dessert – These bring back childhood memories and make everyone smile – they’re the kind of treat that disappears quickly at parties and family gatherings.
What Kind of Cocoa Powder Should I Use?
For whoopie pies, Dutch-process cocoa powder is your best bet and will give you that rich, deep chocolate flavor you’re looking for. This type of cocoa has been treated to neutralize its acidity, which means it plays nicely with the baking soda in this recipe and creates a more mellow chocolate taste. If you only have natural cocoa powder on hand, you can still use it, but your whoopie pies might have a slightly more acidic, sharper chocolate flavor. When shopping, look for brands like Hershey’s Special Dark or Ghirardelli’s Dutch-process cocoa for consistent results.

Options for Substitutions
These whoopie pies are pretty forgiving when it comes to swaps, so here’s what you can try:
- Dutch-process cocoa powder: Regular unsweetened cocoa powder works fine here – just add an extra ¼ teaspoon of baking soda to balance the acidity. The color might be slightly lighter, but the taste will still be great.
- Buttermilk: No buttermilk? Mix 1¼ cups regular milk with 1 tablespoon white vinegar or lemon juice. Let it sit for 5 minutes until it curdles slightly before using.
- Dark brown sugar: Light brown sugar or even regular white sugar will work, though you’ll lose some of that rich molasses flavor. If using white sugar, consider adding a tablespoon of molasses.
- Marshmallow fluff: This is pretty essential for that classic whoopie pie filling texture, but if you’re desperate, you can make a simple buttercream with extra powdered sugar and butter – it just won’t have that signature marshmallow taste.
- All-purpose flour: Cake flour can work for a more tender cake, but use about 1¾ cups since it’s lighter. Avoid bread flour as it will make the cakes too dense.
Watch Out for These Mistakes While Baking
The biggest mistake when making whoopie pies is overmixing the batter, which can lead to tough, dense cakes instead of the soft, pillowy texture you want – mix just until the ingredients come together and no streaks of flour remain. Another common error is making the cakes too large, as they’ll spread during baking and become difficult to handle, so stick to about 2 tablespoons of batter per cake and leave plenty of space between them on the baking sheet. Don’t skip letting your ingredients come to room temperature, especially the buttermilk and eggs, since cold ingredients won’t blend properly and can result in lumpy batter. For the filling, make sure your butter is at the right temperature (cool room temperature, not warm) or it won’t whip up properly with the marshmallow fluff, and always sift your powdered sugar to avoid a gritty texture in your finished whoopie pies.
What to Serve With Whoopie Pies?
Whoopie pies are pretty perfect on their own, but they’re amazing with a cold glass of milk for dunking – just like you would with cookies! These chocolate treats also pair really well with hot coffee or a steaming mug of hot chocolate, especially on chilly days. If you’re serving them at a party or gathering, try setting out some fresh berries like strawberries or raspberries alongside them for a nice contrast to all that rich chocolate and marshmallow filling. For a fun dessert spread, you can also serve them with vanilla ice cream or even crumble them over the top for an extra indulgent treat.
Storage Instructions
Keep Fresh: Store your whoopie pies in an airtight container in the fridge for up to 5 days. The marshmallow filling stays nice and creamy when kept cold, and the chocolate cakes won’t dry out. I like to place parchment paper between layers so they don’t stick together.
Freeze: These freeze really well for up to 3 months! Wrap each whoopie pie individually in plastic wrap, then pop them in a freezer bag. This way you can grab just one or two whenever you’re craving something sweet without thawing the whole batch.
Serve: Let frozen whoopie pies thaw at room temperature for about 30 minutes before eating. If you’re serving them from the fridge, I actually think they taste best when they’ve been out for 10-15 minutes to soften up a bit. The filling gets perfectly creamy and the cakes have the ideal texture.
| Preparation Time | 20-30 minutes |
| Cooking Time | 11-15 minutes |
| Total Time | 31-45 minutes |
| Level of Difficulty | Medium |
Estimated Nutrition
Estimated nutrition for the whole recipe (without optional ingredients):
- Calories: 4150-4350
- Protein: 45-55 g
- Fat: 185-200 g
- Carbohydrates: 600-630 g
Ingredients
For the chocolate cakes:
- 1 2/3 cups all-purpose flour
- 2/3 cup dutch-process cocoa powder
- 1 1/2 tsp baking soda
- 1/2 tsp fine sea salt
- 1 stick unsalted butter (4 oz), cool room temp
- 1 cup dark brown sugar, lightly packed
- 1 large egg, room temp
- 1 tsp vanilla extract
- 1 1/4 cups buttermilk, room temp
For the marshmallow filling:
- 297 grams marshmallow creme (just under 13 oz)
- 15 tbsp unsalted butter (about 7.5 oz), cool room temp
- 1 cup plus 2 tbsp powdered sugar, sifted
- 1 1/2 tbsp vanilla extract
- 1/2 tsp fine sea salt
Step 1: Prepare Baking Sheets and Oven
Preheat your oven to 375°F (190°C).
Line large baking sheets with parchment paper to prevent the whoopie pies from sticking.
Getting the pans ready at the start helps the baking process go smoothly.
Step 2: Sift Dry Ingredients
- 1 2/3 cups all-purpose flour
- 2/3 cup Dutch-process cocoa powder
- 1 1/2 tsp baking soda
- 1/2 tsp fine sea salt
Sift the all-purpose flour, Dutch-process cocoa powder, baking soda, and salt into a medium bowl.
Set aside.
This step ensures your dry ingredients are evenly distributed and removes any lumps, resulting in a lighter, more tender cake.
Step 3: Mix Butter, Sugar, Egg, and Vanilla
- 1 stick unsalted butter (4 oz), cool room temp
- 1 cup dark brown sugar, lightly packed
- 1 large egg, room temp
- 1 tsp vanilla extract
In the bowl of an electric mixer fitted with the paddle attachment, beat the unsalted butter and dark brown sugar on low speed until combined.
Increase speed to medium-high and beat for about 3 minutes, until the mixture is light and fluffy.
Scrape down the sides of the bowl.
Add the egg and vanilla extract, and beat on medium-high speed for another 3 minutes, or until the mixture is very well combined and creamy.
Step 4: Combine Wet and Dry Ingredients
- dry mixture from Step 2
- 1 1/4 cups buttermilk, room temp
Add half of the sifted dry ingredient mixture (from Step 2) to the butter mixture (from Step 3), then add half of the buttermilk.
Mix on low speed until just combined, scraping the bowl as needed.
Add the remaining buttermilk and the rest of the dry ingredients, and continue to mix until just combined.
The batter should be fluffy and slightly sticky, resembling a very thick cake batter.
I find that alternating between dry and wet helps keep the batter smooth and prevents overmixing.
Step 5: Scoop, Bake, and Cool the Cakes
- batter from Step 4
Use a medium (about 1 ½-tablespoon) spring-loaded scoop to drop mounds of batter onto the prepared baking sheets, leaving about 2 inches between each mound.
Bake for 11 minutes, or until the cakes spring back when pressed gently and appear dry on top.
Let the cakes cool on the pans for 5 minutes before transferring them to a wire rack to cool completely.
I always check the cookies a minute early to make sure they don’t overbake—they should be just set.
Step 6: Prepare Marshmallow Filling
- 297 grams marshmallow creme (just under 13 oz)
- 15 tbsp unsalted butter (about 7.5 oz), cool room temp
- 1 cup plus 2 tbsp powdered sugar, sifted
- 1 1/2 tbsp vanilla extract
- 1/2 tsp fine sea salt
In the clean bowl of an electric mixer, beat the marshmallow creme and unsalted butter on low speed until smooth and combined.
Scrape down the sides and bottom of the bowl.
Add the powdered sugar, vanilla extract, and sea salt.
Mix on low until incorporated, then increase to medium-high and beat until the filling is very smooth, about 3 minutes.
For a fuller flavor, I sometimes add a pinch of extra salt to the filling.
Step 7: Fill and Assemble the Whoopie Pies
- cakes from Step 5
- marshmallow filling from Step 6
Use a medium (1 ½-tablespoon) spring-loaded scoop or a spoon to dollop marshmallow filling (from Step 6) onto the flat side of half of the cooled cakes (from Step 5).
Top each with another cake to form a sandwich, pressing gently.
For neat edges, you can smooth the filling with a small spatula.
If transporting or for a fudgier texture, chill the assembled whoopie pies in the fridge for at least an hour before serving.

Tasty Whoopie Pies
Ingredients
For the chocolate cakes:
- 1 2/3 cups all-purpose flour
- 2/3 cup Dutch-process cocoa powder
- 1 1/2 tsp baking soda
- 1/2 tsp fine sea salt
- 1 stick unsalted butter (4 oz), cool room temp
- 1 cup dark brown sugar, lightly packed
- 1 large egg, room temp
- 1 tsp vanilla extract
- 1 1/4 cups buttermilk, room temp
For the marshmallow filling:
- 297 grams marshmallow creme (just under 13 oz)
- 15 tbsp unsalted butter (about 7.5 oz), cool room temp
- 1 cup plus 2 tbsp powdered sugar, sifted
- 1 1/2 tbsp vanilla extract
- 1/2 tsp fine sea salt
Instructions
- Preheat your oven to 375°F (190°C). Line large baking sheets with parchment paper to prevent the whoopie pies from sticking. Getting the pans ready at the start helps the baking process go smoothly.
- Sift the all-purpose flour, Dutch-process cocoa powder, baking soda, and salt into a medium bowl. Set aside. This step ensures your dry ingredients are evenly distributed and removes any lumps, resulting in a lighter, more tender cake.
- In the bowl of an electric mixer fitted with the paddle attachment, beat the unsalted butter and dark brown sugar on low speed until combined. Increase speed to medium-high and beat for about 3 minutes, until the mixture is light and fluffy. Scrape down the sides of the bowl. Add the egg and vanilla extract, and beat on medium-high speed for another 3 minutes, or until the mixture is very well combined and creamy.
- Add half of the sifted dry ingredient mixture (from Step 2) to the butter mixture (from Step 3), then add half of the buttermilk. Mix on low speed until just combined, scraping the bowl as needed. Add the remaining buttermilk and the rest of the dry ingredients, and continue to mix until just combined. The batter should be fluffy and slightly sticky, resembling a very thick cake batter. I find that alternating between dry and wet helps keep the batter smooth and prevents overmixing.
- Use a medium (about 1 ½-tablespoon) spring-loaded scoop to drop mounds of batter onto the prepared baking sheets, leaving about 2 inches between each mound. Bake for 11 minutes, or until the cakes spring back when pressed gently and appear dry on top. Let the cakes cool on the pans for 5 minutes before transferring them to a wire rack to cool completely. I always check the cookies a minute early to make sure they don’t overbake—they should be just set.
- In the clean bowl of an electric mixer, beat the marshmallow creme and unsalted butter on low speed until smooth and combined. Scrape down the sides and bottom of the bowl. Add the powdered sugar, vanilla extract, and sea salt. Mix on low until incorporated, then increase to medium-high and beat until the filling is very smooth, about 3 minutes. For a fuller flavor, I sometimes add a pinch of extra salt to the filling.
- Use a medium (1 ½-tablespoon) spring-loaded scoop or a spoon to dollop marshmallow filling (from Step 6) onto the flat side of half of the cooled cakes (from Step 5). Top each with another cake to form a sandwich, pressing gently. For neat edges, you can smooth the filling with a small spatula. If transporting or for a fudgier texture, chill the assembled whoopie pies in the fridge for at least an hour before serving.
