Looking for a cake that’s fun, festive, and perfect for your Halloween party? A spooky dessert that actually tastes as good as it looks can be tricky to pull off, especially when you’re juggling party planning, costume prep, and everything else that comes with October 31st.
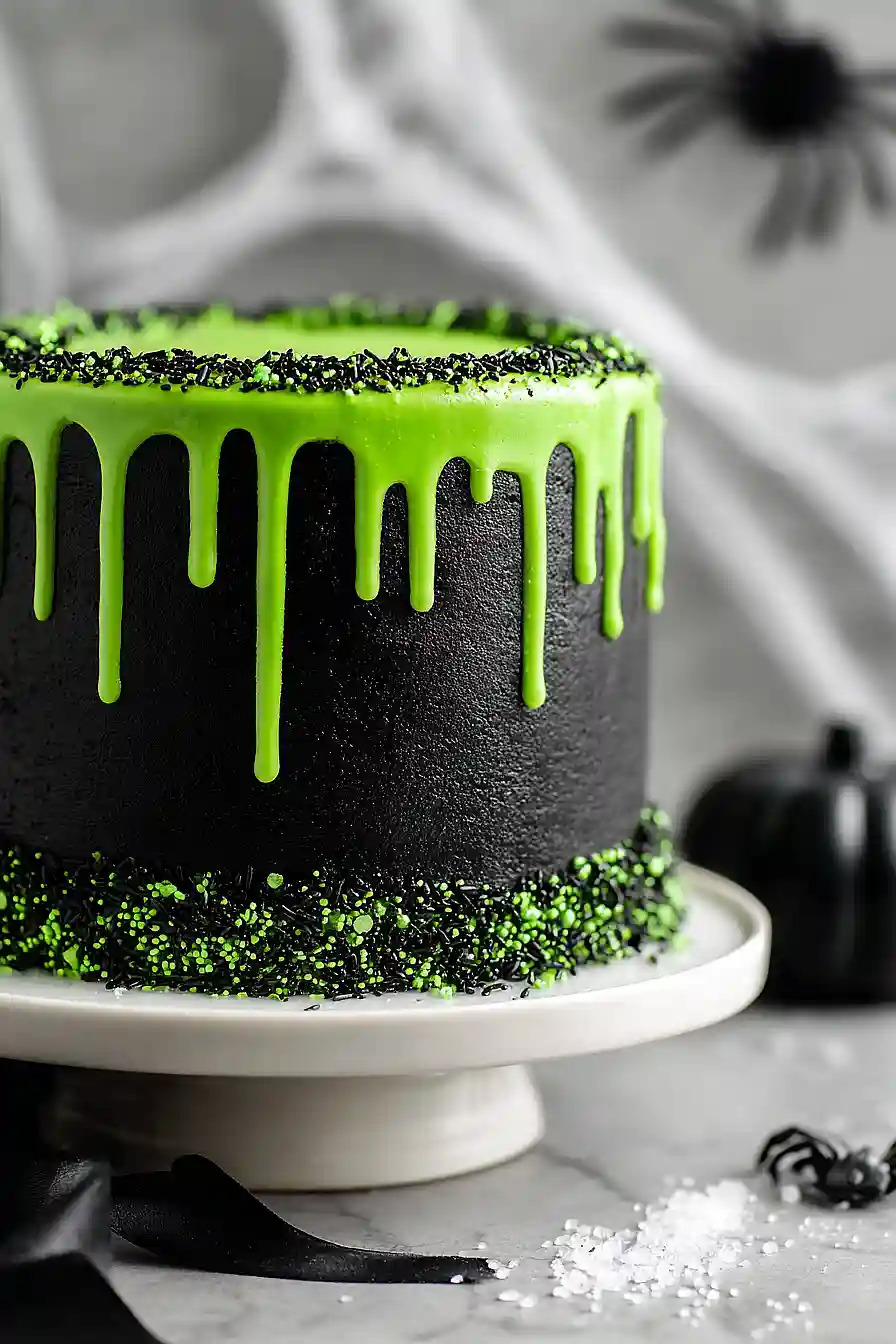
That’s where this coconut Halloween cake comes in. It’s got bright lime flavor, creamy coconut frosting, and just the right amount of spooky decorations to make it party-ready. Plus, the lime and coconut combo gives you something a little different from the usual chocolate-everything Halloween spread, and it’s surprisingly easy to put together even if you’re not a professional baker.
Why You’ll Love This Coconut Halloween Cake
- Perfect for Halloween parties – This festive cake brings the spooky season to life with fun decorations like meringue ghosts and colorful gel coloring that kids and adults will love.
- Tropical twist on a classic – The coconut and lime flavors give this cake a refreshing taste that stands out from typical chocolate Halloween treats.
- Impressive presentation – With white chocolate decorations, sprinkles, and a cake topper, this looks like it came from a bakery but you made it yourself.
- Great for sharing – This generous cake serves a crowd, making it ideal for Halloween gatherings, school parties, or neighborhood celebrations.
What Kind of Coconut Should I Use?
For this cake, you’ll want to use sweetened or unsweetened shredded coconut, depending on your preference. Sweetened coconut will add a bit more sweetness to both the cake and frosting, while unsweetened gives you more control over the sugar level. You can find both varieties in the baking aisle at most grocery stores, usually sold in bags. If you can only find large coconut flakes, you can pulse them in a food processor a few times to break them down into smaller pieces that will mix more evenly into your batter. Just make sure to use the same type of coconut for both the cake and the coconut cream in the frosting to keep the flavor consistent throughout.
Options for Substitutions
This cake recipe has some room for swaps if you need to make adjustments:
- Limes: If you don’t have limes, lemons work great as a substitute and give you that same citrus punch. Use the same amount – the flavor will be slightly different but still delicious.
- Coconut cream: Regular heavy cream or even full-fat canned coconut milk can replace coconut cream in the frosting. If using coconut milk, scoop out just the thick cream from the top of the can.
- Lime curd: You can make your own lime curd if you can’t find it in stores, or swap it for lemon curd. In a pinch, leave it out and add an extra tablespoon of lime juice and zest to the frosting instead.
- White chocolate: Candy melts work as a substitute for the white chocolate coating and actually come in various colors already, which might save you a step with the gel coloring.
- Butter: This cake really needs butter for the right texture and flavor, so I wouldn’t recommend substituting it. Make sure it’s at room temperature for both the cake and frosting.
- Meringue ghosts and cake topper: These are just for decoration, so feel free to use whatever Halloween decorations you have on hand or skip them entirely if you prefer a simpler look.
Watch Out for These Mistakes While Baking
The biggest mistake when making a layered cake like this is not letting your cake layers cool completely before frosting – warm cakes will melt your buttercream and cause the layers to slide around, turning your spooky creation into a lopsided disaster. When adding gel food coloring to your frosting and white chocolate, start with just a tiny amount (a toothpick dip works great) since gel colors are super concentrated and you can always add more but can’t take it back. To get those perfect chocolate drips around the edge, make sure your melted white chocolate isn’t too hot or it’ll run straight down the sides, and not too cool or it won’t drip at all – test it on the side of a glass first to check the consistency. Finally, don’t skip the crumb coat step (that thin first layer of frosting), as it seals in all those loose cake crumbs and gives you a smooth, professional-looking base for your final decoration.
What to Serve With Coconut Halloween Cake?
This coconut Halloween cake is a showstopper on its own, but it pairs really well with a scoop of vanilla ice cream or some lightly sweetened whipped cream on the side. Since the cake has those bright lime flavors, you could serve it with fresh berries like raspberries or blackberries to add a little tartness that cuts through the sweetness. A cup of hot coffee or tea is perfect for adults, while kids will love it with cold milk or hot chocolate. If you’re throwing a Halloween party, consider setting out some extra Halloween candies or cookies around the cake to create a fun dessert spread that everyone can enjoy.
Storage Instructions
Store: This coconut Halloween cake keeps really well in the fridge for up to 5 days. Just cover it loosely with plastic wrap or keep it in a cake container to protect the decorations. The buttercream frosting actually helps keep the cake moist, so it tastes great even a few days later.
Room Temperature: If you’re serving the cake within a day or two, you can leave it at room temperature in a cool spot away from direct sunlight. Just make sure it’s covered to keep it from drying out. The meringue ghosts and chocolate decorations will hold up fine for a couple of days this way.
Freeze: You can freeze unfrosted cake layers wrapped tightly in plastic wrap for up to 3 months, which is great for getting ahead on party prep. I wouldn’t recommend freezing the fully decorated cake though, since the meringue ghosts and sprinkles won’t survive the thaw very well.
| Preparation Time | 60-70 minutes |
| Cooking Time | 35-40 minutes |
| Total Time | 120-140 minutes |
| Level of Difficulty | Hard |
| Servings | 10 slices |
Estimated Nutrition
Estimated nutrition for the whole recipe (without optional ingredients):
- Calories: 7500-8000
- Protein: 65-75 g
- Fat: 430-470 g
- Carbohydrates: 900-970 g
Ingredients
For the cake:
- 11 oz sugar
- 11 oz unsalted butter, softened
- 6 large eggs (room temperature)
- 3 limes (zested and juiced)
- 16 oz all-purpose flour
- 7 tbsp shredded coconut
- 1 tsp vanilla extract
- black gel food coloring
For the icing and filling:
- 17 oz icing sugar, sifted
- 13 oz unsalted butter, softened
- 2.5 tbsp coconut cream
- 1 whole lime (juiced)
- 7 tbsp lime curd
- black gel food coloring
- green gel food coloring
For the decoration:
- 9.5 oz white chocolate (melted and cooled to room temperature)
- green gel food coloring
- sprinkles (black and green)
- 5 meringue ghosts
- 1 cake topper
Step 1: Prepare the Cake Batter and Bake
- 11 oz unsalted butter, softened
- 11 oz sugar
- 6 large eggs
- 3 limes
- 16 oz all-purpose flour
- 7 tbsp shredded coconut
- 1 tsp vanilla extract
Preheat your oven to 160°C and line three 7-inch round cake tins with parchment paper.
In a large bowl, cream together the softened butter and sugar until light and fluffy, about 3 minutes.
Beat in the eggs one at a time, ensuring each is fully incorporated before adding the next.
Stir in the lime zest and fresh lime juice to infuse the batter with bright citrus flavor.
Gently fold in the flour and shredded coconut until just combined—avoid overmixing, which can toughen the cake.
Divide the batter evenly among the three prepared tins and bake for 35 minutes until a toothpick inserted in the center comes out clean.
I like to rotate the tins halfway through baking to ensure even browning across all three cakes.
Step 2: Cool Cakes and Prepare the Black Frosting
- 13 oz unsalted butter, softened
- 17 oz icing sugar, sifted
- 2.5 tbsp coconut cream
- 1 whole lime
- black gel food coloring
Remove the cakes from the oven and let them cool in their tins for 10 minutes—this allows them to set enough to turn out without breaking.
Turn them out onto a wire cooling rack and allow them to cool completely to room temperature.
While the cakes cool, prepare the black frosting by beating together the softened butter and sifted icing sugar until smooth and fluffy.
Add the coconut cream and the juice from one whole lime, beating until well combined.
Stir in black gel food coloring a little at a time until you reach a deep black color, stirring thoroughly to ensure even color distribution.
Step 3: Prepare the Lime Curd and Green Chocolate
- 7 tbsp lime curd
- green gel food coloring
- 9.5 oz white chocolate
While the cakes are cooling, prepare two separate decorative components.
First, take the lime curd and stir in green gel food coloring until you achieve a vibrant lime green color.
Set this aside for layering.
Next, melt the white chocolate over a hot water bath (double boiler), stirring occasionally until completely smooth.
Once melted, remove from heat and let it cool to room temperature—this prevents it from seizing or becoming too thick.
Stir in green gel food coloring to match or complement the lime curd color, mixing thoroughly.
Step 4: Layer and Frost the Cakes
- black frosting from Step 2
- lime curd mixture from Step 3
Place the first cooled cake on your cake board or serving plate.
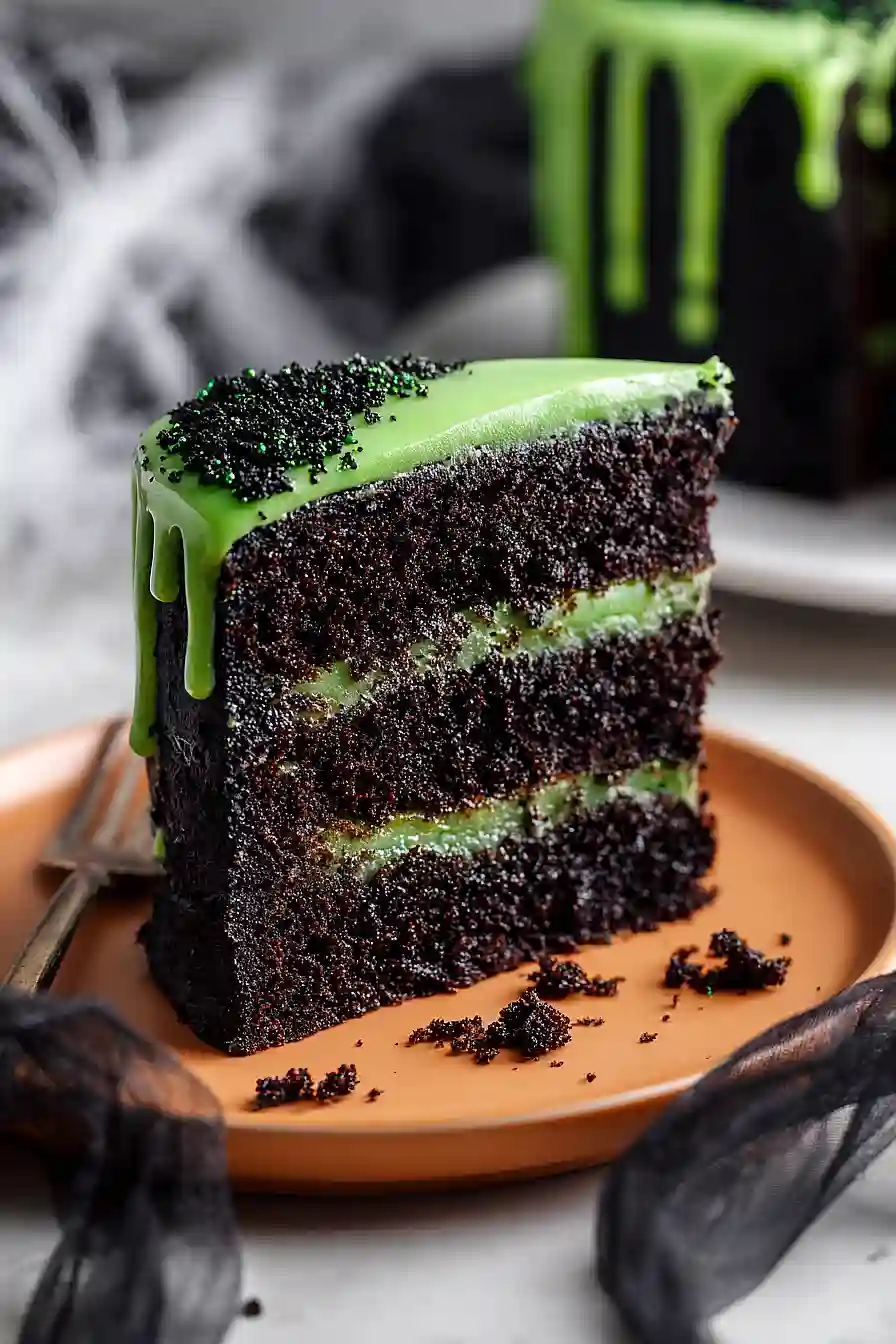
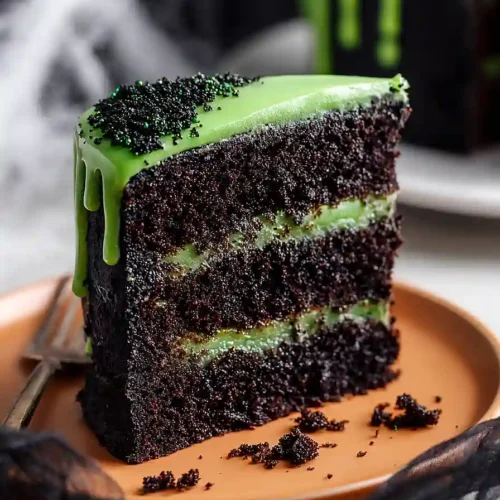
Spread a layer of black frosting from Step 2 on top, then add half of the lime curd from Step 3, swirling slightly.
Stack the second cake on top and repeat with another layer of black frosting and the remaining lime curd.
Place the third cake on top.
Now apply a thin crumb coat of black frosting over the top and sides of the entire cake—this seals in crumbs and creates a smooth base for the final decoration.
I find using an offset spatula dipped in warm water helps smooth the frosting and gives a more polished finish.
Step 5: Create the Drip Effect and Top Decoration
- black frosting from Step 2
- green chocolate mixture from Step 3
- sprinkles
Transfer the remaining black frosting from Step 2 into a piping bag fitted with a small round tip.
Pipe decorative swirls and details around the sides of the cake, then use a warm, damp spatula to smooth some of it for a polished look.
Sprinkle black and green sprinkles around the base of the cake for a festive Halloween touch.
Refrigerate the cake for at least 30 minutes to set the frosting.
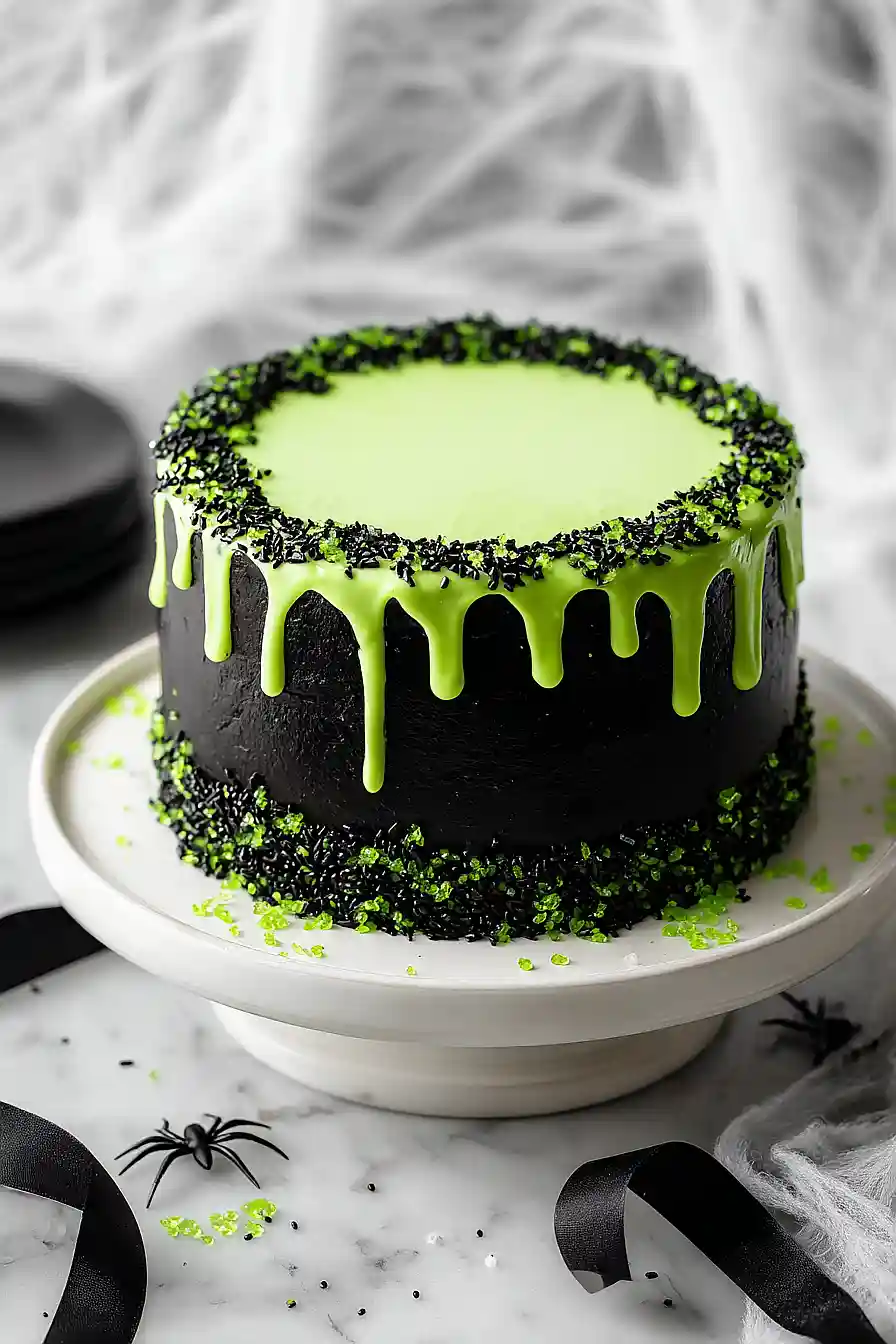
Once chilled, carefully pour or pipe the green chocolate from Step 3 around the top edge of the cake, allowing it to drip down the sides for a spooky effect.
Fill in the top of the cake with the remaining green chocolate, spreading it smoothly.
Step 6: Add Final Halloween Decorations
- black frosting from Step 2
- 5 meringue ghosts
- 1 cake topper
- sprinkles
Once the green chocolate has set (about 15-20 minutes at room temperature), place the meringue ghosts strategically on top of the cake.
Position the cake topper as your centerpiece.
Using the piping bag with black frosting, add decorative piping around the ghosts and topper for extra visual interest and to secure them in place.
Finish with a final sprinkle of black and green sprinkles on top of the green chocolate for added texture and festive flair.
The cake is now ready to serve—this Halloween creation combines lime and coconut flavors with a dramatic black-and-green color scheme perfect for the spooky season.
Tasty Coconut Halloween Cake
Ingredients
For the cake::
- 11 oz sugar
- 11 oz unsalted butter, softened
- 6 large eggs (room temperature)
- 3 limes (zested and juiced)
- 16 oz all-purpose flour
- 7 tbsp shredded coconut
- 1 tsp vanilla extract
- black gel food coloring
For the icing and filling::
- 17 oz icing sugar, sifted
- 13 oz unsalted butter, softened
- 2.5 tbsp coconut cream
- 1 whole lime (juiced)
- 7 tbsp lime curd
- black gel food coloring
- green gel food coloring
For the decoration::
- 9.5 oz white chocolate (melted and cooled to room temperature)
- green gel food coloring
- sprinkles (black and green)
- 5 meringue ghosts
- 1 cake topper
Instructions
- Preheat your oven to 160°C and line three 7-inch round cake tins with parchment paper. In a large bowl, cream together the softened butter and sugar until light and fluffy, about 3 minutes. Beat in the eggs one at a time, ensuring each is fully incorporated before adding the next. Stir in the lime zest and fresh lime juice to infuse the batter with bright citrus flavor. Gently fold in the flour and shredded coconut until just combined—avoid overmixing, which can toughen the cake. Divide the batter evenly among the three prepared tins and bake for 35 minutes until a toothpick inserted in the center comes out clean. I like to rotate the tins halfway through baking to ensure even browning across all three cakes.
- Remove the cakes from the oven and let them cool in their tins for 10 minutes—this allows them to set enough to turn out without breaking. Turn them out onto a wire cooling rack and allow them to cool completely to room temperature. While the cakes cool, prepare the black frosting by beating together the softened butter and sifted icing sugar until smooth and fluffy. Add the coconut cream and the juice from one whole lime, beating until well combined. Stir in black gel food coloring a little at a time until you reach a deep black color, stirring thoroughly to ensure even color distribution.
- While the cakes are cooling, prepare two separate decorative components. First, take the lime curd and stir in green gel food coloring until you achieve a vibrant lime green color. Set this aside for layering. Next, melt the white chocolate over a hot water bath (double boiler), stirring occasionally until completely smooth. Once melted, remove from heat and let it cool to room temperature—this prevents it from seizing or becoming too thick. Stir in green gel food coloring to match or complement the lime curd color, mixing thoroughly.
- Place the first cooled cake on your cake board or serving plate. Spread a layer of black frosting from Step 2 on top, then add half of the lime curd from Step 3, swirling slightly. Stack the second cake on top and repeat with another layer of black frosting and the remaining lime curd. Place the third cake on top. Now apply a thin crumb coat of black frosting over the top and sides of the entire cake—this seals in crumbs and creates a smooth base for the final decoration. I find using an offset spatula dipped in warm water helps smooth the frosting and gives a more polished finish.
- Transfer the remaining black frosting from Step 2 into a piping bag fitted with a small round tip. Pipe decorative swirls and details around the sides of the cake, then use a warm, damp spatula to smooth some of it for a polished look. Sprinkle black and green sprinkles around the base of the cake for a festive Halloween touch. Refrigerate the cake for at least 30 minutes to set the frosting. Once chilled, carefully pour or pipe the green chocolate from Step 3 around the top edge of the cake, allowing it to drip down the sides for a spooky effect. Fill in the top of the cake with the remaining green chocolate, spreading it smoothly.
- Once the green chocolate has set (about 15-20 minutes at room temperature), place the meringue ghosts strategically on top of the cake. Position the cake topper as your centerpiece. Using the piping bag with black frosting, add decorative piping around the ghosts and topper for extra visual interest and to secure them in place. Finish with a final sprinkle of black and green sprinkles on top of the green chocolate for added texture and festive flair. The cake is now ready to serve—this Halloween creation combines lime and coconut flavors with a dramatic black-and-green color scheme perfect for the spooky season.
