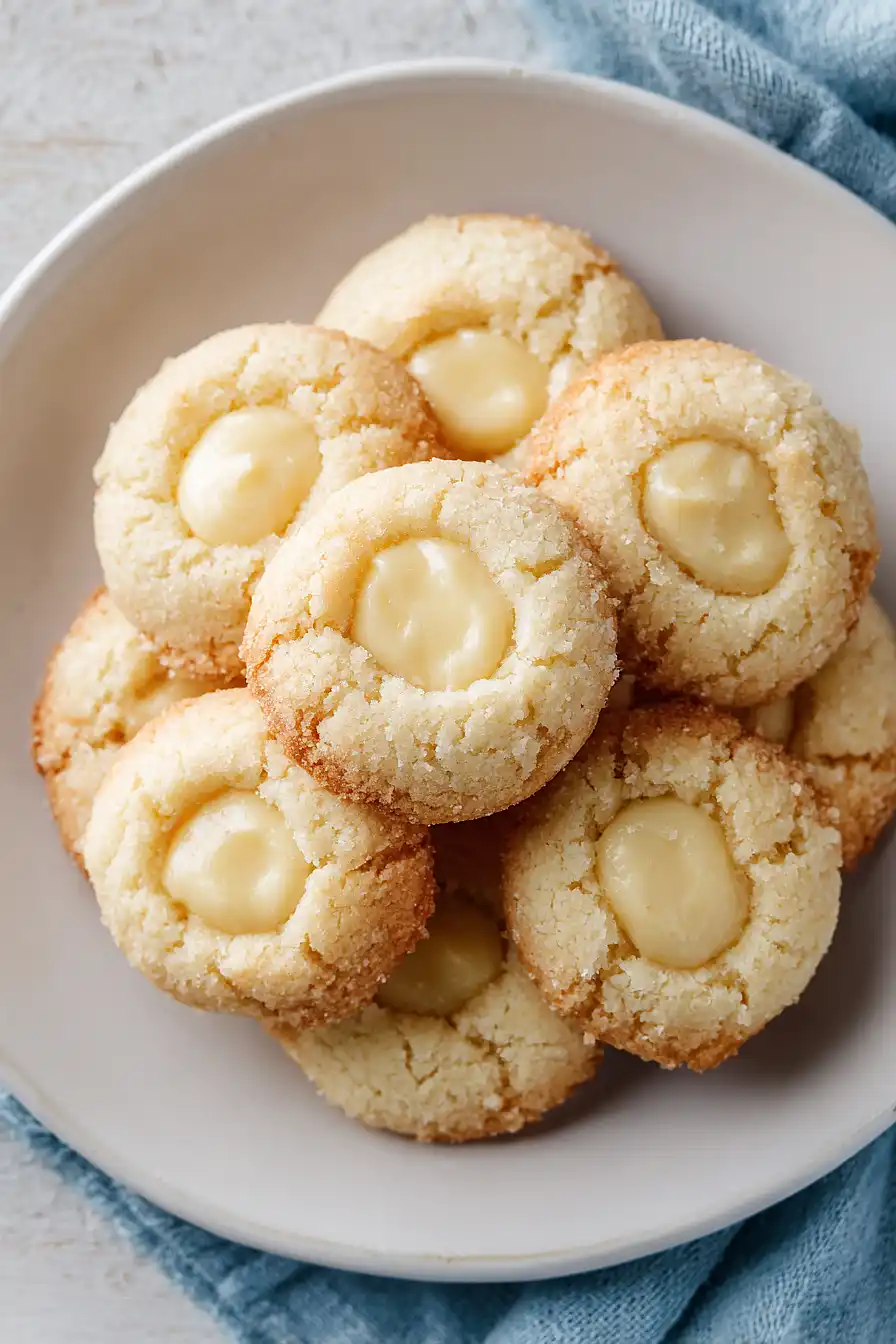
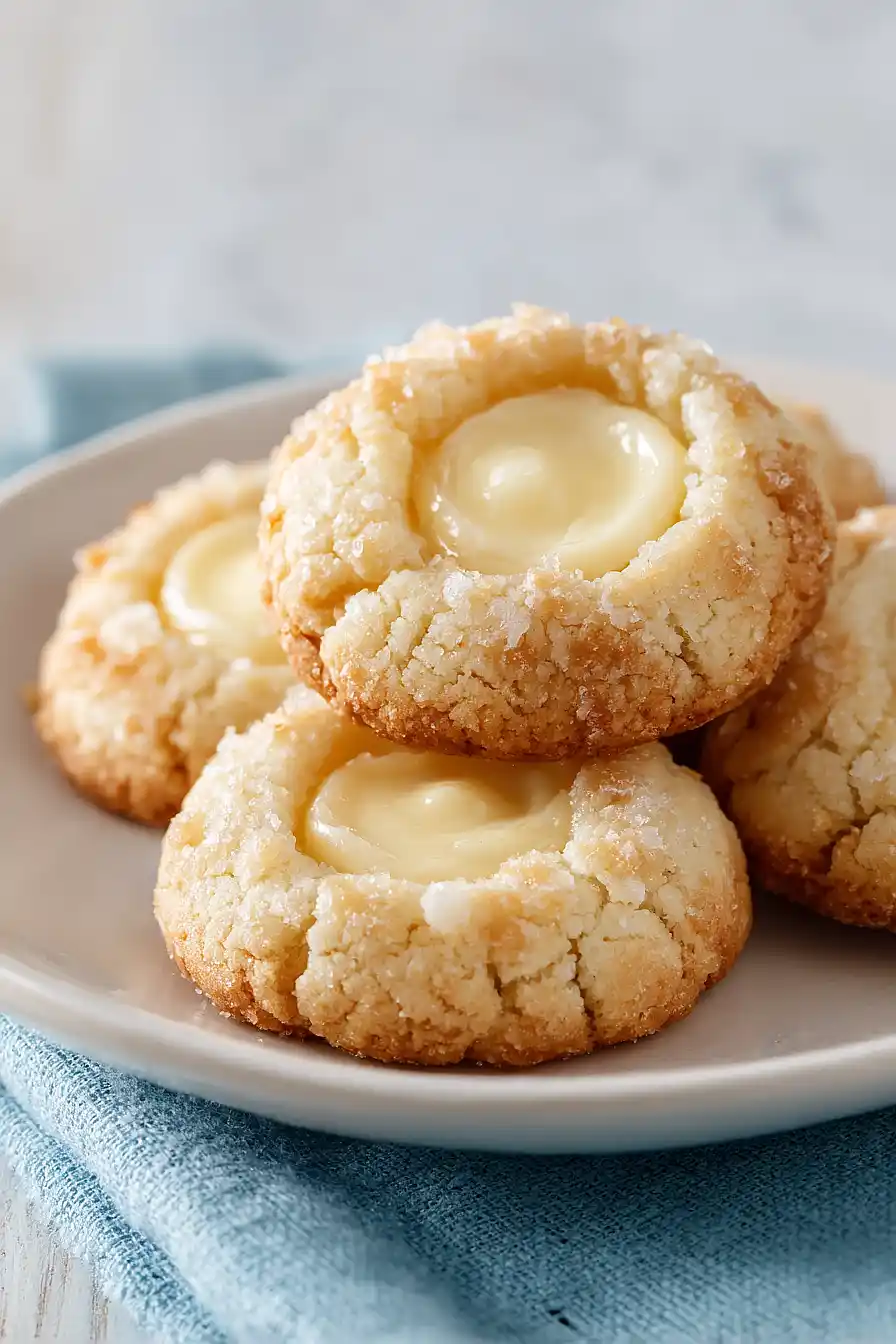
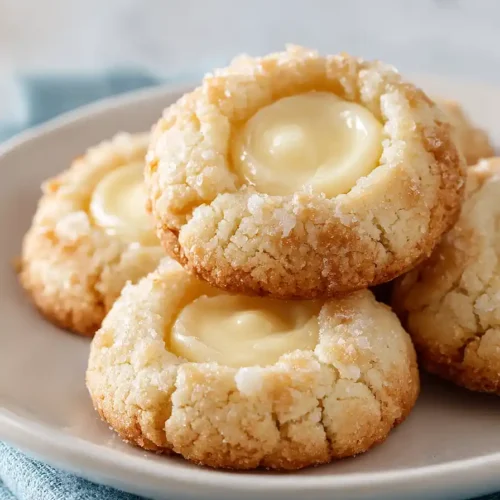
Here are my cheesecake thumbprint cookies, with a buttery cookie base and a creamy, tangy cheesecake filling nestled right in the center of each one.
These cookies are always the first to disappear at holiday parties and bake sales. I love how they combine two desserts in one bite – you get that classic thumbprint cookie texture with all the flavor of real cheesecake. Plus, they’re way easier to make than an actual cheesecake!
Why You’ll Love These Cheesecake Thumbprint Cookies
- Two treats in one – You get the buttery goodness of a classic thumbprint cookie combined with creamy cheesecake filling in every bite.
- Simple ingredients – These cookies use basic pantry staples like butter, flour, cream cheese, and eggs that you probably already have on hand.
- Perfect for special occasions – They look fancy and impressive on a cookie platter, but they’re surprisingly easy to make at home.
- Make-ahead friendly – You can prepare the dough in advance and bake these when you’re ready, making them great for holiday baking or entertaining.
What Kind of Cream Cheese Should I Use?
For these thumbprint cookies, you’ll want to stick with full-fat brick-style cream cheese – the kind that comes in a foil-wrapped block, not the spreadable tub variety. The spreadable versions have added ingredients that make them softer, which can throw off the consistency of your cheesecake filling and make it too runny. Make sure your cream cheese is properly softened to room temperature before you start mixing, as this will help it blend smoothly without any lumps. If you’re in a hurry, you can cut the cream cheese into smaller cubes and let it sit out for about 30 minutes, but avoid microwaving it since that can make it too soft or even start to melt.
Options for Substitutions
These cookies are pretty straightforward, but here are a few swaps you can make if needed:
- Unsalted butter: You can use salted butter instead – just skip the added salt in the recipe to avoid making the cookies too salty.
- Sour cream: If you don’t have sour cream, plain Greek yogurt works great as a substitute. You can also use heavy cream in the same amount, though the filling will be slightly less tangy.
- Cream cheese: This is the star of the filling, so I’d recommend keeping it as is. The cream cheese gives these thumbprints their signature cheesecake flavor that’s hard to replicate with anything else.
- All-purpose flour: Stick with all-purpose flour for this recipe. Other flours like whole wheat or almond flour will change the texture and make the cookies crumbly or dense.
- Egg yolks: The recipe calls for just the yolks, which keep the cookies tender. If you only have whole eggs, you can use them, but your cookies might spread a bit more and be slightly less rich.
Watch Out for These Mistakes While Baking
The biggest mistake with thumbprint cookies is making the indentation too shallow or waiting until after baking, which causes the filling to spill over the edges – press your thumb firmly into each cookie before baking to create a deep well that holds the cheesecake filling.
Overmixing your cookie dough can lead to tough, dense cookies instead of the tender, crumbly texture you want, so mix just until the flour disappears into the butter mixture.
Room temperature ingredients are crucial for the cheesecake filling, as cold cream cheese will create lumps no matter how much you mix it, so let your cream cheese and egg yolk sit out for about 30 minutes before starting.
Finally, resist the urge to fill the cookies all the way to the top – fill each well only about three-quarters full since the cheesecake mixture will puff up slightly during baking.
What to Serve With Cheesecake Thumbprint Cookies?
These cookies are perfect alongside a hot cup of coffee or tea for an afternoon treat or after-dinner dessert. I love setting them out on a platter with other cookies like chocolate chip or snickerdoodles when I’m having people over – they add a fancy touch to any cookie spread. They’re also great packed up in a tin as a gift, especially during the holidays when everyone appreciates homemade treats. If you want to make it a full dessert moment, serve them with a scoop of vanilla ice cream or a glass of cold milk for dunking.
Storage Instructions
Store: Keep your cheesecake thumbprint cookies in an airtight container in the fridge since they have that creamy cheesecake filling. They’ll stay fresh for up to 5 days, and honestly, they taste even better the next day once the flavors have had time to meld together.
Freeze: These cookies freeze really well for up to 2 months. Just make sure they’re completely cooled first, then layer them between sheets of parchment paper in a freezer-safe container so the cheesecake centers don’t get squished.
Serve: Let frozen cookies thaw in the fridge overnight or at room temperature for about 30 minutes before serving. I actually prefer eating these straight from the fridge because the cheesecake filling is nice and cool, but room temperature works great too if you want a softer cookie.
| Preparation Time | 30-45 minutes |
| Cooking Time | 25-30 minutes |
| Total Time | 4 hours 55 minutes – 5 hours 15 minutes |
| Level of Difficulty | Medium |
Estimated Nutrition
Estimated nutrition for the whole recipe (without optional ingredients):
- Calories: 2650-2850
- Protein: 30-36 g
- Fat: 185-205 g
- Carbohydrates: 245-265 g
Ingredients
For the cookie dough:
- 1 large egg yolk (room temperature)
- 2 cups all-purpose flour (I use King Arthur)
- 1/4 cup sugar
- 1/4 tsp salt
- 1 cup unsalted butter (softened to room temperature)
- cinnamon sugar (optional, for dusting before baking)
For the cheesecake filling:
- 1/8 tsp vanilla extract (pure vanilla preferred)
- 4 oz cream cheese (softened to room temperature)
- 1 large egg yolk
- 1/4 cup sugar
- pinch salt
- 1.5 tsp sour cream (for tanginess and richness)
Step 1: Prepare the Cheesecake Filling
- 4 oz cream cheese
- 1/4 cup sugar
- pinch salt
- 1 large egg yolk
- 1.5 tsp sour cream
- 1/8 tsp vanilla extract
In a medium bowl, beat the softened cream cheese, sugar, and pinch of salt together until completely smooth and creamy, about 2 minutes.
This removes any lumps and ensures a silky texture.
Add the egg yolk, sour cream, and vanilla extract, then beat until fully combined and homogeneous.
The sour cream adds a subtle tanginess that balances the richness of the cream cheese and prevents the filling from being too heavy.
Transfer to a small bowl and refrigerate while you prepare the cookie dough—this gives the flavors time to meld and makes the filling easier to work with later.
Step 2: Make the Cookie Dough
- 1 cup unsalted butter
- 1/4 cup sugar
- 1/4 tsp salt
- 1 large egg yolk
- 2 cups all-purpose flour
In a separate large bowl, beat the softened butter and sugar together until light and fluffy, about 2-3 minutes—this incorporates air into the dough and helps create a tender cookie texture.
Add the salt and egg yolk, beating until fully incorporated.
Add the flour all at once and mix on low speed until just combined; don’t overmix, as this can make the cookies tough.
The dough should come together but still be slightly crumbly.
Step 3: Shape and Pre-Bake the Cookie Bases
- cookie dough from Step 2
- cinnamon sugar
Preheat your oven to 350°F and line two baking sheets with parchment paper.
Working with about 1 tablespoon of dough at a time, roll the dough into balls and place them about 2 inches apart on the prepared baking sheets.
Using your thumb or the back of a teaspoon, press a small indent into the center of each ball—don’t press too deep, just enough to create a shallow well.
I like to dip my thumb in a little flour to prevent sticking.
If desired, dust the cookies lightly with cinnamon sugar before this first bake.
Bake for 10 minutes until the edges are set but the centers are still pale.
Step 4: Create Deeper Indents and Complete Cookie Baking
Remove the baking sheets from the oven and immediately re-press the indents in each cookie using your thumb or the back of a spoon, pushing slightly deeper than before—the cookies will have firmed up but are still soft enough to mold.
Return the pans to the oven and bake for another 8-10 minutes until the cookies are golden brown around the edges but still tender in the center.
Remove from the oven and let the cookies cool on the baking sheets for at least 5 minutes before moving them, as they’ll continue to set.
Once cooled, you can transfer them to a wire rack if desired, but leaving them on the pan makes the next step easier.
Step 5: Fill and Bake the Cookies
- cooled cookies from Step 4
- cheesecake filling from Step 1
While the cookies are cooling slightly, remove the cheesecake filling from the refrigerator—it should be spreadable but still cool.
Once the cookies have cooled enough to handle safely (about 5 minutes), spoon approximately 1 teaspoon of the cheesecake filling into the indent of each cookie, filling it generously but not overflowing.
Return the filled cookies to the oven (still at 350°F) and bake for 7-8 minutes until the filling is just set and very slightly golden on top.
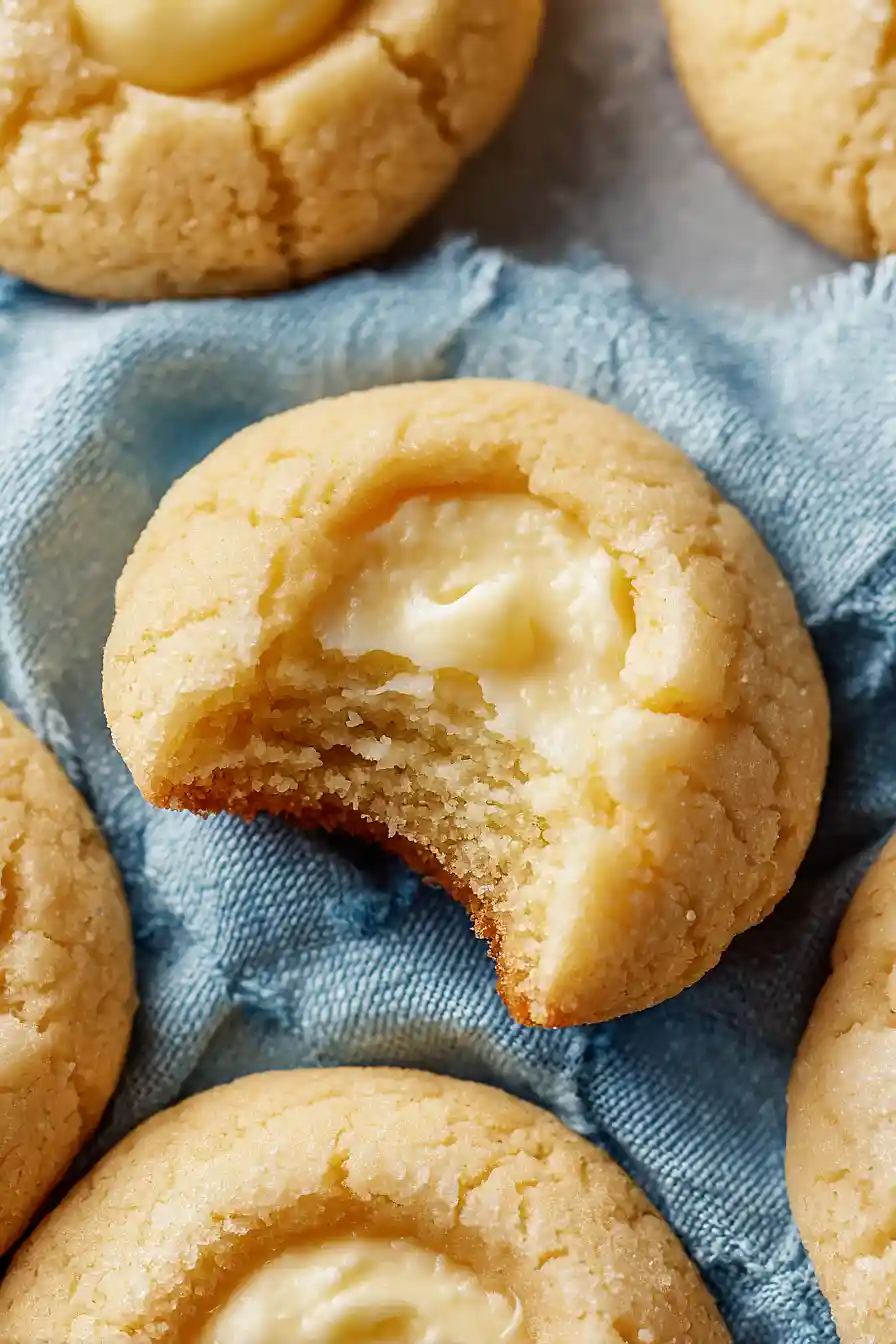
The filling will appear barely set—this is perfect, as it will firm up more as it cools and gives you that creamy cheesecake texture rather than a dry, overbaked one.
Step 6: Cool and Serve
Remove the baked cookies from the oven and let them rest on the baking sheets for 5 minutes to set slightly.
Then transfer them to a wire cooling rack to cool completely, about 30-45 minutes.
The cookies will continue to firm up as they cool, and the filling will set to the perfect creamy consistency.
Store in an airtight container at room temperature for up to 3 days, or refrigerate for up to a week if you prefer them chilled.
Tasty Cheesecake Thumbprint Cookies
Ingredients
For the cookie dough:
- 1 large egg yolk (room temperature)
- 2 cups all-purpose flour (I use King Arthur)
- 1/4 cup sugar
- 1/4 tsp salt
- 1 cup unsalted butter (softened to room temperature)
- cinnamon sugar (optional, for dusting before baking)
For the cheesecake filling:
- 1/8 tsp vanilla extract (pure vanilla preferred)
- 4 oz cream cheese (softened to room temperature)
- 1 large egg yolk
- 1/4 cup sugar
- pinch salt
- 1.5 tsp sour cream (for tanginess and richness)
Instructions
- In a medium bowl, beat the softened cream cheese, sugar, and pinch of salt together until completely smooth and creamy, about 2 minutes. This removes any lumps and ensures a silky texture. Add the egg yolk, sour cream, and vanilla extract, then beat until fully combined and homogeneous. The sour cream adds a subtle tanginess that balances the richness of the cream cheese and prevents the filling from being too heavy. Transfer to a small bowl and refrigerate while you prepare the cookie dough—this gives the flavors time to meld and makes the filling easier to work with later.
- In a separate large bowl, beat the softened butter and sugar together until light and fluffy, about 2-3 minutes—this incorporates air into the dough and helps create a tender cookie texture. Add the salt and egg yolk, beating until fully incorporated. Add the flour all at once and mix on low speed until just combined; don't overmix, as this can make the cookies tough. The dough should come together but still be slightly crumbly.
- Preheat your oven to 350°F and line two baking sheets with parchment paper. Working with about 1 tablespoon of dough at a time, roll the dough into balls and place them about 2 inches apart on the prepared baking sheets. Using your thumb or the back of a teaspoon, press a small indent into the center of each ball—don't press too deep, just enough to create a shallow well. I like to dip my thumb in a little flour to prevent sticking. If desired, dust the cookies lightly with cinnamon sugar before this first bake. Bake for 10 minutes until the edges are set but the centers are still pale.
- Remove the baking sheets from the oven and immediately re-press the indents in each cookie using your thumb or the back of a spoon, pushing slightly deeper than before—the cookies will have firmed up but are still soft enough to mold. Return the pans to the oven and bake for another 8-10 minutes until the cookies are golden brown around the edges but still tender in the center. Remove from the oven and let the cookies cool on the baking sheets for at least 5 minutes before moving them, as they'll continue to set. Once cooled, you can transfer them to a wire rack if desired, but leaving them on the pan makes the next step easier.
- While the cookies are cooling slightly, remove the cheesecake filling from the refrigerator—it should be spreadable but still cool. Once the cookies have cooled enough to handle safely (about 5 minutes), spoon approximately 1 teaspoon of the cheesecake filling into the indent of each cookie, filling it generously but not overflowing. Return the filled cookies to the oven (still at 350°F) and bake for 7-8 minutes until the filling is just set and very slightly golden on top. The filling will appear barely set—this is perfect, as it will firm up more as it cools and gives you that creamy cheesecake texture rather than a dry, overbaked one.
- Remove the baked cookies from the oven and let them rest on the baking sheets for 5 minutes to set slightly. Then transfer them to a wire cooling rack to cool completely, about 30-45 minutes. The cookies will continue to firm up as they cool, and the filling will set to the perfect creamy consistency. Store in an airtight container at room temperature for up to 3 days, or refrigerate for up to a week if you prefer them chilled.
