Finding the perfect balance of sweet and spicy in homemade preserves can feel like a real puzzle. Between all the traditional jam recipes out there and the time it takes to get the consistency just right, making something truly unique for your morning toast or cheese board might seem out of reach.
That’s where this raspberry jalapeño jam comes in: it’s a foolproof blend of fresh berries and peppers that’s easy to make in small batches, perfect for adding a little kick to your breakfast routine, and makes an excellent homemade gift for friends who appreciate something different.
Why You’ll Love This Raspberry Jalapeño Jam
- Perfect sweet-heat balance – The natural sweetness of raspberries paired with the kick of jalapeño creates an exciting flavor combination that’s not too spicy and not too sweet.
- Quick preparation – This jam comes together in less than an hour, making it much faster than traditional jam recipes that can take several hours to complete.
- Minimal ingredients – With just 5 simple ingredients, you can create this unique condiment that’s way better than anything you’ll find at the store.
- Versatile spread – It’s perfect on everything from cheese boards and crackers to sandwich spreads and glazes for grilled meats – making it a true kitchen MVP.
What Kind of Raspberries Should I Use?
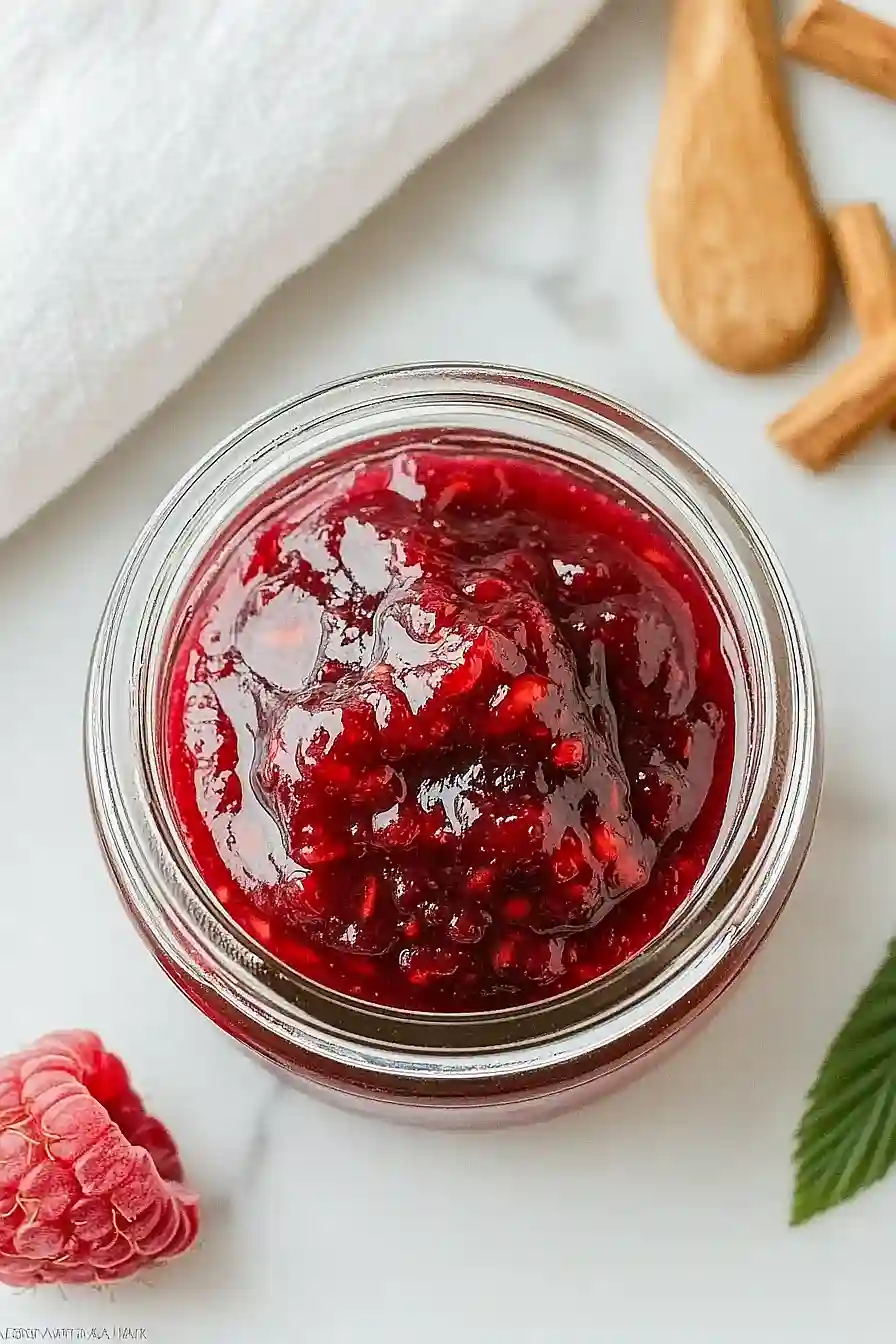
Fresh raspberries are the way to go for this jam, and you’ll want to look for berries that are bright red, plump, and firm to the touch. The good news is that both regular red raspberries and black raspberries will work great in this recipe – just make sure they’re not overripe or mushy. When shopping, check the bottom of the container for any signs of mold or juice collecting at the bottom, which could mean the berries are past their prime. If fresh raspberries aren’t in season, you can use frozen ones instead – just thaw them completely and drain off any excess liquid before starting your jam. Remember to give your berries a gentle rinse right before using them, and let them dry on paper towels to remove any extra moisture.
Options for Substitutions
This jam recipe can handle some ingredient swaps, though some items are key to getting the right results:
- Fresh raspberries: If fresh raspberries aren’t in season, frozen ones work just as well – no need to thaw them first. You could also try blackberries or a mix of berries, but keep in mind this might change the setting time and texture.
- Rhubarb: Can’t find rhubarb? Try using green apple instead – it provides similar tartness and pectin content. Use one medium-sized tart apple, peeled and finely chopped.
- Jalapeño pepper: You can swap jalapeños with serrano peppers for more heat, or poblano for a milder kick. Remove the seeds and membranes to control the spice level. For a different twist, try Thai chili peppers – just use less as they’re usually spicier.
- Granulated sugar: Sugar is necessary for proper jam setting, but you can try reducing it by up to 1/4 cup. Don’t skip it entirely though, as it’s crucial for preservation and texture.
- Lemon juice: Fresh lime juice works just as well as lemon juice. If you don’t have fresh citrus, bottled lemon juice is okay – just make sure it’s pure lemon juice without added ingredients.
Watch Out for These Mistakes While Cooking
The biggest challenge when making jalapeño jam is getting the heat level right – leaving the seeds and membranes in your jalapeño will make the jam too spicy, so remove them unless you’re absolutely sure you want that extra kick. Getting the right consistency can be tricky too – avoid overcooking the jam as it will continue to thicken as it cools, so take it off the heat when it’s still a bit runnier than you want the final product to be. Testing the jam’s readiness is crucial – place a small plate in the freezer before you start cooking, then drop a small amount of jam on the cold plate and run your finger through it; if the line holds and the jam doesn’t run back together, it’s ready. For the best flavor balance, taste and adjust the sugar level before the final set – remember that both raspberries and rhubarb can vary in tartness depending on the season.
What to Serve With Raspberry Jalapeño Jam?
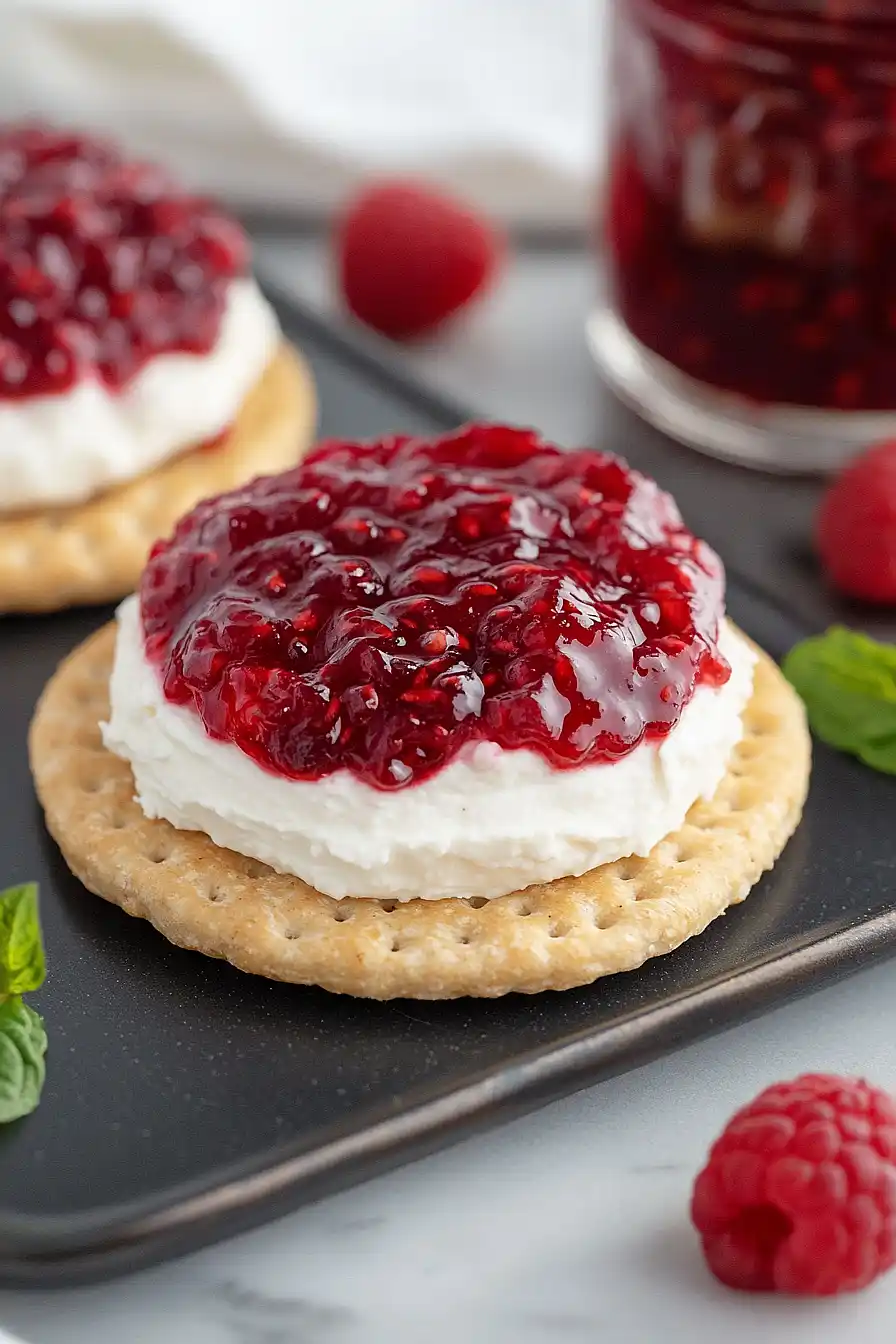
This sweet and spicy jam is super versatile – I love spreading it on a toasted bagel with cream cheese for a quick breakfast that’s anything but boring. For party appetizers, try spooning it over a block of cream cheese or goat cheese and serving with crackers (this is always a hit at gatherings!). The sweet-heat combo also works really well as a glaze for grilled meats like chicken or pork chops, or you can use it as a unique filling for thumbprint cookies during the holidays. When I’m keeping things simple, I just spread it on a piece of buttered sourdough toast and call it breakfast.
Storage Instructions
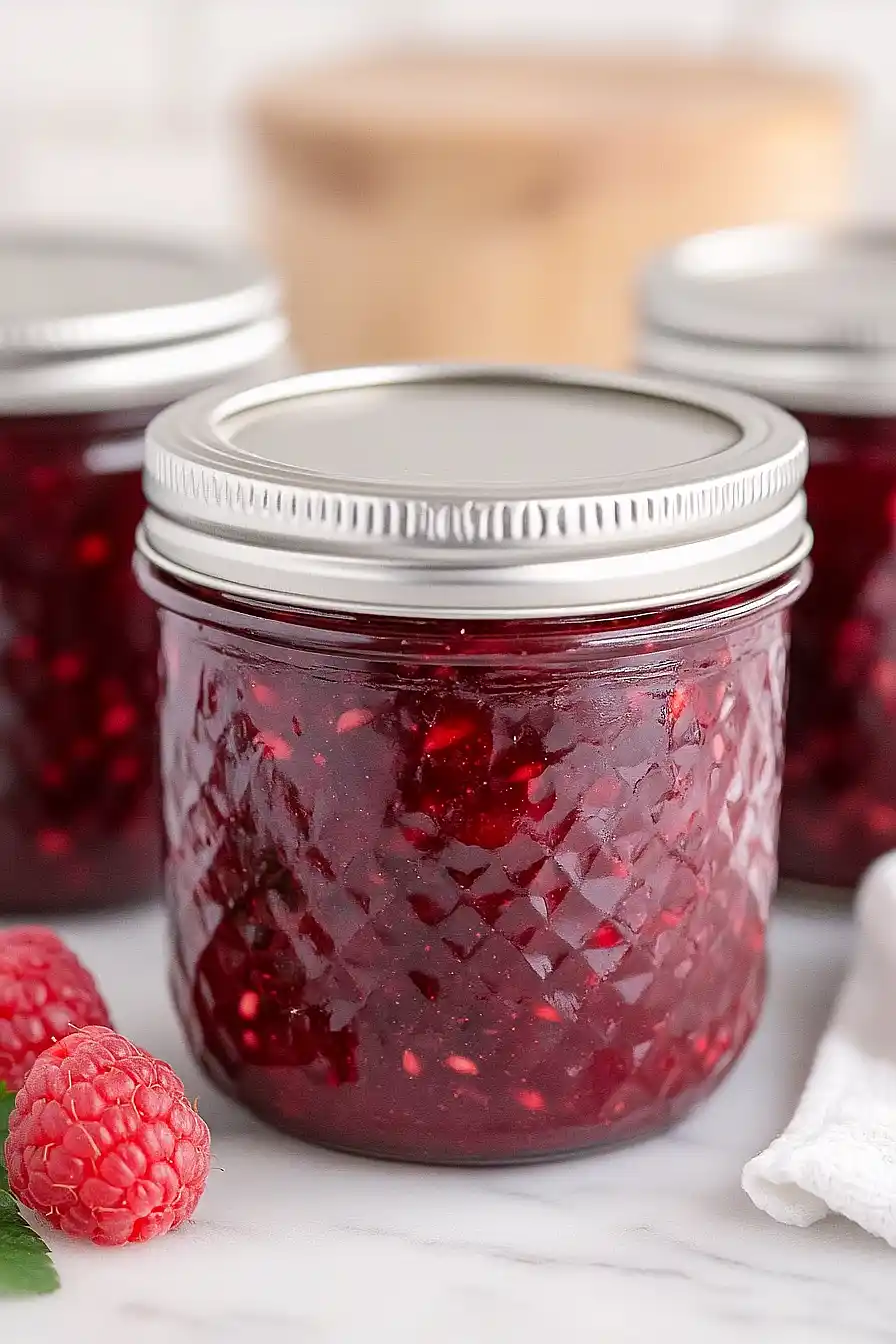
Keep Fresh: Once your raspberry jalapeño jam has cooled completely, pop it into an airtight jar or container and keep it in the fridge. It’ll stay fresh and tasty for up to 3 weeks. The flavors actually get even better after a day or two as everything melds together!
Can: If you’re into canning, this jam is perfect for it! Process the filled jars in a water bath for 10 minutes, and they’ll keep for up to a year in a cool, dark place. Just make sure to check that the lids have properly sealed before storing.
Freeze: Want to keep your jam longer? Pour it into freezer-safe containers, leaving about 1/2 inch of headspace for expansion, and it’ll keep in the freezer for up to 6 months. When you’re ready to use it, just thaw it overnight in the fridge.
| Preparation Time | 10-15 minutes |
| Cooking Time | 10-15 minutes |
| Total Time | 35-50 minutes |
| Level of Difficulty | Medium |
Estimated Nutrition
Estimated nutrition for the whole recipe (without optional ingredients):
- Calories: 400-450
- Protein: 3-5 g
- Fat: 0-1 g
- Carbohydrates: 100-110 g
Ingredients
- 1 cup diced rhubarb (about 1 stalk)
- 3 cups whole raspberries
- 1 large jalapeno, chopped
- 3/4 cup white sugar
- 1 tbsp freshly squeezed lemon juice
Step 1: Prepare the Freezer Test and Jar
Start by placing a small dish in the freezer—this will be used later to test if your jam has set.
Meanwhile, place a clean 6-8 ounce glass mason jar and its lids into a large pot of boiling water, ensuring the jar is fully submerged.
Leave the jar in boiling water until you are ready to fill it.
Step 2: Cook the Jam Mixture
- 1 cup diced rhubarb (about 1 stalk)
- 3 cups whole raspberries
- 1 large jalapeno, chopped
- 3/4 cup white sugar
- 1 tbsp freshly squeezed lemon juice
In a large 12-inch skillet, combine the diced rhubarb, whole raspberries, chopped jalapeno, white sugar, and freshly squeezed lemon juice.
Bring the mixture to a rolling boil over medium-high heat, stirring often to prevent sticking and burning.
Once boiling, continue to cook and stir until the mixture thickens, which usually takes about 8-10 minutes.
I like to keep a close eye during this stage, as the jam can quickly go from perfect to overcooked.
Step 3: Test the Jam for Doneness
To check if your jam has set, remove the chilled dish from the freezer and place a small spoonful of jam onto it.
Let it sit for 30 seconds, then tilt the plate.
If the jam moves quickly, continue cooking the mixture in 1-2 minute increments, occasionally retesting until the jam slides slowly, indicating it’s ready.
This simple trick helps ensure the perfect consistency.
Step 4: Fill the Jar with Jam
- Cooked jam from Step 2
Carefully remove the sterilized jar and lids from the boiling water, making sure to drain all water from the jar while keeping the water boiling for later.
Transfer the finished jam into the jar.
Wipe any excess jam off the rim to ensure a proper seal, and top with the lid.
I recommend using an oven mitt here to hold the hot jar steady.
Step 5: Seal and Store the Jam
Place the sealed jar of jam back into the pot of boiling water, ensuring it is fully submerged.
Boil for 15 minutes to securely seal the jar.
Remove the jar and let it cool on a heat-resistant surface for 18-24 hours.
Once cool, test the seal by pressing down on the lid—if it stays down, your jam is properly sealed and shelf stable; if it pops back up, refrigerate and use within two weeks.
