Here’s my go-to vanilla cake glaze recipe that’s smooth, sweet, and super simple to make. It’s the perfect topping for any basic cake or batch of cookies when you need something quick and reliable.
I make this glaze at least once a month in my house, usually when I’m trying to dress up a plain cake or need a last-minute topping. Trust me – once you see how easy it is, you’ll never buy pre-made glaze again!
Why You’ll Love This Cake Glaze
- Quick 5-minute recipe – This glaze comes together in just minutes with no cooking required – perfect when you need a last-minute topping for your baked goods.
- 3-ingredient simplicity – You only need powdered sugar, milk, and vanilla extract – common pantry staples that you probably already have on hand.
- Flexible ingredients – Works with any type of milk you have available – from whole milk to heavy cream to evaporated milk, making it super convenient to whip up.
- Multi-purpose topping – This basic glaze works perfectly on cakes, cookies, pastries, and even breakfast treats like cinnamon rolls or donuts.
What Kind of Powdered Sugar Should I Use?
Regular powdered sugar (also called confectioner’s sugar or 10X sugar) is perfect for making a smooth, lump-free glaze. The most important step is to sift your powdered sugar before using it – this breaks up any clumps that could leave your glaze looking bumpy. Store-brand powdered sugar works just as well as name brands, so don’t feel like you need to spend extra money there. If you’re in a pinch and realize you’re out of powdered sugar, you can actually make your own by blending regular granulated sugar in a food processor until it becomes a fine powder, though the texture might not be quite as smooth as store-bought.
Options for Substitutions
This simple glaze recipe is pretty adaptable and here’s what you can swap out:
- Powdered sugar: This is the one ingredient you really can’t substitute – it’s essential for the right texture and sweetness. Just make sure to sift it to avoid lumps!
- Milk: This recipe is super flexible with liquids. You can use any milk (even non-dairy like almond, soy, or oat milk), heavy cream, half and half, or evaporated milk. Just remember that the richer the liquid, the creamier your glaze will be. Start with less liquid and add more as needed.
- Vanilla extract: Feel free to swap vanilla with other extracts like almond, lemon, or orange for different flavors. You can also use vanilla bean paste (same amount) or vanilla powder. If using regular vanilla instead of clear, just know your glaze might have a slight tan tint.
Watch Out for These Mistakes While Making
The biggest mistake when making a vanilla glaze is skipping the sifting step – lumpy powdered sugar will create a bumpy, unattractive glaze that won’t spread smoothly over your cake.
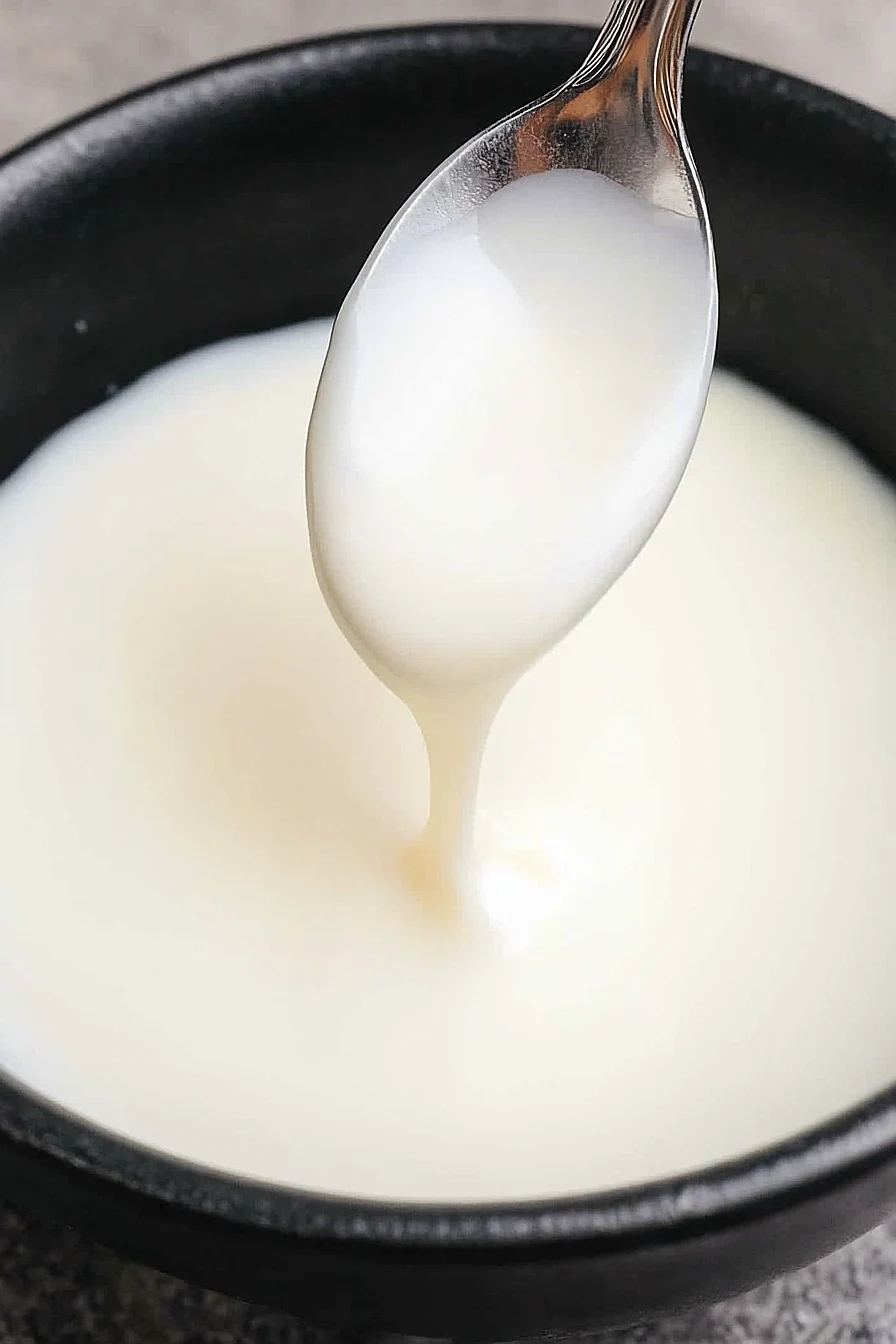
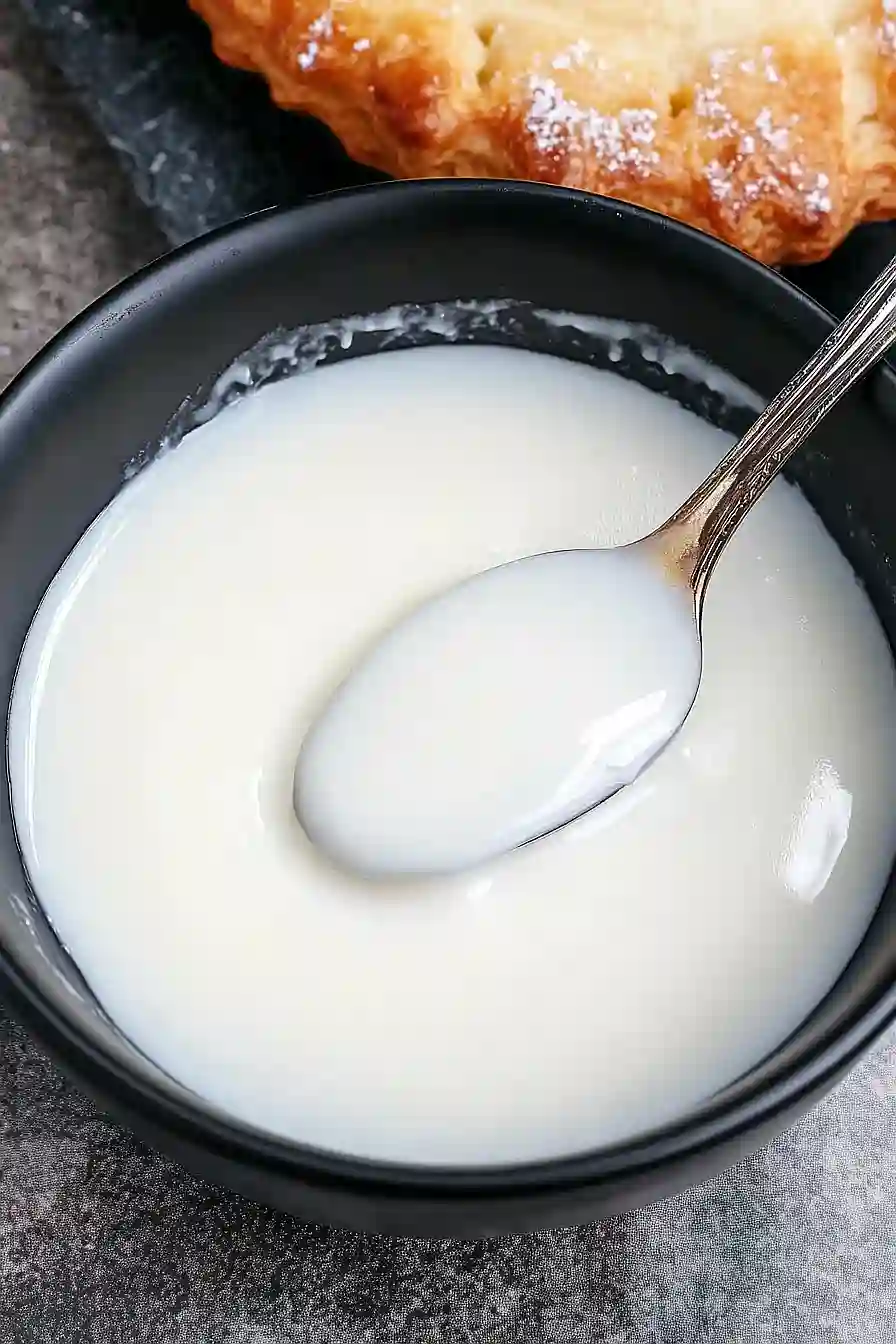
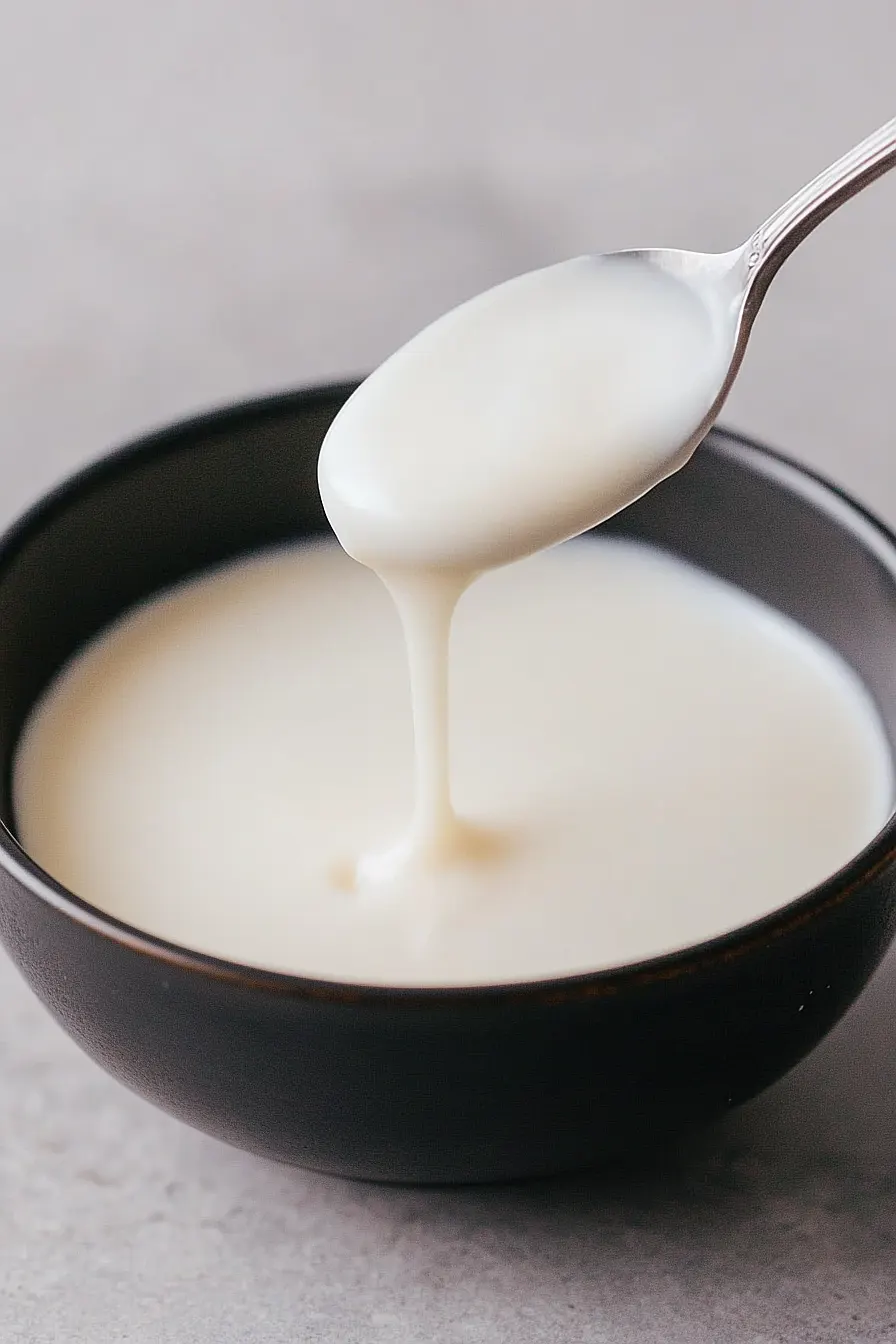
Getting the right consistency is crucial – adding too much liquid at once can make your glaze too thin and runny, so start with just 2 tablespoons of milk and add more, a few drops at a time, until you reach that perfect ribbon-like texture that holds its shape for a few seconds when drizzled back into the bowl.
Temperature matters more than you might think – if your cake is still warm when you apply the glaze, it will become too thin and soak right in, so make sure your baked goods are completely cool before glazing.
For the smoothest results, stir the glaze gently with a spoon or spatula rather than whisking it, which can create air bubbles that will show up in your final presentation.
What to Serve With Vanilla Glaze?
This sweet and simple vanilla glaze is super flexible and goes well with pretty much any baked treat you can think of! Pour it over a warm bundt cake, drizzle it on cinnamon rolls, or use it to top off your favorite muffins or scones. For breakfast treats, I like serving glazed pastries with a hot cup of coffee or tea to balance out the sweetness. If you’re glazing cookies or brownies, try adding a scoop of vanilla ice cream on the side – the cold ice cream and sweet glaze make such a good combo.
Storage Instructions
Keep Fresh: Your vanilla glaze will stay good at room temperature for about 2 days when stored in an airtight container. If you need it to last longer, pop it in the fridge where it’ll keep for up to a week. Just know that the glaze might start to get a bit firm in the fridge – that’s totally normal!
Make Ahead: You can whip up this glaze a day before you need it. Just keep it covered in the fridge, and when you’re ready to use it, let it sit at room temperature for about 30 minutes. If it’s too thick, stir in a tiny splash of milk until you get the right consistency.
Fix Consistency: If your stored glaze becomes too thick, simply add a few drops of milk and stir well. Too thin? Just mix in a little more powdered sugar until you reach that perfect drizzling consistency. It’s super easy to adjust!
| Preparation Time | 5-10 minutes |
| Cooking Time | 0 minutes |
| Total Time | 5-10 minutes |
| Level of Difficulty | Easy |
Estimated Nutrition
Estimated nutrition for the whole recipe (without optional ingredients):
- Calories: 800-900
- Protein: 4-6 g
- Fat: 20-30 g
- Carbohydrates: 160-180 g
Ingredients
- 2 cups confectioners’ sugar, sifted
- 2 to 3 tbsp whole or 2% milk (heavy cream, half and half, or evaporated milk can be used as substitutes)
- 1 tsp vanilla extract (use clear for a whiter icing)
Step 1: Combine the Glaze Ingredients
- 2 cups confectioners’ sugar, sifted
- 2 to 3 tbsp whole or 2% milk (heavy cream, half and half, or evaporated milk can be used as substitutes)
- 1 tsp vanilla extract (use clear for a whiter icing)
In a medium mixing bowl, add the sifted confectioners’ sugar, 2 tablespoons of milk (reserving the remaining tablespoon, if needed), and vanilla extract.
Whisk the mixture thoroughly until it is smooth and glossy, ensuring there are no lumps.
Adjust the consistency by adding more milk, a little at a time, if the glaze is too thick.
If the icing turns out too thin, mix in a bit more sifted confectioners’ sugar to achieve the desired texture.
I like to use clear vanilla extract when I want the icing to look extra white for decorated cookies or cakes.
Step 2: Drizzle and Serve
Once the glaze has reached your desired consistency, drizzle it over cakes or other baked goods as desired.
Allow the icing to set for a few minutes before serving to let it form a light crust.
