Looking for the perfect filling to take your homemade cakes from good to great? I know the struggle – there’s nothing worse than spending hours baking a beautiful cake only to have a lackluster filling let you down. After trying countless recipes and dealing with my fair share of runny or overly sweet fillings, I finally cracked the code with this lemon cake filling recipe.
This bright and zesty filling hits all the right notes: it’s smooth and spreadable, holds up well between layers, and brings just the right balance of sweet and tart flavors that’ll make your cake shine. Plus, it’s surprisingly simple to whip up with ingredients you probably already have in your kitchen.
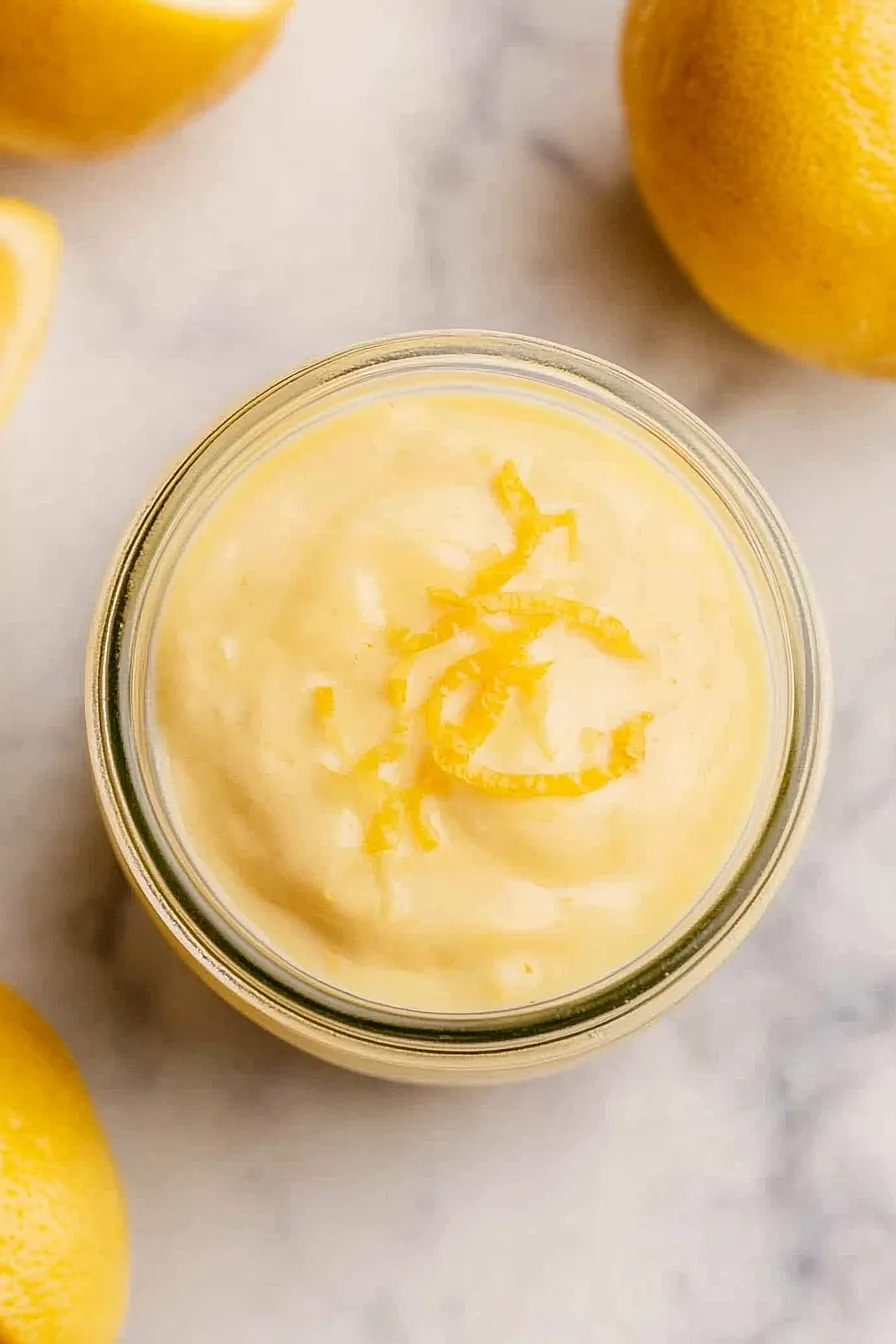
Why You’ll Love This Lemon Filling
- Made from scratch – Using fresh lemon juice and zest gives you a bright, natural flavor that store-bought fillings just can’t match.
- Simple ingredients – You probably have most of these basic pantry staples already on hand – no special trips to the store needed.
- Multi-purpose filling – This versatile filling works perfectly between cake layers, as a pie filling, or even as a topping for breakfast pastries.
- Better than store-bought – With no artificial flavors or preservatives, this homemade filling has a fresh, authentic taste that makes your desserts extra special.
What Kind of Lemons Should I Use?
Regular grocery store lemons (usually Eureka or Lisbon varieties) work perfectly fine for this filling, but Meyer lemons can add an interesting twist if you can find them. Meyer lemons are slightly sweeter and less acidic than regular lemons, giving your filling a more subtle, complex flavor. When picking your lemons, look for ones that feel heavy for their size and have a bright yellow color – these will give you the most juice. For the zest, make sure to wash your lemons well first, and only grate the yellow part of the peel, avoiding the white pith underneath which can make your filling taste bitter.

Options for Substitutions
While this lemon filling is pretty straightforward, here are some helpful substitutions if you need them:
- Cornstarch: If you’re out of cornstarch, you can use arrowroot powder in the same amount. All-purpose flour can work too, but you’ll need to double the amount (½ cup) and cook it a bit longer.
- Egg yolks: The egg yolks are essential for the texture and richness – I don’t recommend substituting these as they’re key to the filling’s success.
- Lemon juice and zest: Fresh lemon juice works best, but in a pinch, you can use bottled lemon juice. Just skip the extra zest if using bottled juice. For a fun twist, try lime juice and zest instead for a different citrus flavor.
- Butter: While unsalted butter is preferred, you can use salted butter – just reduce the added salt to a pinch. For a dairy-free version, use coconut oil, though it will add a slight coconut taste.
- Sugar: Regular white sugar works best here, but you can try coconut sugar or a sugar substitute designed for cooking. Keep in mind this might change the color and texture slightly.
Watch Out for These Mistakes While Cooking
The biggest challenge when making lemon cake filling is preventing lumps from forming – always whisk your cornstarch mixture continuously and strain the filling through a fine-mesh sieve if needed. Getting the right consistency can be tricky, but you’ll know it’s ready when the filling coats the back of a spoon and leaves a clear path when you run your finger through it. To avoid a metallic taste, make sure you’re only getting the yellow part of the lemon when zesting, as the white pith can make your filling bitter. For the smoothest results, remove the filling from heat as soon as it starts to bubble and thicken, then immediately stir in the butter until completely melted – overcooking will result in a rubbery texture that’s hard to spread.

What to Serve With Lemon Cake Filling?
This bright and tangy lemon filling pairs perfectly with so many different dessert bases! You can spread it between layers of vanilla cake, fill buttery shortbread cookies, or use it as a topping for angel food cake. I love serving desserts made with this filling alongside fresh berries – strawberries, raspberries, or blueberries add nice color and complement the citrus flavor really well. For an extra special touch, add a dollop of freshly whipped cream or a scoop of vanilla ice cream on the side to balance out the tartness of the lemon.
Storage Instructions
Keep Fresh: Once your lemon cake filling has cooled completely, transfer it to an airtight container and pop it in the fridge. It’ll stay fresh and tangy for up to 5 days. Pro tip: press a piece of plastic wrap directly onto the surface of the filling before putting the lid on – this prevents that pesky skin from forming on top!
Make Ahead: This filling is perfect for making ahead of time! You can prepare it 2-3 days before you need it, which is super handy when you’re planning a special cake. Just keep it covered in the fridge until you’re ready to use it.
Use After Storage: If your filling feels a bit firm after being in the fridge, let it sit at room temperature for about 15-20 minutes and give it a good stir. This will help bring back its smooth, spreadable consistency. If needed, you can also whisk it briefly to remove any lumps that might have formed.
| Preparation Time | 10-15 minutes |
| Cooking Time | 10-15 minutes |
| Total Time | 70-90 minutes |
| Level of Difficulty | Easy |
Estimated Nutrition
Estimated nutrition for the whole recipe (without optional ingredients):
- Calories: 400-450
- Protein: 6-8 g
- Fat: 14-16 g
- Carbohydrates: 70-80 g
Ingredients
- 1/2 cup granulated sugar
- 1/4 cup cornstarch
- 1/4 tsp salt
- 2 egg yolks
- 3/4 cup water
- 2 tbsp unsalted butter, room temperature
- 1/3 cup fresh lemon juice
- 1 tsp grated lemon zest
Step 1: Combine Dry and Wet Ingredients
- 1/2 cup granulated sugar
- 1/4 cup cornstarch
- 1/4 tsp salt
- 2 egg yolks
- 3/4 cup water
Gather all your ingredients.
In a small saucepan, mix the granulated sugar, cornstarch, and salt together.
Add the egg yolks and mix until the egg yolks are fully incorporated into the dry ingredients.
Then, gradually whisk in the water until you have a smooth mixture.
Step 2: Cook the Lemon Filling Base
- mixture from Step 1
Place the saucepan over medium-low heat and cook the mixture, stirring constantly, until it just begins to boil.
The mixture should become quite thick.
I find it’s important not to rush this step—gentle heat helps prevent the eggs from scrambling.
Step 3: Finish with Butter and Lemon
- 2 tbsp unsalted butter, room temperature
- 1/3 cup fresh lemon juice
- 1 tsp grated lemon zest
- cooked mixture from Step 2
Immediately remove the saucepan from the heat.
Stir in the room temperature butter until completely melted.
Gradually whisk in the fresh lemon juice until the filling is smooth and glossy, then stir in the grated lemon zest for added brightness.
Step 4: Chill the Lemon Filling
Pour the finished lemon filling into a bowl.
Cover the surface directly with plastic wrap to prevent a skin from forming.
Refrigerate the filling until firm, about 1 hour.
Personally, I like to make this in advance so it’s well chilled and ready for pies, tarts, or parfaits!
