Spring baking always gets me excited, especially when rhubarb season rolls around. There’s something about those tart pink stalks that just screams “time to turn on the oven.” But I’ll be honest—I used to only think of rhubarb for pies. Then one morning I had way too much rhubarb and not enough time for pie, so I threw it into muffin batter instead.
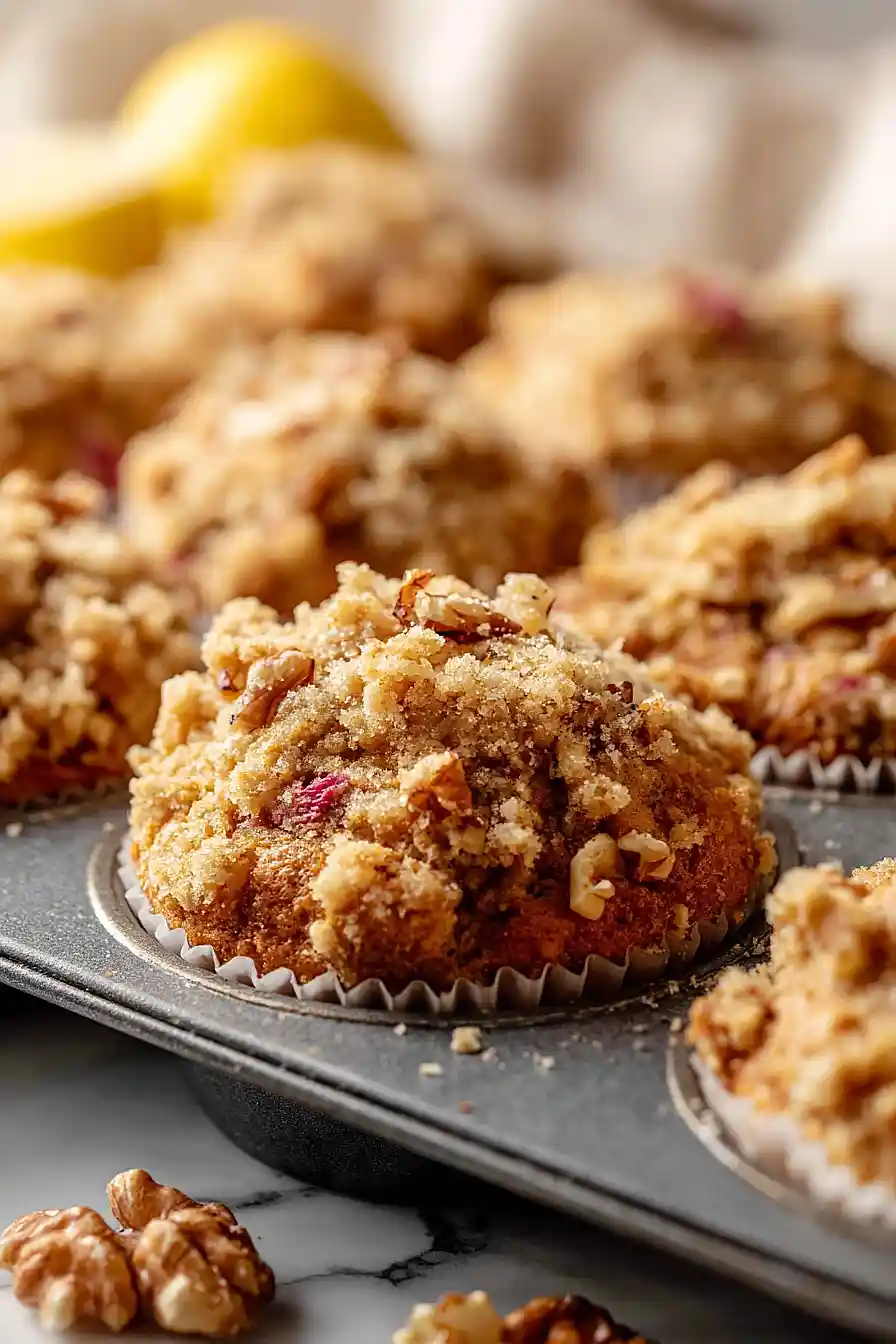
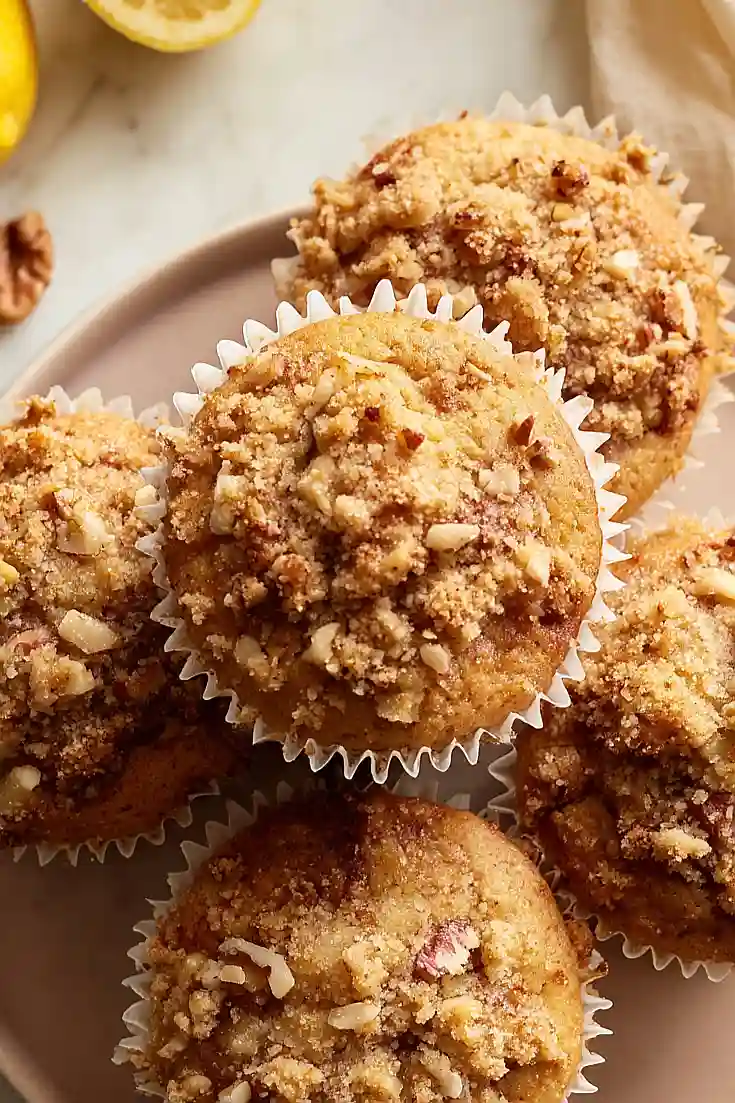
Best mistake ever. These muffins have that perfect balance of sweet and tangy, plus a buttery crumb topping that makes them feel special without being fancy. The walnuts add a nice texture, and that hint of lemon zest? It makes the whole thing sing.
Want a grab-and-go breakfast that tastes homemade? Need something to bring to brunch that’ll actually get compliments? These rhubarb nut muffins are your answer. They’re easy enough for a weekday morning but good enough that people will ask for the recipe.
Why You’ll Love These Rhubarb Nut Muffins
- Quick and easy – These muffins come together in under an hour, making them perfect for a weekend breakfast or last-minute brunch gathering.
- Tart and sweet balance – The tangy rhubarb paired with brown sugar creates a flavor combination that’s not too sweet, making these muffins ideal for breakfast or an afternoon snack.
- Crunchy streusel topping – The buttery walnut streusel adds a nice texture contrast to the soft, tender muffin, giving you that bakery-style finish at home.
- Great way to use rhubarb – If you have rhubarb in your garden or picked some up at the farmers market, this is a simple recipe that lets its unique flavor shine without being complicated.
What Kind of Rhubarb Should I Use?
Fresh rhubarb is always your best bet for these muffins, and you’ll want to look for stalks that are firm and crisp, not limp or bendy. The color of rhubarb can range from pale green to deep red, but don’t worry – the color doesn’t affect the taste, so grab whichever looks freshest at your store. Before using it, make sure to trim off any leaves (they’re actually toxic!) and cut the stalks into small pieces, about half-inch chunks, so they distribute evenly throughout your muffins. If fresh rhubarb isn’t available, frozen rhubarb can work in a pinch, just thaw it first and pat it dry with paper towels to remove excess moisture.
Options for Substitutions
These muffins are pretty forgiving when it comes to swaps, so here are some options if you need them:
- Rhubarb: Fresh rhubarb is best here, but if it’s out of season, you can use frozen rhubarb – just thaw it first and pat it dry with paper towels to remove excess moisture. You could also try diced tart apples or cranberries for a different flavor.
- Buttermilk: No buttermilk? Mix 1/2 cup regular milk with 1/2 tablespoon of lemon juice or white vinegar, let it sit for 5 minutes, and you’re good to go. Plain yogurt thinned with a bit of milk also works.
- Walnuts: Feel free to swap walnuts for pecans, almonds, or hazelnuts. If you have a nut allergy, you can leave them out entirely or use sunflower seeds for some crunch.
- Brown sugar: You can use regular white sugar instead, though you’ll lose a bit of that molasses flavor. If using white sugar, the muffins will be slightly less moist.
- Vegetable oil: Canola oil, melted coconut oil, or melted butter all work fine as replacements. Use the same amount.
- Lemon zest: Orange zest makes a nice substitute and pairs well with rhubarb. You could also use 1/2 teaspoon of lemon extract if you don’t have fresh lemons.
Watch Out for These Mistakes While Baking
The biggest mistake you can make with rhubarb muffins is overmixing the batter once you combine the wet and dry ingredients – stir just until everything is moistened, even if there are a few lumps, because overmixing leads to tough, dense muffins instead of light and tender ones.
Fresh rhubarb releases a lot of moisture during baking, so make sure to cut it into small pieces (about 1/2 inch) and toss them with that extra tablespoon of flour before folding them in, which helps absorb excess liquid and prevents soggy bottoms.
Don’t skip the two-temperature baking method – starting at 400°F helps the muffins rise quickly and form nice domed tops, while dropping to 350°F ensures they bake through without burning.
Finally, resist the urge to pull them out of the pan right away, as that 10-minute cooling time lets the muffins set properly and makes them much easier to remove without falling apart.

What to Serve With Rhubarb Nut Muffins?
These muffins are perfect for breakfast or brunch alongside a hot cup of coffee or tea. I love serving them with a simple fruit salad featuring strawberries and blueberries, since the fresh berries complement the tangy rhubarb really nicely. They’re also great with a dollop of Greek yogurt or a smear of cream cheese if you want something a bit richer. For a complete brunch spread, pair them with scrambled eggs and crispy bacon, or keep it simple and enjoy them warm with a pat of butter melting on top.
Storage Instructions
Store: Keep your rhubarb nut muffins in an airtight container at room temperature for up to 3 days, or in the fridge for about a week. The rhubarb keeps them nice and moist, so they actually taste great even a few days later.
Freeze: These muffins freeze really well for up to 3 months. Just wrap each one individually in plastic wrap, then put them all in a freezer bag. This way you can grab one whenever you need a quick breakfast or snack.
Thaw: Let frozen muffins sit at room temperature for about an hour, or pop them in the microwave for 20-30 seconds. If you want that fresh-baked feel, warm them in a 300°F oven for about 10 minutes.
| Preparation Time | 20-30 minutes |
| Cooking Time | 25-30 minutes |
| Total Time | 45-60 minutes |
| Level of Difficulty | Medium |
| Servings | 12 muffins |
Estimated Nutrition
Estimated nutrition for the whole recipe (without optional ingredients):
- Calories: 1950-2100
- Protein: 25-30 g
- Fat: 95-105 g
- Carbohydrates: 250-270 g
Ingredients
For the muffins:
- 1.75 cups flour (I always use King Arthur all-purpose flour)
- 3/4 cup brown sugar
- 1/2 tsp baking soda
- 1/4 tsp salt
- 1/2 tsp baking powder
- 1/3 cup vegetable oil (or any other neutral oil like canola)
- 1 egg
- 1/2 cup buttermilk (room temperature, about 70°F)
- 1.5 tsp vanilla
- 1 tbsp lemon zest
- 1 cup rhubarb (cut into 1/2-inch pieces for even distribution)
- 1/2 cup walnuts
For the topping:
- 3 tbsp flour
- 3 tbsp butter (I like Kerrygold unsalted butter for this)
- 1/3 cup brown sugar
- 1/2 tsp cinnamon
- 1/3 cup walnuts (chopped into 1/4-inch pieces, adds a nice crunch)
Step 1: Prepare the Oven and Make the Crumb Topping
- 3 tbsp flour
- 3 tbsp butter
- 1/3 cup brown sugar
- 1/2 tsp cinnamon
- 1/3 cup walnuts, chopped
Preheat your oven to 400°F and grease a standard 12-cup muffin tin.
While the oven heats, prepare the crumb topping by combining the flour, brown sugar, cinnamon, and chopped walnuts in a small bowl.
Cut the cold butter into small cubes and add to the mixture, then use your fingertips to work it together until it resembles coarse breadcrumbs with pea-sized pieces of butter throughout.
Set this topping aside—I like to keep it cool, so I sometimes refrigerate it while preparing the batter.
Step 2: Combine Dry Ingredients and Prepare Wet Ingredients
- 1.75 cups flour
- 3/4 cup brown sugar
- 1/2 tsp baking soda
- 1/4 tsp salt
- 1/2 tsp baking powder
- 1/3 cup vegetable oil
- 1 egg
- 1/2 cup buttermilk
- 1.5 tsp vanilla
In a large mixing bowl, whisk together the flour, brown sugar, baking soda, baking powder, and salt until evenly combined.
In a separate medium bowl, whisk together the oil, egg, room-temperature buttermilk, and vanilla until fully incorporated.
This parallel prep ensures both mixtures are ready to combine without overmixing the batter.
Step 3: Combine Batter and Fold in Fruit and Nuts
- wet ingredient mixture from Step 2
- dry ingredient mixture from Step 2
- 1 cup rhubarb, cut into 1/2-inch pieces
- 1/2 cup walnuts
- 1 tbsp lemon zest
Pour the wet ingredient mixture from Step 2 into the dry ingredients and stir until just combined—the batter should be lumpy and slightly undermixed, which prevents tough muffins.
Gently fold in the rhubarb pieces, whole walnuts, and lemon zest using a spatula with just a few strokes until evenly distributed.
I find that keeping the rhubarb pieces to a consistent 1/2-inch size ensures they distribute evenly and bake through without any tough or raw pieces.
Step 4: Fill Muffin Cups and Add Topping
- batter from Step 3
- crumb topping from Step 1
Divide the batter evenly among the 12 prepared muffin cups, filling each about 2/3 full.
Sprinkle the crumb topping from Step 1 generously over each muffin, pressing it gently so it adheres to the batter.
Step 5: Bake with Two-Temperature Method
Bake at 400°F for 5 minutes to set the outer structure and prevent overmixing issues.
Then lower the oven temperature to 350°F and continue baking for 20 minutes until a toothpick inserted into the center comes out with just a few moist crumbs (the rhubarb releases moisture, so don’t expect it to come out completely clean).
The two-temperature approach helps the muffins bake evenly without over-browning the tops.
Step 6: Cool and Serve
Remove the muffin tin from the oven and let the muffins cool in the pan for 10 minutes.
This resting time allows them to set and firm up, making them easier to remove without falling apart.
Run a thin knife around each muffin to loosen it, then transfer to a wire rack to cool completely.
Simple Rhubarb Nut Muffins
Ingredients
For the muffins::
- 1.75 cups flour (I always use King Arthur all-purpose flour)
- 3/4 cup brown sugar
- 1/2 tsp baking soda
- 1/4 tsp salt
- 1/2 tsp baking powder
- 1/3 cup vegetable oil (or any other neutral oil like canola)
- 1 egg
- 1/2 cup buttermilk (room temperature, about 70°F)
- 1.5 tsp vanilla
- 1 tbsp lemon zest
- 1 cup rhubarb (cut into 1/2-inch pieces for even distribution)
- 1/2 cup walnuts
For the topping::
- 3 tbsp flour
- 3 tbsp butter (I like Kerrygold unsalted butter for this)
- 1/3 cup brown sugar
- 1/2 tsp cinnamon
- 1/3 cup walnuts (chopped into 1/4-inch pieces, adds a nice crunch)
Instructions
- Preheat your oven to 400°F and grease a standard 12-cup muffin tin. While the oven heats, prepare the crumb topping by combining the flour, brown sugar, cinnamon, and chopped walnuts in a small bowl. Cut the cold butter into small cubes and add to the mixture, then use your fingertips to work it together until it resembles coarse breadcrumbs with pea-sized pieces of butter throughout. Set this topping aside—I like to keep it cool, so I sometimes refrigerate it while preparing the batter.
- In a large mixing bowl, whisk together the flour, brown sugar, baking soda, baking powder, and salt until evenly combined. In a separate medium bowl, whisk together the oil, egg, room-temperature buttermilk, and vanilla until fully incorporated. This parallel prep ensures both mixtures are ready to combine without overmixing the batter.
- Pour the wet ingredient mixture from Step 2 into the dry ingredients and stir until just combined—the batter should be lumpy and slightly undermixed, which prevents tough muffins. Gently fold in the rhubarb pieces, whole walnuts, and lemon zest using a spatula with just a few strokes until evenly distributed. I find that keeping the rhubarb pieces to a consistent 1/2-inch size ensures they distribute evenly and bake through without any tough or raw pieces.
- Divide the batter evenly among the 12 prepared muffin cups, filling each about 2/3 full. Sprinkle the crumb topping from Step 1 generously over each muffin, pressing it gently so it adheres to the batter.
- Bake at 400°F for 5 minutes to set the outer structure and prevent overmixing issues. Then lower the oven temperature to 350°F and continue baking for 20 minutes until a toothpick inserted into the center comes out with just a few moist crumbs (the rhubarb releases moisture, so don't expect it to come out completely clean). The two-temperature approach helps the muffins bake evenly without over-browning the tops.
- Remove the muffin tin from the oven and let the muffins cool in the pan for 10 minutes. This resting time allows them to set and firm up, making them easier to remove without falling apart. Run a thin knife around each muffin to loosen it, then transfer to a wire rack to cool completely.
