Finding the perfect cookie recipe for holiday gatherings or weekend baking sessions can feel like searching for a needle in a haystack. Between juggling different taste preferences and trying to create something that looks as good as it tastes, the pressure to deliver a crowd-pleasing treat is real – especially when you’re signed up to bring dessert to the neighborhood potluck or school bake sale.
That’s where these raspberry almond thumbprint cookies come to the rescue: they’re straightforward to make, combine two classic flavors that everyone loves, and have that special homemade touch that makes people think you spent hours in the kitchen (even though you didn’t).

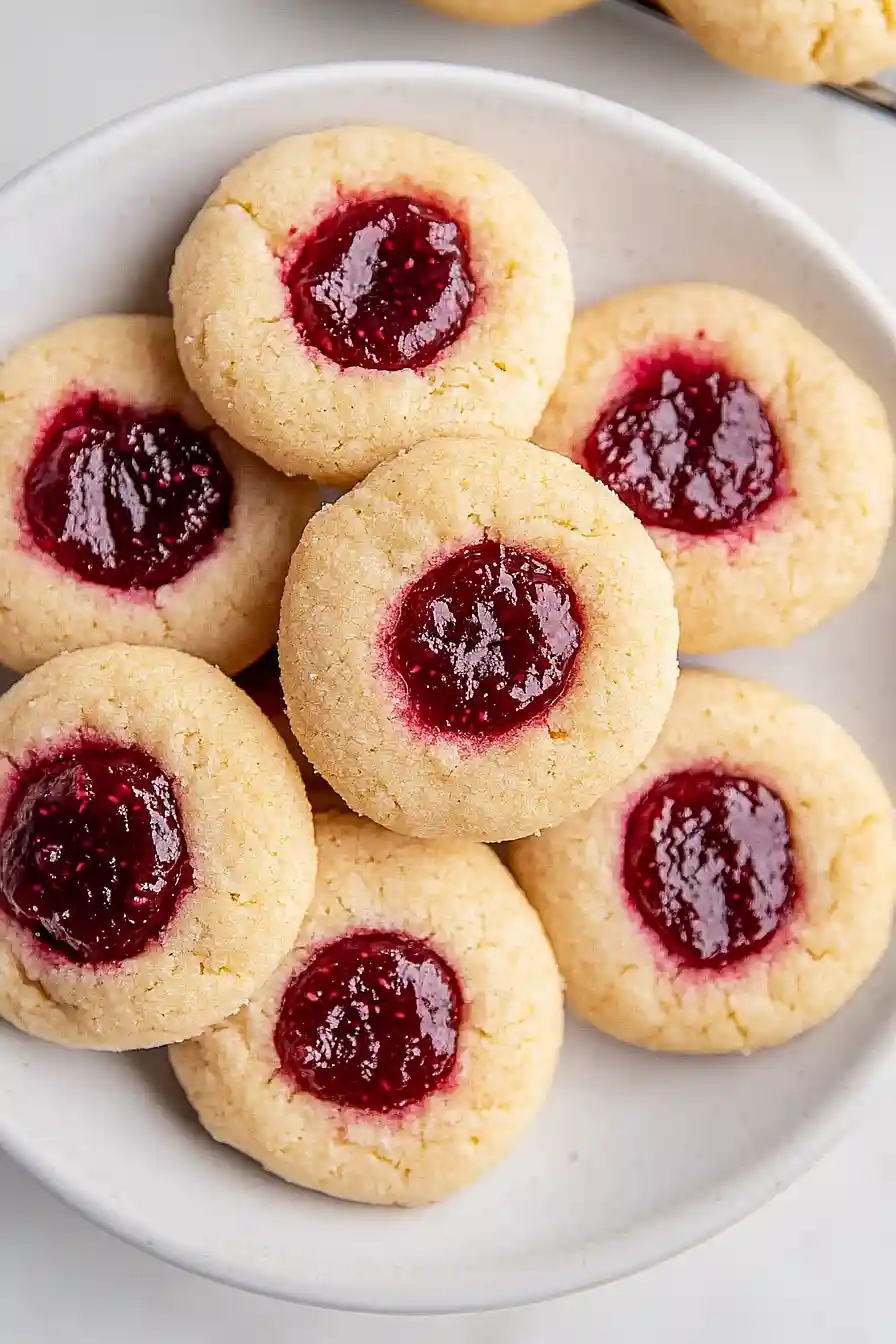
Why You’ll Love These Thumbprint Cookies
- Quick baking project – These cookies come together in under 40 minutes, making them perfect for last-minute holiday baking or weekend treats.
- Basic pantry ingredients – You probably have most of these ingredients in your kitchen already – just grab some raspberry preserves and you’re ready to bake.
- Kid-friendly baking – Little bakers love making the thumbprint indents – it’s like playing with Play-Doh, but you get cookies in the end!
- Make-ahead friendly – These cookies store well in an airtight container, so you can make them ahead for parties or cookie exchanges.
- Classic cookie recipe – The combination of buttery cookie base, almond flavoring, and sweet raspberry preserves is a tried-and-true favorite that never goes out of style.
What Kind of Raspberry Preserves Should I Use?
For thumbprint cookies, the quality of your raspberry preserves really makes a difference in the final taste. Regular raspberry jam will work, but preserves are better since they’re thicker and contain whole fruit pieces that add nice texture to your cookies. Look for preserves that list fruit as the first ingredient rather than sugar – this gives you the most authentic raspberry flavor. If you can’t find raspberry preserves, you can substitute other berry preserves like strawberry or blackberry, though raspberry gives these cookies their classic look and taste. Just make sure whatever preserves you choose aren’t too runny, as they might spread too much during baking.
Options for Substitutions
Need to make some swaps for these classic cookies? Here are some helpful substitutions:
- Unsalted butter: You can use salted butter – just skip the added salt in the recipe. Plant-based butter also works, but the texture might be slightly different. Just make sure it’s stick-style, not the spreadable kind in tubs.
- Almond flavoring: If you’re out of almond flavoring or have nut allergies, try vanilla extract instead. You can also use 1/2 teaspoon of vanilla bean paste for extra flavor.
- Raspberry preserves: Any fruit preserves work great here! Try strawberry, apricot, or blackberry jam. Just avoid using runny jelly as it might leak out during baking.
- White and brown sugar: You can use all white sugar if you’re out of brown sugar. To mimic brown sugar, add 1/2 teaspoon of molasses to white sugar.
- Plain flour: This is one ingredient you shouldn’t substitute, as it’s key for the right cookie texture. Self-rising flour won’t work here since it contains leavening agents.
Watch Out for These Mistakes While Baking
The biggest challenge when making thumbprint cookies is getting the indentation just right – pressing too hard can crack the edges, while too gentle a touch won’t create enough space for the jam. For perfect results, use your thumb to make an initial depression, then gently twist it to create a smooth, round well that’s about 1/2 inch deep. Another common mistake is adding too much jam, which can bubble over during baking and create a sticky mess – stick to about 1/2 teaspoon per cookie and remember that the jam will spread as it heats. The cookies can also spread too much if your butter is too warm, so make sure it’s softened but still slightly cool to the touch, and chill the shaped cookies for 20-30 minutes before baking. For the best texture, don’t overbake these delicate cookies – they should be set but still pale on top, with just a slight golden color on the bottom.

What to Serve With Thumbprint Cookies?
These sweet little cookies are perfect for afternoon tea or coffee time! A hot cup of Earl Grey tea or a creamy latte makes the almond and raspberry flavors really shine. For a cozy dessert spread, I like serving these cookies alongside other small treats like chocolate-dipped strawberries or simple shortbread cookies. Since these cookies are on the sweeter side, they’re also nice with a glass of cold milk or even some vanilla-scented hot chocolate on chilly days.
Storage Instructions
Keep Fresh: These raspberry almond thumbprint cookies stay fresh in an airtight container at room temperature for up to 5 days. I like to place a piece of white bread in the container – it helps keep the cookies soft and chewy, just like when they first came out of the oven!
Freeze: These cookies are perfect for making ahead and freezing! Place them in a freezer-safe container with parchment paper between layers and they’ll keep for up to 3 months. You can even freeze the unbaked dough balls (without the jam) – just add the preserves after thawing when you’re ready to bake.
Thaw: When you’re craving a cookie from the freezer, just take out what you need and let them thaw at room temperature for about 30 minutes. The jam might look a bit watery at first, but it’ll return to normal once the cookie comes to room temperature.
| Preparation Time | 20-30 minutes |
| Cooking Time | 7-8 minutes |
| Total Time | 27-38 minutes |
| Level of Difficulty | Easy |
Estimated Nutrition
Estimated nutrition for the whole recipe (without optional ingredients):
- Calories: 600-700
- Protein: 6-8 g
- Fat: 30-35 g
- Carbohydrates: 85-95 g
Ingredients
- 1/2 cup softened unsalted butter (1 stick)
- 1/2 cup white sugar, divided
- 1/4 cup light brown sugar
- 1 egg
- 1 teaspoon almond flavoring
- 1 1/2 cups plain flour
- 1/4 teaspoon salt
- 1/3 cup raspberry preserves
Step 1: Prepare the Baking Sheet and Preheat the Oven
Start by preheating your oven to 375 degrees Fahrenheit.
Meanwhile, line a baking sheet with parchment paper or spray it lightly with cooking oil to prevent the cookies from sticking during baking.
Step 2: Cream the Butter and Sugars
In a large bowl, combine softened butter, 1/4 cup granulated sugar, and brown sugar.
Use an electric mixer set to medium speed to cream the mixture until smooth and well combined.
This should take a few minutes.
Ensure the mixture is light and fluffy.
Step 3: Incorporate Wet Ingredients
Add the egg and almond extract to the creamed butter and sugar mixture.
Mix well until all the ingredients are thoroughly combined.
This step will ensure that the cookie dough has a flavorful base for the jam-filled cookies.
Step 4: Mix in Dry Ingredients and Form Dough
Sprinkle the salt evenly around the bowl of wet ingredients.
Gradually add in the flour, mixing a little bit at a time.
Continue mixing until a dough forms, scraping down the sides of the bowl as necessary to make sure everything is incorporated evenly.
The dough should be soft but manageable.
Step 5: Shape and Fill the Cookie Dough
Using a tablespoon or a cookie scoop, form cookie dough balls to ensure even sizing.
Roll each ball in 1/4 cup of white sugar for added sweetness and texture, then place the sugared balls onto the prepared baking sheet.
Use the end of a wooden spoon or your thumb to create a small hole in the center of each cookie.
Fill each hole with approximately 1 teaspoon of raspberry jam.
Once filled, sprinkle the tops of the cookies with a little more white sugar for extra sweetness.
Step 6: Chill and Bake the Cookies
Chill the jam-filled cookie dough in the refrigerator for about 20 minutes to help the cookies maintain their shape during baking.
After chilling, bake the cookies in the preheated oven for 7-8 minutes, or until the edges are just lightly browned.
This will result in cookies that are soft and tender.
Step 7: Cool and Enjoy Your Cookies
After removing the cookies from the oven, check the centers.
If any need a little more jam, feel free to add it while the cookies are still hot.
Transfer the cookies to a cooling rack or a clean cooking towel to cool completely.
Once cooled, savor the delightful combination of buttery cookie and fruity jam in each bite.

Can these be made gluten free?