If you ask me, pumpkin chili is one of fall’s best comfort foods.
This hearty dish brings together tender pumpkin chunks with beans and warm spices that fill your kitchen with the most amazing smell. The pumpkin adds a subtle sweetness that balances perfectly with the heat from chili peppers.
It’s simmered low and slow with ground beef, onions, and a blend of cumin and paprika that creates layers of flavor. A sprinkle of cheese and some crusty bread help make this meal complete.
It’s a family-friendly dish that warms you up from the inside out, perfect for those chilly autumn evenings.
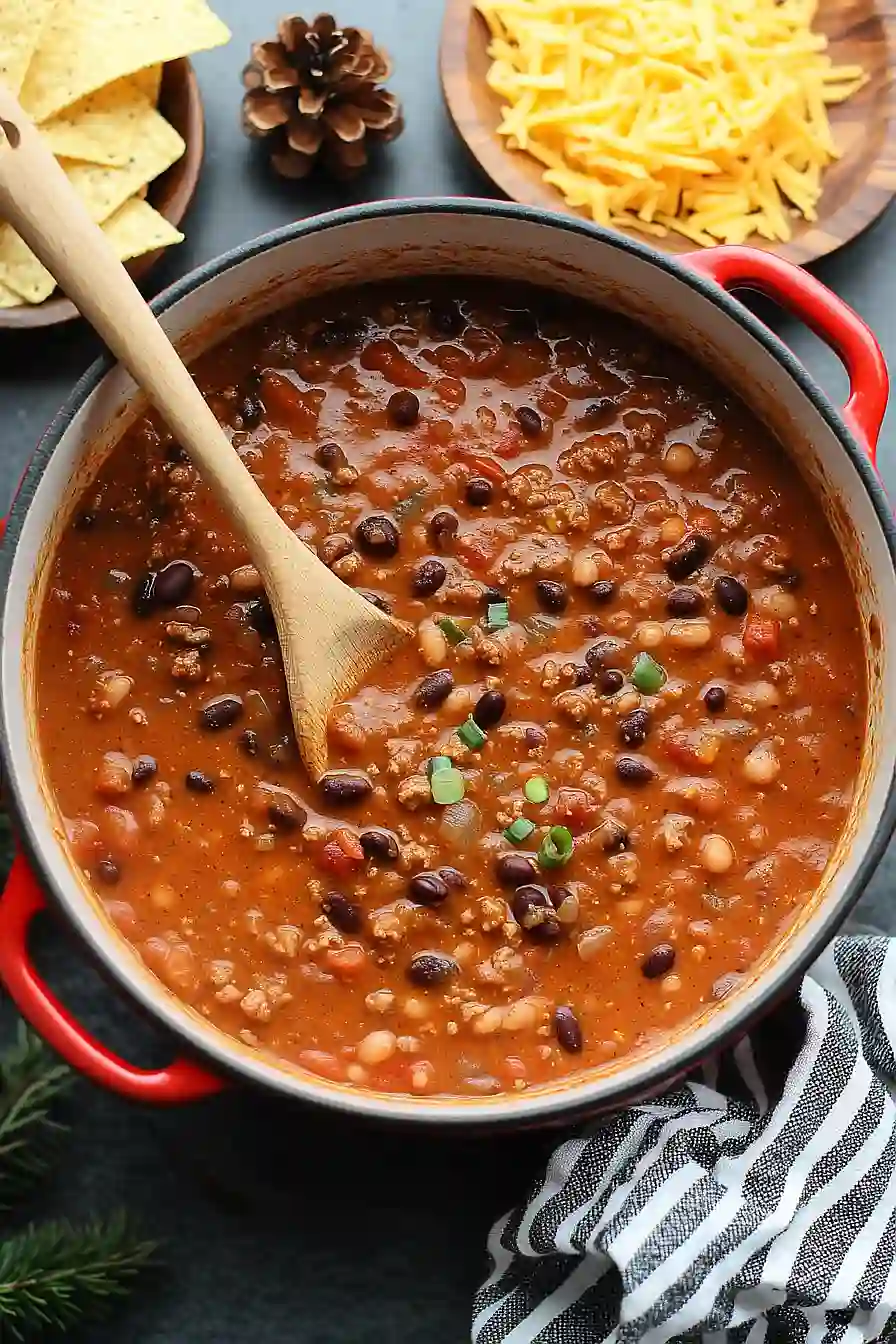
Why You’ll Love This Pumpkin Chili
- Budget-friendly meal – At under $10 total, this chili feeds a crowd without breaking the bank, making it perfect for families or meal prep.
- Sneaky nutrition boost – The pumpkin purée adds vitamins and fiber while creating an incredibly creamy texture that even kids won’t notice.
- One-pot convenience – Everything cooks in a single pot, which means less cleanup and more time to enjoy your meal.
- Perfect fall comfort food – The warm spices and pumpkin make this chili taste like autumn in a bowl, ideal for chilly evenings.
- Great for meal prep – This chili tastes even better the next day and freezes beautifully, so you can make a big batch and enjoy it all week long.
What Kind of Pumpkin Purée Should I Use?
For this chili, you’ll want to grab a can of pure pumpkin purée from the baking aisle – just make sure it’s not pumpkin pie filling, which has spices already added. Libby’s is probably the most common brand you’ll find, and it works perfectly for this recipe. If you’re feeling ambitious, you can definitely make your own pumpkin purée by roasting a sugar pumpkin and blending the flesh, but the canned stuff is convenient and tastes great. The pumpkin adds a subtle sweetness and creamy texture that balances out the heat from the chili powder without making your chili taste like dessert.

Options for Substitutions
This pumpkin chili is pretty forgiving when it comes to swaps, so here are some easy substitutions you can make:
- Ground beef: You can easily swap this for ground turkey, chicken, or even plant-based crumbles. If using leaner meats like turkey, you might want to add an extra tablespoon of oil to prevent sticking.
- Pumpkin purée: This is really the star of the show, so I’d recommend sticking with it. But if you’re in a pinch, butternut squash purée or sweet potato purée can work – just expect a slightly different flavor profile.
- Kidney and black beans: Mix and match any beans you have on hand! Pinto beans, navy beans, or cannellini beans all work great. You can even use just one type if that’s what you’ve got.
- Diced tomatoes: Crushed tomatoes or regular diced tomatoes work just fine if you can’t find petite diced. You can also use fresh tomatoes – just dice them up and add a pinch of salt.
- Smoked paprika: Regular paprika works if you don’t have smoked, though you’ll miss that smoky depth. A tiny pinch of chipotle powder can add some of that smokiness back.
- Water: For extra flavor, swap the water for beef or vegetable broth. It’ll make your chili even more rich and tasty.
Watch Out for These Mistakes While Cooking
The biggest mistake when making pumpkin chili is adding the pumpkin purée too early in the cooking process, which can cause it to break down and create a mushy texture – stir it in during the last 15-20 minutes of simmering instead. Another common error is not browning the ground beef properly before adding other ingredients, so make sure to cook it until it’s nicely browned and has developed some color for better flavor. Don’t forget to drain your beans thoroughly before adding them, as excess liquid can make your chili too watery and dilute the rich pumpkin flavor. For the best results, let your chili simmer on low heat for at least 30 minutes after adding all ingredients, stirring occasionally to prevent sticking, and taste for seasoning adjustments before serving since the pumpkin can mellow out the spices.

What to Serve With Pumpkin Chili?
This hearty pumpkin chili is perfect with warm cornbread or crusty dinner rolls for scooping up every spoonful. I love topping bowls with a dollop of sour cream, shredded cheese, and chopped green onions to balance out the rich, smoky flavors. For a complete meal, serve it over baked sweet potatoes or with a side of fluffy rice to make it even more filling. You can also set out some tortilla chips for dipping, or make it into a chili bar with toppings like avocado slices, cilantro, and lime wedges so everyone can customize their bowl.
Storage Instructions
Refrigerate: This pumpkin chili actually gets better after sitting for a day or two! Store it in the fridge in an airtight container for up to 5 days. The flavors really meld together nicely, making it perfect for meal prep. I love ladling it over baked sweet potatoes or serving it with some crusty bread throughout the week.
Freeze: Chili freezes like a dream, and this pumpkin version is no exception. Let it cool completely, then portion it into freezer bags or containers and freeze for up to 3 months. I like to freeze it in individual serving sizes so I can grab just what I need for a quick lunch.
Warm Up: Reheat your chili gently on the stovetop over medium-low heat, stirring occasionally until heated through. You can also microwave it in 30-second intervals, stirring between each one. If it seems too thick after storing, just add a splash of water or broth to loosen it up.
| Preparation Time | 10-15 minutes |
| Cooking Time | 40-45 minutes |
| Total Time | 50-60 minutes |
| Level of Difficulty | Easy |
Estimated Nutrition
Estimated nutrition for the whole recipe (without optional ingredients):
- Calories: 1550-1700
- Protein: 95-105 g
- Fat: 45-55 g
- Carbohydrates: 180-200 g
Ingredients
- 2 garlic cloves
- 1 yellow onion
- 2 tbsp olive oil
- 1 lb ground beef
- 1 can (15 oz) kidney beans, drained
- 1 can (15 oz) black beans, drained
- 1 can (15 oz) petite diced tomatoes
- 1 can (15 oz) pumpkin purée
- 5 tbsp tomato paste (from half a 6 oz can)
- 2 cups water
- 1 tbsp chili powder
- 1/2 tsp smoked paprika
- 1 tsp ground cumin
- 1/4 tsp garlic powder
- 1/2 tsp onion powder
- 1/4 tsp ground black pepper
- 1 tsp salt
Step 1: Prepare and Sauté the Aromatics
- 2 garlic cloves
- 1 yellow onion
- 2 tbsp olive oil
Mince the garlic cloves and dice the yellow onion.
Heat the olive oil in a large pot over medium heat.
Add the garlic and onion, then sauté until the onions are tender and fragrant, about 5 minutes.
Taking the time to cook the aromatics thoroughly will provide a rich flavor base for your chili.
Step 2: Brown the Ground Beef
- 1 lb ground beef
Add the ground beef to the sautéed onions and garlic in the pot.
Cook the beef, breaking it up with a spoon, until it’s fully browned and cooked through.
This should take about 5-7 minutes.
Make sure to cook off most of the moisture so the beef develops a nice flavor.
Step 3: Add Beans, Tomatoes, Pumpkin, and Seasonings
- 1 can (15 oz) kidney beans, drained
- 1 can (15 oz) black beans, drained
- 1 can (15 oz) petite diced tomatoes
- 1 can (15 oz) pumpkin purée
- 5 tbsp tomato paste (from half a 6 oz can)
- 2 cups water
- 1 tbsp chili powder
- 1/2 tsp smoked paprika
- 1 tsp ground cumin
- 1/4 tsp garlic powder
- 1/2 tsp onion powder
- 1/4 tsp ground black pepper
- 1 tsp salt
Add the drained kidney beans and black beans, diced tomatoes with their juices, pumpkin purée, tomato paste, and water to the pot with the browned ground beef, onions, and garlic.
Sprinkle in the chili powder, smoked paprika, ground cumin, garlic powder, onion powder, ground black pepper, and salt.
Stir everything together until well combined.
I like to add a touch of extra chili powder here if I want my chili to have a bit more kick.
Step 4: Simmer the Chili
Place a lid on the pot and bring the chili to a gentle simmer over medium-low heat.
Allow the chili to simmer for 30 minutes, stirring occasionally to prevent sticking.
This will help the flavors meld and the chili to thicken.
If you have time, simmering even longer can further deepen the flavors.
Step 5: Taste and Serve
After 30 minutes of simmering, taste the chili and adjust the seasoning if necessary by adding more salt or spices to your liking.
Serve the chili hot, garnished with your favorite toppings such as sour cream, shredded cheese, green onions, or corn chips.
For a fun twist, I sometimes like to add a splash of fresh lime juice right before serving to brighten the flavors.

