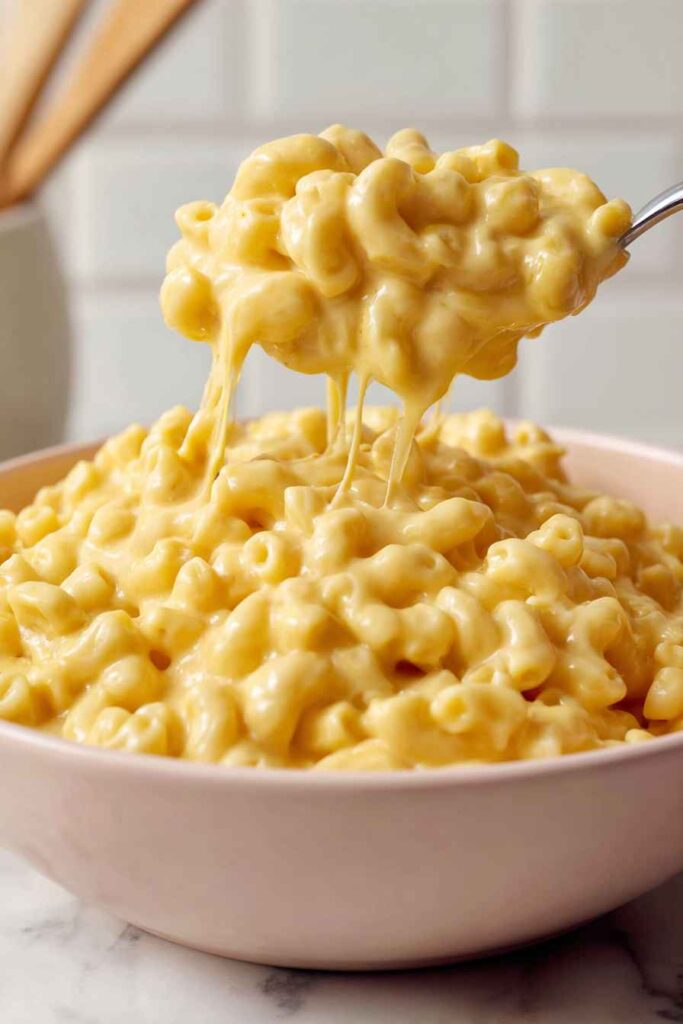
Here is my favorite mac and cheese recipe, with just 5 simple ingredients that come together to make a creamy, cheesy dish that’s ready in under 30 minutes.
This mac and cheese is what I turn to when I need dinner on the table fast and my kids are getting hangry. I always keep these ingredients stocked in my pantry and fridge because you never know when a mac and cheese emergency will strike, am I right?
Why You’ll Love This Mac and Cheese
- Only 5 simple ingredients – You probably already have everything you need in your pantry and fridge – no fancy or hard-to-find ingredients required.
- Budget-friendly meal – At under $4 total, this homemade mac and cheese costs way less than the boxed stuff and tastes so much better.
- Quick and easy – Ready in just 30-40 minutes from start to finish, making it perfect for busy weeknights when you need dinner on the table fast.
- Creamy homemade taste – Skip the processed cheese powder and enjoy real cheddar cheese that melts into a smooth, rich sauce your whole family will love.
- Kid-approved comfort food – This classic recipe is guaranteed to please even the pickiest eaters and makes great leftovers for lunch the next day.
What Kind of Cheddar Cheese Should I Use?
For the best mac and cheese, you’ll want to use a good quality block cheddar and grate it yourself rather than buying pre-shredded cheese. Pre-shredded cheese has anti-caking agents that can make your sauce less smooth and creamy. Sharp cheddar gives you the most flavor, but mild or medium cheddar work great too if you prefer a less tangy taste. If you want to mix things up, try combining sharp cheddar with a bit of mild cheddar or even adding some cream cheese for extra creaminess.
Options for Substitutions
This simple mac and cheese is pretty forgiving when it comes to swaps:
- Cheddar cheese: You can mix things up with other melting cheeses like Monterey Jack, Colby, or Gruyere. For best results, stick with block cheese and grate it yourself – pre-shredded cheese has anti-caking agents that can make your sauce grainy.
- Elbow noodles: Any short pasta works great here! Try shells, rotini, cavatappi, or penne. The key is using pasta with nooks and crannies that hold onto that creamy cheese sauce.
- Milk: Whole milk gives the creamiest results, but you can use 2% if that’s what you have. Heavy cream will make it extra rich, while lower-fat milk might make it a bit thinner.
- All purpose flour: This is pretty essential for thickening the sauce, so I wouldn’t skip it. If you’re out, you could try cornstarch instead – use about 2 tablespoons mixed with a little cold milk first.
- Butter: Margarine or even olive oil can work in a pinch, but butter really gives that rich flavor that makes this mac and cheese special.
Watch Out for These Mistakes While Cooking
The biggest mistake people make with homemade mac and cheese is adding the cheese to milk that’s too hot, which causes the cheese to seize up and become grainy instead of smooth – always remove the milk from heat before whisking in your cheese gradually.
Another common error is not making a proper roux with the butter and flour first, so make sure to cook these together for about 2 minutes to eliminate any raw flour taste before slowly adding your milk.
Don’t forget to reserve some pasta water before draining your noodles, as this starchy liquid can help loosen up your cheese sauce if it gets too thick.
Finally, avoid overcooking the pasta since it will continue to soften when mixed with the hot cheese sauce – aim for just shy of al dente when you drain them.
What to Serve With Mac and Cheese?
Mac and cheese is pretty perfect on its own, but I love pairing it with some crispy bacon or grilled chicken to make it more filling. A simple side salad with ranch dressing helps cut through all that creamy richness, or you could go with some steamed broccoli if you want to sneak in some veggies. For a fun twist, try serving it alongside some barbecue pulled pork or hot dogs for the ultimate comfort food feast. Don’t forget some buttery garlic bread on the side – because really, you can never have too much carbs when mac and cheese is involved!
Storage Instructions
Refrigerate: This mac and cheese keeps really well in the fridge for up to 4 days in a covered container. I actually think it tastes even better the next day after all those cheesy flavors have had time to meld together. Just make sure to let it cool completely before putting it away.
Freeze: You can definitely freeze portions of this mac and cheese for up to 3 months in freezer-safe containers. I like to freeze it in individual serving sizes so I can just grab one when I need a quick comfort food fix. Let it thaw in the fridge overnight before reheating.
Reheat: To warm it back up, add a splash of milk and heat it gently on the stove over low heat, stirring frequently. You can also microwave it in 30-second intervals, stirring between each round. The sauce might look a little thick at first, but it’ll come back together with some gentle stirring and that extra milk.
| Preparation Time | 10-15 minutes |
| Cooking Time | 20-25 minutes |
| Total Time | 30-40 minutes |
| Level of Difficulty | Easy |
Estimated Nutrition
Estimated nutrition for the whole recipe (without optional ingredients):
- Calories: 2700-3000
- Protein: 85-95 g
- Fat: 110-125 g
- Carbohydrates: 325-350 g
Ingredients
- 8 oz sharp cheddar cheese, shredded
- 1 package (16 oz) elbow macaroni
- 2 cups whole milk
- 1/4 cup all-purpose flour
- 2 tbsp unsalted butter
Step 1: Cook the Elbow Macaroni
- 1 package (16 oz) elbow macaroni
Bring a large pot of salted water to a boil.
Add the elbow macaroni and cook according to the package directions until al dente.
Drain the noodles and set them aside for later use.
Step 2: Prepare the Cheese Sauce Base
- 2 tbsp unsalted butter
- 1/4 cup all-purpose flour
While the noodles are cooking, melt the unsalted butter in a small saucepan over medium heat.
Add the all-purpose flour and whisk it together with the butter, forming a roux.
It is normal if there are a few flour lumps at this stage.
Step 3: Finish the Cheese Sauce
- 2 cups whole milk
- 8 oz sharp cheddar cheese, shredded (2 cups)
Gradually pour the whole milk into the roux, whisking continuously to combine.
Continue whisking until the flour dissolves completely and the mixture is smooth and thickened, about 2-3 minutes.
Add the shredded sharp cheddar cheese and whisk until the cheese melts and the sauce is thick and creamy.
I find that patience during this step gives you the smoothest, creamiest sauce.
Step 4: Combine the Noodles and Cheese Sauce
- cheese sauce from Step 3
- cooked elbow macaroni from Step 1
Pour the finished cheese sauce over the cooked elbow macaroni (from Step 1) in a large bowl or directly in the pot.
Stir thoroughly until all the noodles are coated with the cheesy sauce.
Scoop into serving bowls or prepare for baking.
Step 5: Bake for a Cheesy Finish (Optional)
- cheesy macaroni from Step 4
- optional extra shredded cheddar cheese
Preheat your oven to 350°F (175°C).
Transfer the cheesy noodles from Step 4 into a baking dish.
For extra cheesiness, sprinkle additional shredded cheddar cheese on top if you have any left.
Bake for 15 minutes, or until the cheese on top is melted and bubbly.
I like to let it cool just a few minutes before serving so you get the gooey, creamy texture.
Simple Mac and Cheese
Ingredients
- 8 oz sharp cheddar cheese, shredded
- 1 package (16 oz) elbow macaroni
- 2 cups whole milk
- 1/4 cup all-purpose flour
- 2 tbsp unsalted butter
Instructions
- Bring a large pot of salted water to a boil. Add the elbow macaroni and cook according to the package directions until al dente. Drain the noodles and set them aside for later use.
- While the noodles are cooking, melt the unsalted butter in a small saucepan over medium heat. Add the all-purpose flour and whisk it together with the butter, forming a roux. It is normal if there are a few flour lumps at this stage.
- Gradually pour the whole milk into the roux, whisking continuously to combine. Continue whisking until the flour dissolves completely and the mixture is smooth and thickened, about 2-3 minutes. Add the shredded sharp cheddar cheese and whisk until the cheese melts and the sauce is thick and creamy. I find that patience during this step gives you the smoothest, creamiest sauce.
- Pour the finished cheese sauce over the cooked elbow macaroni (from Step 1) in a large bowl or directly in the pot. Stir thoroughly until all the noodles are coated with the cheesy sauce. Scoop into serving bowls or prepare for baking.
- Preheat your oven to 350°F (175°C). Transfer the cheesy noodles from Step 4 into a baking dish. For extra cheesiness, sprinkle additional shredded cheddar cheese on top if you have any left. Bake for 15 minutes, or until the cheese on top is melted and bubbly. I like to let it cool just a few minutes before serving so you get the gooey, creamy texture.

This was such a disappointment. I will blame myself, I bought block cheese as suggested but it must not have been “pure” enough. Heed this warning. Buy cheese at a reputable source! I will attempt again soon!