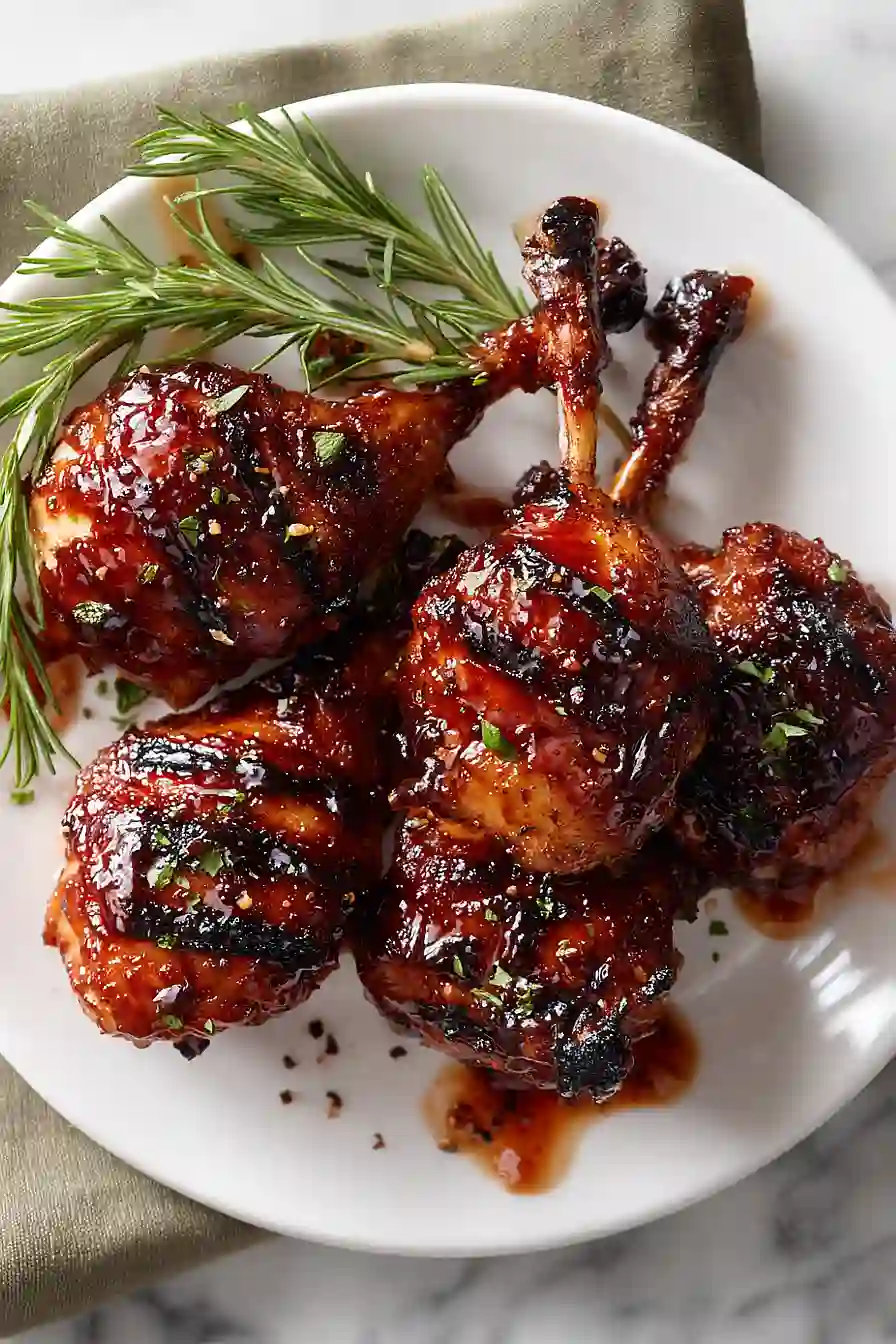
Grilled chicken is a summer staple at our house, but regular old drumsticks can feel a little boring after a while. That’s where these chicken lollipops come in. They’re just drumsticks with the meat pushed down to look like a lollipop, but somehow that simple trick makes dinner feel special without any extra work.
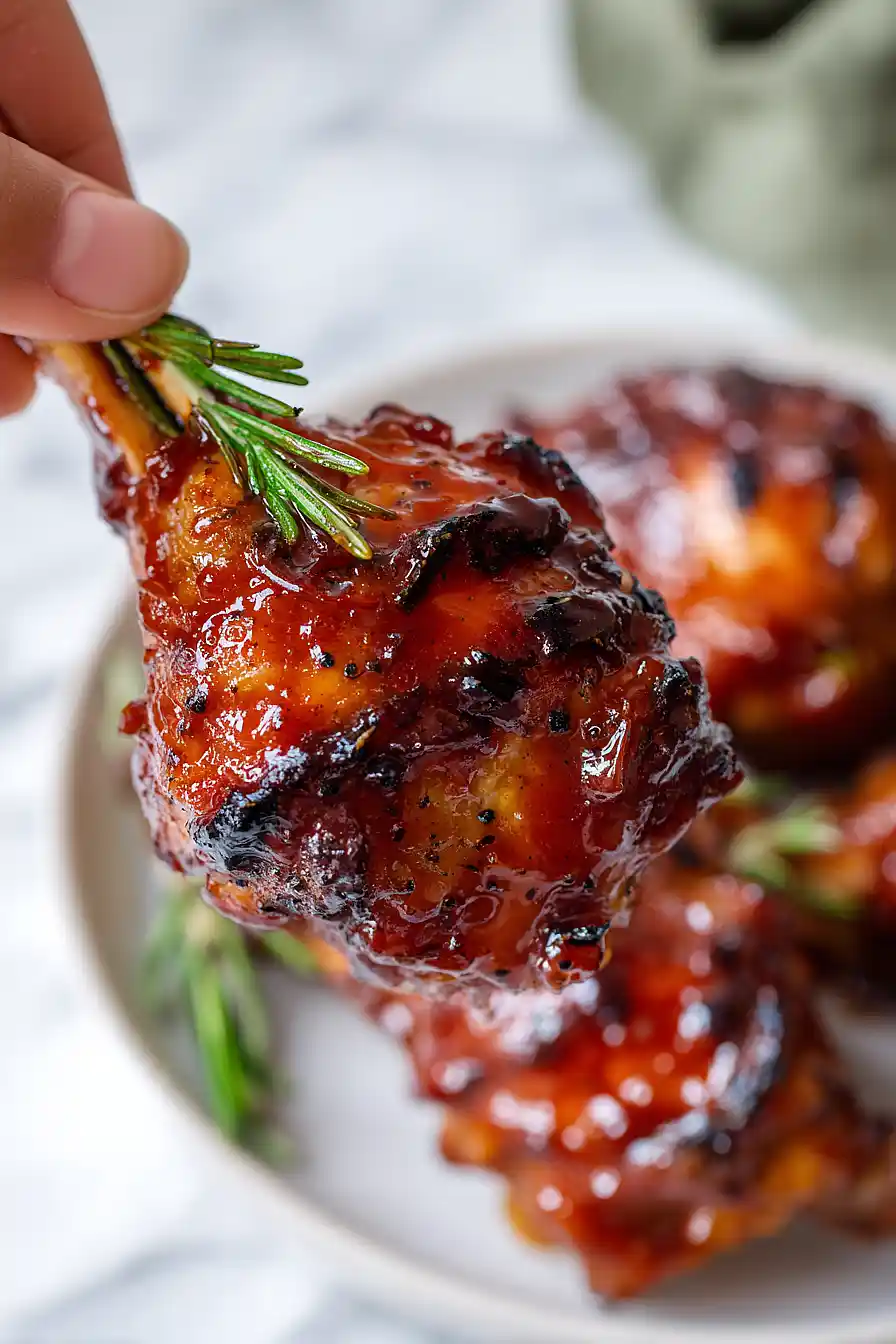
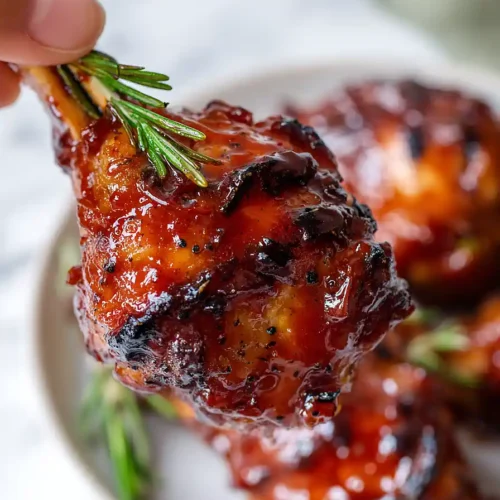
The best part is they’re easier to eat and way more fun for the kids. Plus, with the meat bunched up at the bottom, you get more crispy, caramelized surface area when they hit the grill. I coat them in a simple seasoning rub, then brush on a sweet and tangy BBQ glaze while they cook.
These are perfect for cookouts or just a Tuesday night when you want something that feels a little different. Your family will think you spent hours on them, but really, it’s just chicken drumsticks with a fun shape and great flavor.

Why You’ll Love These Chicken Lollipops
- Fun presentation – These chicken drumsticks are trimmed to look like lollipops, making them perfect for parties, game day, or just making dinner more exciting for the kids.
- Simple ingredients – You probably have most of these in your pantry already – just chicken, basic seasonings, and BBQ sauce with a touch of honey.
- Finger food friendly – The lollipop shape gives you a built-in handle, so they’re easy to eat without making a mess at gatherings or casual dinners.
- Sweet and savory flavor – The honey-BBQ glaze creates that perfect balance everyone loves, with a sticky coating that caramelizes beautifully on the grill.
What Kind of Chicken Drumsticks Should I Use?
For this recipe, you can use either fresh or frozen chicken drumsticks – just make sure frozen ones are completely thawed before you start prepping. When shopping, look for drumsticks that are roughly the same size so they cook evenly on the grill. Organic or free-range drumsticks will give you a bit more flavor, but regular drumsticks from your grocery store work just fine and are usually more budget-friendly. The key is making sure they’re not too small, as you’ll be pushing the meat down to create that lollipop shape, and you want enough meat to make it worthwhile.
Options for Substitutions
This recipe is pretty straightforward, but here are some swaps you can make if needed:
- Chicken drumsticks: While drumsticks are ideal for the lollipop presentation, you can use chicken wings or even bone-in thighs if that’s what you have. Just note that wings will cook faster, so adjust your grilling time accordingly.
- All purpose seasoning: Don’t have all purpose seasoning? Make your own blend with equal parts garlic powder, onion powder, paprika, salt, and pepper. You can also use your favorite dry rub or seasoning blend.
- BBQ sauce: Any store-bought BBQ sauce works here – sweet, smoky, spicy, whatever you prefer. You can also make a quick homemade version with ketchup, brown sugar, vinegar, and spices.
- Honey: Maple syrup or brown sugar dissolved in a bit of water makes a good substitute if you’re out of honey. Use the same amount.
- Worcestershire sauce: In a pinch, you can use soy sauce mixed with a tiny splash of vinegar, though the flavor will be slightly different. Or just skip it – the BBQ sauce will still taste great.
Watch Out for These Mistakes While Grilling
The biggest mistake people make with chicken lollipops is not pushing the meat down far enough when forming them, which can leave you with uneven cooking and a less impressive presentation – use a paper towel to grip the meat firmly and push it all the way to the bottom of the bone for that classic lollipop look.
Another common error is cooking over direct heat the entire time, which will char the outside before the inside reaches a safe temperature, so stick with indirect heat at 350-375°F and only move them over direct heat for a quick final sear if you want extra char.
Don’t sauce your chicken too early or the sugars in the BBQ sauce will burn before the meat is fully cooked – wait until the internal temperature hits 175°F before that first dip, then finish cooking to 185°F for tender, fall-off-the-bone meat.
Finally, skipping the 10-minute rest period is a mistake since it allows the juices to redistribute throughout the meat, keeping each bite moist instead of losing all that flavor on your cutting board.
What to Serve With Grilled Chicken Lollipops?
These chicken lollipops are perfect for parties or game day, so I like to serve them with classic cookout sides that everyone loves. Creamy coleslaw is always a hit because it balances out the sweet and tangy BBQ flavors, and you can’t go wrong with some crispy french fries or potato wedges on the side. For a fresher option, try a simple cucumber salad or corn on the cob, which both work great at room temperature if you’re serving these as finger food. Don’t forget to put out extra napkins and maybe some ranch or blue cheese dressing for dipping!
Storage Instructions
Store: These chicken lollipops keep really well in the fridge for up to 4 days. Just let them cool down completely, then toss them in an airtight container. They make great leftovers for quick lunches or snacks throughout the week.
Freeze: You can freeze these for up to 3 months if you want to prep ahead. I like to freeze them in a single layer on a baking sheet first, then transfer to a freezer bag once they’re solid. This way they don’t stick together and you can grab just what you need.
Reheat: Warm them up in the oven at 350°F for about 15-20 minutes until heated through, or throw them on the grill for a few minutes to crisp up the outside again. The microwave works in a pinch, but the skin won’t be as crispy.
| Preparation Time | 20-30 minutes |
| Cooking Time | 50-70 minutes |
| Total Time | 70-100 minutes |
| Level of Difficulty | Medium |
| Servings | 12 pieces |
Estimated Nutrition
Estimated nutrition for the whole recipe (without optional ingredients):
- Calories: 1900-2100
- Protein: 140-160 g
- Fat: 85-100 g
- Carbohydrates: 110-130 g
Ingredients
For the chicken:
- 12 chicken drumsticks (knuckle bone removed and meat pushed down for the lollipop shape)
- 3 tbsp extra virgin olive oil
- 4 tbsp all-purpose seasoning rub
- 1/2 tsp smoked paprika
For the glaze:
- 1 cup thick BBQ sauce
- 3 tbsp honey
- 1.5 tbsp Worcestershire sauce
- 1/2 tbsp all-purpose seasoning rub
- 1 tsp apple cider vinegar
Step 1: Prepare the Chicken Lollipops
- 12 chicken drumsticks
Start by preparing your chicken drumsticks for the signature lollipop shape.
Cut around the bone just below the knuckle, then carefully remove and discard the small bone.
Gently push all the meat down toward the thicker end of the drumstick, creating a ball of meat on a stick—this is your lollipop.
Pat the chicken dry with paper towels to help the seasoning adhere better and promote better browning on the grill.
Step 2: Season and Oil the Chicken
- 3 tbsp extra virgin olive oil
- 4 tbsp all-purpose seasoning rub
Drizzle the prepared chicken lollipops with olive oil, using about 1/4 teaspoon per piece, and massage it in gently.
Generously coat each lollipop with the all-purpose seasoning rub, making sure to cover all sides.
I like to season these about 15 minutes before grilling so the flavors can start penetrating the meat, but you can grill them immediately if you’re short on time.
Step 3: Prepare the Glaze and Heat the Grill
- 1 cup thick BBQ sauce
- 3 tbsp honey
- 1.5 tbsp Worcestershire sauce
- 1/2 tbsp all-purpose seasoning rub
- 1/2 tsp smoked paprika
- 1 tsp apple cider vinegar
While the seasoned chicken rests, combine the BBQ sauce, honey, Worcestershire sauce, remaining all-purpose seasoning rub, smoked paprika, and apple cider vinegar in a small saucepan.
Simmer over medium-low heat for 5-7 minutes, stirring occasionally, until the sauce is smooth and slightly thickened.
Meanwhile, preheat your grill to 350-375°F and set it up for indirect heat (if using a gas grill, light only one side; if using charcoal, push coals to one side and place a drip pan on the other).
Step 4: Grill Chicken to First Temperature
- seasoned chicken lollipops from Step 2
Place the seasoned chicken lollipops on the indirect heat side of the grill (away from direct flame), leaving the bone pointing outward.
Cover the grill and cook for 30-45 minutes, rotating every 10-12 minutes for even cooking and browning.
Use a meat thermometer to check doneness—you’re aiming for an internal temperature of 175°F at the thickest part of the meat.
Step 5: Glaze and Finish Cooking
- glaze from Step 3
Once the chicken reaches 175°F, remove each lollipop from the grill and quickly dip it into the prepared glaze from Step 3, coating all sides generously.
Return the glazed lollipops to the grill over indirect heat and continue cooking until the internal temperature reaches 185°F, about 5-10 minutes.
I find dipping the chicken twice—once partway through and once at the end—creates a thicker, more flavorful glaze that caramelizes beautifully without burning.
Step 6: Rest and Serve
Transfer the finished chicken lollipops to a clean plate and let them rest for 10 minutes before serving.
This resting period allows the juices to redistribute throughout the meat, ensuring each bite is juicy and flavorful.
Serve hot with any remaining glaze on the side for dipping.
Simple Grilled Chicken Lollipops
Ingredients
For the chicken
- 12 chicken drumsticks (knuckle bone removed and meat pushed down for the lollipop shape)
- 3 tbsp extra virgin olive oil
- 4 tbsp all-purpose seasoning rub
- 1/2 tsp smoked paprika
For the glaze
- 1 cup thick BBQ sauce
- 3 tbsp honey
- 1.5 tbsp Worcestershire sauce
- 1/2 tbsp all-purpose seasoning rub
- 1 tsp apple cider vinegar
Instructions
- Start by preparing your chicken drumsticks for the signature lollipop shape. Cut around the bone just below the knuckle, then carefully remove and discard the small bone. Gently push all the meat down toward the thicker end of the drumstick, creating a ball of meat on a stick—this is your lollipop. Pat the chicken dry with paper towels to help the seasoning adhere better and promote better browning on the grill.
- Drizzle the prepared chicken lollipops with olive oil, using about 1/4 teaspoon per piece, and massage it in gently. Generously coat each lollipop with the all-purpose seasoning rub, making sure to cover all sides. I like to season these about 15 minutes before grilling so the flavors can start penetrating the meat, but you can grill them immediately if you're short on time.
- While the seasoned chicken rests, combine the BBQ sauce, honey, Worcestershire sauce, remaining all-purpose seasoning rub, smoked paprika, and apple cider vinegar in a small saucepan. Simmer over medium-low heat for 5-7 minutes, stirring occasionally, until the sauce is smooth and slightly thickened. Meanwhile, preheat your grill to 350-375°F and set it up for indirect heat (if using a gas grill, light only one side; if using charcoal, push coals to one side and place a drip pan on the other).
- Place the seasoned chicken lollipops on the indirect heat side of the grill (away from direct flame), leaving the bone pointing outward. Cover the grill and cook for 30-45 minutes, rotating every 10-12 minutes for even cooking and browning. Use a meat thermometer to check doneness—you're aiming for an internal temperature of 175°F at the thickest part of the meat.
- Once the chicken reaches 175°F, remove each lollipop from the grill and quickly dip it into the prepared glaze from Step 3, coating all sides generously. Return the glazed lollipops to the grill over indirect heat and continue cooking until the internal temperature reaches 185°F, about 5-10 minutes. I find dipping the chicken twice—once partway through and once at the end—creates a thicker, more flavorful glaze that caramelizes beautifully without burning.
- Transfer the finished chicken lollipops to a clean plate and let them rest for 10 minutes before serving. This resting period allows the juices to redistribute throughout the meat, ensuring each bite is juicy and flavorful. Serve hot with any remaining glaze on the side for dipping.
