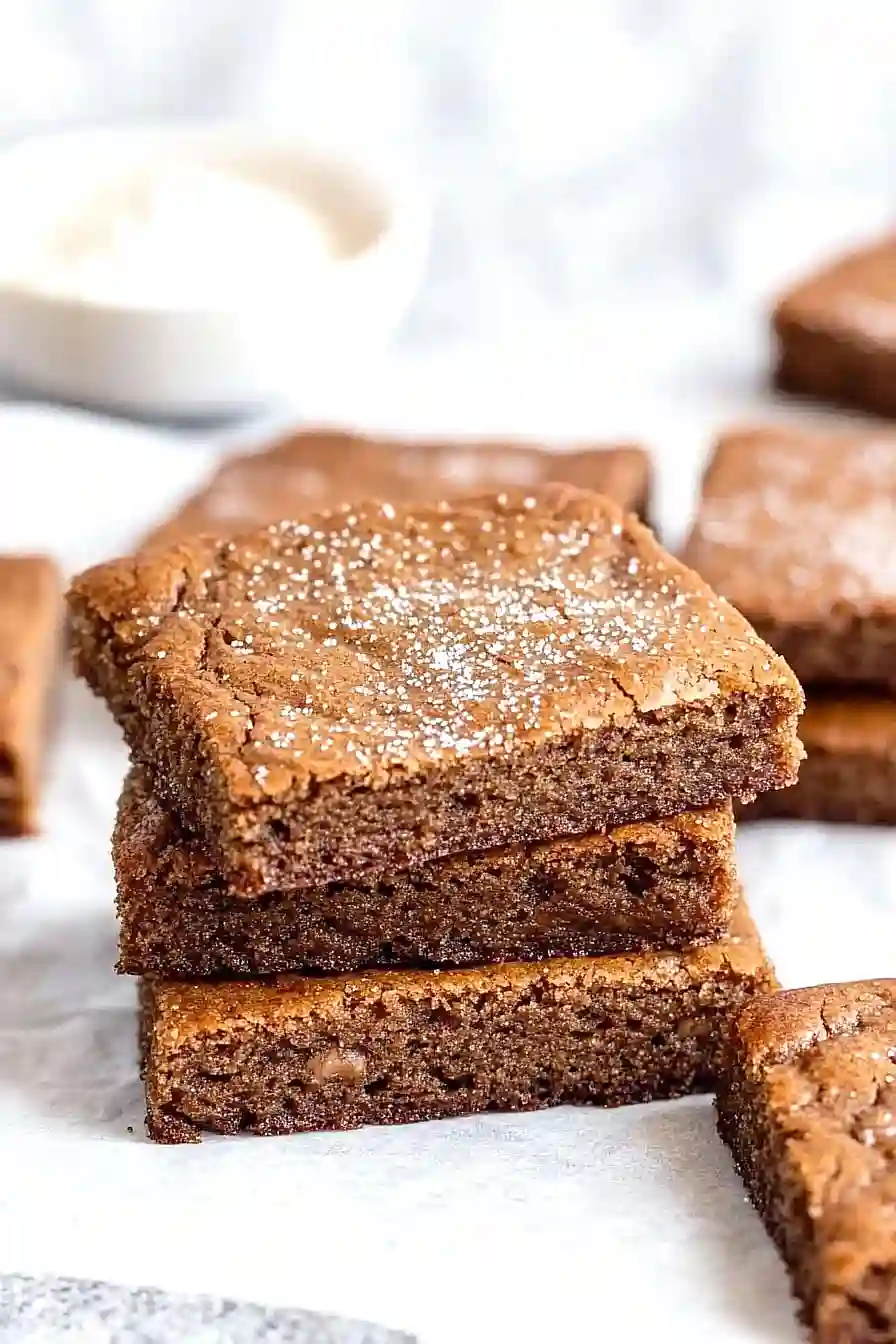
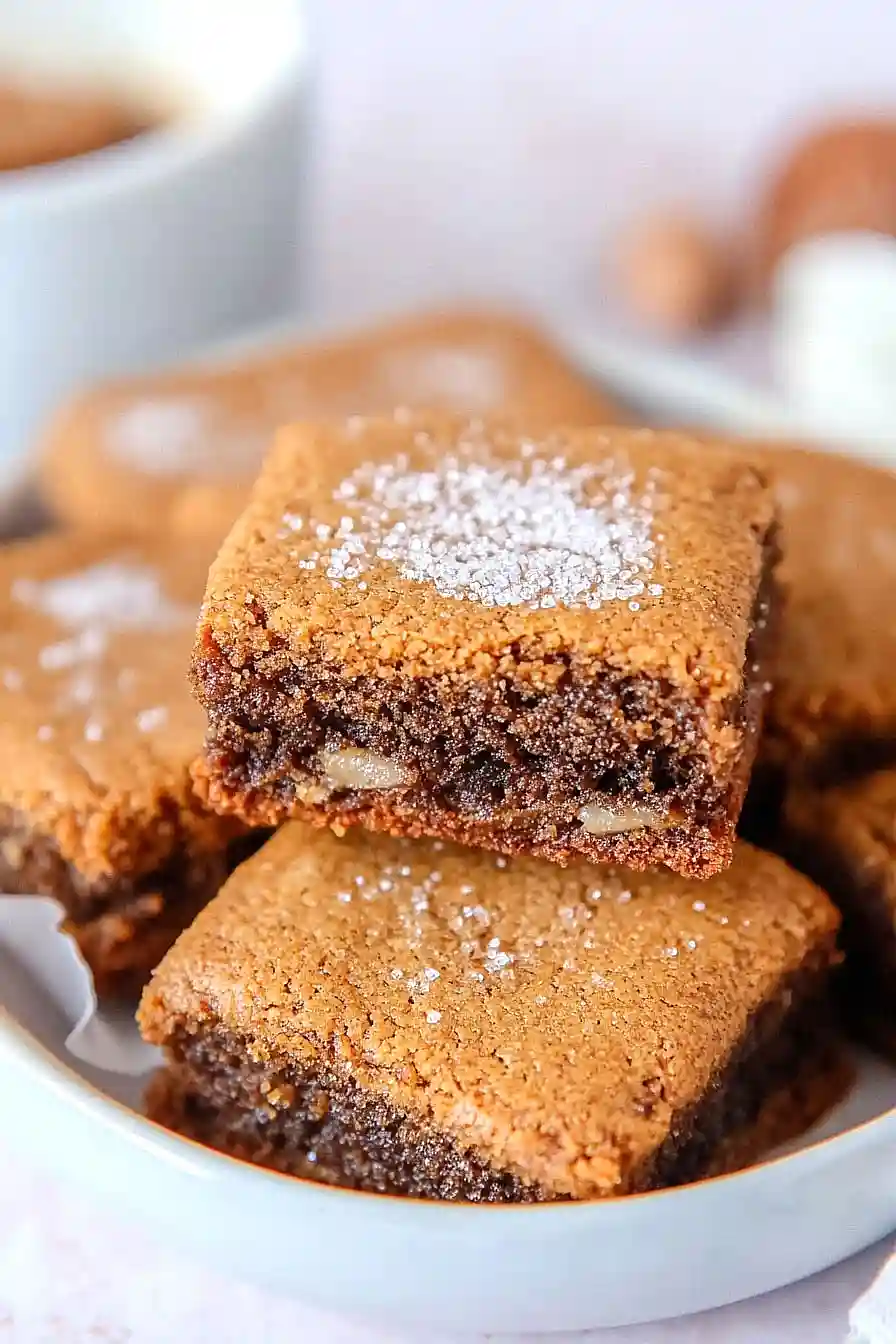
Cookies have always been my weakness, especially during the holiday season. But sometimes I can’t decide between a chewy brownie or a spiced gingerbread cookie – and that’s exactly why these gingerbread brookies are pure genius. The combination of two classic treats brings together the best of both worlds, and they’re so simple to make.
I started making these when my kids couldn’t agree on what holiday treats to bake. One wanted brownies, the other wanted gingerbread cookies, and rather than making two separate batches, I decided to merge them into one delicious dessert. Now they’ve become our go-to December treat, and the house fills with that cozy gingerbread smell that just feels like Christmas.
If you’re looking for something a bit different for your holiday cookie plate this year, these brookies are the answer. They’re part fudgy, part spicy, and completely perfect for sharing (though I won’t judge if you keep them all to yourself).
Why You’ll Love These Brookies
- Two desserts in one – Get the best of both worlds with chewy gingerbread and fudgy brownie layers combined into one amazing treat – no need to choose between your favorite desserts!
- Perfect holiday twist – The warm ginger spice mixed with rich chocolate makes these brookies an ideal dessert for the holiday season, but they’re so good you’ll want to make them year-round.
- Simple ingredients – You probably have most of these basic baking ingredients in your pantry already – no special trips to specialty stores needed.
- Make-ahead friendly – These brookies stay fresh for several days when stored properly, making them perfect for holiday cookie exchanges or weekend baking sessions.
What Kind of Cocoa Powder Should I Use?
For these brookies, you’ll want to use natural unsweetened cocoa powder rather than Dutch-processed cocoa. Natural cocoa powder has a more intense chocolate flavor and works better with the baking soda and baking powder in this recipe. While Dutch-processed cocoa can work in a pinch, it might affect how your brookies rise since it’s been treated with alkali. If you’re shopping for cocoa powder, look for one that’s labeled “natural” or “unsweetened” – brands like Hershey’s natural cocoa powder or Ghirardelli unsweetened cocoa powder are great choices you can find in most grocery stores. Just make sure to sift your cocoa powder before mixing it in to avoid any lumps in your batter.
Options for Substitutions
These tasty brookies can be made with several ingredient swaps if needed:
- Whole wheat flour: You can replace the whole wheat flour with all-purpose flour in equal amounts. The texture will be slightly lighter, but still delicious.
- Molasses: If you’re out of molasses, try using dark corn syrup or honey, though this will give a milder flavor. For the closest match, use dark honey mixed with a tablespoon of brown sugar.
- Brown sugar: No brown sugar? Mix 1 cup of white sugar with 1 tablespoon of molasses. You can also use coconut sugar as a 1:1 replacement.
- Unsalted butter: If you only have salted butter, that’s fine – just reduce the added salt in the recipe by 1/4 teaspoon per stick of butter used.
- Cocoa powder: Any unsweetened cocoa powder works here – Dutch process or natural. Just avoid hot cocoa mix as it contains sugar and other additives.
- Vanilla essence: Vanilla extract, paste, or powder all work well here. If using vanilla powder, use 1/2 teaspoon instead of 2 teaspoons.
Watch Out for These Mistakes While Baking
The biggest challenge when making brookies is achieving the perfect balance between the two distinct layers – overmixing either batter can lead to tough, dense cookies instead of the soft, chewy texture we’re after. Getting the timing right is crucial too – be sure to chill both batters for at least 30 minutes before layering them together, as this prevents them from bleeding into each other and maintains their separate flavors. When it comes to baking, resist the urge to leave them in the oven until they look completely set – they should still be slightly soft in the center when you take them out, as they’ll continue to firm up while cooling on the baking sheet. For the best texture contrast, make sure your butter is truly at room temperature for the gingerbread layer, while the brownie portion needs melted butter that’s slightly cooled to prevent scrambling the eggs.

What to Serve With Brookies?
These gingerbread-meets-brownie treats are perfect with a cold glass of milk or a warm cup of coffee, depending on your mood! Since brookies are pretty rich on their own, I like to keep things simple and serve them with a scoop of vanilla ice cream – the cool, creamy texture pairs so well with the spicy ginger and chocolate flavors. For a fun holiday dessert spread, put these brookies on a platter alongside some fresh berries or a drizzle of caramel sauce to let people mix and match their toppings. If you’re serving these at a party, having some whipped cream on hand is always a good idea too!
Storage Instructions
Keep Fresh: These gingerbread brookies stay super good in an airtight container at room temperature for up to 5 days. I like to put a piece of bread in the container – it’s an old trick that helps keep the brookies soft and chewy, just like when they first came out of the oven!
Freeze: Want to save some for later? These brookies freeze really well for up to 3 months. Just wrap them individually in plastic wrap, then pop them in a freezer bag. It’s perfect for when you need a quick chocolate-gingerbread fix!
Make Ahead: You can prepare the gingerbread and brownie batters separately up to 24 hours in advance. Just keep them covered in the fridge, then let them come to room temperature for about 30 minutes before baking. This is super handy when you’re planning to bake these for a special occasion.
| Preparation Time | 15-20 minutes |
| Cooking Time | 30-35 minutes |
| Total Time | 45-55 minutes |
| Level of Difficulty | Medium |
Estimated Nutrition
Estimated nutrition for the whole recipe (without optional ingredients):
- Calories: 2200-2400
- Protein: 25-30 g
- Fat: 100-110 g
- Carbohydrates: 300-320 g
Ingredients
- 1/3 cup softened unsalted butter
- 1 cup packed brown sugar
- 2 tablespoons molasses
- 1 large egg
- 1 teaspoon vanilla essence
- 1/2 cup all-purpose flour
- 1/2 cup whole wheat flour
- 2 teaspoons ground ginger
- 1/2 teaspoon baking powder
- 1/8 teaspoon baking soda
- 1/2 teaspoon salt
- 2 tablespoons coarse sugar for topping
- 1/2 cup melted unsalted butter
- 1 cup granulated sugar
- 2 large eggs
- 2 teaspoons vanilla essence
- 1/3 cup cocoa powder (unsweetened)
- 1/2 cup all-purpose flour
- 1/4 teaspoon salt
- 1/4 teaspoon baking powder
Step 1: Prepare Baking Equipment
Begin by preheating your oven to 350 degrees Fahrenheit.
Prepare a 9×13 inch baking pan by spraying it lightly with baking spray to prevent sticking.
This will ensure easy removal of your layered treat once baked.
Step 2: Make the Brownie Layer
In a large bowl, whisk together melted butter, sugar, eggs, and vanilla extract until they are well combined.
Gradually whisk in the cocoa powder, followed by the flour, salt, and baking powder until the batter is smooth.
Spread this brownie batter evenly into the prepared baking pan, using a spatula to smooth the top.
Step 3: Make the Gingerbread Layer
Using a stand mixer on medium speed, cream together the butter and brown sugar until the mixture is light and fluffy, about 1 minute.
Add in the molasses, eggs, and vanilla, mixing until the ingredients are well combined.
In a separate bowl, sift together the all-purpose flour, whole wheat flour, ginger, baking soda, baking powder, and salt.
Lower the stand mixer’s speed to the lowest setting and gradually add the dry ingredients to the butter mixture, mixing until just combined.
Step 4: Layer and Sprinkle
Carefully spread the gingerbread batter over the brownie layer in the baking pan.
Use a spatula to gently and evenly distribute the batter, being cautious not to mix the layers.
Once smooth, sprinkle the top with sanding sugar for a slight, sweet crunch when baked.
Step 5: Bake and Cool
Place the baking pan in the preheated oven and bake for 30-35 minutes, or until a toothpick inserted into the center comes out clean (with just a few moist crumbs attached).
After baking, allow the pan to cool thoroughly before slicing to serve.
This waiting period helps set the layers and makes cutting easier.
