If you ask me, lemon raspberry bars are pure summer magic.
These sweet treats bring together tart lemon curd and fresh raspberries on a buttery shortbread crust. The bright citrus flavor pairs perfectly with the sweet-tart berries for a combination that just works.
They start with a simple pressed crust that bakes up golden and crisp. Then comes a smooth lemon filling that’s tangy enough to make you pucker, topped with juicy raspberries that burst in every bite.
These bars are perfect for potlucks and picnics, and they’re way easier to make than you’d think.
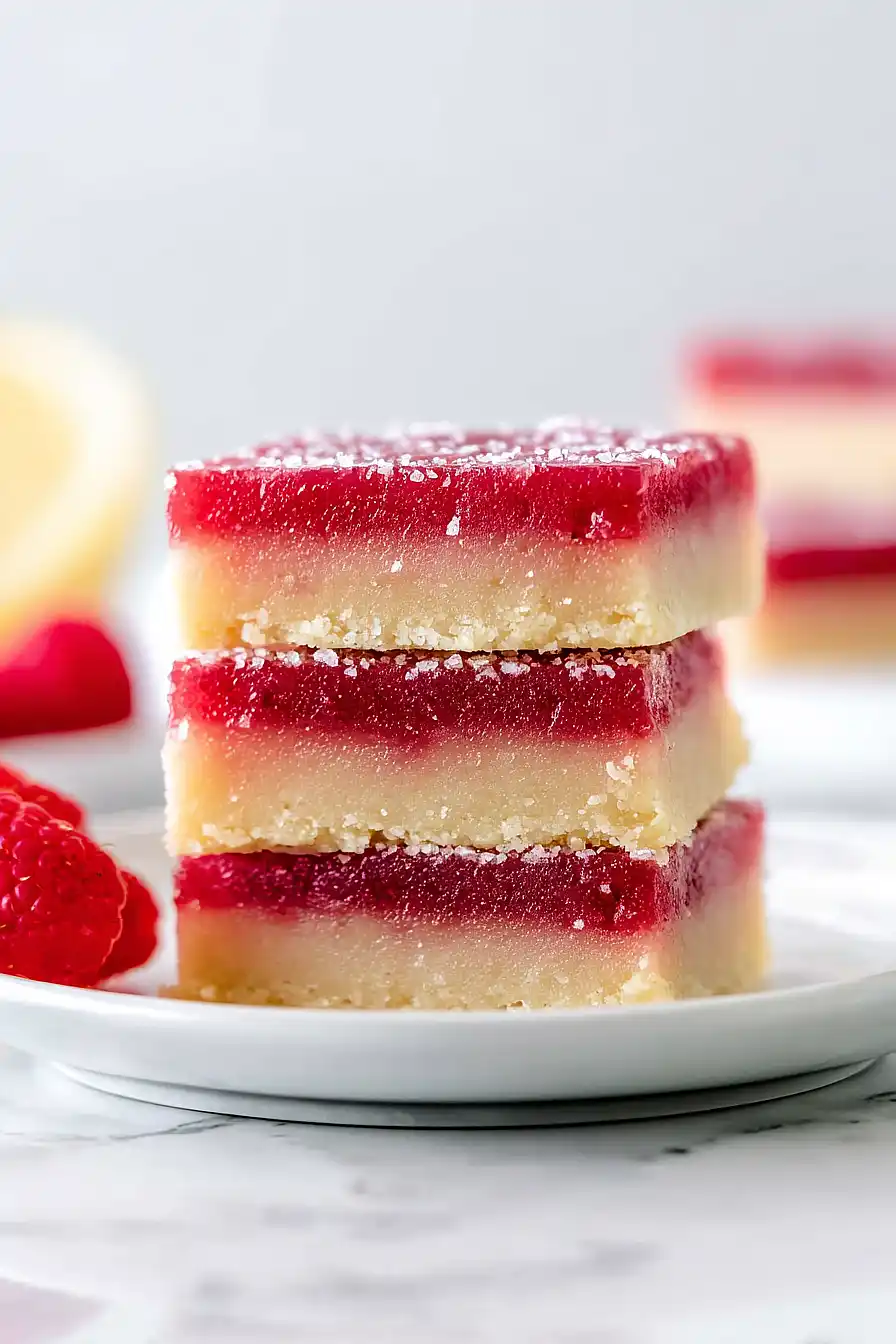
Why You’ll Love These Lemon Raspberry Bars
- Perfect sweet and tart balance – The bright lemon filling paired with fresh raspberries creates that ideal flavor combination that makes your taste buds happy without being too sweet or too sour.
- Make-ahead friendly – These bars actually taste better after sitting overnight, making them perfect for parties, potlucks, or when you want to prep dessert in advance.
- Impressive but simple – They look fancy enough for special occasions but use basic ingredients you probably already have in your kitchen.
- Great for sharing – One batch makes plenty of bars, so they’re perfect for feeding a crowd or having treats to share with neighbors and coworkers.
- Fresh fruit goodness – Using real raspberries and fresh lemon juice gives these bars a bright, natural flavor that beats store-bought desserts every time.
What Kind of Raspberries Should I Use?
Both fresh and frozen raspberries work perfectly for these bars, so don’t worry if you can’t find fresh ones at the store. If you’re using frozen raspberries, there’s no need to thaw them first – just toss them straight into the recipe. Fresh raspberries will give you a slightly brighter flavor, but frozen ones are often more budget-friendly and available year-round. When picking fresh raspberries, look for berries that are plump and deep red without any mushy spots or white fuzzy mold.
Options for Substitutions
These lemon raspberry bars are pretty forgiving when it comes to swaps, so here’s what you can try:
- Fresh raspberries: Frozen raspberries work just as well – no need to thaw them first. You can also try blackberries or blueberries for a different berry flavor, though the taste will change slightly.
- All-purpose flour: You can substitute with a 1:1 gluten-free flour blend if needed. The texture might be a bit different, but it’ll still taste great.
- Fresh lemon juice: Bottled lemon juice can work in a pinch, but fresh really makes a difference here. If you want to switch it up, try lime juice for lemon-lime bars, but use about 2 tablespoons less since lime is more tart.
- Unsalted butter: Salted butter works fine – just reduce the added salt by half. You can also try melted coconut oil, but let it cool slightly before mixing to avoid cooking the eggs.
- Corn starch: If you’re out of corn starch, you can use the same amount of arrowroot powder or potato starch. Regular flour works too, but use about 1.5 times the amount called for.
- Eggs: This recipe really needs the eggs for structure and that creamy curd texture, so I wouldn’t recommend substituting them. Make sure they’re at room temperature for best mixing.
Watch Out for These Mistakes While Baking
The biggest mistake when making lemon raspberry bars is not properly reducing the raspberry puree, which can make your bars too wet and prevent them from setting – simmer those 2 cups of raspberries until you get just 1/4 cup of thick, jam-like puree.
Another common error is not baking the crust long enough before adding the filling, so make sure it’s lightly golden and set (about 18-20 minutes) to prevent a soggy bottom layer.
Don’t skip lining your pan with parchment paper and leaving overhang on the sides – this makes removing the bars so much easier and prevents them from sticking.
Finally, resist the urge to cut into these bars while they’re still warm, as they need to cool completely and even chill in the fridge for clean, neat slices that won’t fall apart.

What to Serve With Lemon Raspberry Bars?
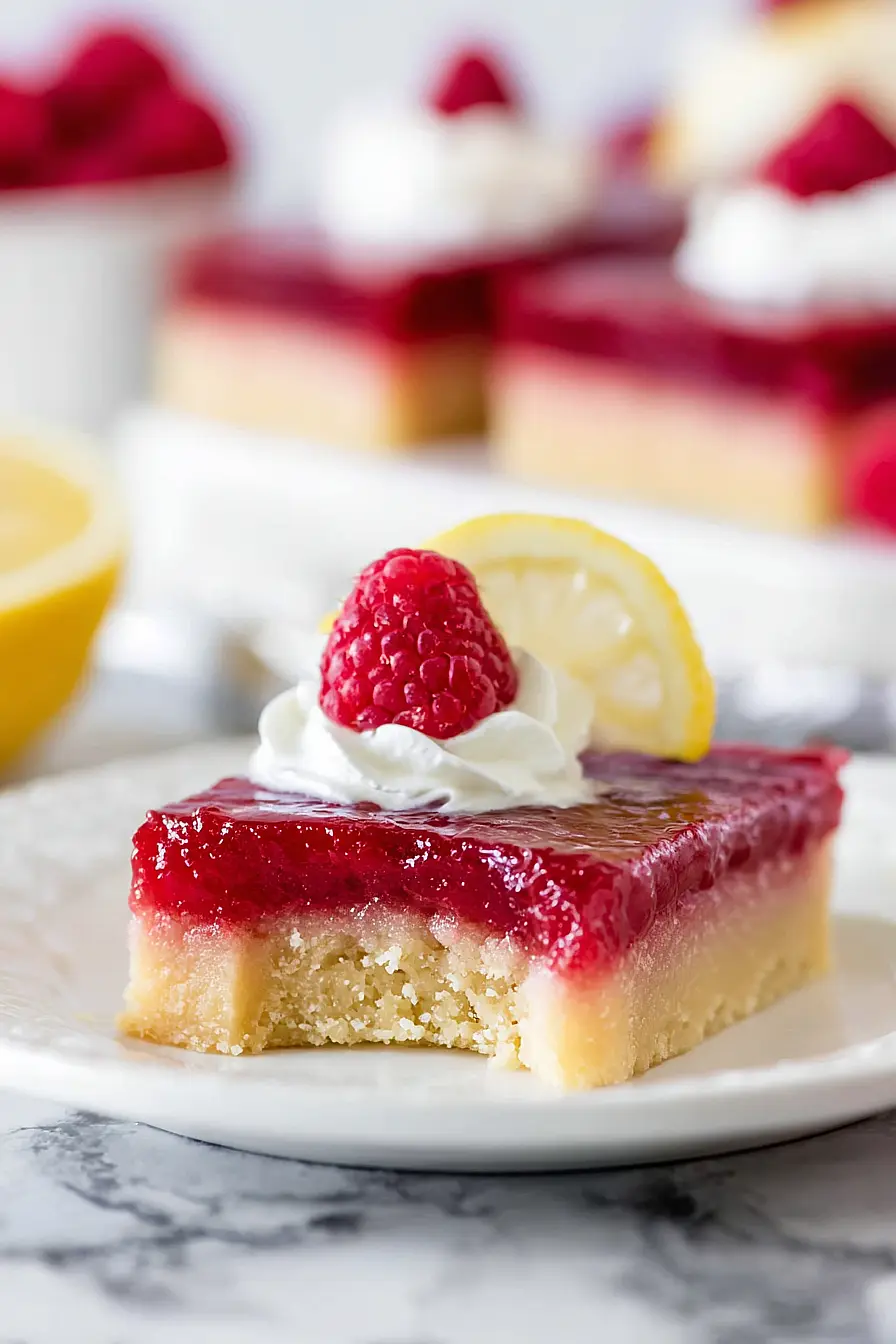
These tangy-sweet bars are perfect on their own, but they really shine when served alongside a cup of hot coffee or black tea – the bitter notes balance out all that fruity sweetness beautifully. I love setting them out at brunch with fresh berries and a dollop of whipped cream, or even vanilla ice cream if you want to turn them into a proper dessert. They’re also great for picnics and potlucks since they travel well and pair nicely with other finger foods like shortbread cookies or fruit salad. For an afternoon treat, try serving them with some sparkling water with a splash of lemon – it’s refreshing and won’t compete with the bright flavors in the bars.
Storage Instructions
Keep Fresh: These lemon raspberry bars taste amazing when stored properly! Keep them covered in the refrigerator for up to 5 days – the cool temperature actually helps the flavors meld together beautifully. I like to cut them into squares and store them in a covered container with parchment paper between layers.
Freeze: You can absolutely freeze these bars for longer storage. Wrap individual pieces in plastic wrap or store them in a freezer-safe container with parchment between layers for up to 3 months. They’re perfect for having a sweet treat ready whenever you need one!
Serve: Serve these bars straight from the fridge for the best texture – they’re meant to be enjoyed chilled. If you’ve frozen them, just thaw in the refrigerator for a few hours before serving. The tangy lemon and sweet raspberry flavors really shine when they’re nice and cool.
| Preparation Time | 30-45 minutes |
| Cooking Time | 40-50 minutes |
| Total Time | 70-95 minutes |
| Level of Difficulty | Medium |
Estimated Nutrition
Estimated nutrition for the whole recipe (without optional ingredients):
- Calories: 3600-3850
- Protein: 45-55 g
- Fat: 150-165 g
- Carbohydrates: 510-540 g
Ingredients
For the raspberry puree:
- 2 cups raspberries (fresh or frozen)
For the crust:
- 2 1/4 cups all-purpose flour
- 1/2 cup white sugar
- 1 tbsp cornstarch
- 1/4 tsp salt
- 1 cup unsalted butter, melted
For the raspberry-lemon layer:
- 1 1/2 cups granulated sugar
- 1/3 cup cornstarch
- 6 large eggs
- 1/4 cup thickened raspberry puree (reduced from above)
- 3/4 cup fresh lemon juice
Step 1: Prepare and Reduce the Raspberry Puree
- 2 cups raspberries (fresh or frozen)
Add the raspberries to a blender or food processor and pulse until smooth.
Pour the puree into a metal sifter in batches, pushing it through to remove the seeds.
This step is optional but recommended for a smooth texture.
Pour the seedless puree into a small saucepan over low-medium heat.
Simmer gently, stirring occasionally, to reduce the puree and remove excess liquid.
Continue until the puree is thickened and you have about 1/4 to 1/3 cup, which should take around 15-20 minutes.
Remove from heat and let the thickened raspberry puree cool as you continue with the recipe.
Step 2: Make and Bake the Shortbread Base
- 2 1/4 cups all-purpose flour
- 1/2 cup white sugar
- 1 tbsp cornstarch
- 1/4 tsp salt
- 1 cup unsalted butter, melted
Preheat your oven to 325°F (160°C).
Line a 9×13 inch (23×33 cm) baking pan with parchment paper, leaving an overhang for easy removal later.
In a medium bowl, whisk together the all-purpose flour, white sugar, 1 tablespoon cornstarch, and salt.
Stir in the melted butter until the mixture is thick.
Press the dough evenly into the bottom of the prepared pan, creating a slight lip around the edge.
Bake in the preheated oven for 20-25 minutes, or until the top is set and slightly golden.
Once baked, remove from oven and gently prick the top with a fork—don’t go all the way through.
As a personal tip, I like to let the base cool just until it’s no longer steaming to help the topping set evenly.
Step 3: Prepare the Lemon Raspberry Filling
- 1 1/2 cups granulated sugar
- 1/3 cup cornstarch
- 6 large eggs
- 1/4 cup thickened raspberry puree (reduced from Step 1)
- 3/4 cup fresh lemon juice
While the base is baking, make the filling.
In a large bowl, whisk together the granulated sugar and 1/3 cup cornstarch until there are no lumps.
Whisk in the eggs, one at a time, until fully incorporated.
Add the cooled, thickened raspberry puree from Step 1, whisking until evenly combined.
Gradually whisk in the lemon juice.
The mixture should be quite liquid — that’s normal for bars like these.
Step 4: Bake the Bars
- lemon raspberry mixture from Step 3
- baked shortbread base from Step 2
Pour the lemon raspberry mixture from Step 3 evenly over the still-warm shortbread base from Step 2.
Return the pan to the oven (still at 325°F/160°C) and bake for 20-25 minutes, or until the top is set and doesn’t jiggle when you shake the pan gently.
Remove from the oven and let the bars cool in the pan for at least 1 hour, or until they reach room temperature.
I like to chill them overnight for the cleanest slices and best flavor, but a minimum of 2 hours in the fridge works well.
Step 5: Chill, Slice, and Serve
Once fully chilled, use the parchment paper overhang to lift the bars out of the pan.
Place on a cutting board, and slice into bars with a sharp knife.
For clean, neat slices, wipe the blade between cuts.
Store the bars in the refrigerator.
For a bright touch, I like to sprinkle a bit of powdered sugar or extra raspberries on top just before serving, though that’s completely optional.
Juicy Lemon Raspberry Bars
Ingredients
For the raspberry puree:
- 2 cups raspberries (fresh or frozen)
For the crust:
- 2 1/4 cups all-purpose flour
- 1/2 cup white sugar
- 1 tbsp cornstarch
- 1/4 tsp salt
- 1 cup unsalted butter, melted
For the raspberry-lemon layer:
- 1 1/2 cups granulated sugar
- 1/3 cup cornstarch
- 6 large eggs
- 1/4 cup thickened raspberry puree (reduced from above)
- 3/4 cup fresh lemon juice
Instructions
- Add the raspberries to a blender or food processor and pulse until smooth. Pour the puree into a metal sifter in batches, pushing it through to remove the seeds. This step is optional but recommended for a smooth texture. Pour the seedless puree into a small saucepan over low-medium heat. Simmer gently, stirring occasionally, to reduce the puree and remove excess liquid. Continue until the puree is thickened and you have about 1/4 to 1/3 cup, which should take around 15-20 minutes. Remove from heat and let the thickened raspberry puree cool as you continue with the recipe.
- Preheat your oven to 325°F (160°C). Line a 9x13 inch (23x33 cm) baking pan with parchment paper, leaving an overhang for easy removal later. In a medium bowl, whisk together the all-purpose flour, white sugar, 1 tablespoon cornstarch, and salt. Stir in the melted butter until the mixture is thick. Press the dough evenly into the bottom of the prepared pan, creating a slight lip around the edge. Bake in the preheated oven for 20-25 minutes, or until the top is set and slightly golden. Once baked, remove from oven and gently prick the top with a fork—don't go all the way through. As a personal tip, I like to let the base cool just until it's no longer steaming to help the topping set evenly.
- While the base is baking, make the filling. In a large bowl, whisk together the granulated sugar and 1/3 cup cornstarch until there are no lumps. Whisk in the eggs, one at a time, until fully incorporated. Add the cooled, thickened raspberry puree from Step 1, whisking until evenly combined. Gradually whisk in the lemon juice. The mixture should be quite liquid — that's normal for bars like these.
- Pour the lemon raspberry mixture from Step 3 evenly over the still-warm shortbread base from Step 2. Return the pan to the oven (still at 325°F/160°C) and bake for 20-25 minutes, or until the top is set and doesn’t jiggle when you shake the pan gently. Remove from the oven and let the bars cool in the pan for at least 1 hour, or until they reach room temperature. I like to chill them overnight for the cleanest slices and best flavor, but a minimum of 2 hours in the fridge works well.
- Once fully chilled, use the parchment paper overhang to lift the bars out of the pan. Place on a cutting board, and slice into bars with a sharp knife. For clean, neat slices, wipe the blade between cuts. Store the bars in the refrigerator. For a bright touch, I like to sprinkle a bit of powdered sugar or extra raspberries on top just before serving, though that's completely optional.

