I made my first Hawaiian coconut cake for a potluck back when I lived in a tiny apartment with no air conditioning. I had no idea what I was doing—I just knew it had pineapple and coconut, which sounded refreshing for a hot summer day.
The cake was a hit, but honestly, I got lucky. I didn’t realize until years later that getting the pineapple filling right is actually the trickiest part. Too watery and it soaks through the cake layers. Too thick and it sits there like jam instead of spreading nicely.
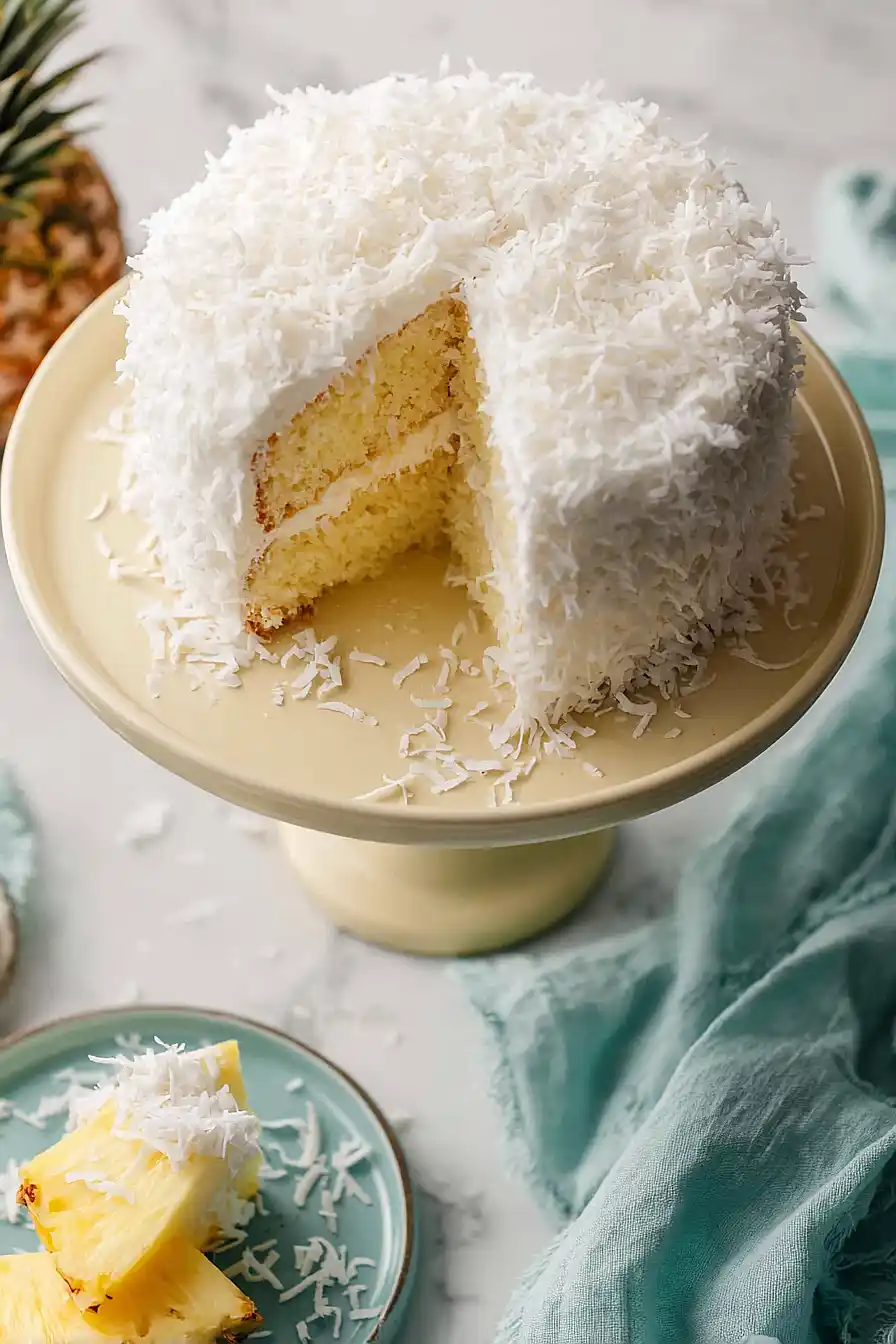
Now I make this cake at least twice a year, and I’ve figured out the cornstarch ratio that works every time. The combination of coconut milk in the cake, pineapple between the layers, and cream cheese frosting on top just works. It tastes like vacation, but without leaving your kitchen.
Why You’ll Love This Hawaiian Coconut Cake
- Tropical flavors – The combination of coconut and pineapple brings a taste of the islands right to your kitchen, making every bite feel like a mini vacation.
- Perfect for special occasions – This impressive layered cake looks bakery-quality and tastes even better, making it ideal for birthdays, potlucks, or any celebration.
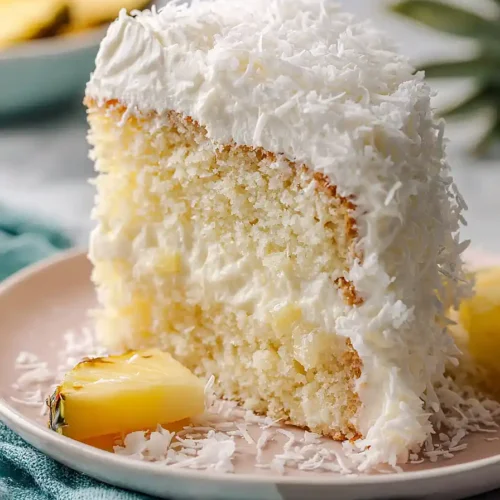
- Moist and flavorful – The coconut milk keeps the cake incredibly tender, while the pineapple filling adds a sweet, tangy surprise between the layers.
- Crowd-pleaser – Even people who don’t usually go for coconut desserts tend to love this cake because the flavors are balanced and not overwhelming.
What Kind of Coconut Milk Should I Use?
For this Hawaiian coconut cake, you’ll want to grab a can of full-fat coconut milk from the baking aisle, not the refrigerated coconut milk beverage that comes in a carton. The canned version is much thicker and creamier, which gives your cake that rich coconut flavor and moist texture you’re looking for. Before you open the can, give it a good shake to mix up the cream and liquid that tend to separate. If you can find it, coconut milk labeled “premium” or “first press” will have an even more pronounced coconut taste, but any standard canned coconut milk will work just fine for this recipe.
Options for Substitutions
This tropical cake is pretty forgiving when it comes to swaps:
- Coconut milk: You can use regular whole milk or even buttermilk instead, though you’ll lose some of that coconut flavor. If you go this route, consider adding an extra 1/2 teaspoon of coconut essence to make up for it.
- Coconut essence: Vanilla extract works as a substitute, but the coconut flavor won’t be as strong. You could also use almond extract for a different twist.
- Crushed pineapple: Fresh pineapple works great too – just chop it finely and drain well. You’ll need about 2 cups of fresh pineapple to equal the canned amount.
- Cream cheese: Make sure your cream cheese is at room temperature for smooth frosting. In a pinch, you could make a simple buttercream instead, but the tangy cream cheese really complements the sweet pineapple.
- Shredded coconut: Both sweetened and unsweetened coconut work here. Sweetened will give you a slightly sweeter finish, while unsweetened keeps things more balanced.
- Egg whites: Don’t toss those yolks! Save them for custard or hollandaise sauce. If you need to use whole eggs instead, use 3 whole eggs, though the cake will be slightly denser.
Watch Out for These Mistakes While Baking
The biggest mistake with this cake is overbeating the batter after adding the flour mixture, which develops too much gluten and creates a dense, tough cake – mix just until combined and you’ll get a lighter, fluffier texture.
When folding in the egg whites, many people stir too vigorously and deflate all that air you worked hard to whip in, so use a gentle folding motion from the bottom up to keep your cake airy.
Your pineapple filling needs to cool completely before assembling the cake, otherwise it’ll melt the frosting and slide right off the layers, turning your beautiful cake into a messy disaster.
Finally, make sure your cake layers are completely cool before frosting – even slightly warm cake will cause the cream cheese frosting to become runny and impossible to work with.

What to Serve With Hawaiian Coconut Cake?
This tropical cake is pretty rich and sweet on its own, so I like to keep things simple when serving it. A scoop of vanilla ice cream or some fresh whipped cream on the side is always a good call, especially if you’re serving it warm. For a fun tropical theme, you could add some fresh pineapple chunks, sliced mango, or even some toasted coconut flakes on top. If you’re serving this at a party or gathering, a cup of hot coffee or cold milk pairs perfectly with the sweetness of the cake and helps balance out all those coconut and pineapple flavors.
Storage Instructions
Store: Keep your Hawaiian coconut cake covered in the fridge since it has cream cheese frosting. It’ll stay fresh and moist for up to 5 days in an airtight container or under a cake dome. The pineapple filling actually helps keep the cake layers nice and tender!
Freeze: You can freeze this cake for up to 2 months, either as a whole cake or in individual slices. Wrap it tightly in plastic wrap, then in aluminum foil to prevent freezer burn. For best results, freeze it unfrosted and add the cream cheese frosting after thawing.
Serve: Take the cake out of the fridge about 30 minutes before serving so the frosting softens up a bit and the flavors really shine through. If you froze it, let it thaw overnight in the refrigerator, then bring it to room temperature before digging in.
| Preparation Time | 45-60 minutes |
| Cooking Time | 25-35 minutes |
| Total Time | 330-385 minutes |
| Level of Difficulty | Hard |
| Servings | 8 slices |
Estimated Nutrition
Estimated nutrition for the whole recipe (without optional ingredients):
- Calories: 5200-5600
- Protein: 40-48 g
- Fat: 200-220 g
- Carbohydrates: 780-850 g
Ingredients
For the cake:
- 2 1/4 cups all-purpose flour
- 1 tbsp baking powder
- 1 tsp salt
- 1/2 cup butter (room temperature, about 70°F)
- 2 1/4 cups sugar
- 1 1/2 cups coconut milk (shake the can well before measuring)
- 1 1/2 tsp coconut essence
- 1 tsp vanilla extract
- 5 egg whites
For the pineapple filling:
- 20 oz crushed pineapple (I use Dole for the best consistency)
- 2/3 cup sugar
- 2 tbsp cornstarch
For the frosting and assembly:
- 1/2 cup butter
- 8 oz cream cheese (I prefer Philadelphia brand for a sturdier frosting)
- 5 1/2 cups powdered sugar (sifted to remove lumps)
- 3 tbsp coconut milk
- 1 cup shredded coconut
Step 1: Prepare Mise en Place and Preheat Oven
- 2 1/4 cups all-purpose flour
- 1 tbsp baking powder
- 1 tsp salt
- 1 1/2 cups coconut milk
Preheat your oven to 350°F and position a rack in the center.
Grease two 8-inch round cake pans with butter or cooking spray, then line the bottoms with parchment paper for easy removal.
Combine the flour, baking powder, and salt in a medium bowl and set aside.
Measure out the coconut milk, making sure to shake the can well first to distribute the cream evenly throughout—this ensures consistent coconut flavor in every slice.
Have all other ingredients at room temperature, especially the butter and egg whites, as this helps create a lighter, more tender crumb.
Step 2: Create Cake Batter Base
- 1/2 cup butter
- 2 1/4 cups sugar
- 1 1/4 cups coconut milk
- 1 1/2 tsp coconut essence
- 1 tsp vanilla extract
- dry ingredient mixture from Step 1
In a large mixing bowl, beat the room-temperature butter and sugar together for about 1 minute until light and fluffy—this process incorporates air into the batter, which helps the cake rise and become tender.
Reduce mixer speed and gradually add 1 1/4 cups of the coconut milk along with the coconut essence and vanilla extract, stirring until just combined.
Add the dry ingredient mixture from Step 1 and mix on low speed for about 2 minutes until the flour is fully incorporated but don’t overmix, as this can make the cake tough.
Step 3: Fold in Egg Whites and Bake Cakes
- 5 egg whites
- cake batter from Step 2
In a separate clean bowl, beat the 5 egg whites on high speed until stiff peaks form—this creates volume and lightness in the cake.
Gently fold the whipped egg whites into the batter from Step 2 in two additions, being careful not to deflate them, as they provide the cake’s tender structure.
Divide the batter evenly between the prepared pans and smooth the tops.
Bake at 350°F for 25 to 35 minutes until a toothpick inserted in the center comes out clean.
The cakes are done when they’re golden on top and spring back when lightly touched.
Step 4: Prepare Pineapple Filling
- 20 oz crushed pineapple
- 2/3 cup sugar
- 2 tbsp cornstarch
While the cakes bake, combine the crushed pineapple (with its juice), the 2/3 cup sugar, and cornstarch in a medium saucepan.
Cook over medium heat, stirring frequently, for 5 to 8 minutes until the mixture thickens and becomes glossy and translucent—you’ll notice the juice will reduce and coat the back of a spoon.
This filling needs to cool completely before assembly so it won’t melt the frosting.
I like to spread it on a shallow plate to cool faster while I work on the frosting.
Step 5: Cool Cakes and Prepare for Assembly
- cooled cakes from Step 3
Remove the cakes from the oven and let them cool in their pans for about 10 minutes, then turn them out onto wire racks to cool completely—this prevents them from becoming too moist.
Once cool, carefully cut each cake layer horizontally into two thinner layers using a serrated knife or cake leveler, working slowly and rotating the cake as you cut to ensure even layers.
This creates four layers total for a more impressive, multi-layered dessert.
Level off any domed tops to create flat surfaces that will stack neatly.
Step 6: Make Cream Cheese Frosting
- 1/2 cup butter
- 8 oz cream cheese
- 5 1/2 cups powdered sugar
- 3 tbsp coconut milk
- 1 cup shredded coconut
In a large bowl, beat together the softened butter and cream cheese for about 1 minute until smooth and creamy.
Gradually add the sifted powdered sugar in batches, mixing on low speed to avoid getting powdered sugar everywhere, then increase to medium speed and beat for about 3 minutes total until light and fluffy.
Pour in the 3 tablespoons of coconut milk and beat just until combined.
Fold in the shredded coconut until evenly distributed.
I find that sifting the powdered sugar through a fine mesh sieve prevents lumps that can create a grainy texture in the frosting.
Step 7: Assemble and Frost the Cake
- cake layers from Step 5
- pineapple filling from Step 4
- cream cheese frosting from Step 6
Place the first cake layer on your serving plate or cake board and spread a thin layer of the cooled pineapple filling from Step 4 on top, then add a layer of cream cheese frosting from Step 6.
Repeat with the remaining two cake layers, finishing with the top layer placed cut-side down.
Spread frosting over the top and around all sides of the cake, then coat the entire outer surface with additional shredded coconut, pressing it gently so it adheres.
For a neat presentation, you can reserve some frosting to pipe around the base.
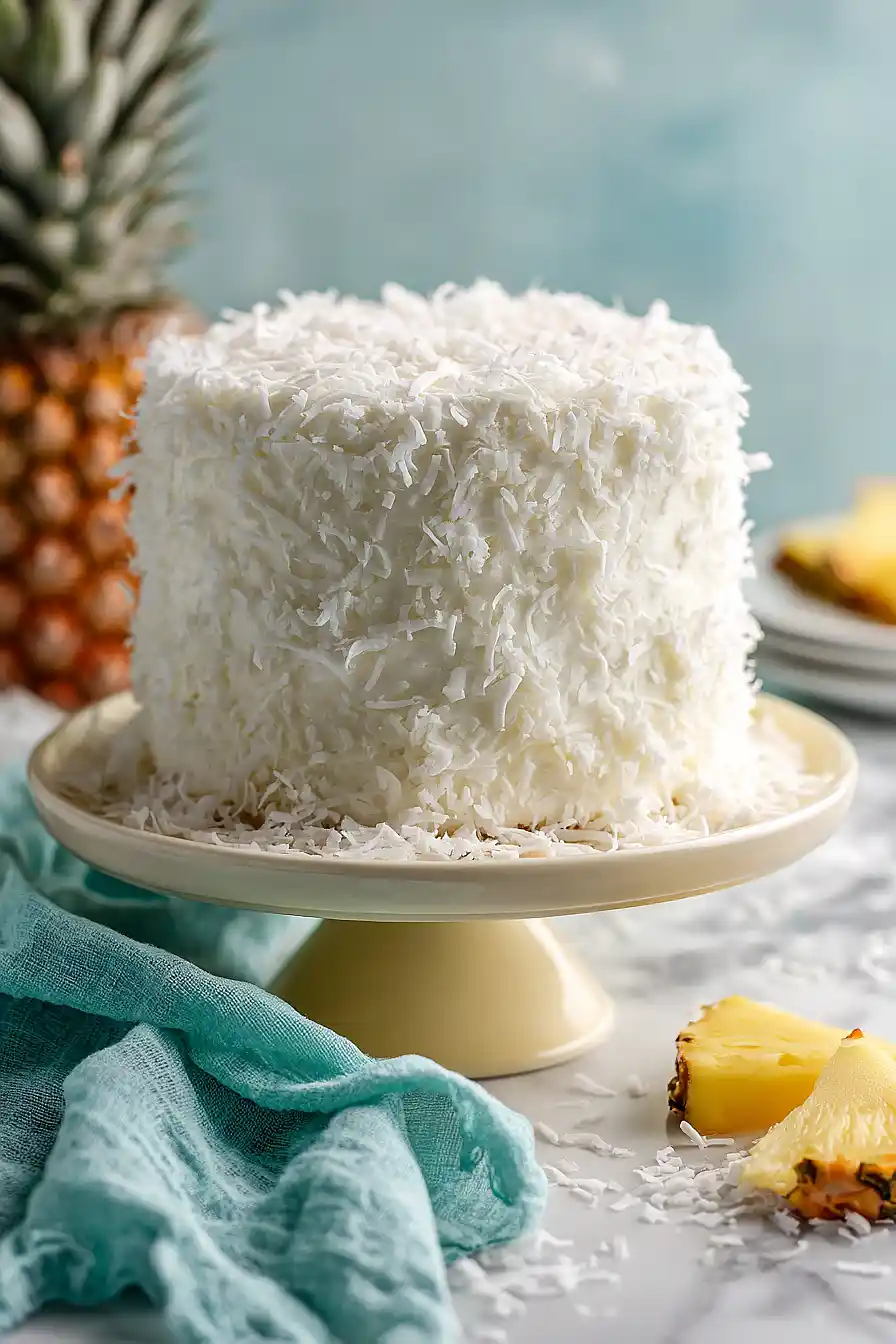
Irresistible Hawaiian Coconut Cake
Ingredients
For the cake
- 2 1/4 cups all-purpose flour
- 1 tbsp baking powder
- 1 tsp salt
- 1/2 cup butter (room temperature, about 70°F)
- 2 1/4 cups sugar
- 1 1/2 cups coconut milk (shake the can well before measuring)
- 1 1/2 tsp coconut essence
- 1 tsp vanilla extract
- 5 egg whites
For the pineapple filling
- 20 oz crushed pineapple (I use Dole for the best consistency)
- 2/3 cup sugar
- 2 tbsp cornstarch
For the frosting and assembly
- 1/2 cup butter
- 8 oz cream cheese (I prefer Philadelphia brand for a sturdier frosting)
- 5 1/2 cups powdered sugar (sifted to remove lumps)
- 3 tbsp coconut milk
- 1 cup shredded coconut
Instructions
- Preheat your oven to 350°F and position a rack in the center. Grease two 8-inch round cake pans with butter or cooking spray, then line the bottoms with parchment paper for easy removal. Combine the flour, baking powder, and salt in a medium bowl and set aside. Measure out the coconut milk, making sure to shake the can well first to distribute the cream evenly throughout—this ensures consistent coconut flavor in every slice. Have all other ingredients at room temperature, especially the butter and egg whites, as this helps create a lighter, more tender crumb.
- In a large mixing bowl, beat the room-temperature butter and sugar together for about 1 minute until light and fluffy—this process incorporates air into the batter, which helps the cake rise and become tender. Reduce mixer speed and gradually add 1 1/4 cups of the coconut milk along with the coconut essence and vanilla extract, stirring until just combined. Add the dry ingredient mixture from Step 1 and mix on low speed for about 2 minutes until the flour is fully incorporated but don't overmix, as this can make the cake tough.
- In a separate clean bowl, beat the 5 egg whites on high speed until stiff peaks form—this creates volume and lightness in the cake. Gently fold the whipped egg whites into the batter from Step 2 in two additions, being careful not to deflate them, as they provide the cake's tender structure. Divide the batter evenly between the prepared pans and smooth the tops. Bake at 350°F for 25 to 35 minutes until a toothpick inserted in the center comes out clean. The cakes are done when they're golden on top and spring back when lightly touched.
- While the cakes bake, combine the crushed pineapple (with its juice), the 2/3 cup sugar, and cornstarch in a medium saucepan. Cook over medium heat, stirring frequently, for 5 to 8 minutes until the mixture thickens and becomes glossy and translucent—you'll notice the juice will reduce and coat the back of a spoon. This filling needs to cool completely before assembly so it won't melt the frosting. I like to spread it on a shallow plate to cool faster while I work on the frosting.
- Remove the cakes from the oven and let them cool in their pans for about 10 minutes, then turn them out onto wire racks to cool completely—this prevents them from becoming too moist. Once cool, carefully cut each cake layer horizontally into two thinner layers using a serrated knife or cake leveler, working slowly and rotating the cake as you cut to ensure even layers. This creates four layers total for a more impressive, multi-layered dessert. Level off any domed tops to create flat surfaces that will stack neatly.
- In a large bowl, beat together the softened butter and cream cheese for about 1 minute until smooth and creamy. Gradually add the sifted powdered sugar in batches, mixing on low speed to avoid getting powdered sugar everywhere, then increase to medium speed and beat for about 3 minutes total until light and fluffy. Pour in the 3 tablespoons of coconut milk and beat just until combined. Fold in the shredded coconut until evenly distributed. I find that sifting the powdered sugar through a fine mesh sieve prevents lumps that can create a grainy texture in the frosting.
- Place the first cake layer on your serving plate or cake board and spread a thin layer of the cooled pineapple filling from Step 4 on top, then add a layer of cream cheese frosting from Step 6. Repeat with the remaining two cake layers, finishing with the top layer placed cut-side down. Spread frosting over the top and around all sides of the cake, then coat the entire outer surface with additional shredded coconut, pressing it gently so it adheres. For a neat presentation, you can reserve some frosting to pipe around the base.
