Here is my favorite strawberry rhubarb pie recipe, with a reliable store-bought crust that bakes up perfectly flaky, and a sweet-tart filling with fresh rhubarb, strawberries, orange zest, and vanilla.
This strawberry rhubarb pie is what I make every spring when rhubarb season hits. The combination of tart rhubarb and sweet strawberries is really something special, and my kids actually request this over chocolate cake. Now that’s saying something, right?

Why You’ll Love This Strawberry Rhubarb Pie
- Perfect balance of sweet and tart – The strawberries bring natural sweetness while the rhubarb adds a tangy kick, creating a flavor combination that’s absolutely delicious.
- Simple, seasonal ingredients – This pie uses just a handful of basic ingredients that come together beautifully, making it easy to whip up when strawberries and rhubarb are in season.
- Classic homemade dessert – There’s something special about serving a from-scratch pie that looks impressive but is actually straightforward to make, even if you’re not an expert baker.
- Great for gatherings – This pie is perfect for potlucks, family dinners, or any occasion where you want to share a crowd-pleasing dessert that everyone will enjoy.
What Kind of Rhubarb Should I Use?
Fresh rhubarb is always your best bet for this pie, and you’ll find it in season during spring and early summer at most grocery stores and farmers markets. The color of the stalks doesn’t really matter – both red and green rhubarb work equally well, though the red varieties do give your pie a prettier pink color. Make sure to trim off and discard any leaves, as they’re toxic, and cut your stalks into pieces about half an inch thick for the best texture. If fresh rhubarb isn’t available, frozen rhubarb will work in a pinch, just don’t thaw it before adding it to your filling or you’ll end up with a watery pie.

Options for Substitutions
This classic pie recipe works well with a few simple swaps if you need them:
- Tapioca: If you don’t have tapioca on hand, you can use 3 tablespoons of cornstarch or 5 tablespoons of all-purpose flour instead. Both will thicken the filling nicely, though tapioca gives the clearest result.
- Strawberries: You can adjust the strawberry-to-rhubarb ratio based on what you have available. More rhubarb will make it tangier, while more strawberries will sweeten it up. Just keep the total fruit at about 5 1/2 cups.
- Orange zest: Lemon zest works just as well and adds a nice bright note to the filling. You could also skip the zest entirely if you don’t have citrus on hand.
- Egg white: For brushing the crust, you can use a whole beaten egg, just milk, or even melted butter. Each gives a slightly different finish, but all work fine.
- Pie dough: Store-bought or homemade both work great here. If you’re short on time, refrigerated pie crusts from the grocery store are a perfectly acceptable shortcut.
- Rhubarb: This is the star of the show, so I wouldn’t recommend substituting it. The tart flavor of rhubarb is what makes this pie special and balances out the sweet strawberries.
Watch Out for These Mistakes While Baking
The biggest problem with strawberry rhubarb pie is a soggy bottom crust, which happens when the filling releases too much liquid during baking – to prevent this, make sure you let the fruit and tapioca mixture sit for the full 10 minutes so the tapioca can start absorbing the juices before it goes into the oven.
Another common mistake is cutting your rhubarb pieces too large or uneven, which leads to some pieces being mushy while others stay tough, so aim for uniform 1/2-inch chunks that will cook at the same rate.
Don’t skip brushing that egg white on the top crust before baking, as it creates a golden, crispy surface that won’t get soggy from the steam, and always place a baking sheet on the rack below your pie to catch any drips and prevent a smoky oven.
Finally, resist the urge to cut into your pie while it’s still warm – letting it cool for at least 3-4 hours allows the filling to set properly so you get clean slices instead of a runny mess.

What to Serve With Strawberry Rhubarb Pie?
A big scoop of vanilla ice cream is the way to go with strawberry rhubarb pie – the cold, creamy sweetness balances out the tart fruit filling perfectly. If you’re not an ice cream person, a dollop of fresh whipped cream or even some Greek yogurt works great too. I love serving this pie slightly warm so the ice cream gets a little melty and mixes with the juices from the strawberries and rhubarb. For a complete dessert spread, pair it with some hot coffee or iced tea, and you’ve got yourself a really satisfying end to any meal.
Storage Instructions
Store: Once your pie has cooled completely, cover it loosely with foil or plastic wrap and keep it at room temperature for up to 2 days. If you want it to last longer, pop it in the fridge where it’ll stay fresh for about 4-5 days.
Freeze: This pie freezes really well, either baked or unbaked. For a baked pie, let it cool completely, wrap it tightly in plastic wrap and then foil, and freeze for up to 3 months. You can also freeze it unbaked – just wrap the whole thing up and bake it straight from frozen when you’re ready, adding about 15-20 extra minutes to the baking time.
Serve: If you’re serving a frozen pie, let it thaw in the fridge overnight or at room temperature for a few hours. I like to warm individual slices in the oven at 350°F for about 10 minutes to bring back that fresh-baked taste and make the filling nice and bubbly again.
| Preparation Time | 20-30 minutes |
| Cooking Time | 60-70 minutes |
| Total Time | 80-100 minutes |
| Level of Difficulty | Medium |
| Servings | 8 slices |
Estimated Nutrition
Estimated nutrition for the whole recipe (without optional ingredients):
- Calories: 1850-2050
- Protein: 18-22 g
- Fat: 45-55 g
- Carbohydrates: 370-400 g
Ingredients
For the filling:
- 4 cups rhubarb (sliced into 1/2-inch thick pieces)
- 2.5 cups strawberries (hulled and halved for better texture)
- 1.25 cups sugar
- 5 tbsp tapioca (I use Minute brand for a perfect set)
- 1/4 tsp salt
- 1 tsp orange zest
- 1/2 tsp vanilla extract
For the crust and assembly:
- 2 pie doughs (I always use Pillsbury for a consistently flaky crust)
- 1 egg white (beaten until frothy to create a moisture barrier)
Step 1: Prepare the Filling and Set Up
- 4 cups rhubarb
- 2.5 cups strawberries
- 1.25 cups sugar
- 5 tbsp tapioca
- 1/4 tsp salt
- 1 tsp orange zest
- 1/2 tsp vanilla extract
Preheat your oven to 400°F.
While it heats, combine the sliced rhubarb, halved strawberries, sugar, tapioca, salt, orange zest, and vanilla extract in a large bowl.
Stir well to distribute the tapioca evenly throughout the fruit—this thickener needs good contact with the juices to set properly.
Let the mixture sit for 10 minutes; this allows the tapioca to begin hydrating and the fruit to release some juice, which helps create the perfect filling consistency.
I like to use Minute tapioca because it sets beautifully without any grittiness that can happen with other starches.
Step 2: Line the Pie Dish and Create a Moisture Barrier
- 1 pie dough disc
- 1 egg white
Remove one pie dough disc from the refrigerator and unfold it into a 9-inch pie dish, letting it settle naturally into the corners and up the sides.
Brush the beaten egg white over the bottom and sides of the dough—this creates a protective barrier that prevents the crust from becoming soggy.
I always beat the egg white until frothy so it spreads evenly and creates a thin, effective seal that the filling won’t saturate.
Step 3: Fill and Top the Pie
- rhubarb-strawberry filling from Step 1
- lined pie crust from Step 2
- 1 pie dough disc
Pour the rhubarb-strawberry filling from Step 1 into the prepared pie crust, mounding it slightly in the center.
Remove the second pie dough disc and unfold it over the filling.
Trim the overhang to about 1/2 inch from the edge of the dish, then fold both crusts together and crimp the edges with your fingers or a fork to seal them well.
Cut 4-5 small slits in the top crust to allow steam to escape during baking, which prevents the filling from bursting and helps the crust bake evenly.
Step 4: Bake in Two Stages for Perfect Results
Place the assembled pie on a baking sheet (this catches any drips and makes handling easier) and bake at 400°F for 20 minutes.
This initial high heat sets the crust and begins cooking the filling.
After 20 minutes, reduce the oven temperature to 350°F and bake for another 40-50 minutes, until the crust is deep golden brown and the filling is bubbling slightly at the edges—you’ll see a little fruit juice seeping out around those top slits, which signals the filling is properly set.
Step 5: Cool and Serve
Remove the pie from the oven and place it on a wire cooling rack.
Let it cool completely at room temperature for at least 2-3 hours before slicing—this cooling time is crucial because the tapioca continues to set and will give you clean, beautiful slices rather than a runny mess.
Serve at room temperature or with a scoop of vanilla ice cream.
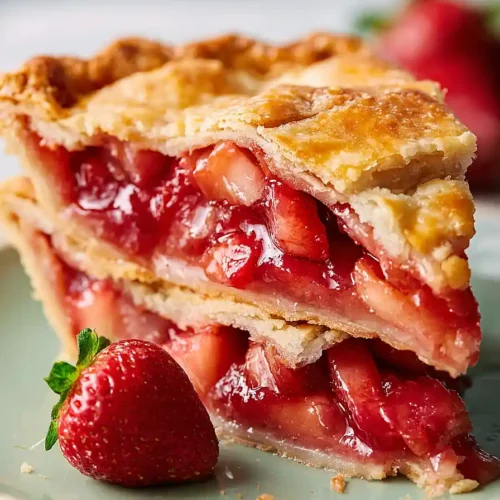
Golden Strawberry Rhubarb Pie
Ingredients
For the filling
- 4 cups rhubarb (sliced into 1/2-inch thick pieces)
- 2.5 cups strawberries (hulled and halved for better texture)
- 1.25 cups sugar
- 5 tbsp tapioca (I use Minute brand for a perfect set)
- 1/4 tsp salt
- 1 tsp orange zest
- 1/2 tsp vanilla extract
For the crust and assembly
- 2 pie doughs (I always use Pillsbury for a consistently flaky crust)
- 1 egg white (beaten until frothy to create a moisture barrier)
Instructions
- Preheat your oven to 400°F. While it heats, combine the sliced rhubarb, halved strawberries, sugar, tapioca, salt, orange zest, and vanilla extract in a large bowl. Stir well to distribute the tapioca evenly throughout the fruit—this thickener needs good contact with the juices to set properly. Let the mixture sit for 10 minutes; this allows the tapioca to begin hydrating and the fruit to release some juice, which helps create the perfect filling consistency. I like to use Minute tapioca because it sets beautifully without any grittiness that can happen with other starches.
- Remove one pie dough disc from the refrigerator and unfold it into a 9-inch pie dish, letting it settle naturally into the corners and up the sides. Brush the beaten egg white over the bottom and sides of the dough—this creates a protective barrier that prevents the crust from becoming soggy. I always beat the egg white until frothy so it spreads evenly and creates a thin, effective seal that the filling won't saturate.
- Pour the rhubarb-strawberry filling from Step 1 into the prepared pie crust, mounding it slightly in the center. Remove the second pie dough disc and unfold it over the filling. Trim the overhang to about 1/2 inch from the edge of the dish, then fold both crusts together and crimp the edges with your fingers or a fork to seal them well. Cut 4-5 small slits in the top crust to allow steam to escape during baking, which prevents the filling from bursting and helps the crust bake evenly.
- Place the assembled pie on a baking sheet (this catches any drips and makes handling easier) and bake at 400°F for 20 minutes. This initial high heat sets the crust and begins cooking the filling. After 20 minutes, reduce the oven temperature to 350°F and bake for another 40-50 minutes, until the crust is deep golden brown and the filling is bubbling slightly at the edges—you'll see a little fruit juice seeping out around those top slits, which signals the filling is properly set.
- Remove the pie from the oven and place it on a wire cooling rack. Let it cool completely at room temperature for at least 2-3 hours before slicing—this cooling time is crucial because the tapioca continues to set and will give you clean, beautiful slices rather than a runny mess. Serve at room temperature or with a scoop of vanilla ice cream.
