I didn’t grow up eating collard greens. They weren’t part of my mom’s usual rotation, and honestly, I thought they seemed intimidating—big, tough leaves that took forever to cook down into something edible.
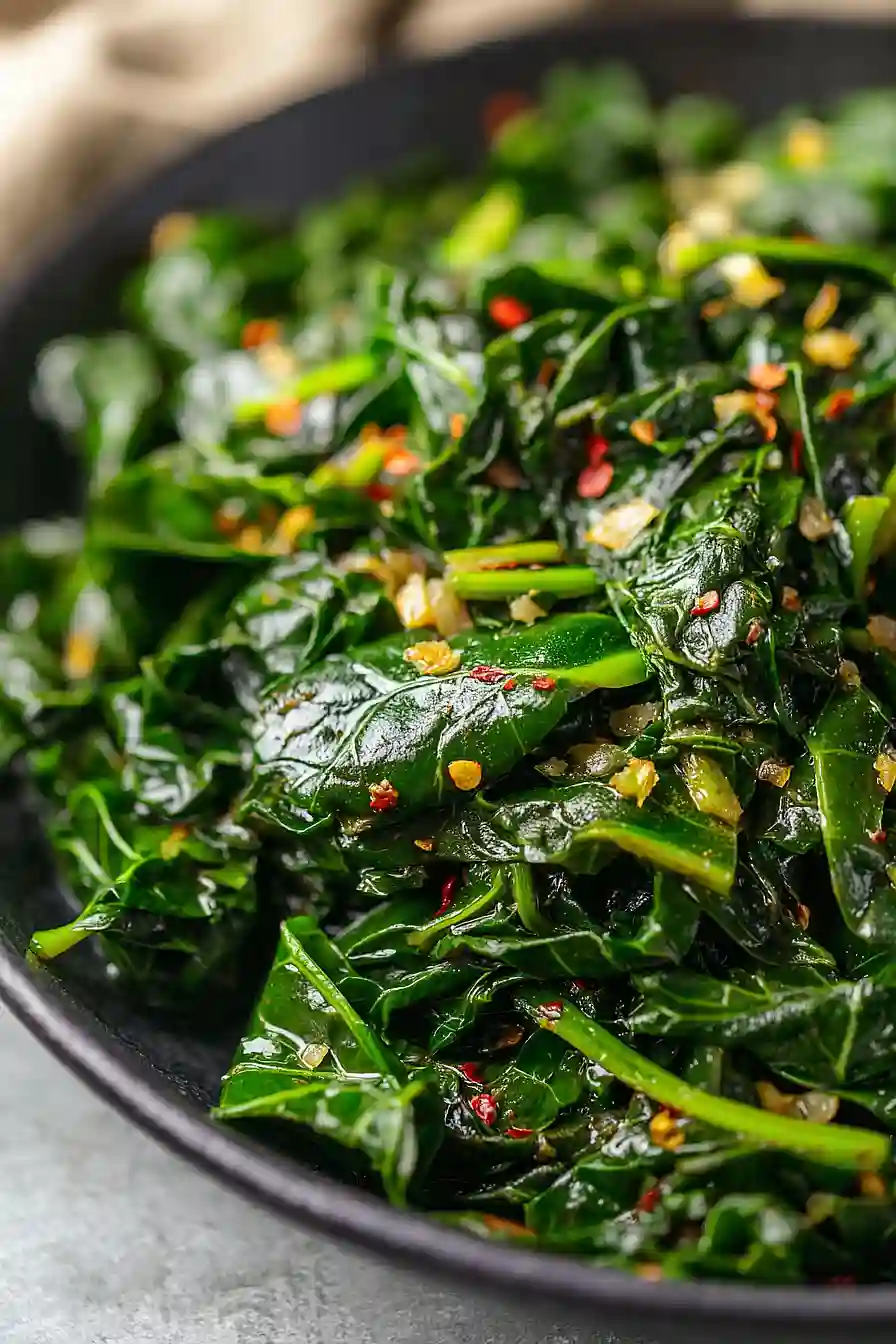
Turns out, I was overthinking it. Collard greens are actually pretty straightforward once you know the basics. The key is removing those thick stems (they’re too fibrous to enjoy) and cooking the leaves just long enough to soften them without turning them to mush. Add some garlic, a few spices, and a splash of mirin for a hint of sweetness, and you’ve got a side dish that’s way easier than it looks. No long simmering required—just about 15 minutes from start to finish.

Why You’ll Love These Collard Greens
- Ready in under 30 minutes – This recipe comes together in just 15-25 minutes, making it perfect for busy weeknights when you need a healthy side dish fast.
- Simple ingredients – You probably have most of these pantry staples on hand already, and the ingredient list is short and straightforward.
- Packed with flavor – The garlic, paprika, and red pepper flakes give these greens a tasty kick that makes eating your vegetables actually enjoyable.
- Healthy and nutritious – Collard greens are loaded with vitamins and fiber, and this recipe keeps them light without heavy cream or bacon.
- Easy preparation – No complicated techniques here—just wash, chop, and sauté for a foolproof side dish every time.
What Kind of Collard Greens Should I Use?
Fresh collard greens are your best bet for this recipe, and you’ll usually find them bundled together in the produce section. Look for leaves that are dark green and firm without any yellowing or wilting – those are signs they’re past their prime. Younger, smaller leaves tend to be a bit more tender and cook faster, while larger, mature leaves have a heartier texture and slightly stronger flavor. If you can only find pre-washed and chopped collard greens in a bag, those will work too and save you some prep time, though fresh bunches usually have better flavor and texture.

Options for Substitutions
This simple side dish is easy to customize with a few swaps:
- Collard greens: You can swap collard greens with other hearty greens like kale, mustard greens, or Swiss chard. Keep in mind that kale and chard cook faster than collards, so reduce your cooking time by a few minutes.
- Mirin: If you don’t have mirin, apple cider vinegar works great and adds a nice tang. You can also try white wine vinegar or rice vinegar for a milder flavor.
- Olive oil: Any neutral cooking oil works here – try avocado oil, vegetable oil, or even butter for a richer taste.
- Red pepper flakes: Skip these if you’re not into spice, or add more if you like things hot. A dash of cayenne pepper or hot sauce can work as a substitute too.
- Paprika: Regular paprika is fine, but smoked paprika adds a nice depth of flavor if you have it on hand.
Watch Out for These Mistakes While Cooking
The biggest mistake people make with collard greens is burning the garlic, which turns bitter and ruins the whole dish – keep your heat at medium and watch it closely during those first 90 seconds, stirring constantly. Another common error is not removing the thick stems from the collard leaves, which stay tough and chewy no matter how long you cook them, so take the extra minute to strip the leaves away from the center rib. Don’t skip adding a splash of liquid like the mirin or even a bit of water if the pan looks dry, as collards need moisture to become tender without scorching on the bottom. If your greens are still tough after the initial cooking time, just add a few more tablespoons of water and let them steam a bit longer – some bunches are more mature and need extra time to soften up properly.
What to Serve With Collard Greens?
Collard greens with garlic are perfect alongside just about any protein you’re making for dinner. They pair really well with roasted chicken, pork chops, or even a simple piece of grilled fish since the garlicky greens add a nice savory element to the plate. I love serving them with cornbread and black-eyed peas for a complete Southern-style meal, or you can keep things simple and serve them over rice or quinoa to soak up all those flavorful juices. If you’re looking for something heartier, they’re also great as a side to meatloaf or baked salmon.
Storage Instructions
Store: These garlicky collard greens keep really well in the fridge. Just pop them in an airtight container and they’ll stay fresh for up to 4 days. They actually taste even better the next day once all those flavors have had time to mingle together!
Freeze: You can freeze cooked collard greens for up to 3 months in a freezer-safe container or bag. Make sure to let them cool completely first, and try to squeeze out any excess liquid before freezing so they don’t get too watery when you thaw them.
Reheat: Warm them up in a skillet over medium heat with a tiny splash of water or broth to keep them from drying out. You can also microwave them in 30-second intervals, stirring in between until they’re heated through.
| Preparation Time | 5-10 minutes |
| Cooking Time | 10-15 minutes |
| Total Time | 15-25 minutes |
| Level of Difficulty | Easy |
| Servings | 2.5 servings |
Estimated Nutrition
Estimated nutrition for the whole recipe (without optional ingredients):
- Calories: 130-170
- Protein: 6-9 g
- Fat: 7-10 g
- Carbohydrates: 15-20 g
Ingredients
- 1.5 tbsp mirin (adds subtle sweetness)
- 1/4 tsp pepper (freshly ground)
- 1/4 tsp onion powder
- 5 garlic cloves (minced, about 2.5 tbsp)
- 16 oz collard greens (fresh, roughly chopped)
- 1/4 tsp paprika (smoked paprika preferred)
- 1/8 tsp red pepper flakes (adjust to taste)
- 1/4 tsp salt
- 1.5 tbsp olive oil (I use extra virgin for better flavor)
Step 1: Prepare the Collard Greens and Build Your Spice Blend
- 16 oz collard greens
- 5 garlic cloves
- 1/4 tsp salt
- 1/4 tsp paprika
- 1/4 tsp pepper
- 1/8 tsp red pepper flakes
- 1/4 tsp onion powder
Remove the thick stems from the collard greens and discard them, then roughly chop the leafy portions into bite-sized pieces.
Rinse the chopped greens thoroughly and pat them dry with paper towels—this helps them cook evenly and allows them to absorb the garlic oil better.
While the greens dry, mince your garlic cloves finely.
In a small bowl, combine the salt, paprika, black pepper, red pepper flakes, and onion powder.
Having everything prepped and measured before you start cooking ensures smooth, seamless cooking with no scrambling mid-step.
Step 2: Bloom the Garlic and Spices in Oil
- 1.5 tbsp olive oil
- 5 garlic cloves
- spice blend from Step 1
Heat the olive oil in a large pan over medium heat for about 1-2 minutes until it’s shimmering but not smoking.
Add your minced garlic and cook for about 90 seconds, stirring occasionally, until it becomes fragrant and just begins to turn golden—this is the sweet spot where garlic releases its flavor without burning.
Immediately add the spice blend from Step 1 and stir constantly for 30 seconds to toast the spices and deepen their flavors.
I like to use extra virgin olive oil here because its fruity notes complement the earthiness of the greens beautifully.
Step 3: Wilt the Greens and Add Mirin
- dried collard greens from Step 1
- garlic-spice mixture from Step 2
- 1.5 tbsp mirin
Add the dried collard greens from Step 1 to the pan with the garlic-spice mixture and stir constantly for 2-3 minutes until they begin to soften and turn a brighter green color.
The greens will initially seem like too much for the pan, but they’ll collapse down quickly as they wilt.
Once they’ve softened noticeably, pour in the mirin and stir to distribute it evenly.
The mirin adds a subtle sweetness that balances the earthiness of the greens without making the dish taste sweet.
Step 4: Finish Cooking with Low Heat
- greens and sauce from Step 3
Cover the pan and reduce the heat to low.
Cook covered for 5 minutes, which allows the greens to finish softening and the flavors to meld together.
After 5 minutes, uncover the pan and continue cooking for another 2-4 minutes, stirring occasionally, until the greens are completely tender and any excess moisture has mostly evaporated.
Taste a piece of green and adjust the seasoning if needed—add more salt, pepper, or red pepper flakes to suit your preference.
The dish is best served immediately while the greens still have some brightness to them.