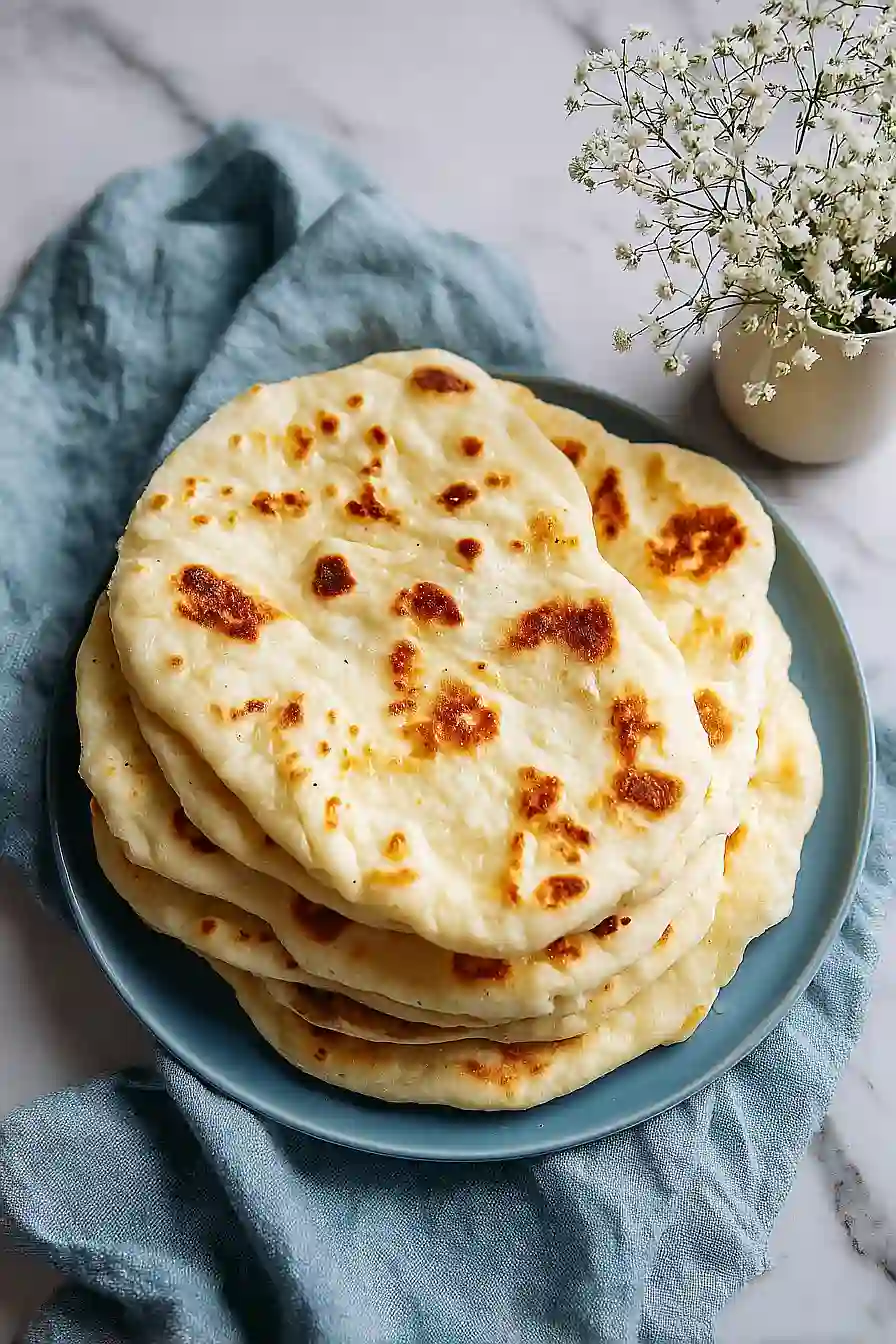
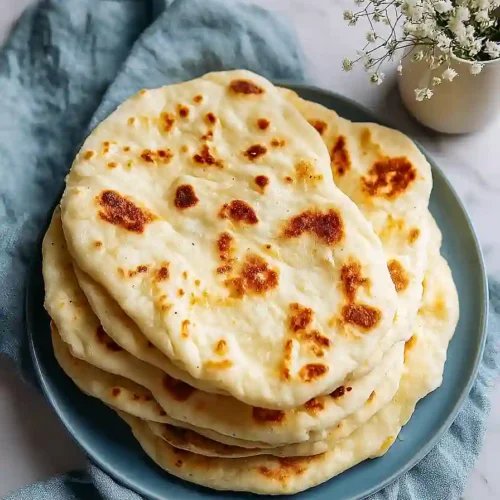
I’ve always loved the smell of fresh bread baking in my kitchen. There’s something about pulling warm pita out of the oven that makes me feel like I’ve accomplished something special. But here’s the thing – homemade pita sounds fancy, and for years I thought it was too hard to try at home.
Turns out, Greek pita is actually one of the easier breads to make. You don’t need any special equipment, and the dough comes together in less than ten minutes. I started making these on Sunday afternoons when I wanted something fresh to go with dinner. Now my family asks for them at least twice a month.
The best part? You can brush them with garlic butter right when they come off the pan. Or keep it simple with just olive oil. Either way, they’re gone before they even cool down.
Why You’ll Love This Greek Pita
- Simple, pantry-friendly ingredients – You probably already have flour, yeast, salt, milk, and olive oil in your kitchen, so no special shopping trip needed.
- Homemade bread without the fuss – Making pita from scratch is easier than you think, and the smell of fresh-baked bread in your kitchen is totally worth it.
- Perfect for meal prep – These pitas freeze beautifully, so you can make a big batch and have homemade bread ready whenever you need it for gyros, sandwiches, or dipping.
- Budget-friendly – Store-bought pita can add up, but making your own costs just pennies per piece and tastes so much better.
What Kind of Flour Should I Use?
All-purpose flour is your best bet for making Greek pita bread at home. It has just the right amount of protein to create a soft, pliable dough that puffs up nicely in the oven. If you want a slightly chewier texture with more authentic flavor, you can swap in half whole wheat flour for half of the all-purpose flour. Bread flour will also work if that’s what you have on hand, though it might make your pitas a bit chewier than traditional Greek pita. Just make sure your flour is fresh and stored properly, as old flour can affect how well your dough rises and the overall taste of your pitas.

Options for Substitutions
Here are some swaps you can make if you’re missing ingredients:
- All-purpose flour: You can substitute up to half of the all-purpose flour with whole wheat flour for a nuttier flavor and more fiber. Just know your pitas might be slightly denser and less puffy.
- Milk: Any milk works here – dairy, almond, oat, or soy. You can even use all water instead of milk if that’s what you have on hand, though the pitas will be slightly less tender.
- Olive oil: Feel free to use vegetable oil, canola oil, or melted butter as a substitute. The flavor will be slightly different, but the texture will still turn out great.
- Active dry yeast: If you only have instant yeast, use the same amount and mix it directly with the dry ingredients – no need to activate it first. The rising time might be slightly shorter.
- Salt: Don’t skip the salt – it’s important for flavor and helps control the yeast. If you only have kosher salt, use about 1.5 teaspoons instead of 1 teaspoon.
Watch Out for These Mistakes While Cooking
The biggest mistake when making pita bread is using liquids that are too hot or too cold – your milk and water should be warm to the touch (around 110°F), as anything hotter will kill the yeast and colder temperatures won’t activate it properly.
Many people skip the resting time after rolling out the dough circles, but letting them sit for 5-10 minutes before cooking helps them puff up better in the pan.
Cooking pitas over medium heat instead of high heat is another common error that prevents that signature pocket from forming, so make sure your pan is really hot before adding the dough.
Finally, avoid pressing down on the pitas while they cook – this releases the steam that creates the pocket, leaving you with flat bread instead of the puffy pitas you’re after.

What to Serve With Greek Pita?
Greek pita is perfect for stuffing with all sorts of fillings or using as a scoop for dips and spreads. I love filling mine with grilled chicken, tzatziki sauce, chopped tomatoes, cucumbers, and red onion for a quick gyro-style meal. You can also serve these pitas alongside hummus, baba ganoush, or a Greek salad with feta cheese and olives. If you’re keeping it simple, just brush the warm pitas with garlic butter and serve them with some crumbled feta and a drizzle of olive oil for dipping.
Storage Instructions
Store: Keep your pitas fresh by stacking them with parchment paper in between and storing in an airtight container or zip-top bag at room temperature for up to 2 days. If you want them to last longer, pop them in the fridge for up to a week.
Freeze: These pitas are perfect for freezing! Just let them cool completely, then stack them with parchment paper between each one and store in a freezer bag for up to 3 months. It’s great to have a stash ready whenever you need them.
Warm Up: To bring your pitas back to life, wrap them in a damp paper towel and microwave for about 20-30 seconds, or warm them in a dry skillet over medium heat for a minute on each side. If they’re frozen, let them thaw at room temperature first or warm them straight from the freezer in the oven at 350°F for about 5 minutes.
| Preparation Time | 90-120 minutes |
| Cooking Time | 15-20 minutes |
| Total Time | 105-140 minutes |
| Level of Difficulty | Medium |
| Servings | 8 pieces |
Estimated Nutrition
Estimated nutrition for the whole recipe (without optional ingredients):
- Calories: 950-1050
- Protein: 21-25 g
- Fat: 24-28 g
- Carbohydrates: 160-175 g
Ingredients
For the dough:
- 2 cups flour (I always use King Arthur all-purpose flour)
- 1 tbsp yeast
- 1 tsp salt
- 1/2 tsp sugar
- 1/4 cup milk (lukewarm, about 105°F to 115°F to bloom yeast)
- 1/2 cup water
- 2 tbsp olive oil
For cooking and serving:
- olive oil (I prefer Bertolli extra virgin for a mild finish)
- garlic butter (optional but recommended for extra richness)
- fresh parsley, chopped (for garnish, optional)
Step 1: Bloom the Yeast and Mix Dry Ingredients
- 2 cups flour
- 1 tbsp yeast
- 1 tsp salt
- 1/2 tsp sugar
- 1/4 cup milk
- 1/2 cup water
Combine the flour, salt, and sugar in a large mixing bowl.
In a separate small bowl, pour the lukewarm milk (105°F to 115°F is crucial—too hot kills the yeast, too cold and it won’t activate) and sprinkle the yeast over it.
Let it sit for 2-3 minutes until it becomes foamy on top, which signals the yeast is alive and ready.
This blooming step ensures your pitas will rise properly and develop good texture.
Add the water to the yeast mixture and stir to combine.
Step 2: Mix and Knead the Dough
- dry ingredients mixture from Step 1
- yeast mixture from Step 1
- 2 tbsp olive oil
Pour the yeast mixture into the flour mixture and stir until a shaggy dough forms.
Add the 2 tablespoons of olive oil and knead the dough in the bowl or on a floured surface for 8-10 minutes until smooth and elastic.
The dough should be soft but not sticky—if it’s too wet, dust with a little more flour.
I like to knead until the dough springs back when I poke it, which tells me the gluten is well developed and the pitas will have good structure.
Step 3: First Rise
- kneaded dough from Step 2
- olive oil
Transfer the kneaded dough to a lightly oiled bowl, turning it to coat all sides with oil.
Cover the bowl with a damp towel or plastic wrap and place it in a warm, draft-free spot.
Let it rise for 1 hour, or until doubled in size.
You’ll know it’s ready when you poke it gently and the indent stays rather than springing back.
Step 4: Divide and Shape the Pitas
- risen dough from Step 3
Turn the risen dough onto a lightly floured surface and gently press out any large air bubbles.
Divide the dough into 8 equal pieces—I like to use a bench scraper to cut the dough into quarters, then cut each quarter in half for consistency.
Roll each piece into a ball, then use a rolling pin or your hands to flatten it into a circle about 1/4 inch thick and 7-8 inches in diameter.
The thickness is important: too thin and they won’t puff, too thick and they’ll be dense.
Step 5: Cook the Pitas
- shaped pita dough from Step 4
- olive oil
Heat a large skillet or cast-iron pan over medium-high heat and lightly coat it with olive oil (about 1-2 tablespoons total).
Once the pan is hot, carefully place one pita dough circle onto the pan.
Cook for about 1-2 minutes on the first side—you should see small bubbles forming and the bottom turning golden.
Flip and cook the other side for another 1-2 minutes until puffed and light golden.
Transfer to a plate and repeat with the remaining dough circles.
The pitas will continue to puff slightly as they cool.
Step 6: Finish and Serve
- cooked pitas from Step 5
- garlic butter
- fresh parsley, chopped
While the pitas are still warm, brush them lightly with garlic butter if desired for extra richness and flavor—this step really elevates the dish.
Sprinkle fresh chopped parsley over the top if you’d like a fresh garnish.
Serve the pitas warm, ideally within a few minutes of cooking, while they’re still soft and pliable for filling with your favorite Greek fillings like gyro meat, tzatziki, and vegetables.
Fluffy Greek Pita
Ingredients
For the dough
- 2 cups flour (I always use King Arthur all-purpose flour)
- 1 tbsp yeast
- 1 tsp salt
- 1/2 tsp sugar
- 1/4 cup milk (lukewarm, about 105°F to 115°F to bloom yeast)
- 1/2 cup water
- 2 tbsp olive oil
For cooking and serving
- olive oil (I prefer Bertolli extra virgin for a mild finish)
- garlic butter (optional but recommended for extra richness)
- fresh parsley, chopped (for garnish, optional)
Instructions
- Combine the flour, salt, and sugar in a large mixing bowl. In a separate small bowl, pour the lukewarm milk (105°F to 115°F is crucial—too hot kills the yeast, too cold and it won't activate) and sprinkle the yeast over it. Let it sit for 2-3 minutes until it becomes foamy on top, which signals the yeast is alive and ready. This blooming step ensures your pitas will rise properly and develop good texture. Add the water to the yeast mixture and stir to combine.
- Pour the yeast mixture into the flour mixture and stir until a shaggy dough forms. Add the 2 tablespoons of olive oil and knead the dough in the bowl or on a floured surface for 8-10 minutes until smooth and elastic. The dough should be soft but not sticky—if it's too wet, dust with a little more flour. I like to knead until the dough springs back when I poke it, which tells me the gluten is well developed and the pitas will have good structure.
- Transfer the kneaded dough to a lightly oiled bowl, turning it to coat all sides with oil. Cover the bowl with a damp towel or plastic wrap and place it in a warm, draft-free spot. Let it rise for 1 hour, or until doubled in size. You'll know it's ready when you poke it gently and the indent stays rather than springing back.
- Turn the risen dough onto a lightly floured surface and gently press out any large air bubbles. Divide the dough into 8 equal pieces—I like to use a bench scraper to cut the dough into quarters, then cut each quarter in half for consistency. Roll each piece into a ball, then use a rolling pin or your hands to flatten it into a circle about 1/4 inch thick and 7-8 inches in diameter. The thickness is important: too thin and they won't puff, too thick and they'll be dense.
- Heat a large skillet or cast-iron pan over medium-high heat and lightly coat it with olive oil (about 1-2 tablespoons total). Once the pan is hot, carefully place one pita dough circle onto the pan. Cook for about 1-2 minutes on the first side—you should see small bubbles forming and the bottom turning golden. Flip and cook the other side for another 1-2 minutes until puffed and light golden. Transfer to a plate and repeat with the remaining dough circles. The pitas will continue to puff slightly as they cool.
- While the pitas are still warm, brush them lightly with garlic butter if desired for extra richness and flavor—this step really elevates the dish. Sprinkle fresh chopped parsley over the top if you'd like a fresh garnish. Serve the pitas warm, ideally within a few minutes of cooking, while they're still soft and pliable for filling with your favorite Greek fillings like gyro meat, tzatziki, and vegetables.
