Growing up, I thought homemade jelly was something only my grandmother could master. Every time I tried making it, I’d end up with either fruit soup or a rock-hard mess that wouldn’t come out of the jar. It wasn’t until years later that I discovered where I went wrong.
The thing about raspberry jelly is that it’s actually pretty simple once you know the basics. You don’t need fancy equipment or professional skills – just the right ratio of ingredients and a bit of patience. While store-bought jelly is convenient, there’s something special about making your own, especially when you get it just right.
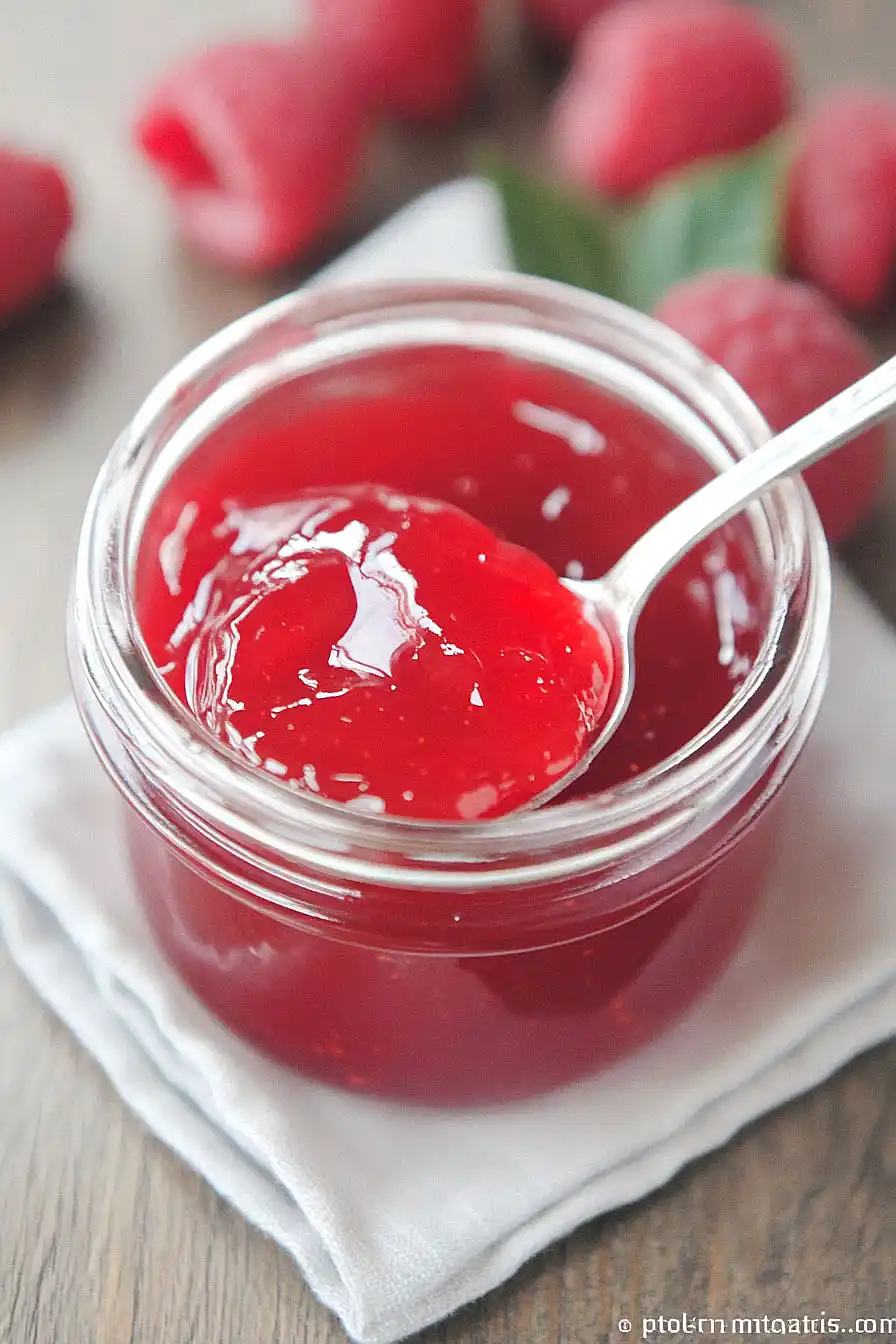
Why You’ll Love This Raspberry Jelly
- Just 2 ingredients – This recipe keeps things wonderfully simple with only raspberries and sugar – no fancy ingredients or special tools needed.
- Quick preparation – You’ll have homemade jelly ready in under an hour, making this a perfect weekend project that doesn’t take all day.
- Perfect for gifting – Homemade raspberry jelly makes a thoughtful gift for friends and family, and they’ll never guess how easy it was to make.
- Better than store-bought – The fresh raspberry flavor really shines through, giving you a pure, natural-tasting jelly without any artificial ingredients or preservatives.
What Kind of Raspberries Should I Use?
Fresh raspberries are ideal for making jelly, but frozen ones will work just as well since we’re extracting the juice anyway. Red raspberries are the most common choice, though you could experiment with black or golden raspberries for a unique twist. When picking fresh raspberries, look for plump, bright-colored berries that aren’t mushy or moldy, and avoid any containers where the berries look wet or crushed. If you’re using frozen berries, make sure they haven’t developed freezer burn, which can affect the flavor of your jelly.

Options for Substitutions
When it comes to making jelly, you’ll want to be careful with substitutions to ensure proper setting and food safety, but here are some options:
- Fresh raspberry juice: You can use frozen raspberries instead of fresh – just thaw them completely first. In a pinch, you can also use store-bought 100% raspberry juice, but avoid any with added sugars or preservatives. For a different flavor, try blackberries or a mix of berries, keeping the same total amount of juice.
- Granulated sugar: This is one ingredient you shouldn’t substitute in traditional jelly making – the exact amount of regular granulated sugar is needed for proper setting and preservation. While there are special low-sugar pectins available, they require different recipes entirely. Honey, artificial sweeteners, or sugar substitutes won’t work as replacements in this recipe.
- Additional info: If you’re looking to make a low-sugar version, it’s best to find a recipe specifically designed for that purpose, as it will require different amounts and types of pectin to set properly.
Watch Out for These Mistakes While Cooking
The biggest challenge when making raspberry jelly is achieving the perfect set – too runny and it won’t hold its shape, too firm and you’ll end up with a rubbery texture. To nail the consistency, use a candy thermometer and cook the mixture until it reaches exactly 220°F (or 8°F above your area’s boiling point). Another common mistake is skipping the pre-jelling test – simply place a small spoonful on a cold plate and refrigerate for a minute; if it wrinkles when pushed with your finger, it’s ready to jar. Rushing the straining process can leave you with cloudy jelly, so let the juice drip naturally through a cheesecloth-lined strainer without pressing or squeezing the berries. For the best results, always start with clean, sterilized jars and leave proper headspace (1/4 inch) when filling them to ensure a good seal.

What to Serve With Raspberry Jelly?
Fresh raspberry jelly is so much more than just a spread for your morning toast (though that’s definitely delicious!). Try spreading it on warm scones or English muffins for a classic breakfast treat, or use it as a filling between layers of vanilla cake. For a quick afternoon snack, I love adding a spoonful to plain Greek yogurt or swirling it into oatmeal. You can also pair it with soft cheeses like brie or cream cheese on a cheese board – the sweet-tart jelly creates such a nice balance with the creamy cheese.
Storage Instructions
Keep Fresh: Once your raspberry jelly has set and cooled completely, keep those unopened jars in a cool, dark place like your pantry. They’ll stay good for up to 12 months this way. After opening a jar, pop it in the fridge and use it within 3-4 weeks.
Seal: Make sure your jars are properly sealed – you should hear that satisfying ‘pop’ sound as they cool down. If any lids don’t seal (they’ll stay slightly raised in the middle), just store those jars in the fridge and use them first.
Tips: Label your jars with the date you made the jelly – it’s super helpful when you’ve got multiple batches. If you notice any mold or off smells when you open a jar, it’s best to play it safe and toss it out.
| Preparation Time | 10-15 minutes |
| Cooking Time | 30-40 minutes |
| Total Time | 40-55 minutes |
| Level of Difficulty | Medium |
Estimated Nutrition
Estimated nutrition for the whole recipe (without optional ingredients):
- Calories: 2200-2400
- Protein: 0-5 g
- Fat: 0-5 g
- Carbohydrates: 550-600 g
Ingredients
- 5 cups raspberry juice (see note 1)
- 5 cups white sugar (refer to note 2)
Step 1: Combine Raspberry Juice and Sugar
- 5 cups raspberry juice (see Note 1)
- 5 cups white sugar (refer to Note 2)
In a large heavy-bottomed pot (at least 5 quarts), combine the raspberry juice and white sugar.
Stir the mixture to begin dissolving the sugar.
I like to make sure the mixture is well combined before heating for an even texture.
Step 2: Dissolve Sugar and Bring to a Boil
- sugar and raspberry juice mixture from Step 1
Gently heat the mixture over medium heat, stirring frequently to completely dissolve the sugar.
Once most of the sugar is dissolved, increase the heat to medium-high and bring the mixture to a full rolling boil—this means the mixture continues to boil even when you stir it.
Step 3: Boil Until Jelly Reaches Setting Point
- boiling mixture from Step 2
Continue boiling the mixture, stirring often to prevent burning, until it reaches at least 215°F when checked with an instant-read thermometer—this should take about 25 minutes.
Skim off any foam from the surface with a slotted spoon after turning off the heat.
For an even clearer jelly, I like to let the mixture settle briefly before skimming.
Step 4: Jar the Jelly
- hot raspberry jelly from Step 3
Ladle the hot jelly into sterilized jars, leaving at least 1/4 inch space from the top.
Clean the jar rims with a damp towel, then place the lids on top.
Tighten the metal rings by holding the lid in place with your finger to avoid damaging the seal.
Step 5: Process the Jars in a Water Bath
Place the filled jars into a deep pot lined with a canning rack, making sure they are covered by at least 4 inches of boiling water.
Boil the jars for 10 minutes, then turn off the heat and let them sit in the water for 5 minutes before removing.
A towel-lined counter works well for cooling jars and catching drips.
Step 6: Cool and Store the Jelly
Remove the jars and let them cool completely.
Listen for popping sounds as the jars seal.
Properly sealed jars can be kept in the pantry for up to 1 year, while unsealed jars should be stored in the refrigerator and used within 1 month.
