I never thought I’d be the type of person to make candy at home until my kids started begging for “something special” every Halloween. Store-bought treats are fine, but there’s something about making your own that gets everyone excited.
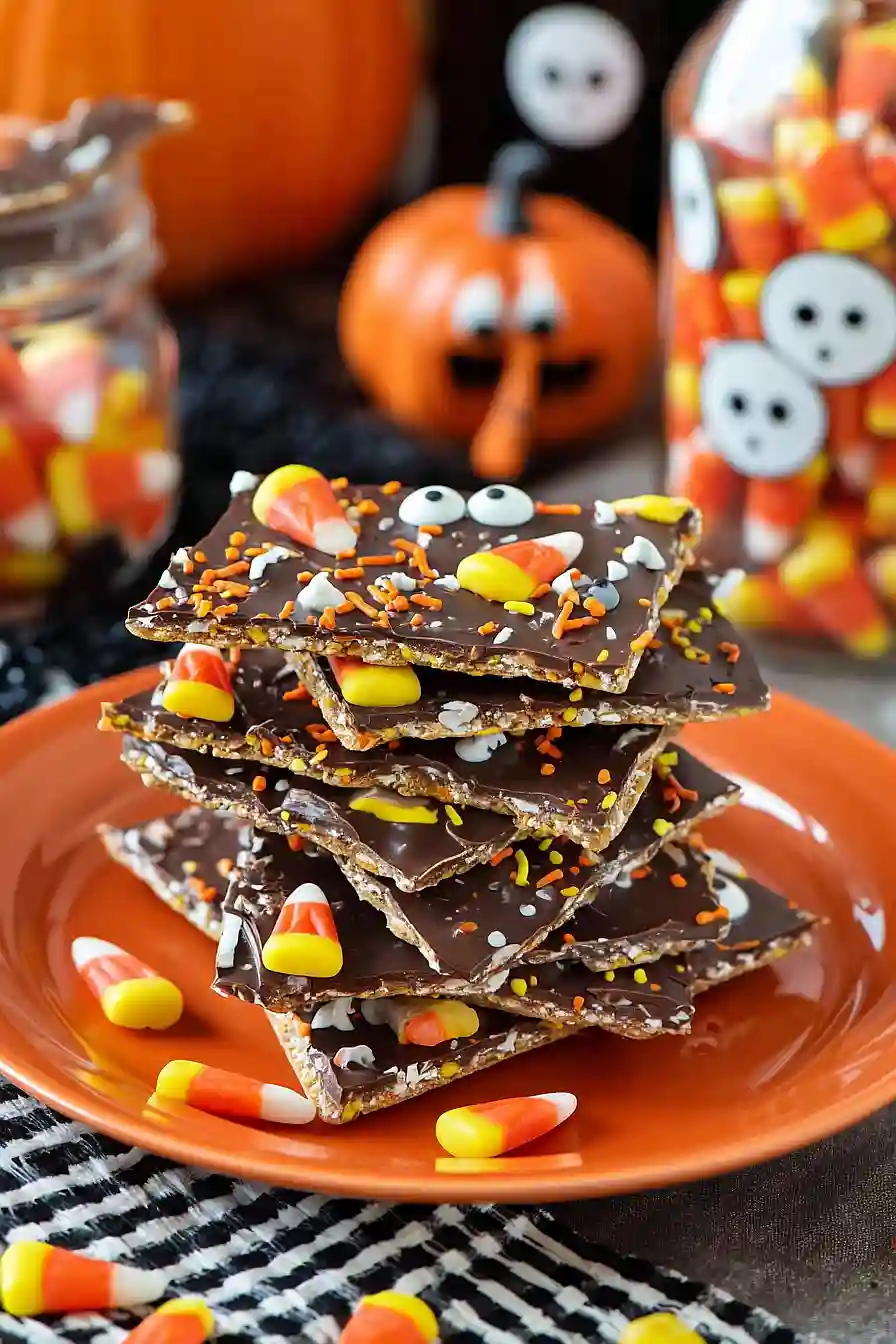
That’s how I discovered Halloween Crack—and yes, it really is as addictive as the name suggests. This sweet and salty treat takes maybe 20 minutes to throw together, but it disappears from the counter in about 5. The best part? You probably already have most of the ingredients sitting in your pantry right now.

Why You’ll Love This Halloween Crack
- Simple ingredients – You probably already have most of these pantry staples at home, and the rest are easy to find at any grocery store.
- Perfect for parties – This festive treat is ideal for Halloween gatherings, school parties, or trick-or-treat handouts that both kids and adults will devour.
- Easy to make – Even beginner bakers can master this recipe with just a few simple steps and no special skills required.
- Addictive sweet and salty combo – The crunchy saltine base topped with buttery caramel and chocolate creates an irresistible flavor combination that lives up to its ‘crack’ nickname.
- Fun to customize – You can get creative with different Halloween candies and sprinkles to make it your own spooky masterpiece.
What Kind of Saltine Crackers Should I Use?
Any brand of regular saltine crackers will work perfectly for this Halloween crack recipe. You’ll want to stick with the classic square saltines rather than any flavored varieties, since the plain salted crackers provide the perfect base for all that sweet chocolate and caramel goodness. Most sleeves contain around 35-40 crackers, so one sleeve should give you just the right amount. Make sure your crackers are fresh and crispy – stale crackers won’t give you that satisfying crunch that makes this treat so addictive.
Options for Substitutions
This addictive treat is pretty forgiving when it comes to swaps – here’s what you can change up:
- Saltine crackers: Club crackers or Ritz crackers work great too, though they’ll give you a slightly different texture. Just make sure to use the same amount and arrange them in a single layer.
- Semi-sweet chocolate chips: Feel free to use milk chocolate chips, dark chocolate chips, or even white chocolate chips for a different look. You could also chop up chocolate bars instead of using chips.
- Brown sugar: Light or dark brown sugar both work fine here. If you only have white sugar, you can use that too, but you’ll lose some of that rich caramel flavor.
- Halloween candies: This is where you can get creative! Use any small candies you have on hand – mini M&Ms, chopped up candy bars, crushed Oreos, or even festive sprinkles. The key is adding them while the chocolate is still warm so they stick.
- Butter: Stick with real butter for this one – it’s what creates that perfect toffee layer. Margarine won’t give you the same results.
Watch Out for These Mistakes While Cooking
The biggest mistake when making Halloween crack is letting the butter and brown sugar mixture burn, which happens quickly once it starts boiling – keep stirring constantly and watch for a golden caramel color rather than timing it.
Another common error is not spreading the chocolate chips evenly while they’re still hot, so work fast to cover the entire surface before the caramel cools and the chips won’t melt properly.
Don’t skip lining your pan with parchment paper or foil, as this treat will stick like crazy without it, and make sure to let it cool completely before breaking it into pieces – rushing this step will leave you with a gooey mess instead of crispy crack.
For the best results, add your Halloween decorations while the chocolate is still slightly warm but not completely melted, so they stick without sinking in.

What to Serve With Halloween Crack?
Halloween crack is honestly perfect on its own as a sweet treat, but it pairs really well with a cold glass of milk or some hot apple cider to balance out all that rich chocolate and caramel goodness. If you’re serving it at a Halloween party, consider setting it out alongside other finger foods like popcorn, pretzels, or mixed nuts to create a fun snack spread. The salty-sweet combo also works great with some vanilla ice cream if you want to turn it into more of a dessert situation. Since it’s already loaded with candy toppings, you really don’t need much else – just grab a napkin and enjoy the addictive crunch!
Storage Instructions
Keep Fresh: Halloween crack stays crispy and delicious when stored in an airtight container at room temperature for up to a week. I like to layer pieces between parchment paper to prevent them from sticking together. Just make sure it’s completely cooled before storing so the chocolate doesn’t get messy.
Freeze: This treat freezes really well for longer storage! Break it into pieces and store in freezer bags or containers for up to 3 months. It’s actually pretty tasty eaten straight from the freezer – the chocolate gets nice and firm while the toffee layer stays perfectly chewy.
Make Ahead: Halloween crack is perfect for making ahead since it actually gets better after sitting for a day or two. The flavors meld together nicely, and it’s one less thing to worry about when you’re prepping for parties or trick-or-treaters.
| Preparation Time | 15-20 minutes |
| Cooking Time | 10-15 minutes |
| Total Time | 85-135 minutes |
| Level of Difficulty | Easy |
Estimated Nutrition
Estimated nutrition for the whole recipe (without optional ingredients):
- Calories: 3400-3800
- Protein: 18-24 g
- Fat: 200-220 g
- Carbohydrates: 420-460 g
Ingredients
For the base:
- 35 saltine crackers (about 1 sleeve)
For the caramel:
- 1 cup butter
- 1 cup brown sugar
For the chocolate layer:
- 10 oz semi-sweet chocolate chips
For the toppings:
- Eye-shaped candy decorations
- Candy corn pieces
- Reese’s pieces
- Halloween-themed sprinkles
Step 1: Prepare Baking Sheet and Saltines
- 35 saltine crackers (about 1 sleeve)
Preheat your oven to 350°F (175°C).
Line a baking sheet with parchment paper to prevent sticking, then arrange the saltine crackers in neat rows to fully cover the sheet.
Step 2: Make Caramel Topping
- 1 cup butter
- 1 cup brown sugar
In a saucepan over medium heat, melt the butter and add the brown sugar.
Stir constantly and bring the mixture to a boil.
Continue boiling for 2-3 minutes, stirring frequently, until the mixture thickens and forms a caramel.
Pour the hot caramel evenly over the arranged saltines, then use a rubber spatula to spread it into a smooth layer.
Step 3: Bake the Saltine Caramel Base
- saltine crackers and caramel layer from Step 2
Place the baking sheet with the caramel-covered saltines in the preheated oven.
Bake for 4-5 minutes, until the caramel is browned and bubbling.
Carefully remove the sheet from the oven.
Step 4: Melt and Spread Chocolate
- 10 oz semi-sweet chocolate chips
Immediately after removing the pan from the oven, sprinkle the semi-sweet chocolate chips evenly over the hot caramel layer.
Let the chocolate chips sit undisturbed for 5 minutes to melt.
Once melted, use a clean spatula to spread the chocolate into an even layer across all the crackers.
I like to gently nudge the chocolate to the very edges, so every bite has a perfect chocolate layer.
Step 5: Decorate
- eye-shaped candy decorations
- candy corn pieces
- Reese’s Pieces
- halloween-themed sprinkles
While the chocolate is still warm and spreadable, top the surface with your favorite Halloween decorations.
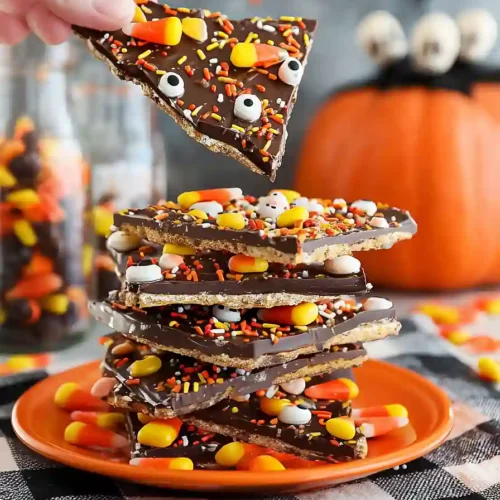
Distribute eye-shaped candy decorations, candy corn pieces, Reese’s Pieces, and Halloween-themed sprinkles freely over the chocolate.
Feel free to get creative with your designs!
Step 6: Chill and Serve
Place the decorated tray in the refrigerator for at least 1-2 hours, or until the chocolate has fully hardened.
Once set, break the candy into pieces and enjoy.
Any leftovers can be stored in a zip-top bag in the freezer for a sweet treat any time!
Easy Halloween Crack
Ingredients
For the base:
- 35 saltine crackers (about 1 sleeve)
For the caramel:
- 1 cup butter
- 1 cup brown sugar
For the chocolate layer:
- 10 oz semi-sweet chocolate chips
For the toppings:
- eye-shaped candy decorations
- candy corn pieces
- Reese’s Pieces
- halloween-themed sprinkles
Instructions
- Preheat your oven to 350°F (175°C). Line a baking sheet with parchment paper to prevent sticking, then arrange the saltine crackers in neat rows to fully cover the sheet.
- In a saucepan over medium heat, melt the butter and add the brown sugar. Stir constantly and bring the mixture to a boil. Continue boiling for 2-3 minutes, stirring frequently, until the mixture thickens and forms a caramel. Pour the hot caramel evenly over the arranged saltines, then use a rubber spatula to spread it into a smooth layer.
- Place the baking sheet with the caramel-covered saltines in the preheated oven. Bake for 4-5 minutes, until the caramel is browned and bubbling. Carefully remove the sheet from the oven.
- Immediately after removing the pan from the oven, sprinkle the semi-sweet chocolate chips evenly over the hot caramel layer. Let the chocolate chips sit undisturbed for 5 minutes to melt. Once melted, use a clean spatula to spread the chocolate into an even layer across all the crackers. I like to gently nudge the chocolate to the very edges, so every bite has a perfect chocolate layer.
- While the chocolate is still warm and spreadable, top the surface with your favorite Halloween decorations. Distribute eye-shaped candy decorations, candy corn pieces, Reese’s Pieces, and Halloween-themed sprinkles freely over the chocolate. Feel free to get creative with your designs!
- Place the decorated tray in the refrigerator for at least 1-2 hours, or until the chocolate has fully hardened. Once set, break the candy into pieces and enjoy. Any leftovers can be stored in a zip-top bag in the freezer for a sweet treat any time!
