I’ve always been torn between brownies and cookies. Why should I have to pick a favorite when they both make me so happy? Brownies are rich and fudgy, cookies are crispy on the edges and chewy in the middle. For years, I’d make both and watch them disappear at different speeds depending on who was visiting.
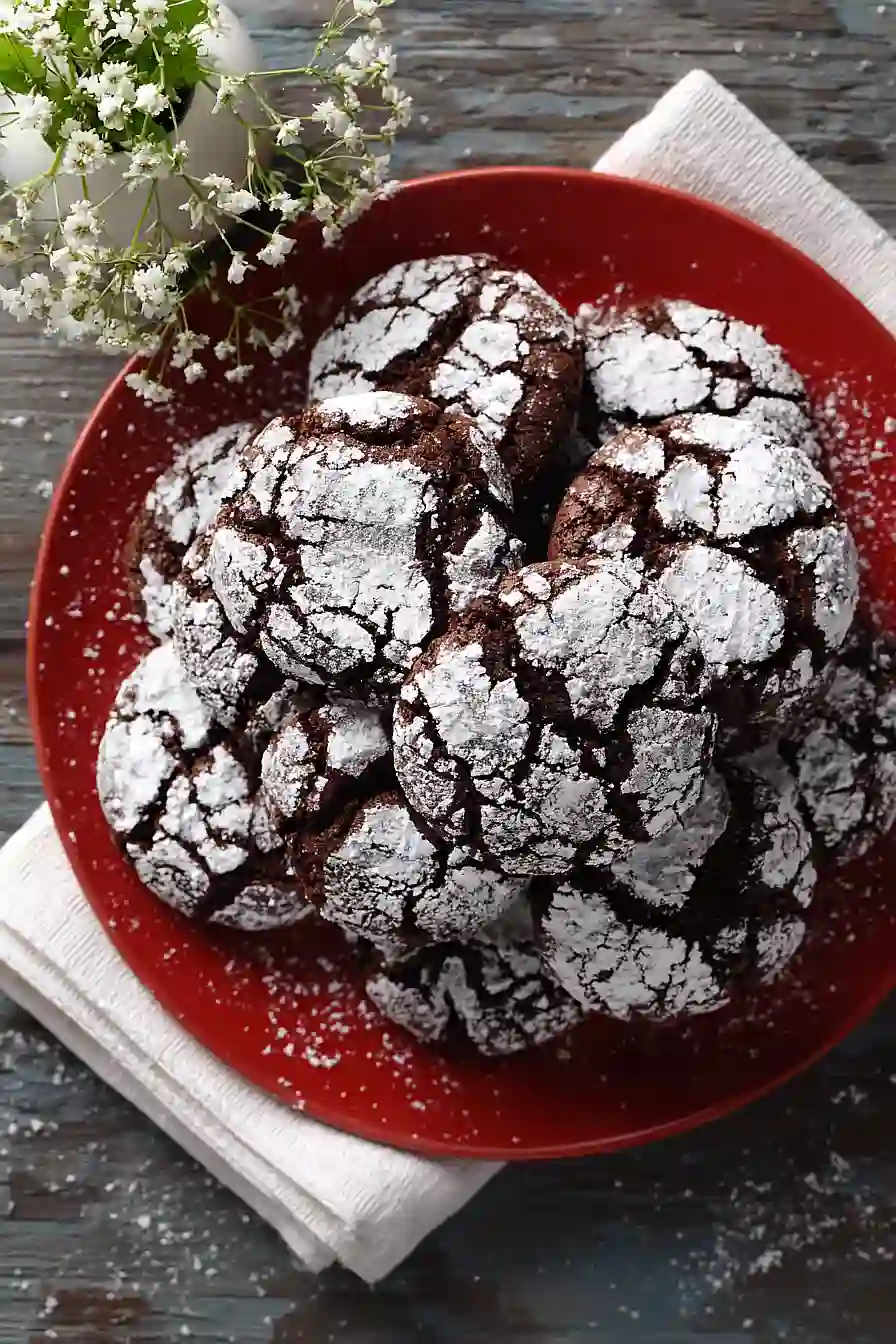
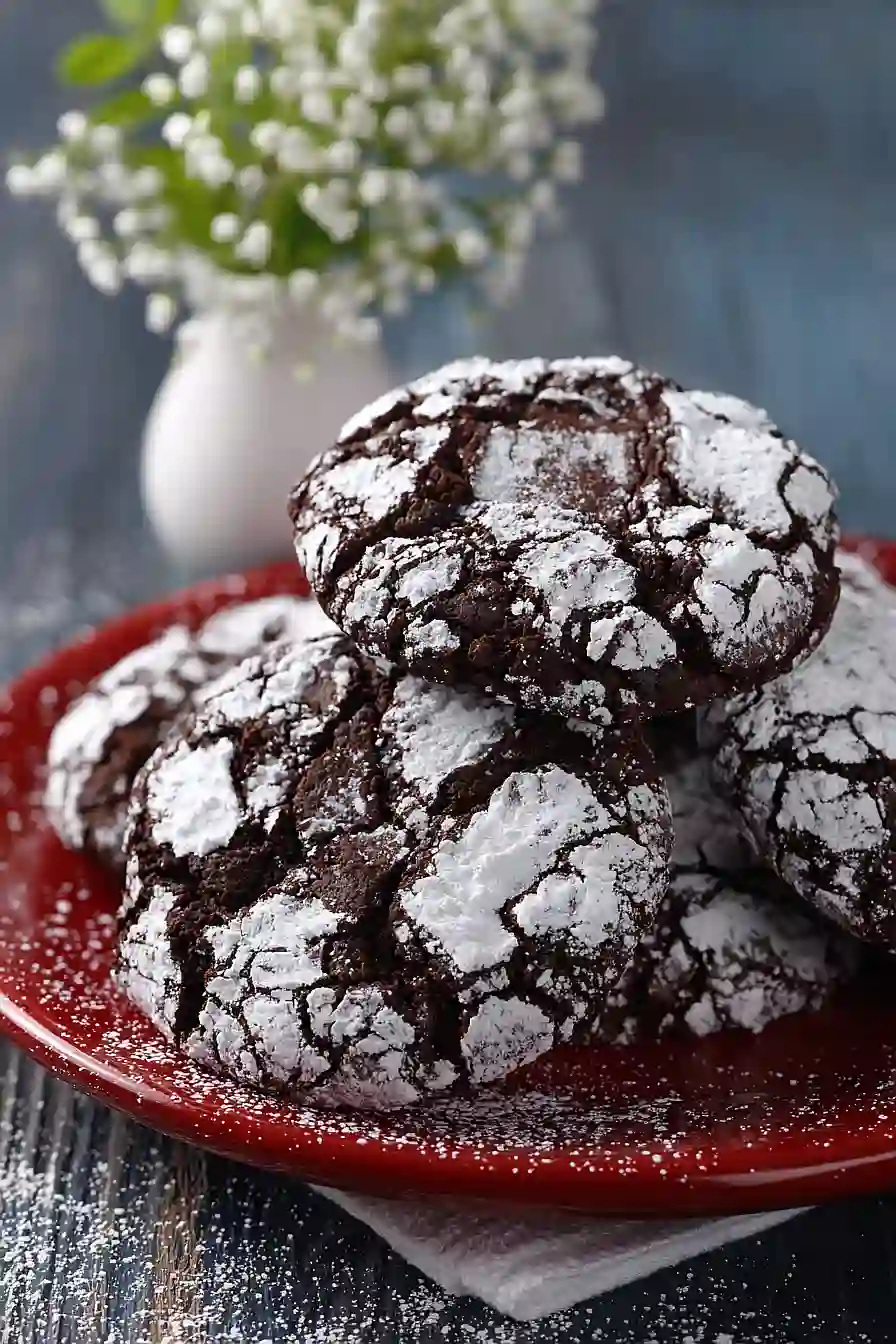
Then I discovered these chocolate brownie crinkle cookies, and suddenly I didn’t have to choose anymore. They’ve got that intense chocolate flavor you get from a good brownie, but they’re in cookie form with those pretty cracked tops dusted in powdered sugar. The best part? They come together with simple pantry ingredients and one bowl.
Want something chocolatey but can’t decide what to bake? These cookies have your back. They’re basically a brownie that you can grab with your hands and eat three of without anyone judging you.
Why You’ll Love These Chocolate Brownie Crinkle Cookies
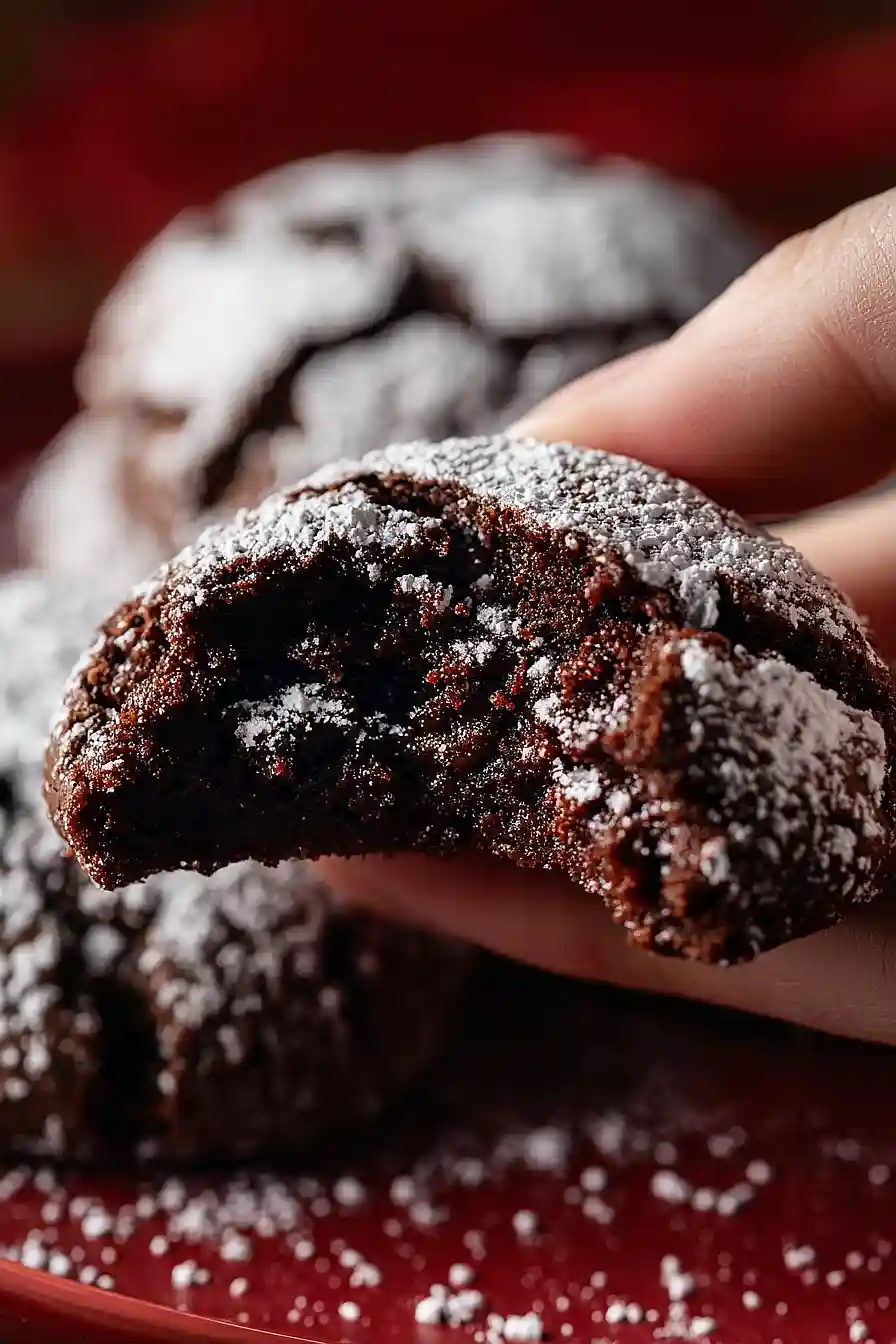
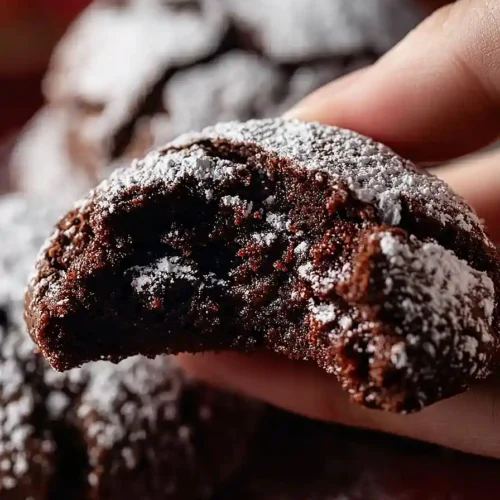
- Rich, fudgy brownie flavor – These cookies taste like your favorite brownies but in cookie form, with that perfect chewy center and crackly exterior.
- Simple pantry ingredients – You probably already have everything you need in your kitchen – no fancy chocolate or special ingredients required.
- Beautiful presentation – The powdered sugar coating creates those signature crinkles that make these cookies look bakery-worthy without any extra effort.
- Make-ahead friendly – The dough needs to chill anyway, so you can prep it ahead and bake fresh cookies whenever you want them.
- Perfect for any occasion – Whether you’re bringing them to a holiday party or just want a chocolate fix, these cookies work for everything from casual snacking to special gatherings.
What Kind of Cocoa Powder Should I Use?
For these brownie crinkle cookies, you can use either natural or Dutch-process cocoa powder, and both will give you delicious results. Natural cocoa powder has a lighter, more acidic flavor that works well with the baking powder in this recipe, while Dutch-process cocoa is darker and has a smoother, more mellow chocolate taste. If you want a really deep, dark chocolate flavor, go for the Dutch-process, but honestly, whatever you have in your pantry will work just fine. Just make sure your cocoa powder is unsweetened – sweetened cocoa mix won’t give you the right texture or flavor for these cookies.
Options for Substitutions
These cookies are pretty forgiving when it comes to swaps, so here are some options if you need them:
- All-purpose flour: You can use a 1:1 gluten-free flour blend if needed. The texture might be slightly different, but they’ll still turn out great.
- Canola oil: Any neutral oil works here – vegetable oil, melted coconut oil, or even melted butter. If using butter, let it cool slightly before mixing with the sugars.
- Brown sugar: In a pinch, you can use all granulated sugar instead, though you’ll lose a bit of that chewy texture and molasses flavor. Or make your own brown sugar by mixing 1 cup granulated sugar with 1 tablespoon molasses.
- Unsweetened cocoa powder: Dutch-process cocoa will give you a darker, richer color and slightly different flavor, but regular unsweetened cocoa works perfectly fine. Don’t substitute with hot cocoa mix as it contains sugar and milk powder.
- Eggs: For each egg, you can use 1/4 cup applesauce or a flax egg (1 tablespoon ground flaxseed mixed with 3 tablespoons water, let sit for 5 minutes). The texture will be slightly different but still delicious.
Watch Out for These Mistakes While Baking
The biggest mistake with brownie crinkle cookies is skipping the chilling step – if your dough is too warm, the cookies will spread too quickly in the oven and you’ll lose those signature cracks.
Make sure to chill the dough for at least 2 hours (or overnight) so it’s firm enough to roll into balls without sticking to your hands.
When rolling the cookies, coat them generously in granulated sugar first, then powdered sugar – doing it in this order creates those beautiful white cracks that make these cookies look so good.
Don’t overbake them either, as they should come out of the oven when the edges are set but the centers still look slightly underdone at around 10-12 minutes, which gives you that fudgy brownie texture inside.
What to Serve With Chocolate Brownie Crinkle Cookies?
These cookies are perfect alongside a cold glass of milk or a hot cup of coffee, especially if you want that classic cookie-dunking experience. I love serving them as part of a dessert spread with vanilla ice cream – you can even make ice cream sandwiches by pressing a scoop between two cookies. They’re also great on a cookie platter with other treats like sugar cookies or peanut butter cookies when you’re hosting friends or bringing something to a party. If you want to get fancy, serve them warm with a drizzle of chocolate or caramel sauce and some whipped cream on the side.
Storage Instructions
Store: Keep your brownie crinkle cookies in an airtight container at room temperature for up to 5 days. I like to layer them with parchment paper in between so they don’t stick together. They’ll stay soft and fudgy this way, which is exactly what you want!
Freeze: These cookies freeze really well for up to 3 months. You can freeze them baked or even freeze the dough balls before rolling them in sugar. If freezing the dough, just roll them in the sugars after thawing slightly, then bake as usual.
Refresh: If your cookies lose a bit of their softness after a few days, pop them in the microwave for about 10 seconds to warm them up. They’ll taste almost fresh-baked again! You can also enjoy them straight from the freezer if you like a firmer, cold cookie.
| Preparation Time | 180-1440 minutes |
| Cooking Time | 10-12 minutes |
| Total Time | 190-1452 minutes |
| Level of Difficulty | Medium |
Estimated Nutrition
Estimated nutrition for the whole recipe (without optional ingredients):
- Calories: 3400-3600
- Protein: 38-44 g
- Fat: 95-110 g
- Carbohydrates: 590-630 g
Ingredients
For the dry ingredients:
- 1/2 tsp salt
- 2 cups all-purpose flour (I use King Arthur all-purpose)
- 1 cup unsweetened cocoa powder (sifted to remove lumps)
- 2 tsp baking powder
For the wet ingredients:
- 1 cup granulated sugar
- 1 cup brown sugar (packed)
- 1 tbsp vanilla extract (or 1 tsp vanilla bean paste for deeper flavor)
- 4 large eggs (room temperature)
- 1/2 cup canola oil
For the coating:
- 1/2 cup powdered sugar (for the crinkled effect)
- 1/4 cup granulated sugar
Step 1: Prepare Dry Ingredients and Mise en Place
- 1 cup unsweetened cocoa powder
- 2 cups all-purpose flour
- 2 tsp baking powder
- 1/2 tsp salt
Sift the cocoa powder into a small bowl to remove any lumps, which ensures smooth, lump-free cookies.
In another bowl, whisk together flour, baking powder, and salt, breaking up any clumps in the brown sugar as you measure it.
Have all ingredients measured and ready before you begin mixing, as the wet ingredients will come together quickly once you start.
Step 2: Create the Chocolate Base
- 1 cup unsweetened cocoa powder
- 1 cup granulated sugar
- 1 cup brown sugar
- 1/2 cup canola oil
- 1 tbsp vanilla extract
In a large bowl, combine cocoa powder, granulated sugar, brown sugar, canola oil, and vanilla extract.
Beat with an electric mixer for about 1-2 minutes until the mixture is well combined and slightly fluffy.
The oil and sugars should emulsify slightly, creating a rich base that will help the cookies develop their signature crinkled texture.
Step 3: Incorporate Eggs for Structure
- 4 large eggs
- chocolate base mixture from Step 2
Add eggs to the chocolate mixture one at a time, beating well after each addition for about 30 seconds.
This gradual incorporation helps emulsify the eggs into the mixture rather than creating a separated, broken texture.
Room temperature eggs combine more smoothly, so take them out of the fridge about 15 minutes before you start if you remember—but don’t stress if you forget; they’ll still work fine.
Step 4: Combine Wet and Dry Ingredients
- wet chocolate mixture from Step 3
- dry ingredient mixture from Step 1
Add the dry ingredient mixture from Step 1 to the wet chocolate-egg mixture and fold together with a spatula until just combined, being careful not to overmix.
Overmixing develops too much gluten, which makes cookies tough instead of tender.
The dough should come together in a thick, fudgy consistency.
Step 5: Chill the Dough
- cookie dough from Step 4
Cover the dough tightly with plastic wrap and refrigerate for at least 3 hours, or up to overnight.
The chill time allows the flavors to develop and makes the dough easier to scoop without spreading.
You can prepare this the night before if you’d like, making the baking day much quicker.
Step 6: Prepare for Baking and Create Coating Station
- 1/4 cup granulated sugar
- 1/2 cup powdered sugar
Preheat oven to 350°F and line two baking sheets with parchment paper.
While the oven heats, place 1/4 cup granulated sugar in one shallow bowl and 1/2 cup powdered sugar in another shallow bowl.
This two-sugar coating technique is what creates the signature crinkled appearance—the granulated sugar helps with the initial texture while the powdered sugar develops cracks as the cookie bakes and spreads.
Step 7: Shape, Coat, and Bake
- chilled cookie dough from Step 5
- sugar coatings from Step 6
Remove chilled dough from refrigerator and scoop 1-inch balls using a cookie scoop or tablespoon, working quickly so the dough doesn’t warm up too much.
Roll each ball first in granulated sugar, then immediately in powdered sugar, coating all sides.
Place coated balls 2 inches apart on prepared baking sheets and bake for 10-12 minutes until the edges are set but the centers still look slightly underbaked and crackled.
Let cookies cool on the baking sheet for 10-15 minutes before transferring to a wire rack—this cooling time allows the centers to set up properly so they stay fudgy rather than becoming cake-like.
Easy Chocolate Brownie Crinkle Cookies
Ingredients
For the dry ingredients:
- 1/2 tsp salt
- 2 cups all-purpose flour (I use King Arthur all-purpose)
- 1 cup unsweetened cocoa powder (sifted to remove lumps)
- 2 tsp baking powder
For the wet ingredients:
- 1 cup granulated sugar
- 1 cup brown sugar (packed)
- 1 tbsp vanilla extract (or 1 tsp vanilla bean paste for deeper flavor)
- 4 large eggs (room temperature)
- 1/2 cup canola oil
For the coating:
- 1/2 cup powdered sugar (for the crinkled effect)
- 1/4 cup granulated sugar
Instructions
- Sift the cocoa powder into a small bowl to remove any lumps, which ensures smooth, lump-free cookies. In another bowl, whisk together flour, baking powder, and salt, breaking up any clumps in the brown sugar as you measure it. Have all ingredients measured and ready before you begin mixing, as the wet ingredients will come together quickly once you start.
- In a large bowl, combine cocoa powder, granulated sugar, brown sugar, canola oil, and vanilla extract. Beat with an electric mixer for about 1-2 minutes until the mixture is well combined and slightly fluffy. The oil and sugars should emulsify slightly, creating a rich base that will help the cookies develop their signature crinkled texture.
- Add eggs to the chocolate mixture one at a time, beating well after each addition for about 30 seconds. This gradual incorporation helps emulsify the eggs into the mixture rather than creating a separated, broken texture. Room temperature eggs combine more smoothly, so take them out of the fridge about 15 minutes before you start if you remember—but don't stress if you forget; they'll still work fine.
- Add the dry ingredient mixture from Step 1 to the wet chocolate-egg mixture and fold together with a spatula until just combined, being careful not to overmix. Overmixing develops too much gluten, which makes cookies tough instead of tender. The dough should come together in a thick, fudgy consistency.
- Cover the dough tightly with plastic wrap and refrigerate for at least 3 hours, or up to overnight. The chill time allows the flavors to develop and makes the dough easier to scoop without spreading. You can prepare this the night before if you'd like, making the baking day much quicker.
- Preheat oven to 350°F and line two baking sheets with parchment paper. While the oven heats, place 1/4 cup granulated sugar in one shallow bowl and 1/2 cup powdered sugar in another shallow bowl. This two-sugar coating technique is what creates the signature crinkled appearance—the granulated sugar helps with the initial texture while the powdered sugar develops cracks as the cookie bakes and spreads.
- Remove chilled dough from refrigerator and scoop 1-inch balls using a cookie scoop or tablespoon, working quickly so the dough doesn't warm up too much. Roll each ball first in granulated sugar, then immediately in powdered sugar, coating all sides. Place coated balls 2 inches apart on prepared baking sheets and bake for 10-12 minutes until the edges are set but the centers still look slightly underbaked and crackled. Let cookies cool on the baking sheet for 10-15 minutes before transferring to a wire rack—this cooling time allows the centers to set up properly so they stay fudgy rather than becoming cake-like.
