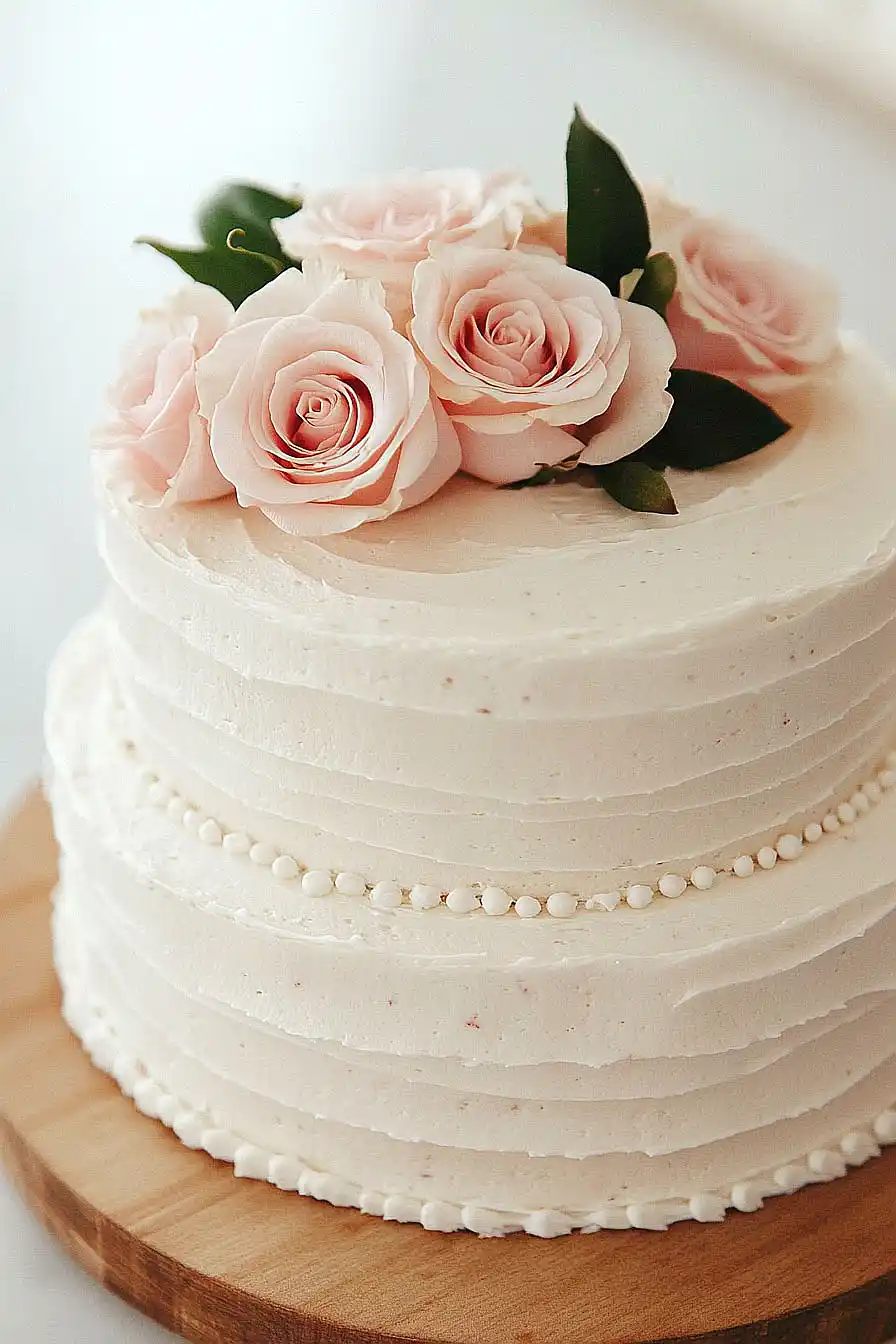
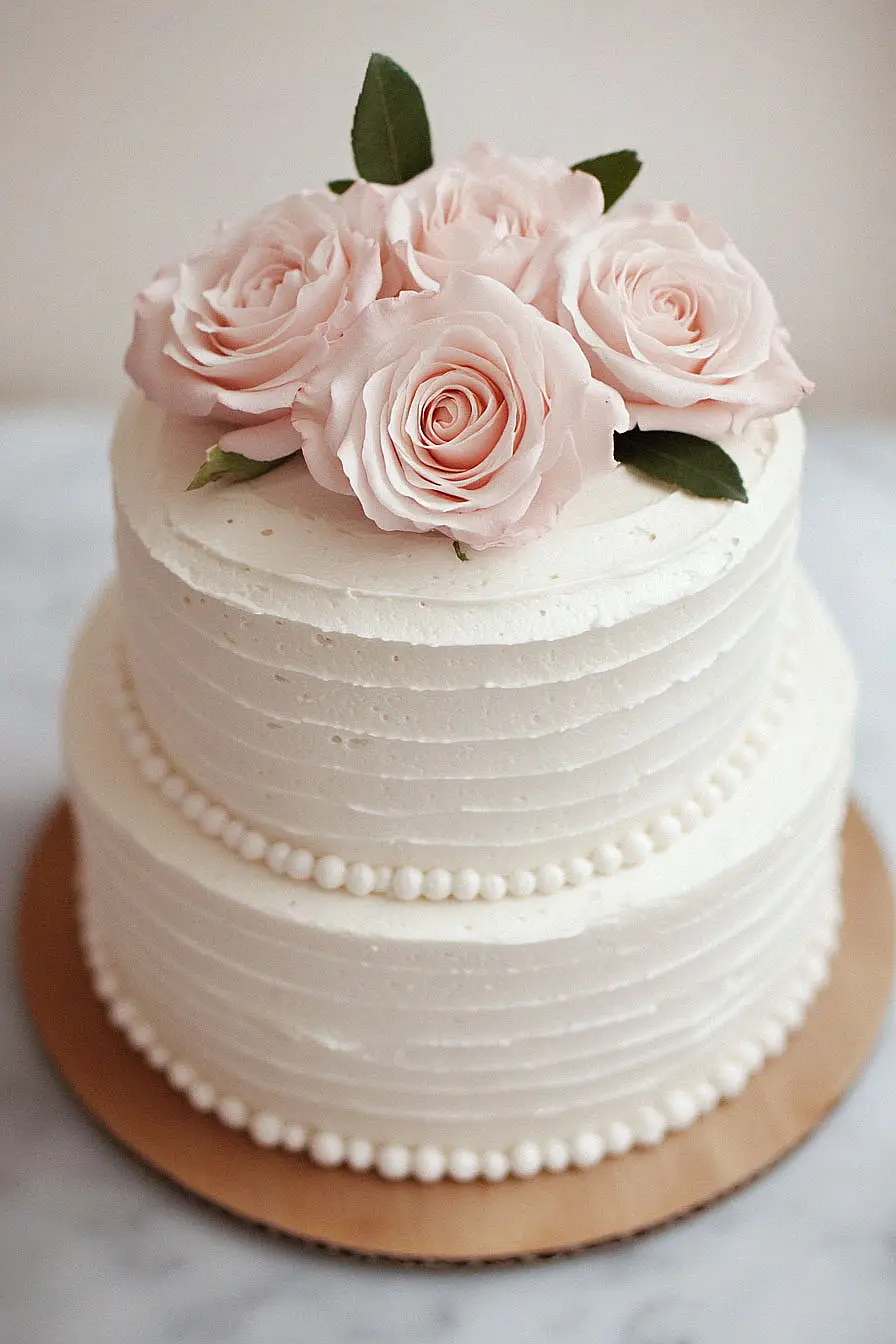
Here is my go-to strawberry wedding cake recipe, with a light, moist vanilla cake base, fresh strawberry filling, and smooth cream cheese frosting that’s perfect for any special celebration.
This cake has become my most requested dessert for bridal showers and small weddings. I often make an extra small tier just for the happy couple to take home. Nothing says “congratulations” quite like having a slice of homemade wedding cake the next day, don’t you think?
Why You’ll Love This Wedding Cake
- Professional-quality results – This recipe gives you all the techniques and ingredients needed to create a bakery-worthy wedding cake right in your own kitchen.
- Perfect texture – The combination of cake flour and sour cream creates an incredibly soft, moist cake with a tender crumb that melts in your mouth.
- Make-ahead friendly – You can bake the layers in advance and freeze them, making your wedding preparations more manageable and stress-free.
- Customizable design – The classic vanilla base pairs beautifully with any decorating style, from simple elegant to elaborate designs, letting you create the wedding cake of your dreams.
- Feeds a crowd – This recipe makes enough cake to serve a large wedding party, with generous portions for all your special guests.
What Kind of Strawberries Should I Use?
For a wedding cake, you’ll want to select fresh strawberries that are uniformly red, firm, and ripe – but not overripe. While local, in-season strawberries will give you the best flavor, standard grocery store strawberries work well too since they’ll be paired with other ingredients. Look for medium-sized berries that are bright red all the way to the top, as these tend to be sweeter and more flavorful than ones with white or green shoulders. If fresh strawberries aren’t available, you can use frozen strawberries for the filling or puree, just make sure to thaw and drain them well to avoid adding extra moisture to your cake.
Options for Substitutions
When making this special cake, some ingredients can be swapped while others are best kept as written. Here are some helpful substitutions:
- Cake flour: If you’re out of cake flour, you can make your own by replacing 2 tablespoons of all-purpose flour with 2 tablespoons of cornstarch for each cup needed. Just sift them together well.
- Sour cream: Full-fat plain Greek yogurt works great as a 1:1 replacement for sour cream. The texture and moisture will be very similar.
- Whole milk: You can use 2% milk, though the cake won’t be quite as rich. For the best results, stick with whole milk or mix half-and-half with 2% milk.
- Heavy cream: For the frosting, you can use whole milk instead of heavy cream, but you might need to use less to achieve the right consistency.
- Vanilla essence: Pure vanilla extract is best for a wedding cake, but you can use clear vanilla if you want to maintain a pure white color in the frosting.
- Butter: This is one ingredient you shouldn’t substitute – the butter creates the perfect texture and flavor that’s essential for a wedding cake. Make sure to use unsalted butter at room temperature.
Watch Out for These Mistakes While Baking
Temperature control is crucial when making a wedding cake – using cold ingredients straight from the fridge can lead to uneven mixing and a dense, heavy cake, so make sure all your dairy ingredients (eggs, milk, sour cream) are at room temperature before starting. A common mistake is incorrectly measuring the flour – always spoon it into the measuring cup and level it off with a knife rather than scooping directly from the flour bag, which can pack too much flour into your cups. The mixing order matters more than you might think – overbeating the batter after adding flour can develop too much gluten and result in a tough cake, so mix just until the ingredients are combined. For the smoothest frosting possible, make sure your butter is properly softened (but not melted) and sift your powdered sugar to avoid any lumps that could clog your piping tip or create a grainy texture.

What to Serve With Wedding Cake?
When serving wedding cake, it’s all about creating a lovely dessert experience that everyone will enjoy. Coffee and tea are must-haves – the warmth and slight bitterness of a good coffee pairs perfectly with the sweet strawberry cake, while tea offers a lighter option for guests who prefer it. For an extra special touch, set up a small ice cream station with vanilla bean ice cream, which goes wonderfully with the cake’s fruity flavors. You might also want to include some fresh strawberries on the dessert table to tie everything together and give guests a fresh option to enjoy alongside their cake.
Storage Instructions
Room Temperature: Your finished wedding cake can sit at room temperature for up to 24 hours if kept in a cool, dry place. Just make sure it’s covered with a cake dome or kept in a cake box to protect it from dust and insects. This works great if you’re making it the day before the wedding!
Refrigerate: If you need to store the cake for longer, pop it in the fridge for up to 5 days. Cover it well to prevent it from absorbing any fridge odors. The buttercream will firm up in the fridge, which actually makes it easier to transport if needed.
Freeze: You can freeze unfrosted cake layers wrapped tightly in plastic wrap and aluminum foil for up to 3 months. When you’re ready to use them, thaw overnight in the refrigerator and bring to room temperature before frosting. The completed cake with frosting can also be frozen for up to a month – just place it in the freezer until the frosting is firm, then wrap well.
Serve: For the best taste and texture, let a refrigerated cake sit at room temperature for about 30 minutes before serving. This allows the buttercream to soften and the cake to reach the perfect temperature for enjoying.
| Preparation Time | 30-45 minutes |
| Cooking Time | 23-26 minutes |
| Total Time | 53-71 minutes |
| Level of Difficulty | Medium |
Estimated Nutrition
Estimated nutrition for the whole recipe (without optional ingredients):
- Calories: 7000-8000
- Protein: 70-90 g
- Fat: 350-400 g
- Carbohydrates: 900-1000 g
Ingredients
- – cups of cake flour, spooned and leveled
- – 1.38 teaspoons of salt
- – 1 3/4 teaspoons of baking powder
- – 1 teaspoon of baking soda
- – cups of unsalted butter, softened
- – 3 cups of regular sugar
- – 3 large eggs
- – 2 extra egg whites, brought to room temperature
- – 1 tablespoon of pure vanilla essence
- – 1 1/4 cups of full-fat sour cream, at room temperature
- – 1 1/4 cups of whole milk, at room temperature
- – more cups of cake flour, spooned and leveled
- – 3 1/2 cups of unsalted butter, softened
- – 1 large egg
- – 1 additional egg white, at room temperature
- – 3 teaspoons of pure vanilla essence
- – 13 cups of powdered sugar
- – 6 tablespoons of heavy cream, or whole milk
- – additional teaspoons of pure vanilla essence
- – 1/4 cup of whole milk, or heavy cream
- – additional salt to taste
Step 1: Prepare and Preheat
Before you start, make sure to watch the video tutorial, read the entire blog post, and review the recipe notes thoroughly.
Gather and prepare the recommended special tools specified in your resources to ensure a smooth baking process.
Preheat your oven to 350°F (177°C).
Grease three 9×2 inch round cake pans, line each with parchment paper rounds, and then grease the parchment paper to prevent the cakes from sticking.
Step 2: Prepare the Cake Batter
In a bowl, whisk together the cake flour, baking powder, baking soda, and salt.
Set the dry mixture aside for later use.
In a mixer, beat the softened butter and granulated sugar on high speed until the mixture is smooth and creamy, for about 3 minutes.
Be sure to scrape down the sides of the bowl as necessary.
Incorporate the 3 eggs, 2 egg whites, and vanilla extract, and beat on high speed until well combined, around 2 minutes.
Mix in the sour cream, followed by the dry ingredients on low speed until just incorporated.
While the mixer is on low, slowly pour in the milk and mix until the batter is even.
Give a final whisk by hand to make sure there are no lumps.
Step 3: Divide and Bake the Cakes
Carefully pour the prepared batter evenly into the three prepared cake pans.
Place the pans in the preheated oven and bake for 23-26 minutes.
To check for doneness, insert a toothpick into the center of the cakes; if it comes out clean, the cakes are done.
Allow the cakes to cool completely in their pans on a wire rack to maintain their structural integrity.
Step 4: Final Preparations
While the cakes are cooling, you can plan to prepare your frosting and any additional decorations or fillings you desire.
Once the cakes have cooled, you can proceed with assembling and frosting your cake, keeping in mind any specific techniques or details mentioned in your recipe notes.

How much flor? No amount shown!