If you ask me, maple and pecan is one of those flavor combinations that just works.
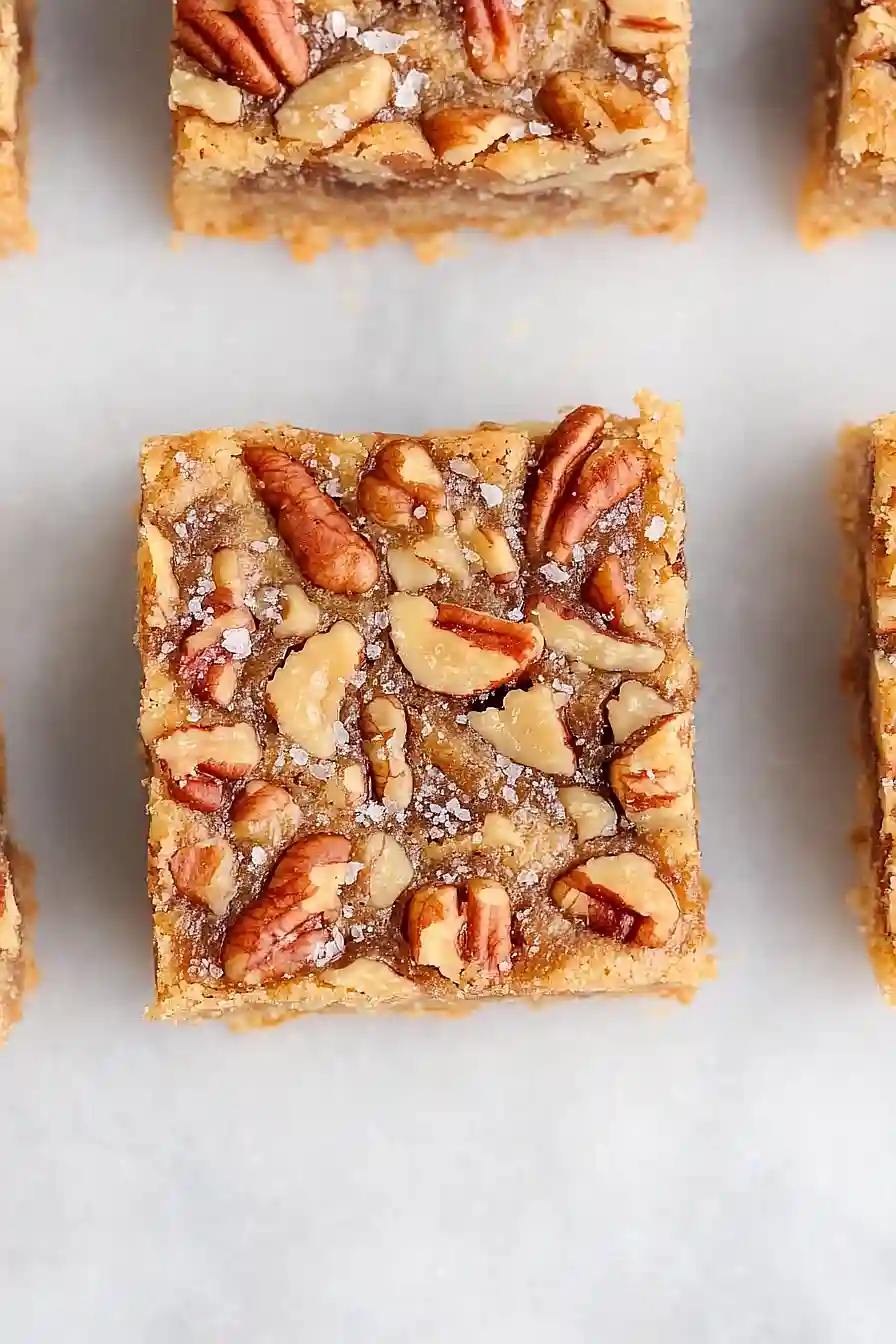
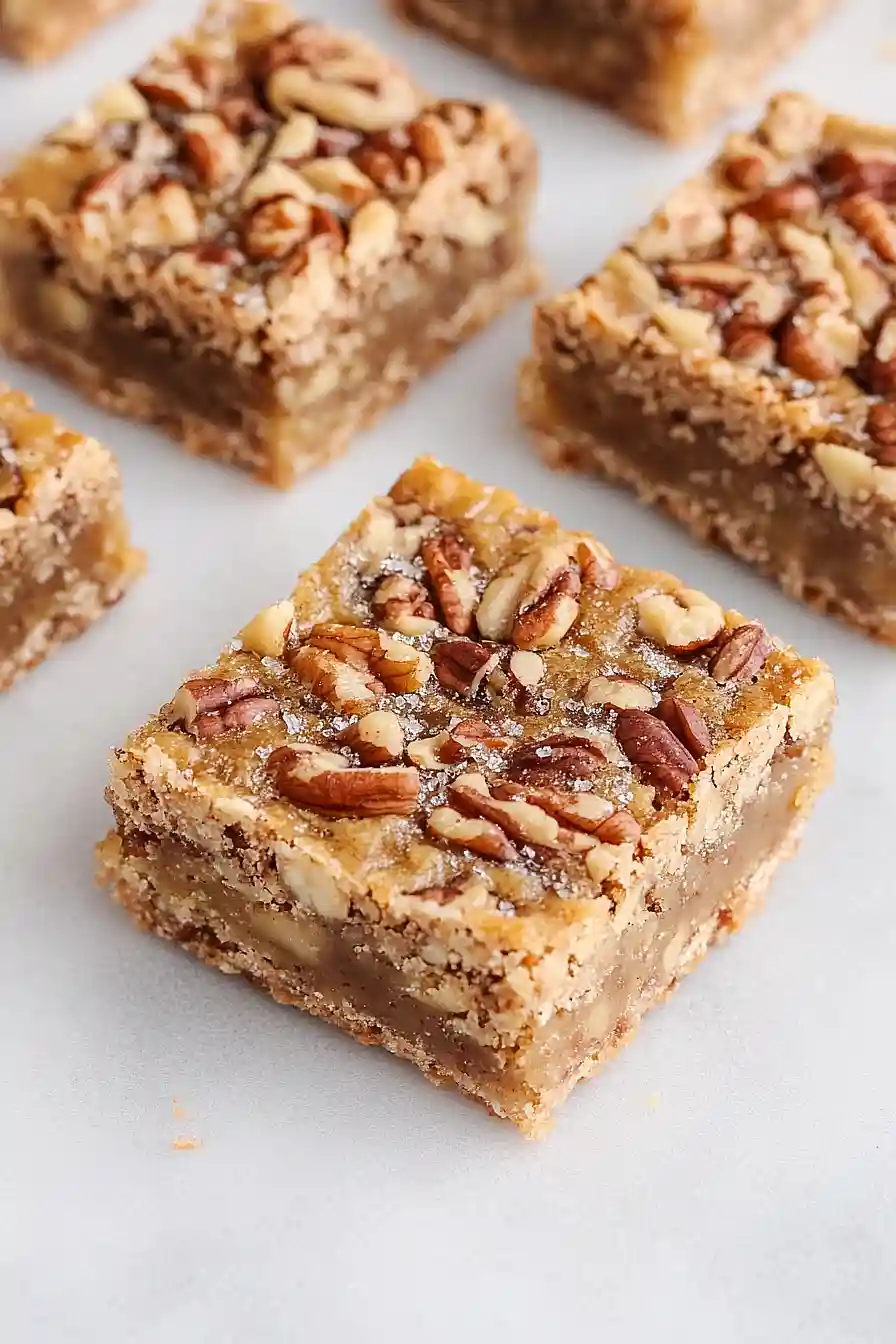
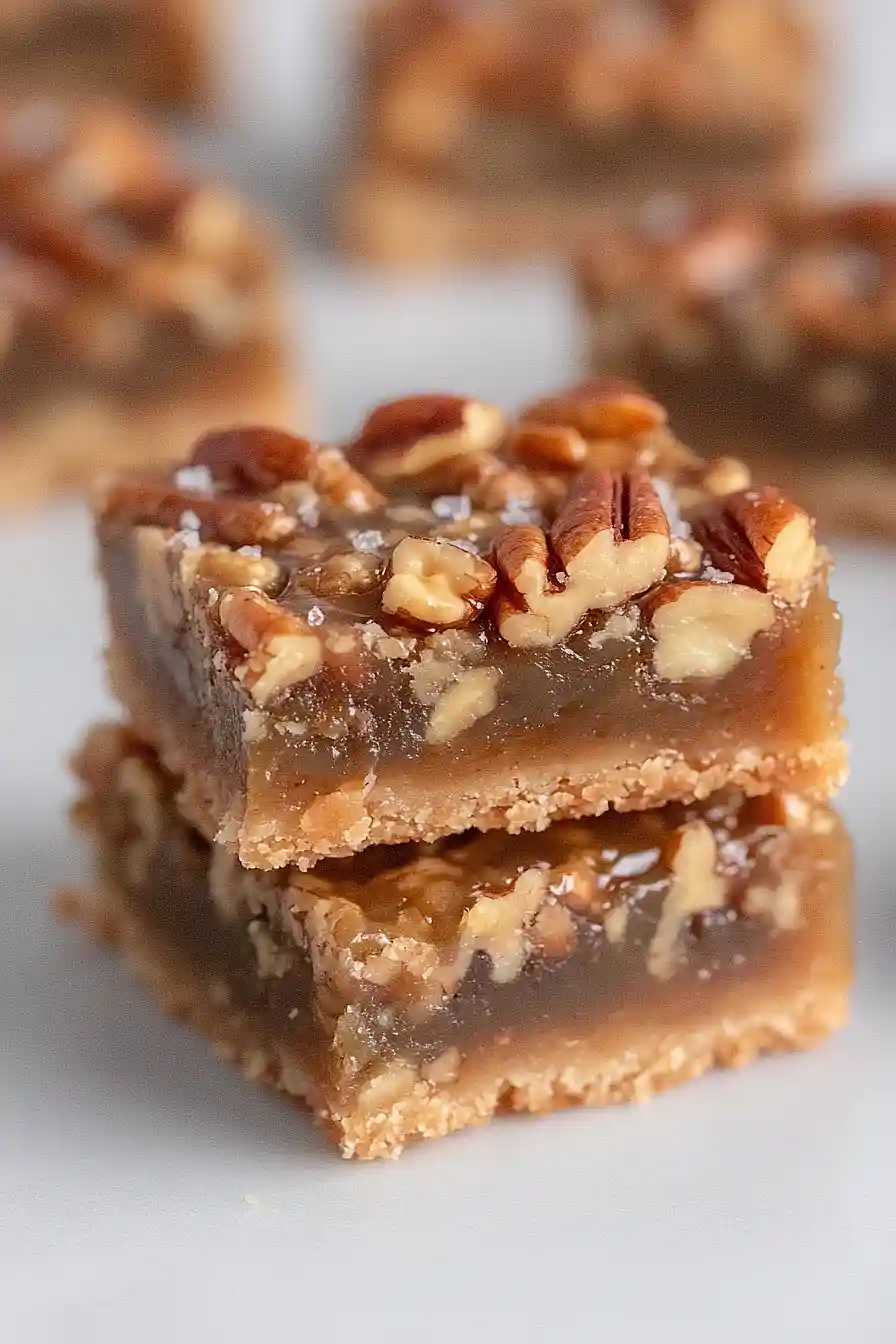
These salted maple pecan bars are the kind of treat that disappears fast at potlucks and bake sales. The sweet maple filling sits on top of a buttery shortbread crust, while toasted pecans add that perfect crunch.
A sprinkle of flaky sea salt on top balances out all that sweetness and makes each bite even better. The bars slice clean and hold together well, so they’re great for packing in lunch boxes or serving at parties.
They’re rich enough to satisfy any sweet tooth but not so heavy that you can’t sneak a second piece.
Why You’ll Love These Salted Maple Pecan Bars
- Perfect sweet and salty balance – The combination of rich maple syrup, toasted pecans, and flaky salt creates an irresistible flavor that hits all the right notes.
- Make-ahead friendly – These bars actually taste better the next day and can be stored for several days, making them perfect for parties or meal prep.
- Impressive but simple – They look like they came from a fancy bakery, but the recipe is straightforward enough for home bakers of any skill level.
- Great for sharing – One batch makes plenty of bars, so they’re perfect for potlucks, bake sales, or bringing to the office.
- Real maple flavor – Using pure maple syrup instead of artificial flavoring gives these bars an authentic, rich taste that maple lovers will appreciate.
What Kind of Pecans Should I Use?
For these bars, you’ll want to use pecan halves rather than pieces since they give you more control over the final texture when you chop them yourself. Fresh pecans will always taste better than older ones, so give them a quick taste test before using – they should be sweet and buttery, not bitter or stale. Make sure to toast your pecans well before chopping them, as this brings out their natural oils and adds a deeper, nuttier flavor that really makes these bars shine. You can toast them in a 350°F oven for about 8-10 minutes, or until they smell fragrant and look slightly golden.
Options for Substitutions
These bars are pretty forgiving when it comes to swaps, so here’s what you can change up:
- Pure maple syrup: Real maple syrup is key here – don’t substitute with pancake syrup as it won’t give you the same rich flavor. If you only have a lighter grade, that works too, though the maple taste will be milder.
- Pecan halves: Walnuts or chopped almonds make great substitutes if pecans aren’t available. Just make sure to toast them first for the best flavor and crunch.
- Heavy cream: You can use half-and-half or even whole milk in place of heavy cream, though the filling might be slightly less rich.
- Apple cider vinegar: White vinegar or lemon juice work just as well here – you just need that little bit of acid to balance the sweetness.
- Brown sugar: Light or dark brown sugar both work fine. Dark gives a deeper molasses flavor, while light keeps things milder. You can even use coconut sugar for a slightly different taste.
- Flaky salt: Regular kosher salt works if you don’t have flaky salt, just use a lighter hand since it’s more concentrated than the flaky stuff.
Watch Out for These Mistakes While Baking
The biggest mistake with pecan bars is underbaking the crust, which leads to a soggy bottom layer – make sure to bake your shortbread base until it’s lightly golden and set before adding the filling. Another common error is not toasting your pecans properly, so toast them in a 350°F oven for 8-10 minutes until fragrant and golden to bring out their rich, nutty flavor. Don’t skip letting the bars cool completely before cutting, as the filling needs time to set properly or you’ll end up with a gooey mess when you try to slice them. For clean cuts, use a sharp knife wiped between each slice, and if you want extra indulgent bars, drizzle a bit more maple syrup on top just before serving with that flaky salt garnish.
What to Serve With Salted Maple Pecan Bars?
These rich, sweet bars are perfect on their own, but they pair beautifully with a hot cup of coffee or black tea to balance out all that maple goodness. I love serving them alongside vanilla ice cream for an extra indulgent dessert, especially when the bars are still slightly warm from the oven. They also make a great addition to any fall dessert spread – try them with apple cider or even a glass of cold milk for a cozy afternoon treat. For something a bit different, these bars are wonderful crumbled over plain Greek yogurt for breakfast or as an afternoon snack.
Storage Instructions
Store: These maple pecan bars keep really well at room temperature in an airtight container for up to a week. I like to cut them into squares and layer them between parchment paper so they don’t stick together. The flavors actually get even better after a day or two!
Refrigerate: If your kitchen is warm or you want them to last longer, pop them in the fridge where they’ll stay fresh for up to 2 weeks. They get a bit firmer when cold, but I actually love eating them straight from the fridge – the texture is almost like a chewy candy bar.
Freeze: These bars freeze like a dream for up to 3 months. Wrap individual pieces in plastic wrap or store them in a freezer container with parchment between layers. Let them thaw at room temperature for about 30 minutes before serving, or enjoy them partially frozen for a fun treat.
| Preparation Time | 20-30 minutes |
| Cooking Time | 40-50 minutes |
| Total Time | 60-80 minutes |
| Level of Difficulty | Medium |
Estimated Nutrition
Estimated nutrition for the whole recipe (without optional ingredients):
- Calories: 3050-3250
- Protein: 30-35 g
- Fat: 210-225 g
- Carbohydrates: 335-355 g
Ingredients
For the crust:
- 8 tbsp unsalted butter, at room temperature (113g)
- 1/2 tsp kosher salt (2g)
- 1/3 cup powdered sugar (40g)
- 1 1/2 tsp vanilla extract
- 1 cup all-purpose flour (125g)
For the filling:
- 5 1/3 tbsp unsalted butter (75g)
- 1/2 cup pure maple syrup, amber or dark (120g)
- 1/2 cup packed brown sugar, dark or light (110g)
- 1/2 tsp kosher salt (2g)
- 1 1/2 tsp vanilla extract
- 2 tbsp heavy cream (30g)
- 2 tsp apple cider vinegar (10g)
- 2 large eggs
- 1 tbsp all-purpose flour (12g)
- 1 1/4 cups pecan halves, toasted and chopped (150g)
- Flaky salt, for finishing
Step 1: Prepare the Pan and Preheat the Oven
Preheat your oven to 350°F (175°C) and position a rack in the middle.
Line an 8×8-inch square metal baking pan with foil, dull side up, leaving a couple of inches of overhang on two sides.
This will make it much easier to lift out the bars for slicing later.
Step 2: Make the Shortbread Crust
- 8 tbsp unsalted butter, at room temperature (113g)
- 1/3 cup powdered sugar (40g)
- 1/2 tsp kosher salt (2g)
- 1 1/2 tsp vanilla extract
- 1 cup all-purpose flour (125g)
In a medium bowl, combine 8 tablespoons unsalted butter at room temperature, 1/3 cup powdered sugar, and 1/2 teaspoon kosher salt.
Using an electric handheld mixer, beat on low speed to mix, then increase to medium and continue beating until smooth and well combined, about 2-3 minutes.
Scrape down the sides as needed.
Beat in 1 1/2 teaspoons vanilla extract.
Add 1 cup all-purpose flour and mix on low until a crumbly dough forms.
Fold the dough with a spatula to make sure there are no dry spots.
Scatter the dough across the bottom of the prepared pan, then press it evenly using the back of a measuring cup or a small glass (use parchment or plastic wrap if it sticks).
Chill the crust in the fridge for 10 minutes, then prick all over with a fork.
Step 3: Bake and Cool the Crust
- shortbread dough (from Step 2)
Bake the chilled crust for 15-20 minutes, until the surface appears matte and the edges are starting to color.
While still warm, gently press down on the crust with the back of a glass to compress it.
Allow the crust to cool on a wire rack while you prepare the filling.
Don’t turn off the oven, you’ll need it again soon.
Step 4: Make the Maple Pecan Filling
- 5 1/3 tbsp unsalted butter (75g)
- 1/2 cup pure maple syrup, amber or dark (120g)
- 1/2 cup packed brown sugar, dark or light (110g)
- 1/2 tsp kosher salt (2g)
- 1 1/2 tsp vanilla extract
- 2 tbsp heavy cream (30g)
- 2 tsp apple cider vinegar (10g)
- 2 large eggs
- 1 tbsp all-purpose flour (12g)
- 1 1/4 cups pecan halves, toasted and chopped (150g)
To make the filling, place 5 1/3 tablespoons unsalted butter in a light-colored saucepan over medium-low heat.
Once melted, increase the heat slightly and cook, stirring frequently, until the butter foams, turns clear gold, and starts to brown, about 5-7 minutes—watch carefully to prevent burning.
Carefully pour in 1/2 cup maple syrup, reduce heat to low, and stir until the syrup thickens and darkens slightly, about 2 minutes.
Remove from the heat and scrape the mixture into a large bowl.
Let cool for 5-10 minutes.
Then whisk in 1/2 cup packed brown sugar, 1/2 teaspoon kosher salt, 1 1/2 teaspoons vanilla extract, 2 tablespoons heavy cream, 2 teaspoons apple cider vinegar, 2 large eggs, and 1 tablespoon all-purpose flour until smooth.
Fold in 1 1/4 cups toasted and roughly chopped pecan halves.
I like to toast the pecans beforehand for even deeper flavor—it makes a big difference!
Step 5: Bake the Bars
- baked crust (from Step 3)
- maple pecan filling (from Step 4)
- flaky salt, for finishing
Pour the maple pecan filling over the baked and cooled crust.
Bake for about 25 minutes, until the filling is browned and appears set with just a slight jiggle in the center.
Remove from the oven and sprinkle flaky salt over the top while it’s still hot.
Let the bars cool completely at room temperature.
For the cleanest slices, I find it best to refrigerate the bars before cutting.
Step 6: Slice and Serve the Bars
Once the bars are fully cooled and chilled, use the foil overhang to lift them out of the pan.
With a serrated knife, cut them into your desired size and shape.
Serve the bars slightly chilled or at room temperature for the best texture.
Store any leftovers in an airtight container for up to 5 days, or freeze for longer storage.
Enjoy!
Classic Salted Maple Pecan Bars
Ingredients
For the crust:
- 8 tbsp unsalted butter, at room temperature (113g)
- 1/2 tsp kosher salt (2g)
- 1/3 cup powdered sugar (40g)
- 1 1/2 tsp vanilla extract
- 1 cup all-purpose flour (125g)
For the filling:
- 5 1/3 tbsp unsalted butter (75g)
- 1/2 cup pure maple syrup, amber or dark (120g)
- 1/2 cup packed brown sugar, dark or light (110g)
- 1/2 tsp kosher salt (2g)
- 1 1/2 tsp vanilla extract
- 2 tbsp heavy cream (30g)
- 2 tsp apple cider vinegar (10g)
- 2 large eggs
- 1 tbsp all-purpose flour (12g)
- 1 1/4 cups pecan halves, toasted and chopped (150g)
- flaky salt, for finishing
Instructions
- Preheat your oven to 350°F (175°C) and position a rack in the middle. Line an 8x8-inch square metal baking pan with foil, dull side up, leaving a couple of inches of overhang on two sides. This will make it much easier to lift out the bars for slicing later.
- In a medium bowl, combine 8 tablespoons unsalted butter at room temperature, 1/3 cup powdered sugar, and 1/2 teaspoon kosher salt. Using an electric handheld mixer, beat on low speed to mix, then increase to medium and continue beating until smooth and well combined, about 2-3 minutes. Scrape down the sides as needed. Beat in 1 1/2 teaspoons vanilla extract. Add 1 cup all-purpose flour and mix on low until a crumbly dough forms. Fold the dough with a spatula to make sure there are no dry spots. Scatter the dough across the bottom of the prepared pan, then press it evenly using the back of a measuring cup or a small glass (use parchment or plastic wrap if it sticks). Chill the crust in the fridge for 10 minutes, then prick all over with a fork.
- Bake the chilled crust for 15-20 minutes, until the surface appears matte and the edges are starting to color. While still warm, gently press down on the crust with the back of a glass to compress it. Allow the crust to cool on a wire rack while you prepare the filling. Don't turn off the oven, you'll need it again soon.
- To make the filling, place 5 1/3 tablespoons unsalted butter in a light-colored saucepan over medium-low heat. Once melted, increase the heat slightly and cook, stirring frequently, until the butter foams, turns clear gold, and starts to brown, about 5-7 minutes—watch carefully to prevent burning. Carefully pour in 1/2 cup maple syrup, reduce heat to low, and stir until the syrup thickens and darkens slightly, about 2 minutes. Remove from the heat and scrape the mixture into a large bowl. Let cool for 5-10 minutes. Then whisk in 1/2 cup packed brown sugar, 1/2 teaspoon kosher salt, 1 1/2 teaspoons vanilla extract, 2 tablespoons heavy cream, 2 teaspoons apple cider vinegar, 2 large eggs, and 1 tablespoon all-purpose flour until smooth. Fold in 1 1/4 cups toasted and roughly chopped pecan halves. I like to toast the pecans beforehand for even deeper flavor—it makes a big difference!
- Pour the maple pecan filling over the baked and cooled crust. Bake for about 25 minutes, until the filling is browned and appears set with just a slight jiggle in the center. Remove from the oven and sprinkle flaky salt over the top while it's still hot. Let the bars cool completely at room temperature. For the cleanest slices, I find it best to refrigerate the bars before cutting.
- Once the bars are fully cooled and chilled, use the foil overhang to lift them out of the pan. With a serrated knife, cut them into your desired size and shape. Serve the bars slightly chilled or at room temperature for the best texture. Store any leftovers in an airtight container for up to 5 days, or freeze for longer storage. Enjoy!

