Finding a cookie recipe that looks just as impressive as it tastes can be tricky, especially when you want something that feels special enough for celebrations but easy enough for a random Tuesday afternoon. Plus, cookies that stay soft and chewy for days without drying out? That’s the dream we’re all chasing.
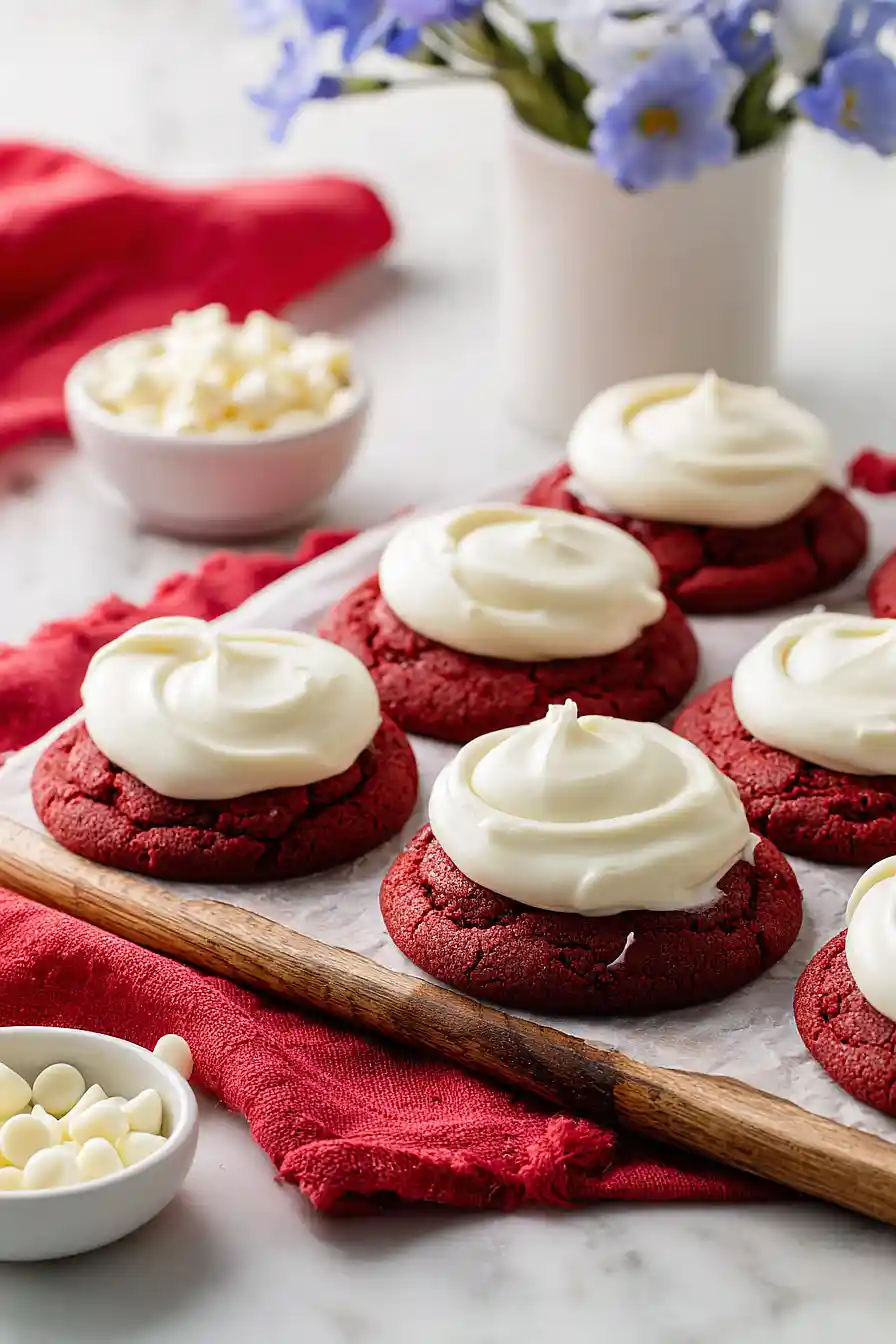
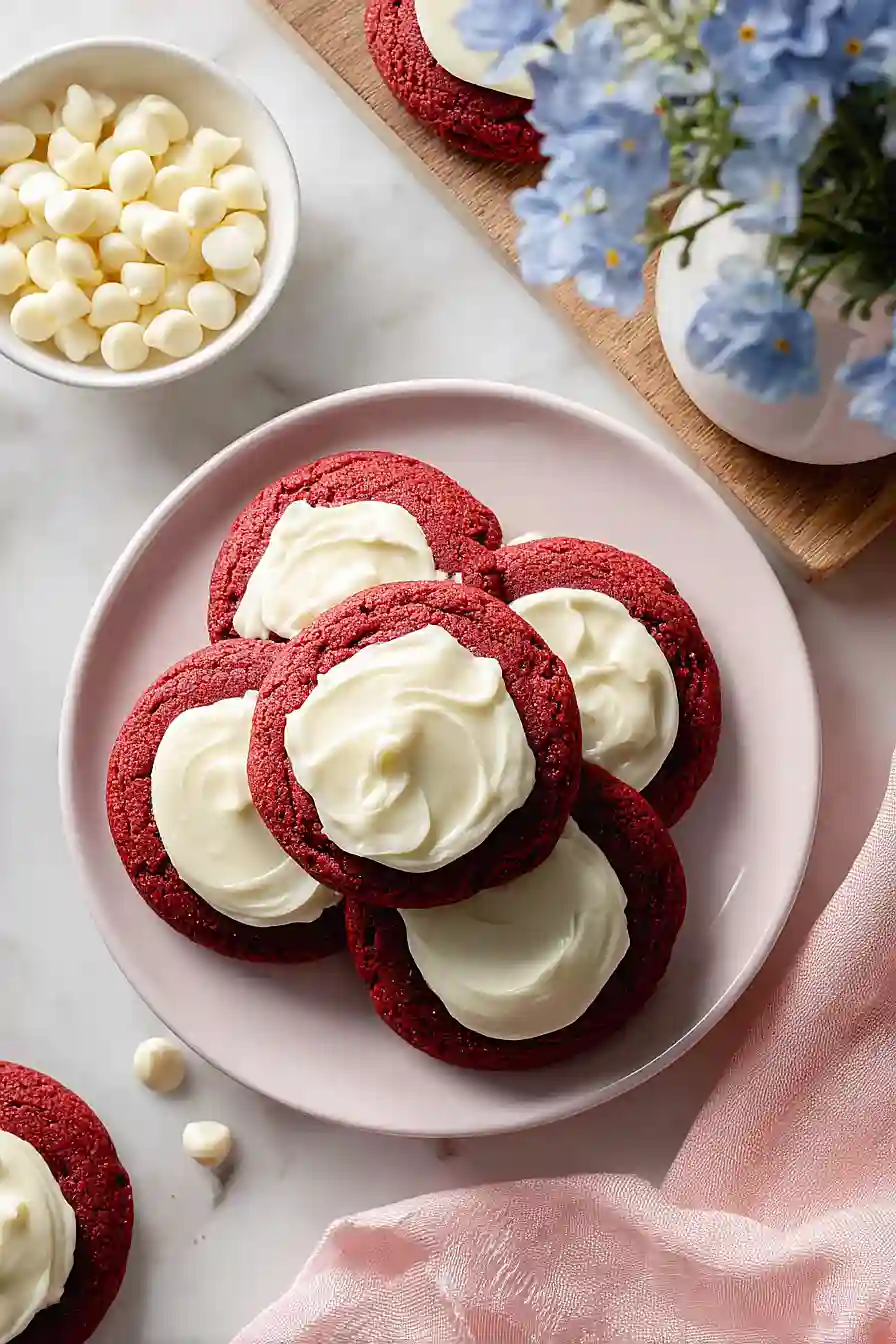
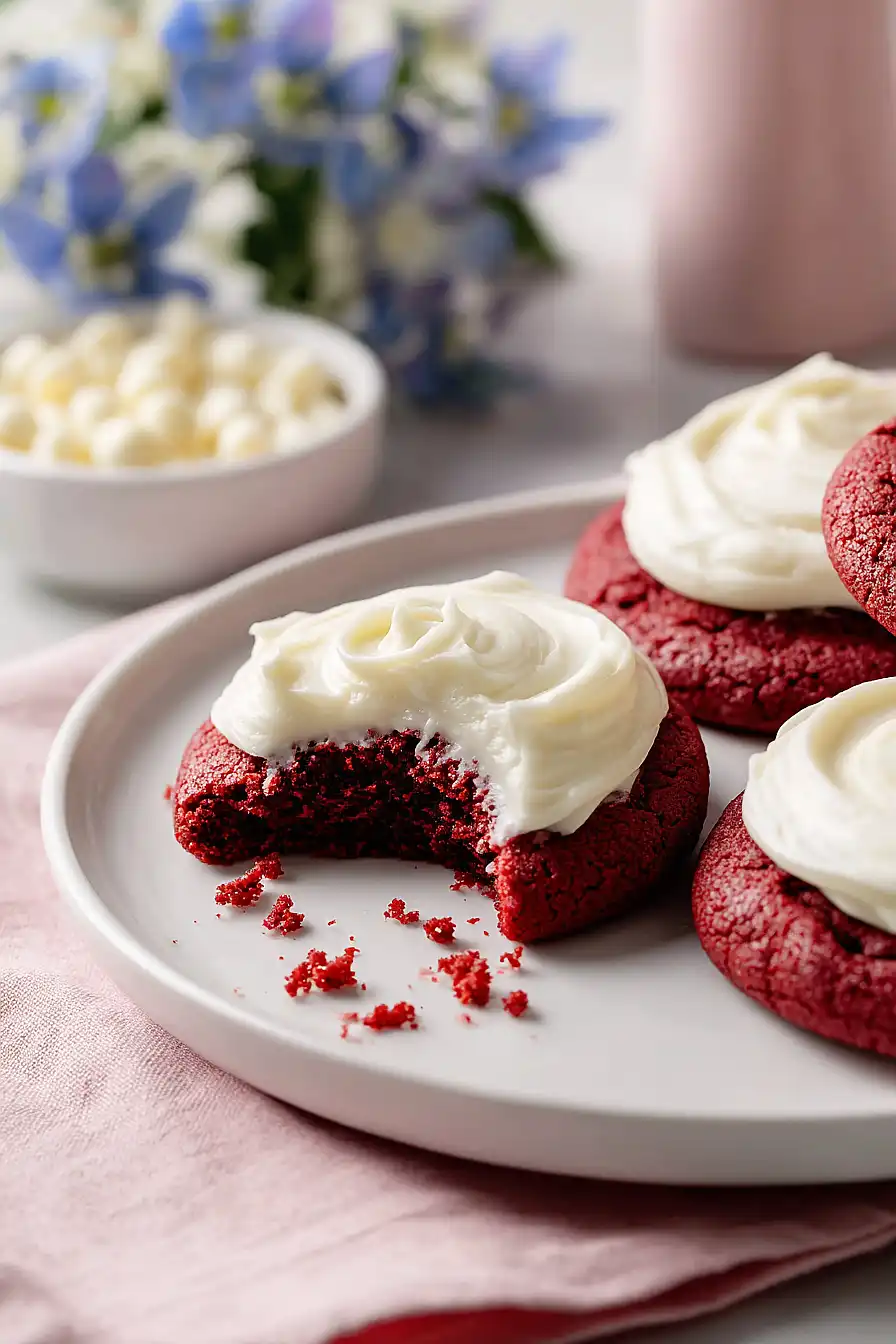
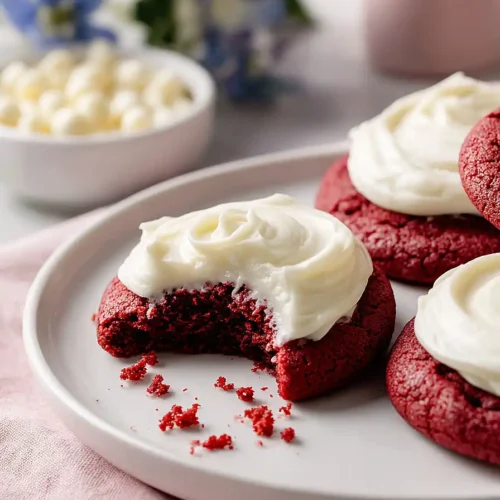
That’s exactly why these red velvet cookies with cream cheese frosting are such a winner: they’ve got that gorgeous red color everyone loves, they’re wonderfully soft and cake-like, and the tangy cream cheese frosting takes them from good to absolutely incredible.
Why You’ll Love These Red Velvet Cookies
- Quick and easy to make – These cookies come together in under an hour, making them perfect for last-minute gatherings or when you’re craving something sweet without spending all day in the kitchen.
- Crowd-pleasing flavor – The classic red velvet taste with tangy cream cheese frosting is always a hit at parties, potlucks, or as a special treat for your family.
- Simple ingredients – You probably already have most of these pantry staples on hand, so you can whip up a batch whenever the mood strikes.
- Fun and festive – The bright red color makes these cookies perfect for holidays like Valentine’s Day or Christmas, but they’re delicious enough to enjoy any time of year.
What Kind of Cream Cheese Should I Use?
For the frosting on these red velvet cookies, you’ll want to use full-fat brick-style cream cheese, not the spreadable kind that comes in a tub. The spreadable versions have added ingredients that make them softer, which means your frosting won’t hold its shape as well and might end up too runny. Make sure your cream cheese is at room temperature before you start mixing – this usually takes about 30 minutes on the counter. Cold cream cheese will give you a lumpy frosting that’s harder to spread smoothly on your cookies, so a little patience here really pays off.
Options for Substitutions
These cookies are pretty forgiving when it comes to swaps, so here are some options if you’re missing an ingredient:
- Red food coloring: If you want to skip the artificial dye, you can use beet powder or natural red food coloring instead. Keep in mind you’ll need about 2-3 tablespoons of beet powder to get a similar color, though it won’t be quite as bright. Or just leave it out completely for chocolate cookies with cream cheese frosting.
- Cocoa powder: Dutch-process cocoa will give you a richer, darker color, while natural cocoa powder works just fine too. Either one will do the job here.
- Butter: You can use margarine or vegetable shortening in place of butter for the cookies, though the flavor won’t be quite as rich. For the frosting, stick with real butter if possible since it really makes a difference in taste.
- Cream cheese: The cream cheese is pretty important for that classic frosting, so I’d recommend keeping it. Make sure it’s at room temperature so it mixes smoothly without lumps.
- Vanilla essence: Vanilla extract works the same way as vanilla essence. If you’re out of both, try almond extract for a different but tasty twist – just use half the amount since it’s stronger.
Watch Out for These Mistakes While Baking
The biggest mistake you can make with red velvet cookies is overbaking them – they should look slightly underdone when you pull them out at 10-11 minutes, as they’ll continue to firm up while cooling and stay soft and chewy instead of turning into hockey pucks.
Another common error is frosting the cookies while they’re still warm, which will cause your cream cheese frosting to melt and slide right off, so be patient and wait the full 30 minutes for them to cool completely.
Don’t skip the step of letting your butter and cream cheese come to room temperature before making the frosting – cold ingredients will give you a lumpy, difficult-to-spread mess instead of smooth, creamy frosting.
Finally, resist the urge to add extra red food coloring thinking it’ll make your cookies more vibrant, since too much can actually give them a bitter taste and an artificial flavor.
What to Serve With Red Velvet Cookies?
These cookies are pretty rich and sweet on their own, so they pair perfectly with a cold glass of milk or a hot cup of coffee. If you’re serving them at a party or gathering, set them out alongside some fresh strawberries or raspberries to balance out the sweetness. You could also make them part of a dessert spread with vanilla ice cream or serve them with hot chocolate for an extra indulgent treat. For a fun presentation, stack a few cookies on a plate with some whipped cream on the side for dipping.
Storage Instructions
Store: Keep your frosted red velvet cookies in an airtight container in the fridge for up to 5 days. The cream cheese frosting needs to stay cold, so don’t leave them out on the counter for too long. If you’re stacking them, put a piece of parchment paper between layers so the frosting doesn’t stick.
Freeze: You can freeze the unfrosted cookies for up to 3 months in a freezer-safe container or bag. I like to freeze them this way and then frost them fresh when I’m ready to serve. If you do freeze frosted cookies, just know the frosting texture might change a bit when thawed.
Serve: Let refrigerated cookies sit at room temperature for about 10 minutes before serving so the frosting softens up a bit. If you froze unfrosted cookies, thaw them completely and then add your cream cheese frosting right before you’re ready to enjoy them.
| Preparation Time | 40-50 minutes |
| Cooking Time | 10-15 minutes |
| Total Time | 50-65 minutes |
| Level of Difficulty | Medium |
| Servings | 30 cookies |
Estimated Nutrition
Estimated nutrition for the whole recipe (without optional ingredients):
- Calories: 3100-3400
- Protein: 22-28 g
- Fat: 135-150 g
- Carbohydrates: 430-470 g
Ingredients
For the cookies:
- 2 1/4 cups flour (I always use King Arthur all-purpose flour)
- 1/4 cup cocoa powder (sifted to remove lumps for a smoother batter)
- 1 tsp baking soda
- 1/4 tsp baking powder
- 1/2 tsp salt
- 1/2 cup + 1 tbsp butter (room temperature, about 70°F)
- 1 cup sugar
- 1 egg
- 2 tsp vanilla essence
- 1 tbsp red food coloring (liquid or gel for that classic vibrant look)
For the frosting:
- 4 oz cream cheese (I prefer Philadelphia brand for the best consistency)
- 1/4 cup butter (softened to room temperature for easier mixing)
- 2 cups powdered sugar
- 1 1/2 tsp vanilla essence
- 1 pinch salt
Step 1: Prepare Mise en Place and Preheat
- 2 1/4 cups flour
- 1/4 cup cocoa powder
- 1 tsp baking soda
- 1/4 tsp baking powder
- 1/2 tsp salt
Preheat your oven to 350°F and line a baking sheet with parchment paper.
While the oven heats, sift together the flour, cocoa powder, baking soda, baking powder, and salt in a medium bowl—sifting removes lumps and aerates the dry ingredients for a smoother batter.
Set this dry mixture aside.
Ensure your butter for the dough is at room temperature (about 70°F) so it creams properly with the sugar.
Step 2: Cream Butter and Sugar, Then Build the Cookie Dough
- 1/2 cup + 1 tbsp butter
- 1 cup sugar
- 1 egg
- 2 tsp vanilla essence
- 1 tbsp red food coloring
- dry ingredient mixture from Step 1
Beat the 1/2 cup + 1 tbsp room-temperature butter and sugar together for 2-3 minutes until light and fluffy—this incorporation of air helps the cookies rise and gives them a tender crumb.
Add the egg and beat until fully combined, then stir in the vanilla essence and red food coloring until the mixture is evenly colored.
Gently fold in the dry ingredient mixture from Step 1 until just combined; avoid overmixing, which can make cookies tough.
Step 3: Shape and Bake the Cookies
- cookie dough from Step 2
Using a cookie scoop or your hands, shape the dough from Step 2 into 1-inch balls and place them about 2 inches apart on your prepared baking sheet.
Gently flatten each ball with the bottom of a glass or your palm to about 1/4-inch thickness.
Bake for 10-11 minutes until the edges are just set but the centers still have a slight give—the cookies will firm up as they cool.
Step 4: Cool the Cookies
Let the baked cookies cool on the baking sheet for 5 minutes to firm up slightly, then transfer them to a wire cooling rack for about 30 minutes until completely cooled.
I find that this two-stage cooling prevents them from breaking apart while still allowing air circulation for even cooling.
Step 5: Make the Cream Cheese Frosting
- 4 oz cream cheese
- 1/4 cup butter
- 2 cups powdered sugar
- 1 1/2 tsp vanilla essence
- 1 pinch salt
While the cookies cool, beat the softened cream cheese and 1/4 cup room-temperature butter together until smooth and creamy—this usually takes about 1-2 minutes.
I always use Philadelphia brand cream cheese for the best consistency and flavor.
Gradually add the powdered sugar, vanilla essence, and salt, then beat for another 2 minutes until light and fluffy.
The frosting should be spreadable but hold its shape.
Step 6: Frost and Finish the Cookies
- cooled cookies from Step 4
- cream cheese frosting from Step 5
Once the cookies from Step 4 are completely cool, spread or pipe the frosting from Step 5 onto each cookie.
For a classic look, I like to use a small offset spatula to create a slight dome of frosting, but you can be as generous or minimal as you prefer.
Serve immediately or store in an airtight container.
Classic Red Velvet Cookies with Cream Cheese Frosting
Ingredients
For the cookies::
- 2 1/4 cups flour (I always use King Arthur all-purpose flour)
- 1/4 cup cocoa powder (sifted to remove lumps for a smoother batter)
- 1 tsp baking soda
- 1/4 tsp baking powder
- 1/2 tsp salt
- 1/2 cup + 1 tbsp butter (room temperature, about 70°F)
- 1 cup sugar
- 1 egg
- 2 tsp vanilla essence
- 1 tbsp red food coloring (liquid or gel for that classic vibrant look)
For the frosting::
- 4 oz cream cheese (I prefer Philadelphia brand for the best consistency)
- 1/4 cup butter (softened to room temperature for easier mixing)
- 2 cups powdered sugar
- 1 1/2 tsp vanilla essence
- 1 pinch salt
Instructions
- Preheat your oven to 350°F and line a baking sheet with parchment paper. While the oven heats, sift together the flour, cocoa powder, baking soda, baking powder, and salt in a medium bowl—sifting removes lumps and aerates the dry ingredients for a smoother batter. Set this dry mixture aside. Ensure your butter for the dough is at room temperature (about 70°F) so it creams properly with the sugar.
- Beat the 1/2 cup + 1 tbsp room-temperature butter and sugar together for 2-3 minutes until light and fluffy—this incorporation of air helps the cookies rise and gives them a tender crumb. Add the egg and beat until fully combined, then stir in the vanilla essence and red food coloring until the mixture is evenly colored. Gently fold in the dry ingredient mixture from Step 1 until just combined; avoid overmixing, which can make cookies tough.
- Using a cookie scoop or your hands, shape the dough from Step 2 into 1-inch balls and place them about 2 inches apart on your prepared baking sheet. Gently flatten each ball with the bottom of a glass or your palm to about 1/4-inch thickness. Bake for 10-11 minutes until the edges are just set but the centers still have a slight give—the cookies will firm up as they cool.
- Let the baked cookies cool on the baking sheet for 5 minutes to firm up slightly, then transfer them to a wire cooling rack for about 30 minutes until completely cooled. I find that this two-stage cooling prevents them from breaking apart while still allowing air circulation for even cooling.
- While the cookies cool, beat the softened cream cheese and 1/4 cup room-temperature butter together until smooth and creamy—this usually takes about 1-2 minutes. I always use Philadelphia brand cream cheese for the best consistency and flavor. Gradually add the powdered sugar, vanilla essence, and salt, then beat for another 2 minutes until light and fluffy. The frosting should be spreadable but hold its shape.
- Once the cookies from Step 4 are completely cool, spread or pipe the frosting from Step 5 onto each cookie. For a classic look, I like to use a small offset spatula to create a slight dome of frosting, but you can be as generous or minimal as you prefer. Serve immediately or store in an airtight container.
