Finding a breakfast that’s both filling and quick can feel like mission impossible some mornings. Between getting the kids ready for school and trying to get myself out the door, I often end up grabbing whatever’s fastest – which isn’t always the best choice for starting the day right.
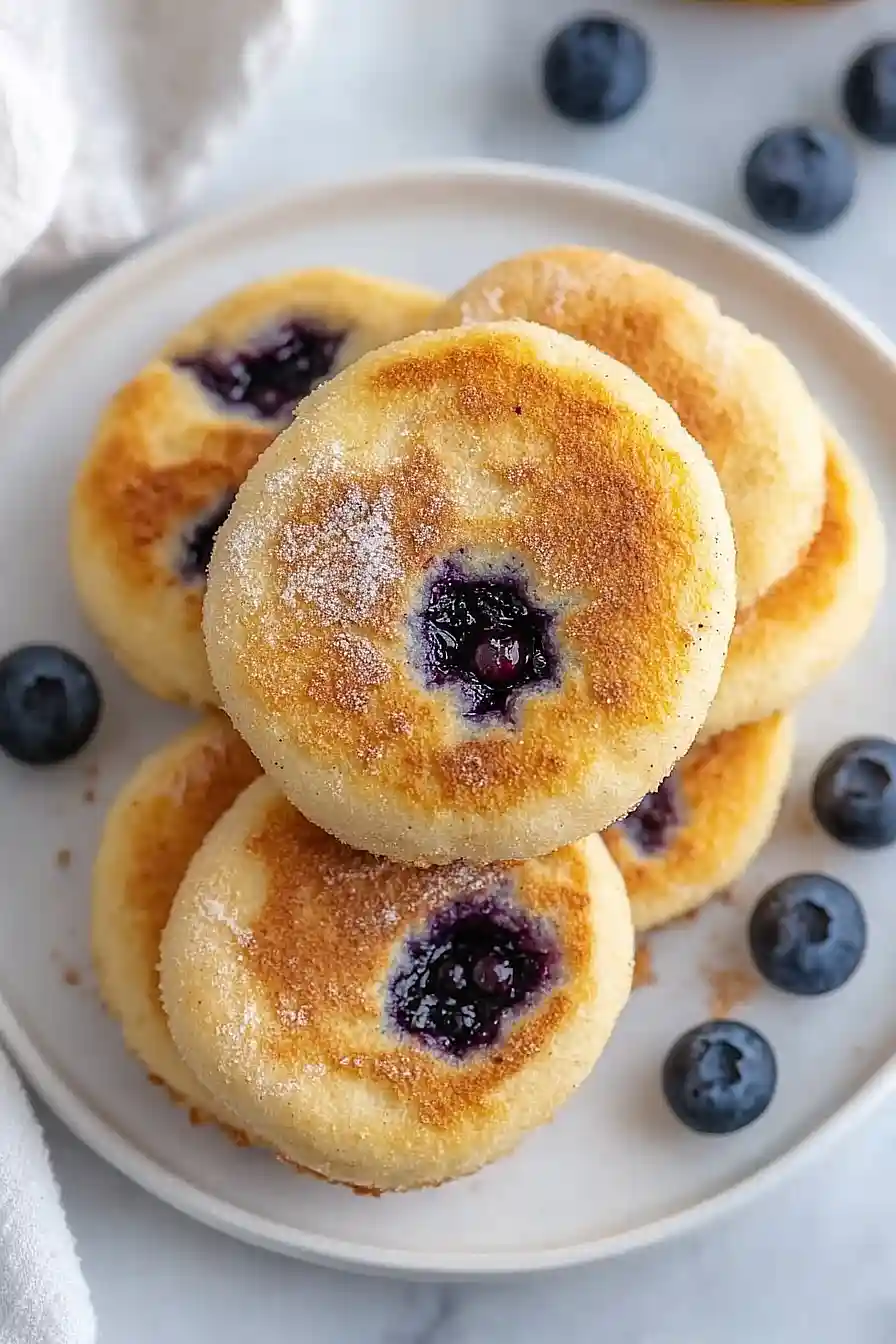
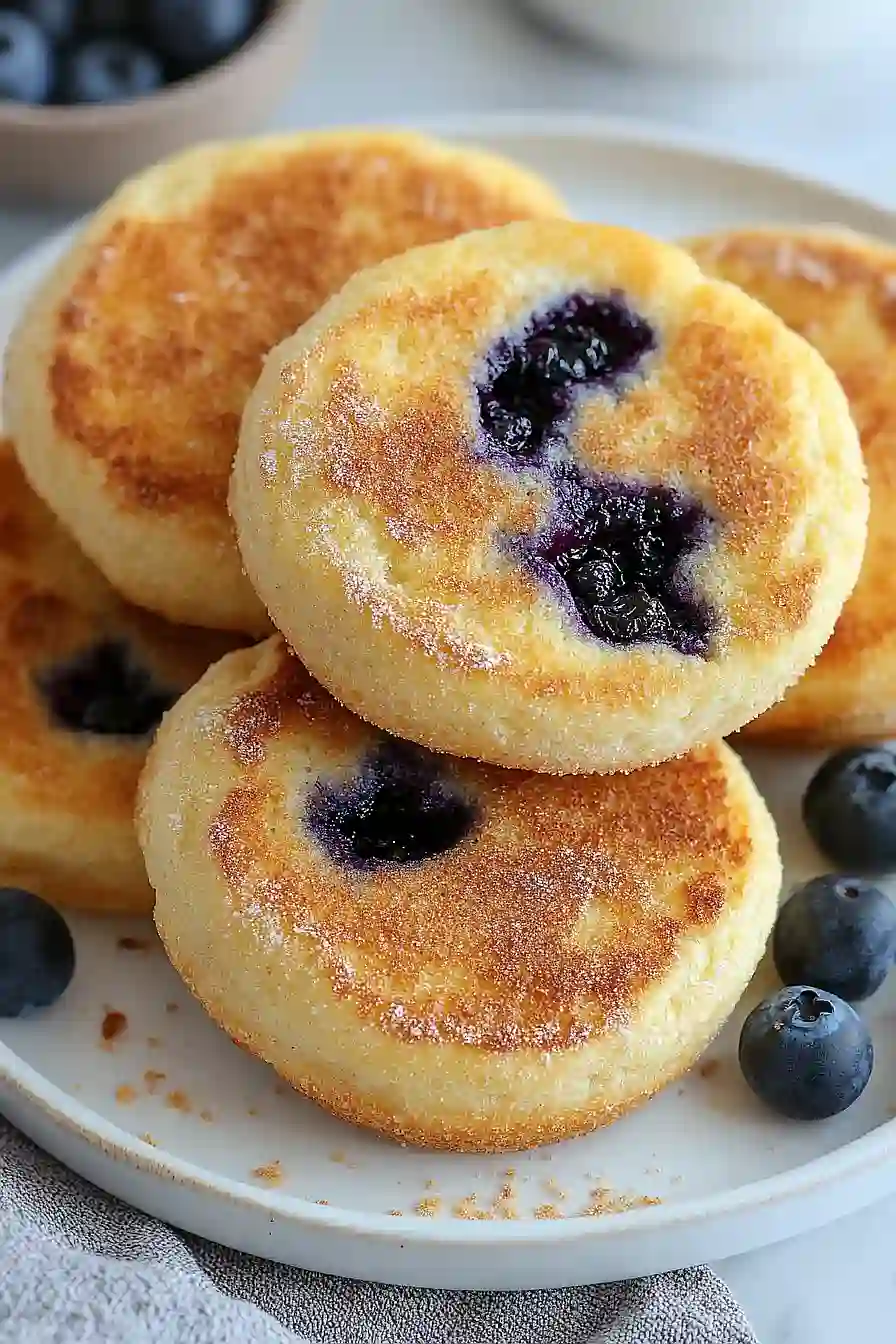
That’s why these blueberry English muffins have become my morning lifesaver. They’re super easy to put together, can be customized with different toppings, and give you that perfect mix of comfort and nutrition to power through your busy day.
Why You’ll Love These Blueberry English Muffins
- Made from scratch – These homemade English muffins taste so much better than store-bought ones, with real blueberries baked right into the dough.
- Perfect for meal prep – While they take time to make, most of it is hands-off rising time, and you can freeze extras for quick breakfasts throughout the week.
- Simple ingredients – You only need basic pantry staples plus fresh blueberries to make these – no artificial preservatives or additives like in store versions.
- Customizable – Once you master the basic recipe, you can swap the blueberries for other mix-ins like dried fruit, different berries, or even chocolate chips.
What Kind of Blueberries Should I Use?
Fresh blueberries are the way to go for these English muffins, but not all fresh blueberries are created equal. Look for berries that are firm, deep blue in color, and have a slight silvery frost on their skin – this natural coating actually helps protect the berries. Small to medium-sized blueberries work better than the jumbo ones since they’ll distribute more evenly throughout your dough and won’t create overly wet pockets. If fresh blueberries aren’t in season, you can use frozen ones, but make sure to keep them frozen until you’re ready to fold them into the dough and be prepared for them to release a bit more moisture.

Options for Substitutions
Making these muffins but missing something? Here are some helpful swaps you can try:
- Whole milk: You can use 2% milk or even plant-based alternatives like soy or oat milk. For extra richness with lower-fat milk, add an extra tablespoon of melted butter.
- Bread flour: While bread flour gives the best chewy texture, all-purpose flour will work too. Just know your muffins might be slightly less chewy. Avoid cake flour as it won’t provide enough structure.
- Fresh blueberries: Frozen blueberries work great – just don’t thaw them first! You can also try other berries like chopped strawberries or raspberries. Just keep the pieces small.
- Honey: Feel free to swap honey with maple syrup, agave nectar, or regular sugar. The sweetness level stays pretty much the same.
- Cornmeal: For dusting, semolina flour works really well. In a pinch, you can use regular flour, though you won’t get that classic English muffin texture on the outside.
- Instant yeast: If you only have active dry yeast, use the same amount but dissolve it in the warm milk first and wait 5-10 minutes until it gets foamy before mixing with other ingredients.
Watch Out for These Mistakes While Baking
The temperature of your milk is crucial when making English muffins – if it’s too hot (over 115°F), it will kill the yeast, and if it’s too cold, your dough won’t rise properly, so using a kitchen thermometer takes the guesswork out of this step.
A common mistake is overworking the dough when incorporating the blueberries – fold them in gently at the very end of kneading to prevent them from breaking and turning your dough purple, and if using frozen berries, don’t thaw them first as they’ll be easier to work with while frozen.
The cooking temperature needs careful attention – setting your griddle or skillet too hot will result in burnt outsides and doughy centers, so maintain a medium-low heat and cook them slowly for about 5-7 minutes per side until golden brown.
For the perfect nooks and crannies, avoid the temptation to press down on the muffins while they’re cooking, and always use a fork to split them open rather than a knife – this creates that classic English muffin texture that’s perfect for catching melted butter.
What to Serve With Blueberry English Muffins?
These homemade blueberry English muffins are perfect for breakfast or brunch, and there are so many tasty ways to enjoy them! A simple spread of salted butter lets the blueberry flavor shine through, while cream cheese adds a nice tangy balance to the sweet berries. For a heartier breakfast, try topping your muffin with scrambled eggs and a slice of crispy bacon, or go the sweet route with a drizzle of maple syrup and a dollop of whipped cream. You can also turn these into mini breakfast sandwiches by adding a fried egg and some sharp cheddar cheese – the sweet and savory combo is so good!
Storage Instructions
Keep Fresh: These homemade blueberry English muffins stay good at room temperature for about 2 days when stored in a sealed bag or container. For longer storage, pop them in the fridge where they’ll keep well for up to a week. The fresh blueberries make them extra moist, so using an airtight container is key to preventing any mold.
Freeze: These muffins are perfect for freezing! Let them cool completely, then place them in a freezer bag with parchment paper between each muffin to prevent sticking. They’ll stay fresh in the freezer for up to 3 months – perfect for when you want a quick breakfast.
Toast: When you’re ready to enjoy a frozen muffin, you don’t even need to thaw it first. Just pop it straight into the toaster or toaster oven and toast until warm and slightly crispy on the outside. If you’re using one from the fridge, a quick toast will make it taste fresh-baked again!
| Preparation Time | 10-15 minutes |
| Cooking Time | 24-30 minutes |
| Total Time | 10 hours 34 minutes-10 hours 45 minutes |
| Level of Difficulty | Medium |
Estimated Nutrition
Estimated nutrition for the whole recipe (without optional ingredients):
- Calories: 2200-2500
- Protein: 40-50 g
- Fat: 90-100 g
- Carbohydrates: 350-400 g
Ingredients
- 2 cups whole milk, warmed to around 110°f (43°c)
- 4 tablespoons melted unsalted butter
- 2 tablespoons honey
- 1 1/2 teaspoons salt
- 4 cups bread flour
- 2 teaspoons instant yeast
- 1 cup fresh blueberries
- Cornmeal for dusting
Step 1: Combine the Ingredients and Mix the Dough
Place the milk, butter, honey, salt, 3 cups of the bread flour, and yeast into the bowl of a stand mixer, or alternatively, use a large mixing bowl.
Beat the dough using the flat beater paddle at medium-high speed.
If using a large mixing bowl, vigorously stir the mixture with a spoon.
Gradually add the last cup of flour a little at a time until the dough becomes sticky but not wet.
Note: You may not need to use all of the flour.
Step 2: Incorporate the Blueberries and Begin Dough Rising
Gently stir fresh blueberries into the dough.
Shape the dough into a rough ball and lay a piece of plastic wrap loosely over the top.
Cover the bowl with a clean towel.
Allow the dough to rise in a warm place for at least 10 hours until it has more than doubled in size and bubbles have formed on top.
Step 3: Shape the Muffins
After the dough has risen, sprinkle cornmeal over the top of the dough and over your hands to prevent sticking.
The dough will be sticky.
Tear off sections of dough and form them into balls about 2 inches in diameter.
Continue with the remaining dough.
Rub more cornmeal on your hands as needed.
Step 4: Prepare Muffins for Second Rise
Sprinkle a large baking sheet with cornmeal and lay the dough balls on top.
Lightly sprinkle the tops with more cornmeal.
Cover the muffins with plastic wrap and a clean towel, allowing them to rest for 45 minutes.
Step 5: Cook the Muffins
Once the muffins have completed their second rise, transfer them onto a non-stick griddle or large skillet, leaving a bit of space between each one.
Cook over medium heat for about 12 to 15 minutes per side, until the crust is golden brown and the interior is cooked through.
To ensure doneness, check with an instant-read thermometer, which should register 200°F (93°C) when inserted into the center of a muffin.
Repeat this process for all remaining muffins.
Step 6: Cool, Split, and Serve
Allow the muffins to cool slightly before splitting them open with a fork to create nooks and crannies.
Serve them fresh with butter, and add jam if desired for extra sweetness.
