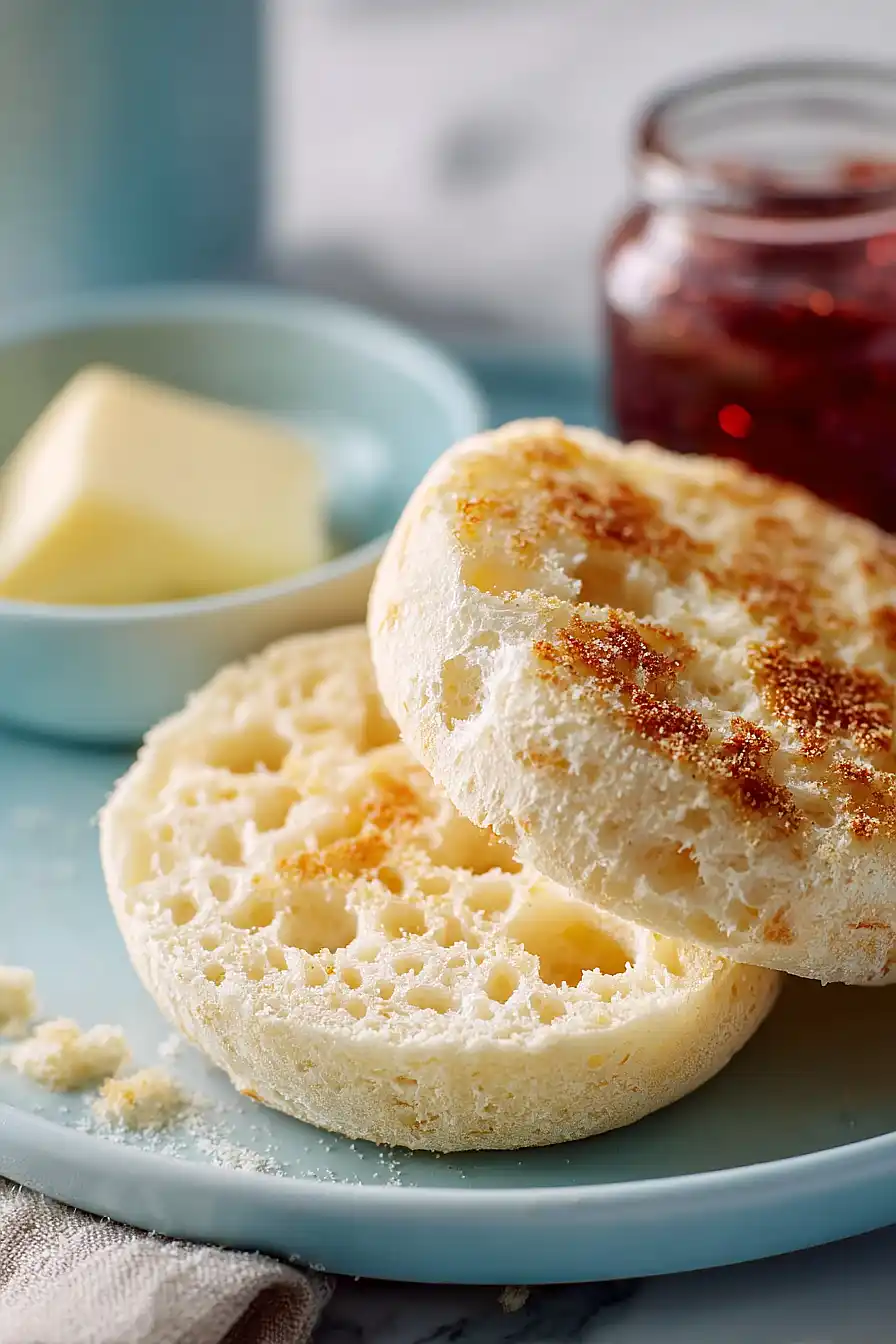
If you ask me, homemade English muffins are worth the little bit of extra effort.
These breakfast staples have those signature nooks and crannies that trap butter and jam perfectly. A simple dough made with buttermilk and just a handful of pantry ingredients comes together easier than you might think.
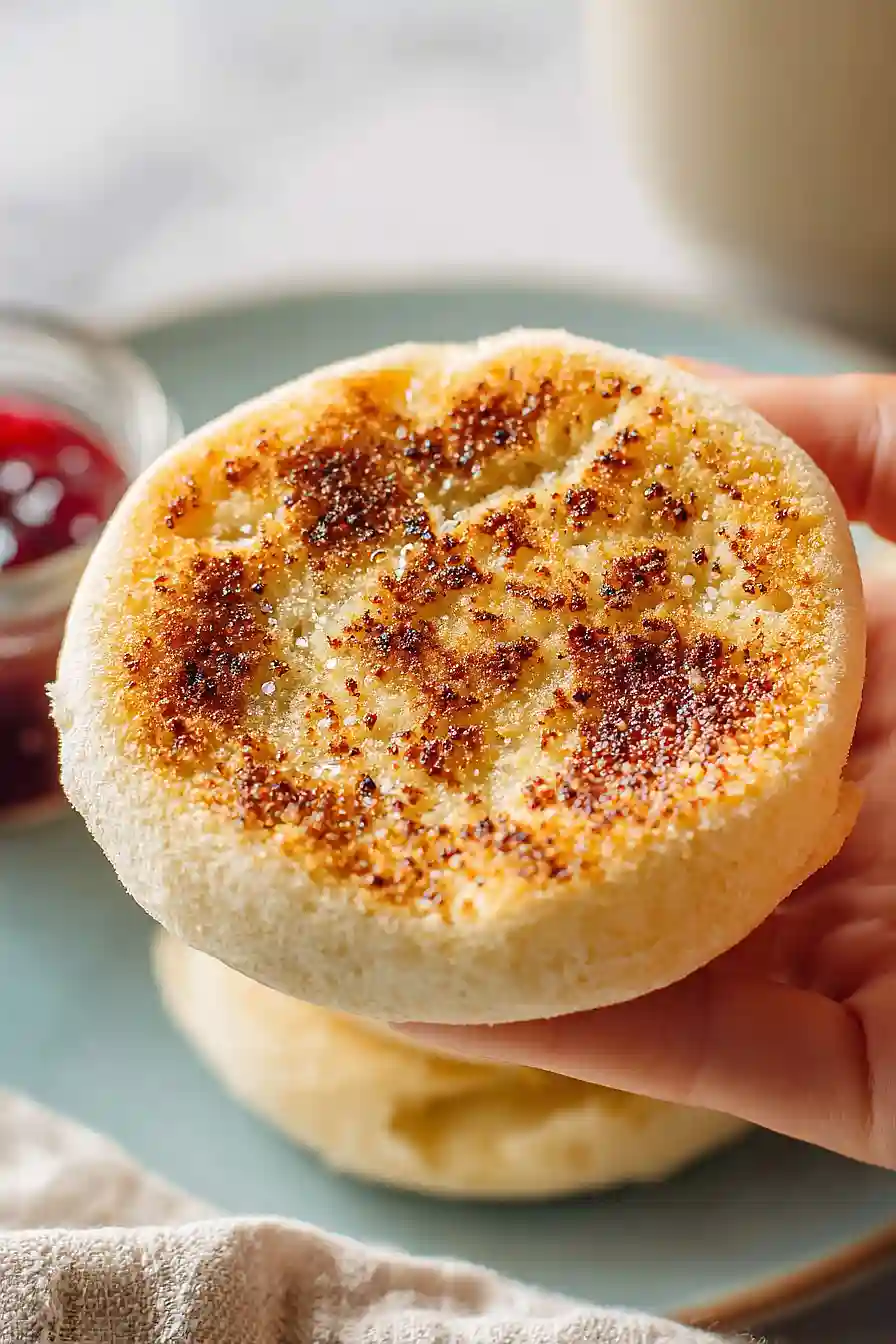
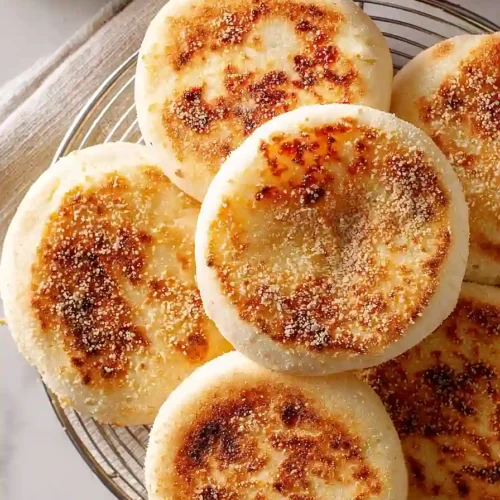
They’re cooked on a griddle instead of baked in the oven, giving them that crispy, cornmeal-dusted exterior. Split them open with a fork to get all those little pockets, then toast until golden.
They’re perfect for weekend mornings when you want something special, and they freeze beautifully for busy weekdays ahead.
Why You’ll Love These English Muffins
- Homemade goodness – There’s nothing quite like fresh English muffins straight from your own kitchen, with those perfect nooks and crannies that store-bought versions can’t match.
- Simple ingredients – You probably already have most of these basic pantry staples on hand, making this recipe easy to whip up whenever the craving hits.
- Budget-friendly – Making your own English muffins costs a fraction of what you’d pay at the store, and you’ll get better flavor and texture too.
- Freezer-friendly – Make a big batch and freeze them for quick breakfasts throughout the week—just pop them in the toaster whenever you need one.
What Kind of Flour Should I Use?
All-purpose flour is your best bet for making English muffins at home. It has just the right amount of protein to create those signature nooks and crannies we all love without making the muffins too dense or chewy. Bread flour can work in a pinch, but it might make your muffins a bit tougher than you want. If you’re using bread flour, you might want to cut it with a little all-purpose to keep things light. Make sure to measure your flour properly by spooning it into your measuring cup and leveling it off – packing it in can lead to dry, heavy muffins.

Options for Substitutions
Here are some handy swaps you can make if you’re missing an ingredient or two:
- Buttermilk: Don’t have buttermilk? Mix 1 cup of regular milk with 1 tablespoon of lemon juice or white vinegar. Let it sit for 5 minutes until it curdles slightly, and you’ve got a great substitute.
- Yeast: You can use active dry yeast or instant yeast interchangeably in this recipe. Just note that instant yeast can be mixed directly with dry ingredients, while active dry should be dissolved in warm liquid first.
- Cornmeal: The cornmeal is mainly for dusting and that classic texture, but you can use semolina flour or even regular flour if that’s all you have. The taste will be slightly different, but your muffins will still turn out great.
- All-purpose flour: Stick with all-purpose flour for this recipe – it’s really important for getting that perfect English muffin texture. Bread flour might make them too chewy, and cake flour won’t give you enough structure.
- Butter: You can swap the butter for an equal amount of vegetable oil or melted coconut oil if needed.
Watch Out for These Mistakes While Cooking
The biggest mistake when making English muffins is heating your buttermilk mixture too hot, which will kill the yeast – aim for that sweet spot between 100-110°F, and if you don’t have a thermometer, the liquid should feel just slightly warm to the touch, like bathwater.
Another common error is cooking the muffins over high heat, which browns the outside while leaving the inside raw and doughy, so keep your skillet at medium heat and resist the urge to turn up the temperature.
Don’t skip the second rise after cutting your circles, as this step is what gives English muffins their signature light and airy texture with all those nooks and crannies inside.
Finally, make sure your skillet is completely dry before cooking – any oil or butter will fry the muffins instead of giving them that characteristic toasted, slightly dry exterior that makes them perfect for soaking up butter and jam.
What to Serve With English Muffins?
English muffins are perfect for breakfast or brunch, and they’re amazing toasted with butter and your favorite jam or honey. I love using them as the base for eggs benedict with hollandaise sauce, poached eggs, and Canadian bacon, or you can keep it simple with scrambled eggs and cheese for a quick breakfast sandwich. They also work great alongside a bowl of soup or a fresh fruit salad for a lighter meal. If you’re feeling fancy, try topping them with avocado, tomato, and a fried egg for a satisfying start to your day.
Storage Instructions
Store: Once your English muffins have cooled completely, keep them in an airtight container or zip-top bag at room temperature for up to 3 days. If you want them to last longer, stash them in the fridge for up to a week.
Freeze: English muffins are perfect for freezing! Just let them cool, then wrap each one individually in plastic wrap or pop them in a freezer bag with parchment paper between them. They’ll keep for up to 3 months, which is great for busy mornings.
Toast: Whether fresh, refrigerated, or frozen, these are best when split and toasted. You can toast them straight from the freezer without thawing. Just pop them in the toaster until they’re golden and crispy on the inside with those classic nooks and crannies ready for butter.
| Preparation Time | 20-30 minutes |
| Cooking Time | 10-20 minutes |
| Total Time | 210-240 minutes |
| Level of Difficulty | Medium |
| Servings | 12 muffins |
Estimated Nutrition
Estimated nutrition for the whole recipe (without optional ingredients):
- Calories: 1250-1400
- Protein: 30-36 g
- Fat: 12-16 g
- Carbohydrates: 245-270 g
Ingredients
- 2.5 cups all-purpose flour
- 1/2 teaspoon salt
- 1 cup + 2 tablespoons buttermilk (room temperature, about 70°F)
- 1 tablespoon butter (Kerrygold unsalted butter recommended)
- 1.5 teaspoons sugar
- 2/3 tablespoon active dry yeast
- 1/2 cup cornmeal (for coating to prevent sticking and add a classic crunch)
Step 1: Activate the Yeast
- 1 cup + 2 tablespoons buttermilk
- 1 tablespoon butter
- 1.5 teaspoons sugar
- 2/3 tablespoon active dry yeast
Combine the buttermilk and butter in a microwave-safe cup and heat for 55 seconds until the temperature reaches 100-110°F (this is the ideal range for yeast activation without killing it).
Add the sugar and yeast to the warm liquid and stir gently to combine.
Cover the cup loosely and let it sit for 5 minutes—you’ll see it become foamy and smell fragrant, which confirms the yeast is alive and active.
Step 2: Mix the Dough
- yeast mixture from Step 1
- 2.5 cups all-purpose flour
- 1/2 teaspoon salt
While the yeast activates, combine the flour and salt in a stand mixer bowl.
Once the yeast mixture is foamy, pour it into the flour mixture and mix on medium speed for 5 minutes until the dough comes together.
The dough should be slightly sticky but cohesive—if it’s too dry, it won’t rise properly, and if it’s too wet, the muffins will be dense.
I prefer to use a stand mixer here because it develops the gluten structure evenly without over-working the dough by hand.
Step 3: First Rise
- dough from Step 2
Transfer the dough from Step 2 to a lightly greased bowl and cover it with plastic wrap or a damp towel.
Let it rise in a warm spot (around 70-75°F room temperature works fine, or use a proofing box set to 170°F if you have one) for 1 hour until the dough roughly doubles in size.
This slow fermentation develops flavor and gives the dough its characteristic open crumb structure.
Step 4: Shape the Muffins
- risen dough from Step 3
- 1/2 cup cornmeal
Dust a work surface lightly with flour and turn out the risen dough.
Using a rolling pin, gently roll the dough to about 1/2 inch thickness—don’t compress it too much or you’ll deflate all the air bubbles you just developed.
Using a cup or 3-inch round cutter, cut the dough into circles and place them on a baking sheet that you’ve dusted generously with cornmeal (this prevents sticking and gives the muffins their characteristic textured bottom).
Sprinkle the tops of the muffins with a light coating of cornmeal as well.
Step 5: Second Rise
- shaped muffins from Step 4
Cover the shaped muffins loosely with plastic wrap and let them rise for another hour in a warm spot until they’re puffy and light.
They should increase in height noticeably but not double completely—this second rise gives them that characteristic pillowy texture and ensures they’ll cook through properly when you griddle them.
Step 6: Cook on the Griddle
- risen muffins from Step 5
Heat a skillet or griddle over medium heat (around 350°F if using an electric griddle).
Once hot, carefully transfer the risen muffins to the skillet and cook for 5-6 minutes on the first side until they develop a light golden-brown crust.
Flip them carefully and cook the other side for another 5-6 minutes until both sides are evenly golden and the muffins sound hollow when tapped.
I like to keep the heat at medium rather than high because this allows the insides to cook through gently without burning the outsides.
Step 7: Cool and Finish
- cooked muffins from Step 6
Transfer the cooked muffins to a wire rack to cool for a few minutes.
Once they’re cool enough to handle, gently poke the edges all around with a fork to create openings—this is the signature English muffin finish and makes them easier to pull apart and toast later.
Serve warm with butter and your favorite jam or topping.
Buttery English Muffins
Ingredients
- 2.5 cups all-purpose flour
- 1/2 teaspoon salt
- 1 cup + 2 tablespoons buttermilk (room temperature, about 70°F)
- 1 tablespoon butter (Kerrygold unsalted butter recommended)
- 1.5 teaspoons sugar
- 2/3 tablespoon active dry yeast
- 1/2 cup cornmeal (for coating to prevent sticking and add a classic crunch)
Instructions
- Combine the buttermilk and butter in a microwave-safe cup and heat for 55 seconds until the temperature reaches 100-110°F (this is the ideal range for yeast activation without killing it). Add the sugar and yeast to the warm liquid and stir gently to combine. Cover the cup loosely and let it sit for 5 minutes—you'll see it become foamy and smell fragrant, which confirms the yeast is alive and active.
- While the yeast activates, combine the flour and salt in a stand mixer bowl. Once the yeast mixture is foamy, pour it into the flour mixture and mix on medium speed for 5 minutes until the dough comes together. The dough should be slightly sticky but cohesive—if it's too dry, it won't rise properly, and if it's too wet, the muffins will be dense. I prefer to use a stand mixer here because it develops the gluten structure evenly without over-working the dough by hand.
- Transfer the dough from Step 2 to a lightly greased bowl and cover it with plastic wrap or a damp towel. Let it rise in a warm spot (around 70-75°F room temperature works fine, or use a proofing box set to 170°F if you have one) for 1 hour until the dough roughly doubles in size. This slow fermentation develops flavor and gives the dough its characteristic open crumb structure.
- Dust a work surface lightly with flour and turn out the risen dough. Using a rolling pin, gently roll the dough to about 1/2 inch thickness—don't compress it too much or you'll deflate all the air bubbles you just developed. Using a cup or 3-inch round cutter, cut the dough into circles and place them on a baking sheet that you've dusted generously with cornmeal (this prevents sticking and gives the muffins their characteristic textured bottom). Sprinkle the tops of the muffins with a light coating of cornmeal as well.
- Cover the shaped muffins loosely with plastic wrap and let them rise for another hour in a warm spot until they're puffy and light. They should increase in height noticeably but not double completely—this second rise gives them that characteristic pillowy texture and ensures they'll cook through properly when you griddle them.
- Heat a skillet or griddle over medium heat (around 350°F if using an electric griddle). Once hot, carefully transfer the risen muffins to the skillet and cook for 5-6 minutes on the first side until they develop a light golden-brown crust. Flip them carefully and cook the other side for another 5-6 minutes until both sides are evenly golden and the muffins sound hollow when tapped. I like to keep the heat at medium rather than high because this allows the insides to cook through gently without burning the outsides.
- Transfer the cooked muffins to a wire rack to cool for a few minutes. Once they're cool enough to handle, gently poke the edges all around with a fork to create openings—this is the signature English muffin finish and makes them easier to pull apart and toast later. Serve warm with butter and your favorite jam or topping.
