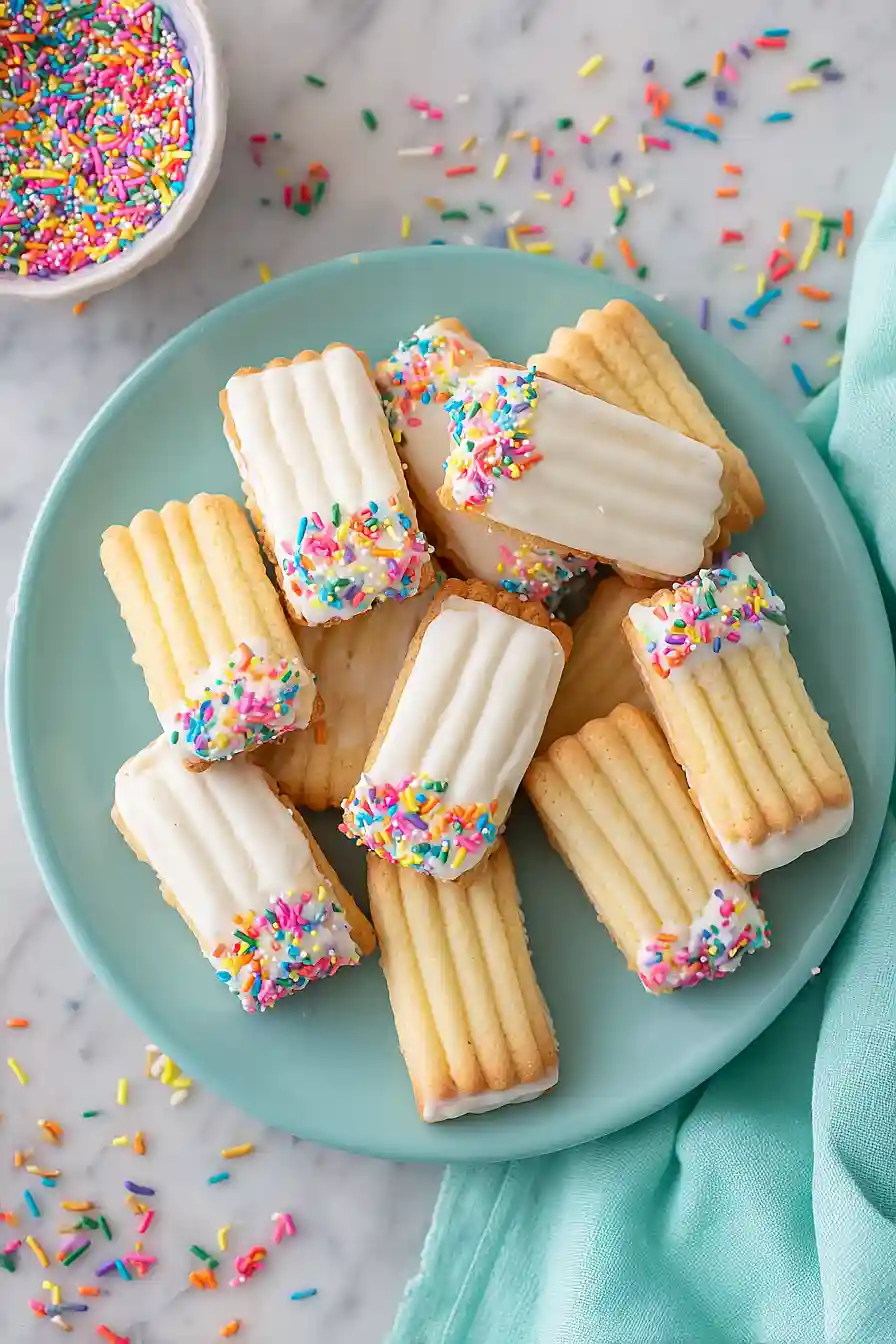
I’ve been making spritz cookies since my kids were little, and they never get old. There’s something satisfying about pressing dough through a cookie press and watching those neat ribbons form. Plus, they look fancy without requiring any special decorating skills.
Ribbon spritz cookies are perfect for when you want homemade cookies that don’t require rolling out dough or using cookie cutters. Just mix up the dough, load it into your press, and squeeze. The hardest part is waiting for them to cool before dipping them in white chocolate.
The lemon zest in these gives them a fresh twist on the classic butter cookie flavor. And honestly, any cookie that gets dipped in chocolate and covered with sprinkles is going to be a hit. My family fights over the last few every single time I make them.
Why You’ll Love These Ribbon Spritz Cookies
- Quick and easy – These cookies come together in under 45 minutes, making them perfect when you need a homemade treat without spending all day in the kitchen.
- Simple ingredients – You probably already have butter, sugar, eggs, and flour in your pantry, so there’s no need for a special shopping trip.
- Fun to decorate – The white chocolate coating and colorful sprinkles make these cookies look festive and give you a chance to get creative or let the kids help out.
- Perfect for any occasion – Whether you’re baking for the holidays, a party, or just because, these buttery cookies with a hint of lemon always impress.
What Kind of Butter Should I Use?
For spritz cookies, butter is really the star of the show, so quality matters here. You’ll want to use real butter, not margarine or spreads, since butter gives these cookies their classic rich flavor and helps them hold their shape when piped. European-style butter with higher fat content can make your cookies even more tender and flavorful, but regular unsalted butter from the grocery store works perfectly fine too. Make sure your butter is properly softened to room temperature – it should be soft enough to leave an indent when you press it, but not melting or greasy, which helps create that perfect cookie texture.

Options for Substitutions
These cookies are pretty straightforward, but here are some swaps you can make if needed:
- Butter: Stick with real butter for this recipe – it’s really important for getting that classic spritz cookie texture and flavor. Margarine or oil won’t give you the same results.
- Lemon zest: If you don’t have fresh lemons, try orange zest for a different citrus note, or use 1 teaspoon of lemon extract instead. You can also skip it entirely and add an extra ½ teaspoon of vanilla.
- White baking chocolate: Feel free to use milk chocolate or dark chocolate instead if that’s what you prefer. You can also skip the chocolate coating altogether and just decorate with the sprinkles before baking.
- Nonpareils or decorator sugars: Any sprinkles, colored sugar, or even finely chopped nuts work great here. Get creative with whatever you have in your pantry.
- Powdered sugar: In a pinch, you can make your own by blending granulated sugar in a blender or food processor until fine and powdery.
Watch Out for These Mistakes While Baking
The biggest mistake when making spritz cookies is using melted or too-soft butter, which causes the dough to be too loose and your cookies won’t hold their pretty shapes – your butter should be softened but still cool to the touch, around 65°F.
Another common error is overfilling the cookie press, which makes it harder to get consistent shapes and can cause the dough to squish out the sides, so fill it only about two-thirds full for better control.
If your cookies aren’t sticking to the baking sheet when you lift the press, try skipping the parchment paper and press directly onto an ungreased cool baking sheet, which gives the dough something to grip onto.
When dipping in white chocolate, make sure your cookies are completely cool and the chocolate isn’t too hot (let it cool for a few minutes after melting), otherwise the chocolate will be too thin and won’t coat properly.
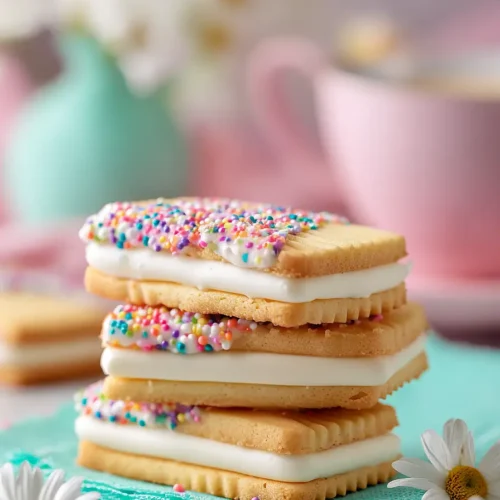
What to Serve With Ribbon Spritz Cookies?
These buttery cookies are perfect alongside a hot cup of coffee or tea, especially during the holidays when you want something sweet but not too heavy. I love setting out a platter of spritz cookies with other simple treats like chocolate chip cookies or shortbread to give everyone options. They’re also great for packaging up as gifts – just layer them in a tin with parchment paper between each layer so the white chocolate doesn’t stick. If you’re hosting a party, serve them with hot cocoa, eggnog, or even a glass of cold milk for a nostalgic treat that everyone will enjoy.
Storage Instructions
Store: These ribbon spritz cookies stay fresh in an airtight container at room temperature for up to a week. Just make sure they’re completely cool before storing, and layer them with parchment paper if you’re stacking them to keep the chocolate from sticking together.
Freeze: Spritz cookies are perfect for freezing! You can freeze the baked cookies in a freezer-safe container for up to 3 months. I like to freeze them before dipping in chocolate, then thaw and decorate when I’m ready to serve them so they look freshly made.
Make Ahead: The dough can be made a day or two in advance and kept in the fridge wrapped tightly in plastic wrap. Just let it sit at room temperature for about 15 minutes before piping so it’s soft enough to work with but still holds its shape nicely.
| Preparation Time | 15-20 minutes |
| Cooking Time | 7-9 minutes per batch |
| Total Time | 30-45 minutes |
| Level of Difficulty | Medium |
Estimated Nutrition
Estimated nutrition for the whole recipe (without optional ingredients):
- Calories: 3750-3950
- Protein: 35-45 g
- Fat: 220-235 g
- Carbohydrates: 445-470 g
Ingredients
For the cookies:
- 1 large egg (room temperature)
- 3/4 cup powdered sugar (sifted to remove lumps)
- 1.5 tsp vanilla extract
- 1 cup unsalted butter (room temperature, about 70°F)
- 1/4 tsp salt
- 2.25 cups all-purpose flour (I use King Arthur all-purpose flour)
- 1 tbsp lemon zest (freshly grated for best flavor)
For the filling:
- 12 oz white chocolate (chopped into small pieces for even melting)
For the topping:
- assorted nonpareils (for decoration)
Step 1: Prepare Mise en Place and Preheat
- 1 cup unsalted butter
- 1 large egg
- 3/4 cup powdered sugar
- 1 tbsp lemon zest
- 12 oz white chocolate
Start by preheating your oven to 375°F.
While the oven heats, bring your butter and egg to room temperature (around 70°F) if they aren’t already—this ensures smooth, even mixing and better texture in the final cookies.
Sift the powdered sugar to remove any lumps, grate your lemon zest fresh, and chop the white chocolate into small, uniform pieces for even melting later.
Having everything prepped and ready will make the dough-making process smooth and efficient.
Step 2: Create the Cookie Dough
- 1 cup unsalted butter
- 3/4 cup powdered sugar
- 1/4 tsp salt
- 1 large egg
- 1 tbsp lemon zest
- 1.5 tsp vanilla extract
- 2.25 cups all-purpose flour
In a large mixing bowl, beat together the room-temperature butter, sifted powdered sugar, and salt for 2-3 minutes until the mixture is light and fluffy—this aerates the dough and creates a tender cookie.
Add the room-temperature egg, lemon zest, and vanilla extract, then beat for another minute until fully combined and smooth.
Finally, add the flour and mix on low speed just until the dough comes together; I find it’s important not to overmix at this stage, as overworking the dough can make the cookies tough rather than delicate.
The dough should be smooth and pipeable.
Step 3: Press and Cut Cookie Ribbons
- cookie dough from Step 2
Fill your cookie press with the dough from Step 2 and attach the ribbon disk.
Press long, continuous dough strips onto ungreased cookie sheets, spacing them about 1 inch apart.
While the strips are still on the warm sheets, use a sharp knife or kitchen shears to cut each strip into 1-inch lengths—cutting while slightly warm makes this much cleaner than trying to cut cold, fragile cookies.
If the dough becomes too soft to cut cleanly, let the sheets rest in the refrigerator for 5 minutes before continuing.
Step 4: Bake the Cookies
- cut cookie pieces from Step 3
Bake the cookie ribbons at 375°F for 7-9 minutes, until the edges are just beginning to brown but the centers remain pale—you want delicate, tender cookies, not crispy ones.
Remove from the oven and let them cool on the baking sheets for 2-3 minutes until they’re firm enough to handle but still slightly warm, then transfer to a wire rack to cool completely.
I like to bake in batches so you can work with one tray while the next bakes, keeping your workflow smooth.
Step 5: Melt White Chocolate and Sandwich Cookies
- 12 oz white chocolate
- cooled baked cookies from Step 4
Place the chopped white chocolate in a heatproof bowl and set it over a pot of gently simmering water (a double boiler setup), stirring occasionally until smooth and melted.
Once the cookies from Step 4 are completely cooled, spread a thin layer of melted white chocolate on the flat bottom of one cookie, then press the flat bottom of another cookie on top to create a sandwich.
Repeat until all cookies are paired, then place them on a parchment-lined baking sheet and refrigerate for about 5 minutes until the chocolate is completely set and the sandwich holds together.
Step 6: Decorate with Chocolate and Nonpareils
- white chocolate sandwich cookies from Step 5
- assorted nonpareils
- remaining melted white chocolate
Reheat the white chocolate slightly if it has become too thick (it should be thin enough to dip into).
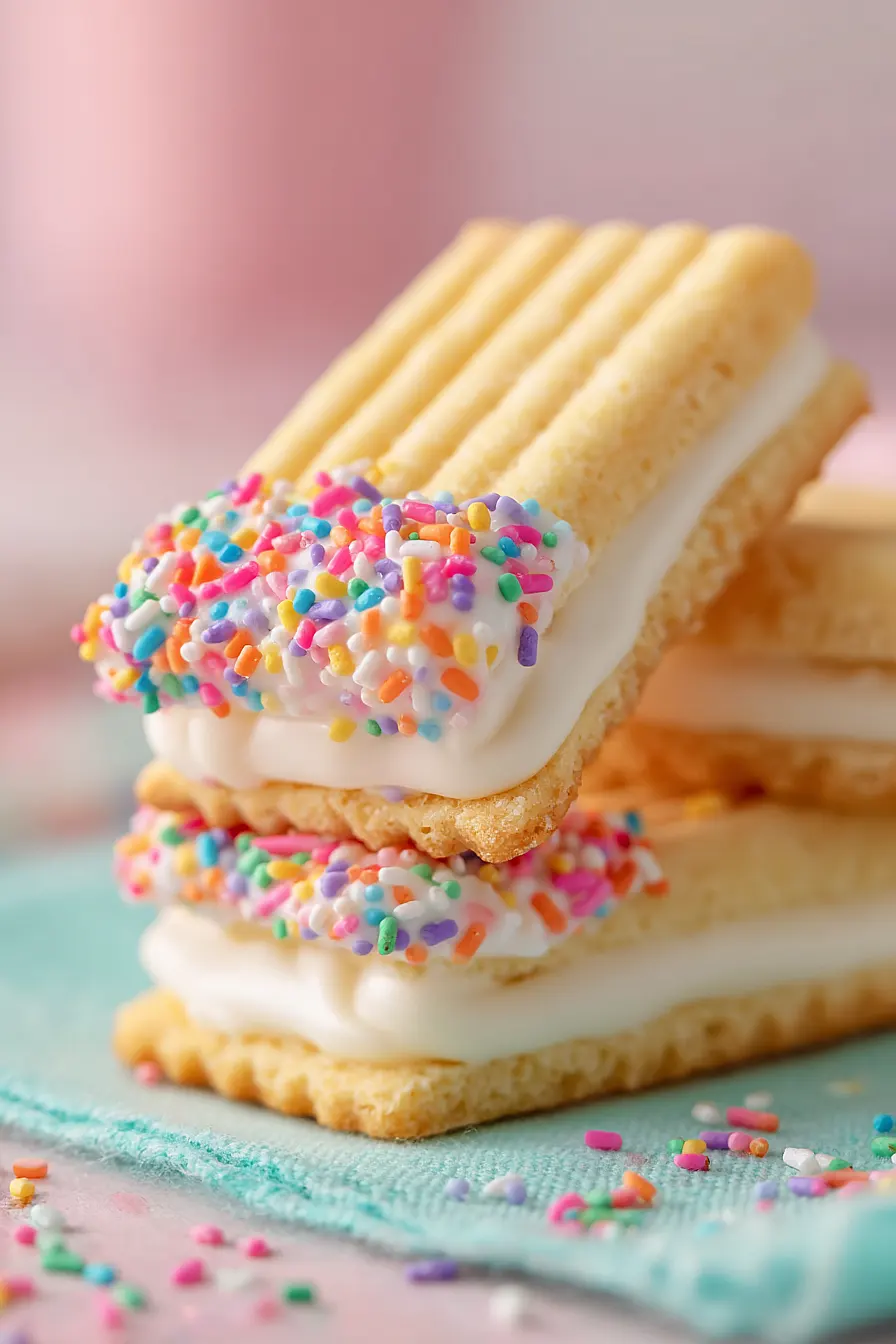
Working with one sandwich cookie at a time, dip a corner into the melted chocolate, then immediately dip that chocolate-covered corner into the assorted nonpareils for a colorful garnish.
Place the decorated cookies on a fresh piece of waxed paper and let them sit at room temperature until the chocolate is completely set, about 10-15 minutes.
This final decoration step adds a festive, professional touch to these elegant treats.
Best Ribbon Spritz Cookies
Ingredients
For the cookies:
- 1 large egg (room temperature)
- 3/4 cup powdered sugar (sifted to remove lumps)
- 1.5 tsp vanilla extract
- 1 cup unsalted butter (room temperature, about 70°F)
- 1/4 tsp salt
- 2.25 cups all-purpose flour (I use King Arthur all-purpose flour)
- 1 tbsp lemon zest (freshly grated for best flavor)
For the filling:
- 12 oz white chocolate (chopped into small pieces for even melting)
For the topping:
- assorted nonpareils (for decoration)
Instructions
- Start by preheating your oven to 375°F. While the oven heats, bring your butter and egg to room temperature (around 70°F) if they aren't already—this ensures smooth, even mixing and better texture in the final cookies. Sift the powdered sugar to remove any lumps, grate your lemon zest fresh, and chop the white chocolate into small, uniform pieces for even melting later. Having everything prepped and ready will make the dough-making process smooth and efficient.
- In a large mixing bowl, beat together the room-temperature butter, sifted powdered sugar, and salt for 2-3 minutes until the mixture is light and fluffy—this aerates the dough and creates a tender cookie. Add the room-temperature egg, lemon zest, and vanilla extract, then beat for another minute until fully combined and smooth. Finally, add the flour and mix on low speed just until the dough comes together; I find it's important not to overmix at this stage, as overworking the dough can make the cookies tough rather than delicate. The dough should be smooth and pipeable.
- Fill your cookie press with the dough from Step 2 and attach the ribbon disk. Press long, continuous dough strips onto ungreased cookie sheets, spacing them about 1 inch apart. While the strips are still on the warm sheets, use a sharp knife or kitchen shears to cut each strip into 1-inch lengths—cutting while slightly warm makes this much cleaner than trying to cut cold, fragile cookies. If the dough becomes too soft to cut cleanly, let the sheets rest in the refrigerator for 5 minutes before continuing.
- Bake the cookie ribbons at 375°F for 7-9 minutes, until the edges are just beginning to brown but the centers remain pale—you want delicate, tender cookies, not crispy ones. Remove from the oven and let them cool on the baking sheets for 2-3 minutes until they're firm enough to handle but still slightly warm, then transfer to a wire rack to cool completely. I like to bake in batches so you can work with one tray while the next bakes, keeping your workflow smooth.
- Place the chopped white chocolate in a heatproof bowl and set it over a pot of gently simmering water (a double boiler setup), stirring occasionally until smooth and melted. Once the cookies from Step 4 are completely cooled, spread a thin layer of melted white chocolate on the flat bottom of one cookie, then press the flat bottom of another cookie on top to create a sandwich. Repeat until all cookies are paired, then place them on a parchment-lined baking sheet and refrigerate for about 5 minutes until the chocolate is completely set and the sandwich holds together.
- Reheat the white chocolate slightly if it has become too thick (it should be thin enough to dip into). Working with one sandwich cookie at a time, dip a corner into the melted chocolate, then immediately dip that chocolate-covered corner into the assorted nonpareils for a colorful garnish. Place the decorated cookies on a fresh piece of waxed paper and let them sit at room temperature until the chocolate is completely set, about 10-15 minutes. This final decoration step adds a festive, professional touch to these elegant treats.
