I never thought about putting fruit in a cake until I moved in with my college roommate. She was always baking these simple cakes with whatever fruit was getting soft in our tiny kitchen. At first, I thought it was weird—cake was supposed to be chocolate or vanilla, right?
But then I tried her peach cake made with olive oil instead of butter, and it completely changed my mind. The olive oil made it so moist, and the fruit added this natural sweetness that wasn’t too heavy. Now I make this nectarine version all summer long when they’re cheap at the farmers market.

Why You’ll Love This Nectarine Olive Oil Cake
- Simple ingredients – You probably have most of these pantry staples on hand already, and the fresh nectarines are easy to find during summer season.
- Quick and easy – This cake comes together in under an hour, making it perfect for when you want a homemade dessert without spending all day in the kitchen.
- Moist and tender texture – The olive oil keeps this cake incredibly soft and gives it a lovely, rich flavor that’s different from butter-based cakes.
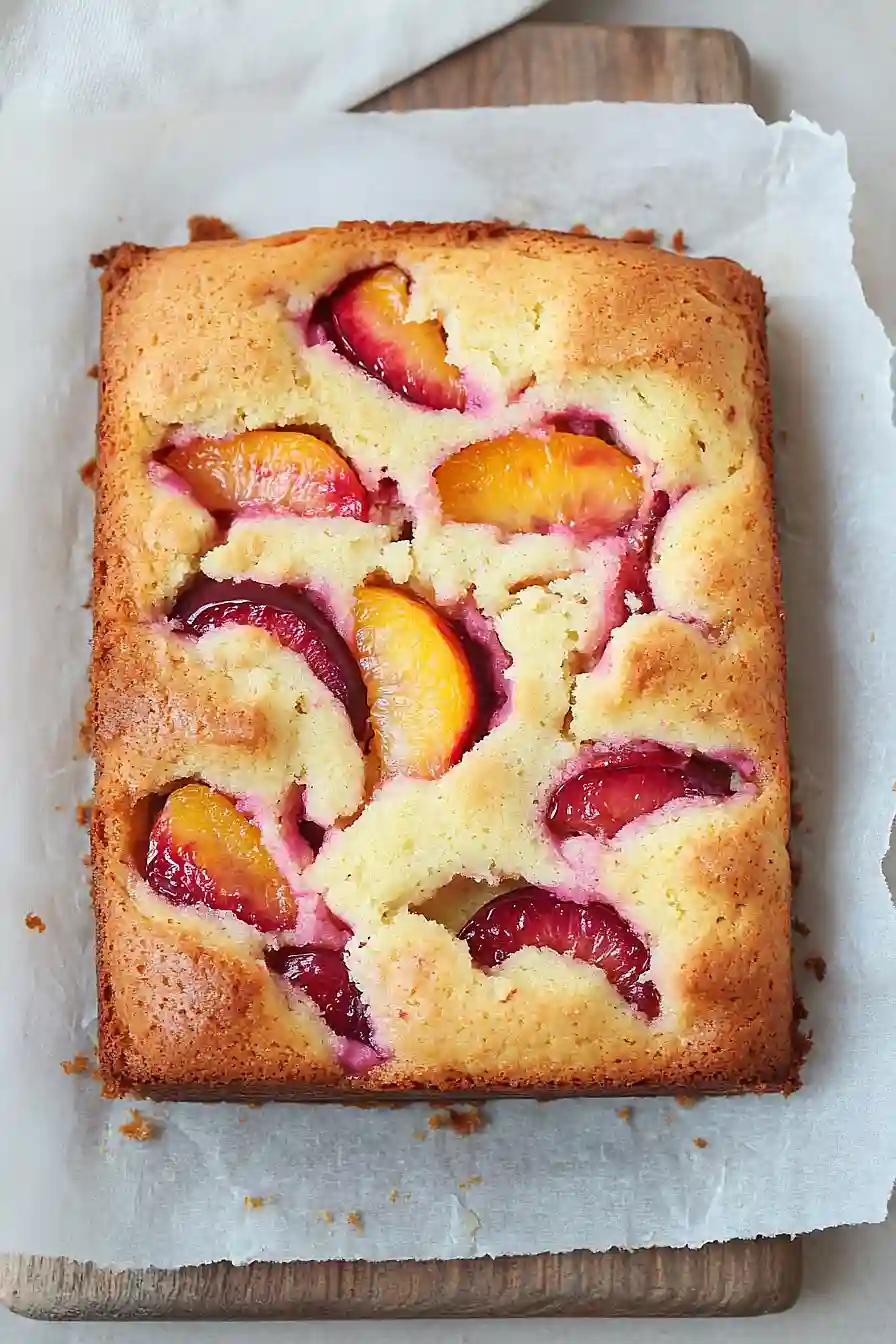
- Fresh fruit goodness – The juicy nectarine slices add natural sweetness and make every bite taste like summer, plus they look beautiful on top of the cake.
- Healthier dessert option – Using olive oil instead of butter and fresh fruit means you can feel a little better about having that second slice.
What Kind of Nectarines Should I Use?
For this olive oil cake, you’ll want to use ripe nectarines that give slightly when you press them gently – they should smell sweet and fragrant at the stem end. Both yellow and white nectarines work well, though yellow varieties tend to hold their shape a bit better during baking. If your nectarines are still firm, you can let them ripen on your counter for a day or two until they’re ready. Don’t worry if they have a few soft spots or blemishes, as you’ll be slicing them anyway and the imperfections won’t affect the taste of your cake.
Options for Substitutions
This cake is pretty forgiving when it comes to swaps, so here are some options if you need to make changes:
- Nectarines: No nectarines? Peaches work perfectly since they’re so similar. You could also try plums, apricots, or even thinly sliced apples. Just make sure whatever fruit you choose is ripe but still holds its shape when baked.
- Extra virgin olive oil: While olive oil gives this cake its signature flavor and moist texture, you can substitute with vegetable oil or melted butter if needed. Keep in mind that butter will give you a more traditional cake flavor, while vegetable oil keeps it neutral.
- Plain flour: All-purpose flour works the same way here. If you only have self-rising flour, skip the baking powder and baking soda since it’s already included.
- Sugar: Regular white sugar is best for this recipe as it helps create the right texture. You could try caster sugar if that’s what you have, but avoid brown sugar as it might make the cake too dense.
- Baking powder and baking soda: These are pretty important for getting the right rise, so try not to skip them. If you’re missing one, you can use 1 teaspoon of baking powder in place of the baking soda, but the texture might be slightly different.
Watch Out for These Mistakes While Baking
The biggest mistake with olive oil cake is using low-quality or strongly flavored olive oil, which can overpower the delicate nectarine flavor – stick with a mild, fruity extra virgin olive oil for the best results. Another common error is using underripe nectarines, which won’t provide enough natural sweetness and can make your cake taste bland, so make sure your fruit gives slightly when pressed. Overmixing the batter is also a recipe for disaster since it develops too much gluten and creates a tough, dense cake instead of the tender crumb you’re after – mix just until the ingredients are combined. Finally, don’t skip lining your pan with parchment paper and lightly greasing it, as the fruit can stick badly to the bottom, and always test for doneness with a toothpick since the moisture from the nectarines can make it tricky to judge when it’s fully baked.

What to Serve With Nectarine Olive Oil Cake?
This cake is perfect on its own with a cup of coffee or tea, but it really shines when you add a dollop of whipped cream or a scoop of vanilla ice cream. The fruity sweetness pairs beautifully with a drizzle of honey or a sprinkle of powdered sugar if you want to dress it up a bit. I love serving it alongside fresh berries like strawberries or blueberries to play up the summer fruit theme. For a more indulgent treat, try it with a small glass of dessert wine or even a light prosecco – the bubbles complement the olive oil’s richness perfectly.
Storage Instructions
Keep Fresh: This nectarine olive oil cake actually gets better after a day or two! Store it covered at room temperature for up to 3 days, or in the fridge for up to a week. The olive oil keeps it wonderfully moist, and the flavors really develop over time.
Freeze: You can freeze this cake for up to 3 months – just wrap it tightly in plastic wrap and then foil. I like to slice it first and freeze individual pieces so I can grab just what I need. It thaws perfectly at room temperature in about an hour.
Serve: This cake is delicious at room temperature or slightly warmed. If you’ve stored it in the fridge, let it sit out for 30 minutes before serving to bring out all those lovely flavors. A light dusting of powdered sugar or a dollop of whipped cream makes it extra special.
| Preparation Time | 15-20 minutes |
| Cooking Time | 25-30 minutes |
| Total Time | 40-50 minutes |
| Level of Difficulty | Medium |
Estimated Nutrition
Estimated nutrition for the whole recipe (without optional ingredients):
- Calories: 2000-2200
- Protein: 30-35 g
- Fat: 180-200 g
- Carbohydrates: 200-220 g
Ingredients
For the fruit topping:
- 3 to 4 ripe nectarines, sliced
- 1/4 cup extra virgin olive oil
- 2 tbsp sugar
For the cake batter:
- 2 large eggs
- 1/2 cup plus 2 tbsp sugar
- 3/4 cup extra virgin olive oil
- 1 1/3 cups all-purpose flour
- 1/2 tsp baking powder
- Pinch baking soda
Step 1: Prepare the Cake Tin and Oven
Preheat your oven to 180°C, or 160°C for fan bake.
Grease a 20cm x 20cm square cake tin and line it with baking paper.
Prepping your pan ahead makes sure nothing sticks—I’ve found greasing helps the paper hold in place, too.
Step 2: Marinate the Nectarines
- 3 to 4 ripe nectarines, sliced
- 1/4 cup extra virgin olive oil
- 2 tbsp sugar
Slice the ripe nectarines and toss them with 1/4 cup extra virgin olive oil and 2 tablespoons of sugar in a bowl.
Let the mixture sit for 10 minutes to allow the nectarines to release their juices and absorb the olive oil, which will create a rich and flavorful base for your cake.
Step 3: Make the Cake Batter
- 2 large eggs
- 1/2 cup plus 2 tbsp sugar
- 3/4 cup extra virgin olive oil
- 1 1/3 cups all-purpose flour
- 1/2 tsp baking powder
- pinch baking soda
In a large bowl, whisk the eggs with the remaining 1/2 cup plus 2 tablespoons of sugar until the mixture is pale and thickened.
Gradually whisk in the remaining 3/4 cup extra virgin olive oil.
Sift in the all-purpose flour, baking powder, and a pinch of baking soda, then stir just until combined.
I like to be gentle here so the cake stays tender.
Step 4: Combine Fruit and Batter, Then Bake
- marinated nectarines and juices from Step 2
- cake batter from Step 3
Carefully fold the marinated nectarines and their juices from Step 2 into the batter from Step 3, making sure the fruit is evenly distributed.
Pour the combined batter into the prepared cake tin.
Bake in the preheated oven for 25-30 minutes, or until a skewer inserted into the center comes out clean.
Step 5: Cool and Serve
Allow the cake to cool in the tin before removing it.
I find letting it sit for at least 20 minutes makes it easier to slice and helps the flavors settle.

