If you ask me, chocolate cookies are one of life’s simple pleasures.
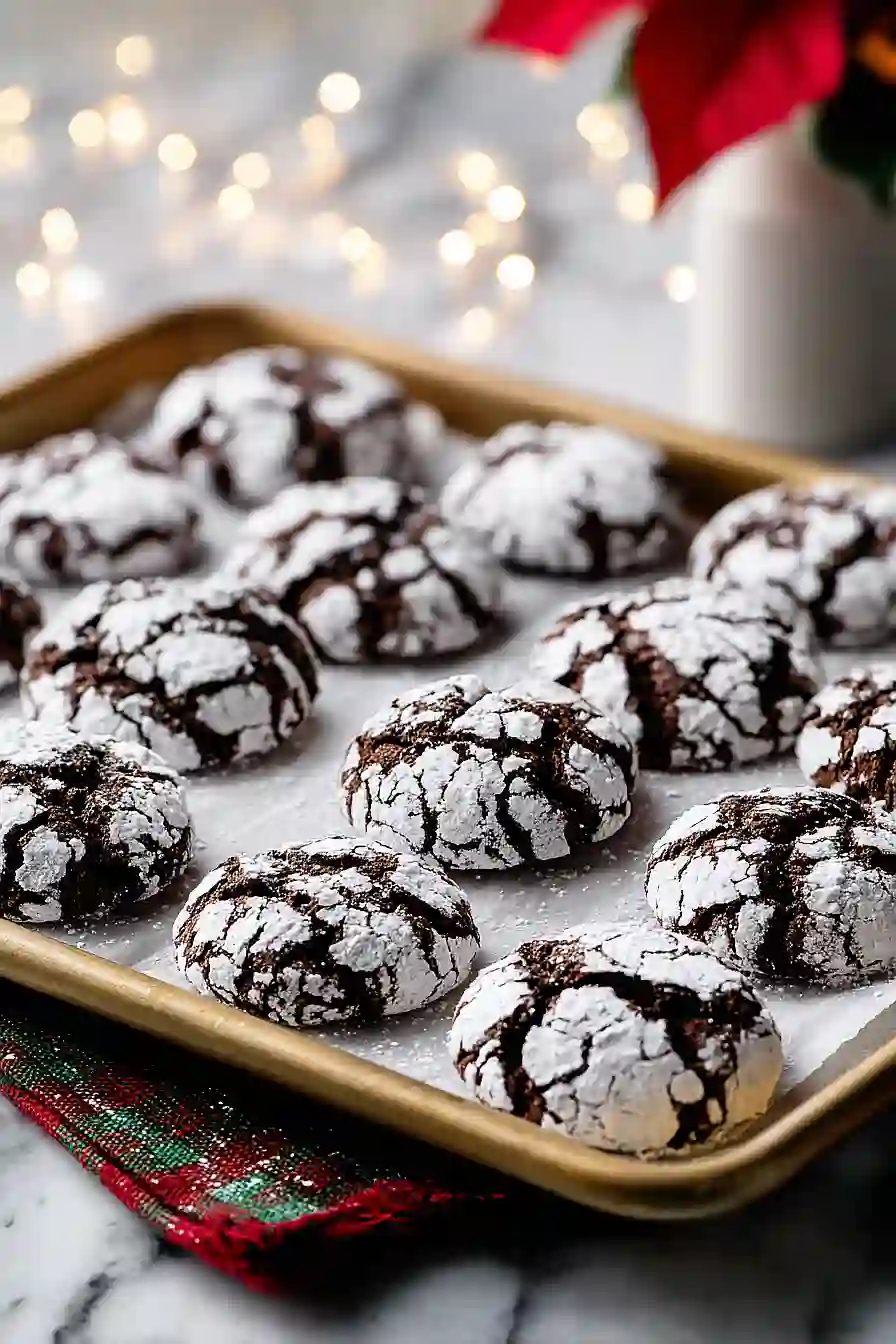
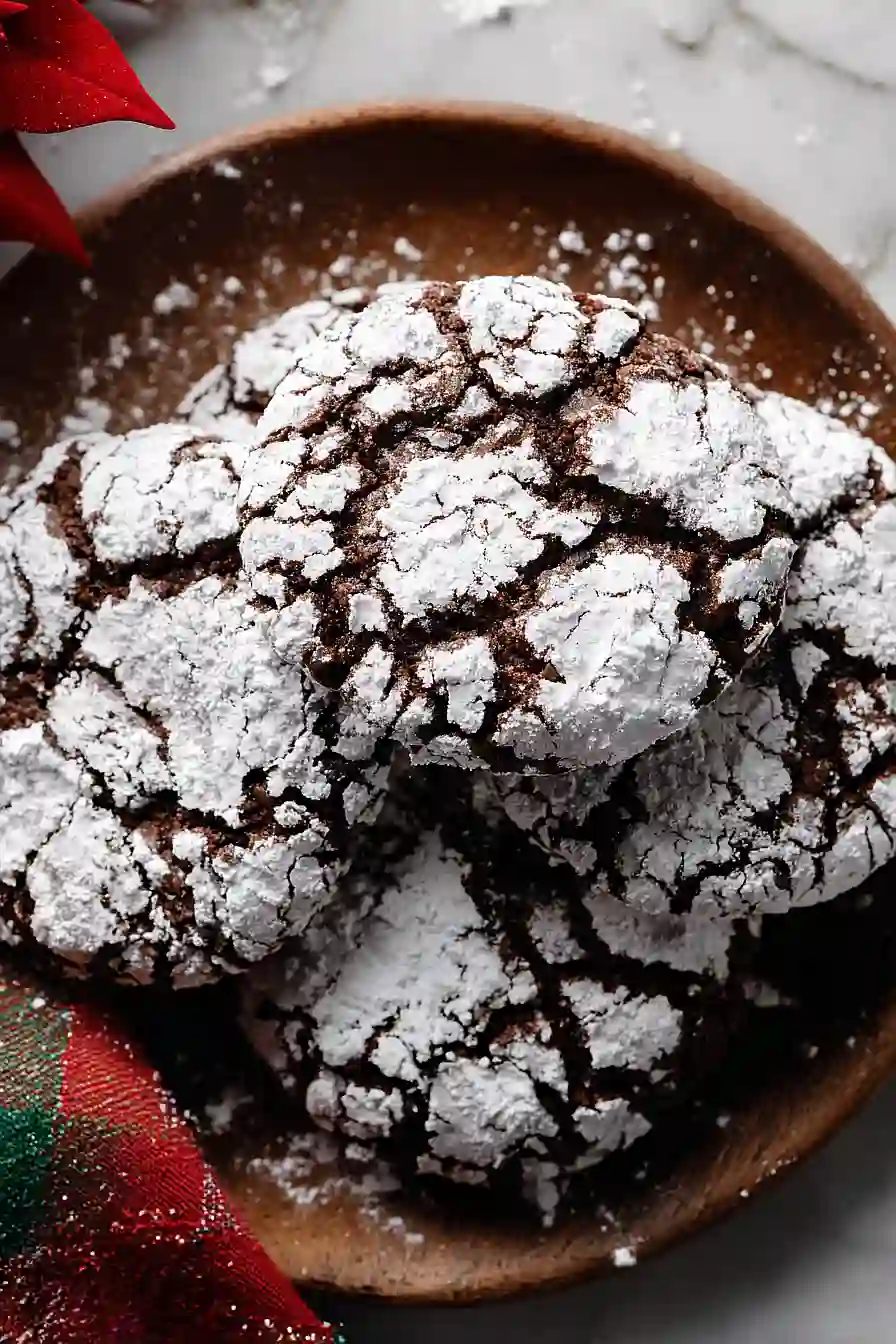
These double chocolate crinkle cookies bring together rich cocoa powder and melted chocolate chips for a cookie that’s deeply chocolatey. The crackled powdered sugar coating creates a pretty contrast against the dark dough.
They’re rolled in granulated sugar first, then tossed in confectioners sugar before baking. As they spread in the oven, the surface cracks to reveal those characteristic crinkles that give these cookies their name.
They’re a crowd-pleasing treat that works for holidays or any regular Tuesday. Soft and fudgy in the center with slightly crisp edges, they’re the kind of cookie that disappears fast.
Why You’ll Love These Double Chocolate Crinkle Cookies
- Impressive presentation – These cookies look like they came from a fancy bakery with their crackled powdered sugar coating, but they’re surprisingly simple to make at home.
- Double chocolate goodness – With cocoa powder in the dough and chocolate chips throughout, these cookies deliver serious chocolate flavor in every bite.
- Make-ahead friendly – You can prepare the dough up to 3 days in advance and bake fresh cookies whenever you need them, making them perfect for holiday baking or last-minute guests.
- Soft and chewy texture – The combination of butter and brown sugar creates cookies that stay soft in the center with slightly crisp edges.
- Common pantry ingredients – You probably already have most of these staples in your kitchen, so no special shopping trip required.
What Kind of Cocoa Powder Should I Use?
For these double chocolate crinkle cookies, you’ll want to use unsweetened natural cocoa powder rather than Dutch-process cocoa powder. Natural cocoa powder is more acidic and works better with the baking soda in this recipe to help the cookies rise and spread properly. You can find natural cocoa powder at most grocery stores – Hershey’s is a common brand that works great. If you accidentally use Dutch-process (which is usually darker and says “alkalized” on the label), your cookies might not have the same texture or that classic crinkled appearance we’re going for.
Options for Substitutions
While these cookies are pretty straightforward, here are some swaps you can make if needed:
- Unsalted butter: You can use salted butter instead – just skip the added salt in the recipe. Coconut oil also works as a dairy-free option, though the cookies will spread a bit more.
- Brown sugar: If you’re out of brown sugar, mix 1/2 cup of granulated sugar with 1 tablespoon of molasses. Or just use all granulated sugar, though the cookies will be slightly less chewy.
- Unsweetened cocoa powder: Natural cocoa powder is best here for that classic crinkle look, but Dutch-process cocoa will work too. Just know your cookies might not crack quite as much on top.
- Semi-sweet chocolate chips: Feel free to use dark chocolate chips, milk chocolate chips, or even white chocolate chips based on your preference. Chopped chocolate bars work great too.
- Egg: For an egg-free version, try using 1/4 cup of unsweetened applesauce or a flax egg (1 tablespoon ground flaxseed mixed with 3 tablespoons water, let sit for 5 minutes).
- Confectioners’ sugar: This is really important for the signature crinkle look, so I wouldn’t recommend skipping it. The powdered sugar coating is what creates those pretty cracks.
Watch Out for These Mistakes While Baking
The biggest mistake with crinkle cookies is skipping the chilling step – if your dough is too warm, the cookies will spread too quickly in the oven and you’ll lose those signature cracks, so make sure to refrigerate the dough for at least 2 hours or until it’s firm enough to roll into balls.
Another common error is rolling the cookies in powdered sugar while the dough is still sticky or warm, which causes the sugar to dissolve and disappear during baking – for the best crinkle effect, roll the chilled dough balls in granulated sugar first, then generously coat them in powdered sugar.
Don’t overbake these cookies or they’ll turn dry and hard instead of staying soft and fudgy in the center – they should look slightly underdone when you pull them out at around 10-12 minutes, with cracks forming but the centers still looking a bit wet.
Finally, resist the urge to flatten the dough balls before baking, as they need to spread naturally in the oven to create those beautiful crinkles on top.

What to Serve With Double Chocolate Crinkle Cookies?
These cookies are perfect alongside a cold glass of milk, which helps balance out all that rich chocolate flavor. I love serving them at holiday gatherings with hot cocoa or coffee, since the sweetness pairs nicely with something warm to drink. They’re also great on a dessert platter with some vanilla ice cream on the side – you can even make ice cream sandwiches by pressing two cookies together with a scoop in between. For a fun party spread, set them out with other cookies like snickerdoodles or sugar cookies so everyone can mix and match their favorites.
Storage Instructions
Store: These cookies stay soft and chewy when kept in an airtight container at room temperature for up to 1 week. Just stack them with parchment paper between layers if you want to keep that pretty powdered sugar coating looking nice.
Freeze: You can freeze baked cookies in a freezer-safe container for up to 3 months. I also love freezing the dough balls before rolling them in powdered sugar, so I can bake fresh cookies whenever a craving hits. Just add a minute or two to the baking time if you’re baking from frozen.
Make Ahead: The dough can be made ahead and stored in the fridge for up to 3 days before baking. Let it sit at room temperature for about 15 minutes before scooping and rolling, since cold dough can be a bit firm to work with.
| Preparation Time | 15-20 minutes |
| Cooking Time | 11-12 minutes |
| Total Time | 3 hours 26 minutes – 3 days 12 minutes |
| Level of Difficulty | Medium |
Estimated Nutrition
Estimated nutrition for the whole recipe (without optional ingredients):
- Calories: 2850-3100
- Protein: 28-34 g
- Fat: 150-170 g
- Carbohydrates: 380-420 g
Ingredients
For the cookie dough:
- 1 large egg (room temperature)
- 1 tsp baking soda
- 1/8 tsp salt
- 1/2 cup unsalted butter (softened to room temperature)
- 1 tsp vanilla extract
- 1 cup semi-sweet chocolate chips (I prefer Ghirardelli)
- 1 cup all-purpose flour (I use King Arthur all-purpose flour)
- 1/2 cup granulated sugar
- 1/2 cup packed brown sugar
- 6 tbsp unsweetened cocoa powder (for rich chocolate flavor)
For rolling:
- 1 cup confectioners sugar (for the crinkle coating)
- 3 tbsp granulated sugar
Step 1: Cream Butter and Sugars
- 1/2 cup unsalted butter
- 1/2 cup granulated sugar
- 1/2 cup packed brown sugar
In a large mixing bowl, combine the softened butter, granulated sugar, and packed brown sugar.
Beat on medium speed for 2-3 minutes until the mixture is light, fluffy, and pale in color.
This creaming process incorporates air into the dough, which helps create the signature crinkled texture on the cookies.
Make sure your butter is truly softened but not melted—it should be around 65-70°F for best results.
Step 2: Add Egg and Vanilla
- 1 large egg
- 1 tsp vanilla extract
Add the room-temperature egg and vanilla extract to the creamed mixture.
Beat on medium speed for about 1 minute until fully combined and the mixture looks smooth and integrated.
Room-temperature ingredients blend more evenly and create a better emulsion, which gives you a more cohesive dough.
Step 3: Prepare Dry Ingredients
- 1 cup all-purpose flour
- 6 tbsp unsweetened cocoa powder
- 1 tsp baking soda
- 1/8 tsp salt
In a separate medium bowl, whisk together the all-purpose flour, unsweetened cocoa powder, baking soda, and salt.
Whisking helps distribute the leavening agent evenly throughout the dry mixture, ensuring consistent rise and texture in every cookie.
This step should take just 30 seconds to a minute.
Step 4: Combine Wet and Dry Ingredients
- dry ingredient mixture from Step 3
- 1 cup semi-sweet chocolate chips
Slowly add the dry ingredient mixture from Step 3 to the wet mixture, beating on low speed just until combined.
The dough will be thick and dark.
Once the flour is mostly incorporated, add the chocolate chips and fold them in gently with a spatula.
I like to use semi-sweet chips because they provide just enough sweetness to balance the cocoa powder without making the cookies overly sweet.
Step 5: Chill the Dough
Cover the dough with plastic wrap or transfer it to an airtight container, then refrigerate for at least 3 hours (or up to 24 hours).
Chilling is essential for this recipe—it prevents the cookies from spreading too much and helps develop deeper chocolate flavor.
The cold dough also becomes easier to handle when rolling into balls.
Step 6: Prepare Coating and Shape Cookies
- chilled dough from Step 5
- 1 cup confectioners sugar
- 3 tbsp granulated sugar
Remove the dough from the refrigerator and let it sit at room temperature for 10-20 minutes to make it easier to scoop.
While the dough is warming slightly, combine the confectioners sugar and 3 tablespoons granulated sugar in a shallow bowl.
Once the dough is workable, roll it into 1.5-inch balls and immediately roll each ball in the sugar coating until fully covered.
This coating creates the signature crinkled appearance as the cookies bake and the sugar melts and cracks.
Step 7: Bake the Cookies
- sugar-coated dough balls from Step 6
Preheat your oven to 350°F and line your baking sheets with parchment paper.
Arrange the sugar-coated dough balls about 3 inches apart on the prepared sheets—they will spread as they bake.
Bake for 11-12 minutes; the cookies should look slightly underbaked in the center when you pull them from the oven, as they’ll continue to set as they cool.
This ensures a soft, chewy center with crispy edges.
Step 8: Cool and Finish
Allow the cookies to cool on the baking sheet for 5 minutes—this sets the structure just enough to handle them.
Transfer them to a wire cooling rack to cool completely.
I find that this brief rest on the sheet prevents them from breaking apart while still allowing them to finish cooling quickly so the crinkle texture sets perfectly.

Best Double Chocolate Crinkle Cookies
Ingredients
For the cookie dough:
- 1 large egg (room temperature)
- 1 tsp baking soda
- 1/8 tsp salt
- 1/2 cup unsalted butter (softened to room temperature)
- 1 tsp vanilla extract
- 1 cup semi-sweet chocolate chips (I prefer Ghirardelli)
- 1 cup all-purpose flour (I use King Arthur all-purpose flour)
- 1/2 cup granulated sugar
- 1/2 cup packed brown sugar
- 6 tbsp unsweetened cocoa powder (for rich chocolate flavor)
For rolling:
- 1 cup confectioners sugar (for the crinkle coating)
- 3 tbsp granulated sugar
Instructions
- In a large mixing bowl, combine the softened butter, granulated sugar, and packed brown sugar. Beat on medium speed for 2-3 minutes until the mixture is light, fluffy, and pale in color. This creaming process incorporates air into the dough, which helps create the signature crinkled texture on the cookies. Make sure your butter is truly softened but not melted—it should be around 65-70°F for best results.
- Add the room-temperature egg and vanilla extract to the creamed mixture. Beat on medium speed for about 1 minute until fully combined and the mixture looks smooth and integrated. Room-temperature ingredients blend more evenly and create a better emulsion, which gives you a more cohesive dough.
- In a separate medium bowl, whisk together the all-purpose flour, unsweetened cocoa powder, baking soda, and salt. Whisking helps distribute the leavening agent evenly throughout the dry mixture, ensuring consistent rise and texture in every cookie. This step should take just 30 seconds to a minute.
- Slowly add the dry ingredient mixture from Step 3 to the wet mixture, beating on low speed just until combined. The dough will be thick and dark. Once the flour is mostly incorporated, add the chocolate chips and fold them in gently with a spatula. I like to use semi-sweet chips because they provide just enough sweetness to balance the cocoa powder without making the cookies overly sweet.
- Cover the dough with plastic wrap or transfer it to an airtight container, then refrigerate for at least 3 hours (or up to 24 hours). Chilling is essential for this recipe—it prevents the cookies from spreading too much and helps develop deeper chocolate flavor. The cold dough also becomes easier to handle when rolling into balls.
- Remove the dough from the refrigerator and let it sit at room temperature for 10-20 minutes to make it easier to scoop. While the dough is warming slightly, combine the confectioners sugar and 3 tablespoons granulated sugar in a shallow bowl. Once the dough is workable, roll it into 1.5-inch balls and immediately roll each ball in the sugar coating until fully covered. This coating creates the signature crinkled appearance as the cookies bake and the sugar melts and cracks.
- Preheat your oven to 350°F and line your baking sheets with parchment paper. Arrange the sugar-coated dough balls about 3 inches apart on the prepared sheets—they will spread as they bake. Bake for 11-12 minutes; the cookies should look slightly underbaked in the center when you pull them from the oven, as they'll continue to set as they cool. This ensures a soft, chewy center with crispy edges.
- Allow the cookies to cool on the baking sheet for 5 minutes—this sets the structure just enough to handle them. Transfer them to a wire cooling rack to cool completely. I find that this brief rest on the sheet prevents them from breaking apart while still allowing them to finish cooling quickly so the crinkle texture sets perfectly.
