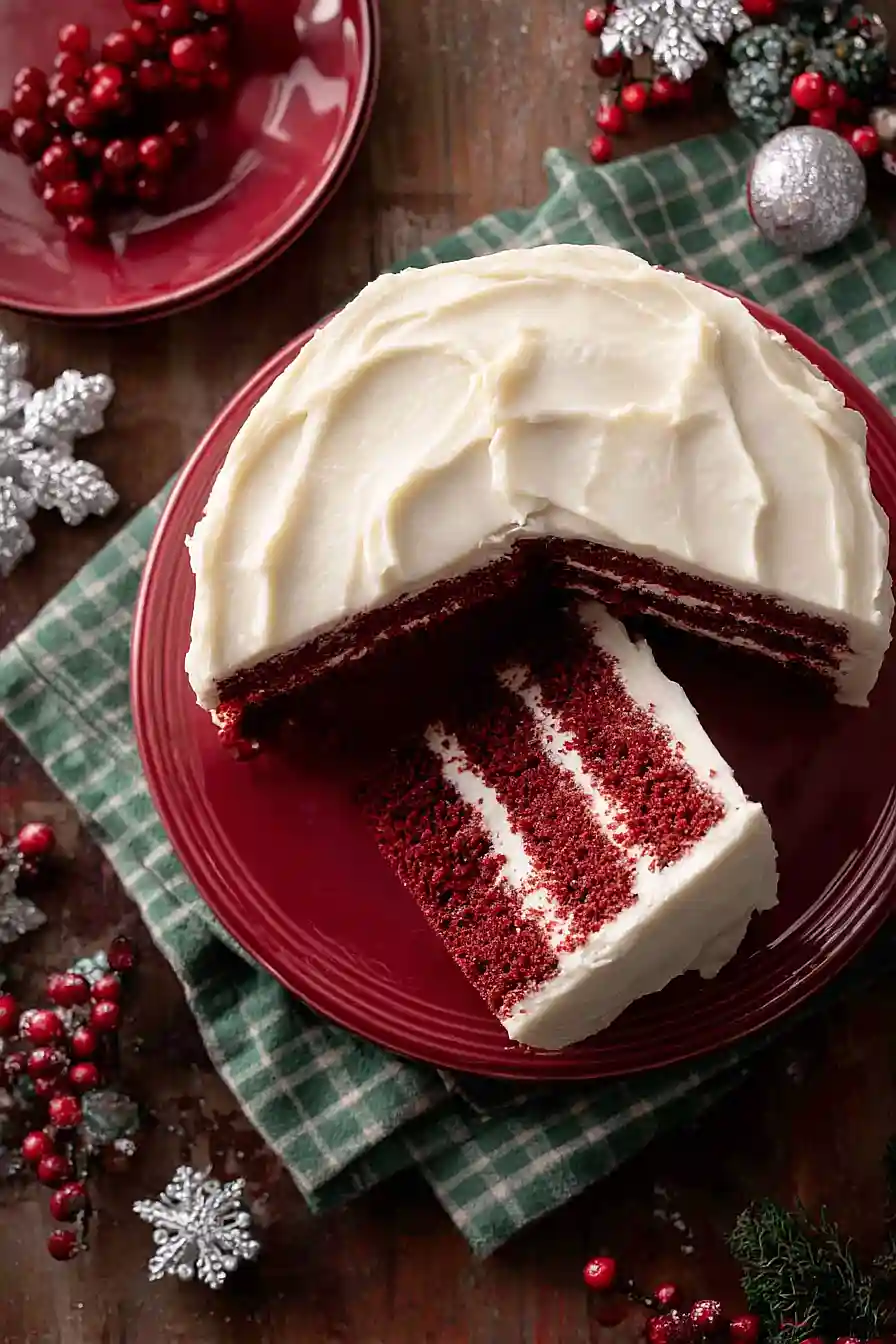
If you ask me, red velvet cake is the perfect showstopper for Christmas dinner.
This Southern-style layer cake brings together cocoa powder and buttermilk for a tender crumb that’s just slightly chocolate-y. The red food coloring gives it that classic holiday look that everyone expects.
It’s topped with a thick cream cheese frosting that balances out the sweetness perfectly. The tangy buttermilk and vinegar work with the baking soda to create a soft, moist texture that keeps people coming back for seconds.
It’s a festive dessert that tastes as good as it looks, perfect for making your holiday table feel special.
Why You’ll Love This Red Velvet Christmas Cake
- Quick and easy to make – This cake comes together in under an hour, making it perfect for holiday baking when you’re short on time but still want something special.
- Simple pantry ingredients – You probably already have most of these staples in your kitchen, so no need for a special trip to the store.
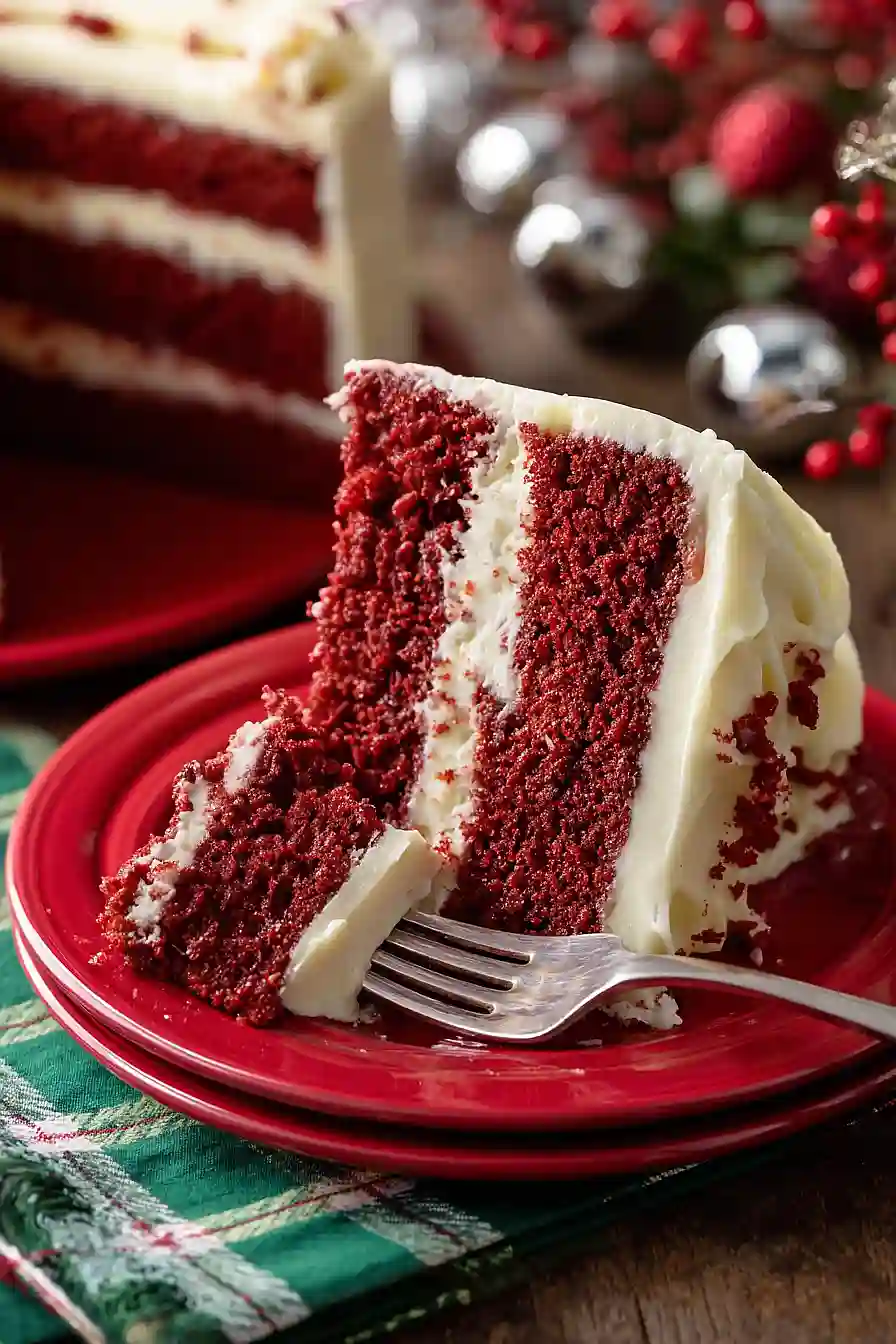
- Perfect for celebrations – The rich red color and cream cheese frosting make this cake look festive and impressive without requiring any fancy decorating skills.
- Classic flavor everyone loves – The subtle cocoa taste paired with tangy cream cheese frosting is a crowd-pleaser that works for Christmas dinner, potlucks, or any special occasion.
What Kind of Red Food Coloring Should I Use?
You’ll want to use liquid red food coloring for this recipe, which is what you’ll find in most grocery stores in the baking aisle. The standard liquid variety works perfectly fine and gives you that classic red velvet color. If you want a deeper, more intense red color, you can opt for gel food coloring instead – just keep in mind that gel is more concentrated, so you’ll only need about half the amount called for in the recipe. Some bakers prefer natural food colorings made from beet juice or other plant sources, though these tend to produce a more muted, burgundy tone rather than the bright red most people expect from red velvet cake.

Options for Substitutions
This classic cake is pretty forgiving when it comes to swaps, though a few ingredients are essential:
- Buttermilk: Don’t have buttermilk? Make your own by adding 1 tablespoon of white vinegar or lemon juice to 1 cup of regular milk. Let it sit for 5 minutes before using.
- Vegetable oil: You can swap this with canola oil or melted coconut oil. Avoid using olive oil as it has too strong a flavor for this cake.
- Red food coloring: While traditional red velvet uses liquid food coloring, you can use gel food coloring instead – just use less (about 1 to 1½ teaspoons) since it’s more concentrated. Some folks prefer natural beet juice, but you’ll need about ¼ cup and the color won’t be as bright.
- White vinegar: Apple cider vinegar works just as well here and you won’t taste the difference in the final cake.
- All-purpose flour: Stick with all-purpose flour for this recipe – cake flour will make it too delicate, and bread flour will make it too dense.
- Cocoa powder: Use unsweetened cocoa powder only. Don’t substitute with hot cocoa mix as it contains sugar and will throw off the recipe’s balance.
Watch Out for These Mistakes While Baking
The biggest mistake when baking red velvet cake is overmixing the batter once you add the flour, which develops too much gluten and creates a dense, tough cake instead of the tender crumb you’re looking for – mix just until the ingredients are combined and no white streaks remain.
Another common error is skipping the room temperature eggs and buttermilk, as cold ingredients don’t emulsify properly with the oil and can lead to an uneven texture, so take them out of the fridge about 30 minutes before you start baking.
Don’t forget that the vinegar and baking soda react to create lift in your cake, so make sure to get the cake in the oven within a few minutes of mixing to capture all that leavening power.
Finally, resist the urge to frost your cake while it’s still warm – this will melt your cream cheese frosting and cause it to slide right off, so let those layers cool completely on a wire rack for at least an hour before assembling.
What to Serve With Red Velvet Cake?
Red velvet cake is a showstopper on its own, but a cup of hot coffee or cold milk is really all you need to make it complete. The rich cream cheese frosting pairs beautifully with the slight tang of buttermilk in the cake, so you don’t want to overpower those flavors with anything too heavy. If you’re serving this at a holiday party, consider setting out some fresh berries like strawberries or raspberries on the side – they add a nice pop of freshness that cuts through the sweetness. For a cozy winter dessert, a scoop of vanilla ice cream alongside a warm slice is always a crowd-pleaser.
Storage Instructions
Store: Keep your red velvet cake covered at room temperature for up to 2 days, or in the fridge for up to a week. The cream cheese frosting means it’s best refrigerated if you’re keeping it longer than a day or two, especially in warmer weather.
Freeze: This cake freezes really well for up to 3 months. Wrap individual slices tightly in plastic wrap and then in foil, or freeze the whole unfrosted cake layers. If you’re freezing a frosted cake, let it firm up in the freezer first before wrapping so the frosting doesn’t stick.
Serve: Let refrigerated cake sit at room temperature for about 30 minutes before serving so the frosting softens up and the flavors come through better. Frozen slices thaw in about an hour on the counter, or you can thaw them overnight in the fridge.
| Preparation Time | 20-25 minutes |
| Cooking Time | 20-25 minutes |
| Total Time | 40-50 minutes |
| Level of Difficulty | Medium |
| Servings | 12 slices |
Estimated Nutrition
Estimated nutrition for the whole recipe (without optional ingredients):
- Calories: 4000-4300
- Protein: 35-45 g
- Fat: 190-210 g
- Carbohydrates: 550-600 g
Ingredients
For the cake:
- 1 cup whole buttermilk (room temperature)
- 3 large eggs (room temperature)
- 1.75 cups sugar
- 1 tbsp white vinegar (activates the baking soda)
- 1 tbsp vanilla extract (for best flavor)
- 1 cup vegetable oil (or any neutral oil)
- 2 tbsp unsweetened cocoa powder (for deep color and subtle richness)
- 1 tsp baking soda
- 2 tbsp red food coloring (gel or liquid, for vibrant red color)
- 2.5 cups all-purpose flour (I use King Arthur all-purpose flour)
- 3/4 tsp kosher salt
For the frosting:
- double-batch cream cheese frosting (I use Philadelphia cream cheese for smoothest texture)
Step 1: Prepare Equipment and Mise en Place
- 3 round cake pans
- vegetable oil
- all ingredients
Preheat your oven to 325°F and position racks so you can bake three cake pans simultaneously.
Grease three 9-inch round cake pans generously and set them aside.
Gather all ingredients and measure them into separate bowls—this is especially important for baking because you need everything ready to go.
Make sure your eggs, buttermilk, and oil are all at room temperature, as this helps them emulsify properly and creates a more tender crumb.
Room temperature ingredients combine more evenly, which is crucial for red velvet’s signature silky texture.
Step 2: Combine Dry Ingredients and Create the Base
- 2.5 cups all-purpose flour
- 1.75 cups sugar
- 2 tbsp unsweetened cocoa powder
- 1 tsp baking soda
- 3/4 tsp kosher salt
In a stand mixer, combine the flour, sugar, cocoa powder, baking soda, and salt on low speed for about 30 seconds, just until everything is evenly distributed.
The cocoa powder is key here—it creates the deep chocolate undertones that make red velvet distinct from a regular cake.
Don’t overmix at this stage; you just want the dry ingredients incorporated.
This creates the base mixture that will be ready to receive the wet ingredients.
Step 3: Build the Wet Mixture and Emulsify
- 1 cup vegetable oil
- 3 large eggs
- dry ingredient mixture from Step 2
With the mixer running on medium speed, slowly pour in the oil while mixing the dry ingredients from Step 2 until the mixture resembles coarse sand—this takes about 1-2 minutes.
This step is crucial because it coats the flour with fat, which creates a more tender crumb and helps prevent gluten development.
Then add the eggs one at a time, beating for about 30 seconds after each egg until fully incorporated.
I like to pause between eggs to scrape down the bowl, making sure no dry pockets remain.
This creates an emulsion that makes the cake incredibly moist and velvety.
Step 4: Add Flavor and Color Components
- 1 tbsp vanilla extract
- 1 tbsp white vinegar
- 2 tbsp red food coloring
- 1 cup whole buttermilk
- batter from Step 3
With the mixer on medium speed, add the vanilla extract, white vinegar, and red food coloring, beating for about 1 minute until the batter is uniformly colored and fully combined.
The vinegar reacts with the baking soda to create lift and also adds a subtle tanginess that enhances the cocoa flavor—don’t skip it.
The red food coloring should be evenly distributed for that iconic color, so take time to mix it in thoroughly.
Finally, add the buttermilk in two additions, mixing on low speed for about 30 seconds after each addition until just combined.
The batter should be smooth and pourable at this point.
Step 5: Bake the Cakes
- batter from Step 4
Divide the batter evenly among the three prepared pans, filling each about two-thirds full.
Place all three pans in the preheated 325°F oven, spacing them evenly on the racks for even heat circulation.
Bake for 18 to 22 minutes, until a toothpick inserted in the center comes out with just a few moist crumbs—be careful not to overbake, as red velvet cakes can dry out quickly.
The cakes should be springy to the touch and pull slightly from the sides of the pan when done.
Step 6: Cool Cakes and Prepare for Frosting
- baked cakes from Step 5
- wire cooling racks
Remove the cakes from the oven and let them rest in their pans for exactly 5 minutes—this allows them to set slightly while still warm, making them less likely to crack when turned out.
After 5 minutes, run a thin knife around the edges of each pan and carefully turn the cakes out onto wire cooling racks.
Let them cool completely to room temperature, about 1-2 hours, before frosting.
I never frost a warm cake because the frosting will melt and slide off; patience here makes all the difference in a beautiful finished cake.
Step 7: Assemble and Frost the Cake
- cooled cakes from Step 6
- double-batch cream cheese frosting
Once the cakes are completely cool, prepare your double-batch cream cheese frosting, making sure it’s smooth and spreadable—Philadelphia cream cheese works best because it’s less grainy than other brands.
Place the first cooled cake layer on your cake stand or serving plate and spread a generous layer of frosting on top, about 1/2 inch thick.
Stack the second cake layer on top and repeat, then crown with the final cake layer.
Frost the top and sides of the assembled cake with the remaining frosting, using an offset spatula for a smooth, professional finish.
For a festive look, add any holiday garnishes you’d like before serving.
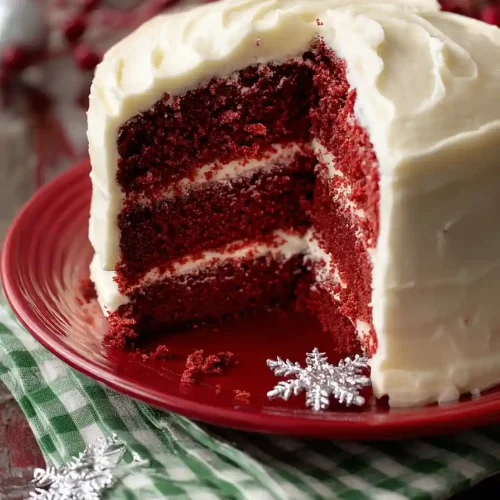
Festive Southern Red Velvet Christmas Cake
Ingredients
For the cake:
- 1 cup whole buttermilk (room temperature)
- 3 large eggs (room temperature)
- 1.75 cups sugar
- 1 tbsp white vinegar (activates the baking soda)
- 1 tbsp vanilla extract (for best flavor)
- 1 cup vegetable oil (or any neutral oil)
- 2 tbsp unsweetened cocoa powder (for deep color and subtle richness)
- 1 tsp baking soda
- 2 tbsp red food coloring (gel or liquid, for vibrant red color)
- 2.5 cups all-purpose flour (I use King Arthur all-purpose flour)
- 3/4 tsp kosher salt
For the frosting:
- double-batch cream cheese frosting (I use Philadelphia cream cheese for smoothest texture)
Instructions
- Preheat your oven to 325°F and position racks so you can bake three cake pans simultaneously. Grease three 9-inch round cake pans generously and set them aside. Gather all ingredients and measure them into separate bowls—this is especially important for baking because you need everything ready to go. Make sure your eggs, buttermilk, and oil are all at room temperature, as this helps them emulsify properly and creates a more tender crumb. Room temperature ingredients combine more evenly, which is crucial for red velvet's signature silky texture.
- In a stand mixer, combine the flour, sugar, cocoa powder, baking soda, and salt on low speed for about 30 seconds, just until everything is evenly distributed. The cocoa powder is key here—it creates the deep chocolate undertones that make red velvet distinct from a regular cake. Don't overmix at this stage; you just want the dry ingredients incorporated. This creates the base mixture that will be ready to receive the wet ingredients.
- With the mixer running on medium speed, slowly pour in the oil while mixing the dry ingredients from Step 2 until the mixture resembles coarse sand—this takes about 1-2 minutes. This step is crucial because it coats the flour with fat, which creates a more tender crumb and helps prevent gluten development. Then add the eggs one at a time, beating for about 30 seconds after each egg until fully incorporated. I like to pause between eggs to scrape down the bowl, making sure no dry pockets remain. This creates an emulsion that makes the cake incredibly moist and velvety.
- With the mixer on medium speed, add the vanilla extract, white vinegar, and red food coloring, beating for about 1 minute until the batter is uniformly colored and fully combined. The vinegar reacts with the baking soda to create lift and also adds a subtle tanginess that enhances the cocoa flavor—don't skip it. The red food coloring should be evenly distributed for that iconic color, so take time to mix it in thoroughly. Finally, add the buttermilk in two additions, mixing on low speed for about 30 seconds after each addition until just combined. The batter should be smooth and pourable at this point.
- Divide the batter evenly among the three prepared pans, filling each about two-thirds full. Place all three pans in the preheated 325°F oven, spacing them evenly on the racks for even heat circulation. Bake for 18 to 22 minutes, until a toothpick inserted in the center comes out with just a few moist crumbs—be careful not to overbake, as red velvet cakes can dry out quickly. The cakes should be springy to the touch and pull slightly from the sides of the pan when done.
- Remove the cakes from the oven and let them rest in their pans for exactly 5 minutes—this allows them to set slightly while still warm, making them less likely to crack when turned out. After 5 minutes, run a thin knife around the edges of each pan and carefully turn the cakes out onto wire cooling racks. Let them cool completely to room temperature, about 1-2 hours, before frosting. I never frost a warm cake because the frosting will melt and slide off; patience here makes all the difference in a beautiful finished cake.
- Once the cakes are completely cool, prepare your double-batch cream cheese frosting, making sure it's smooth and spreadable—Philadelphia cream cheese works best because it's less grainy than other brands. Place the first cooled cake layer on your cake stand or serving plate and spread a generous layer of frosting on top, about 1/2 inch thick. Stack the second cake layer on top and repeat, then crown with the final cake layer. Frost the top and sides of the assembled cake with the remaining frosting, using an offset spatula for a smooth, professional finish. For a festive look, add any holiday garnishes you'd like before serving.

Where is the cream cheese frosting recipe? Thanks!