If you ask me, cookies shaped like adorable little bears never go out of style.
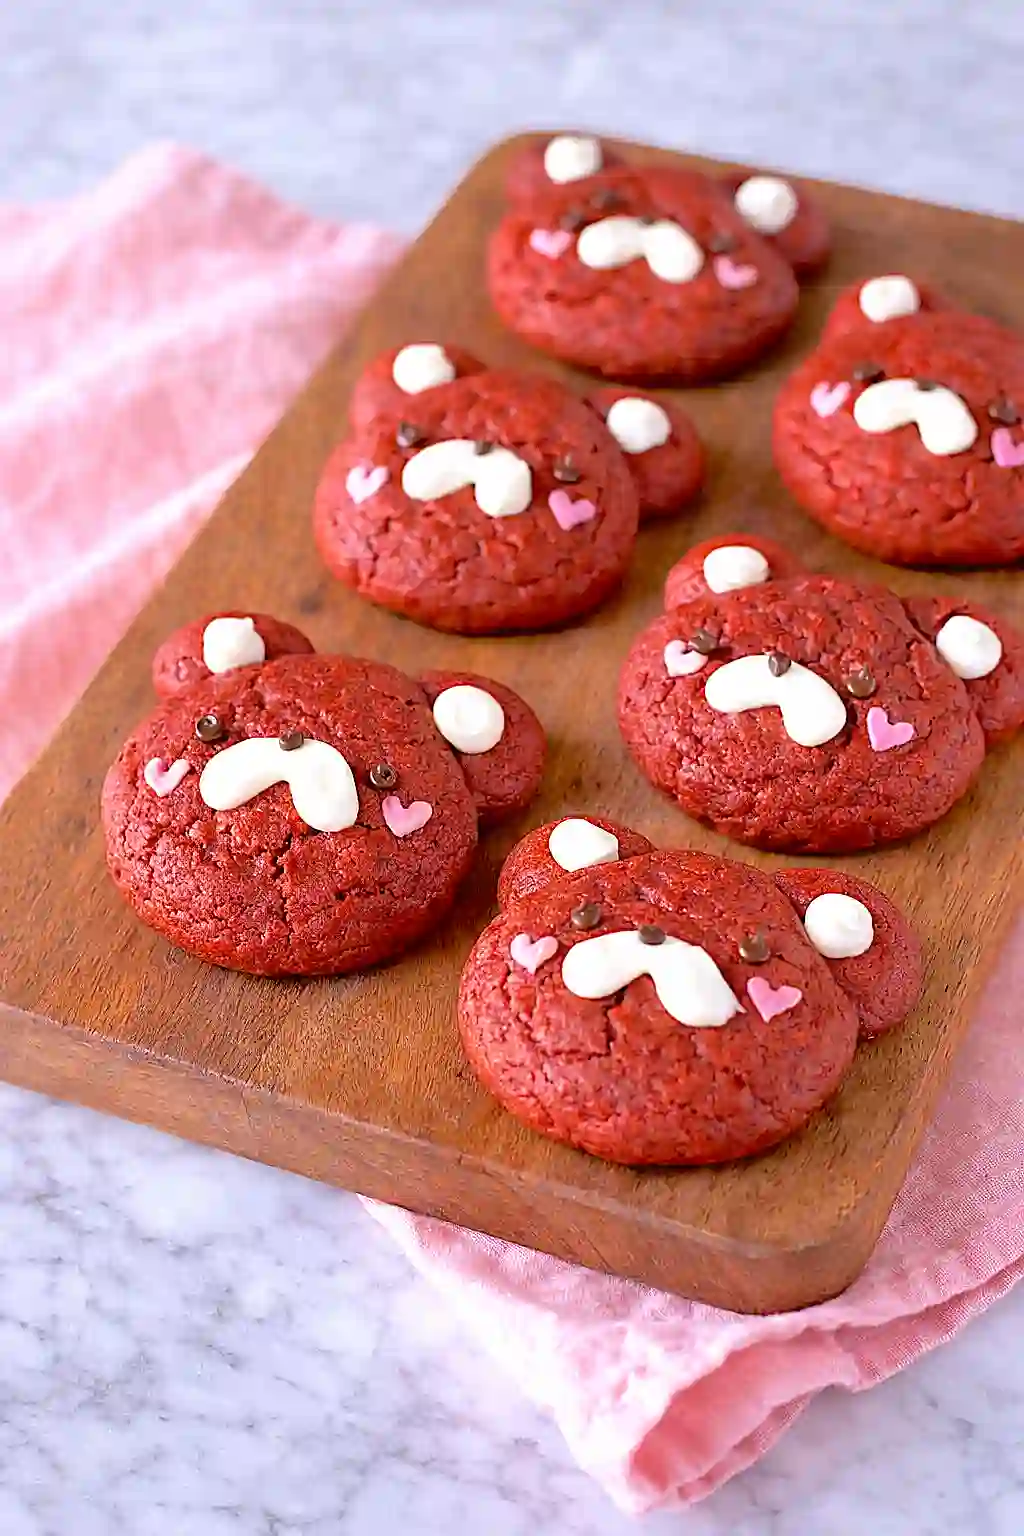
These red velvet bear cookies combine the classic flavor of red velvet cake with a fun, playful shape that kids and adults both love. The soft, slightly cocoa-flavored cookies get their signature color from red food coloring and pair perfectly with sweet chocolate details.
They’re decorated with melted semi-sweet and white chocolate to create cute bear faces that are almost too charming to eat. The cookies themselves have that familiar red velvet taste—a hint of chocolate, a touch of tang from the vinegar, and a tender crumb.
They’re a crowd-pleasing treat that works for Valentine’s Day, birthday parties, or just because you want something fun to bake.
Why You’ll Love These Red Velvet Bear Cookies
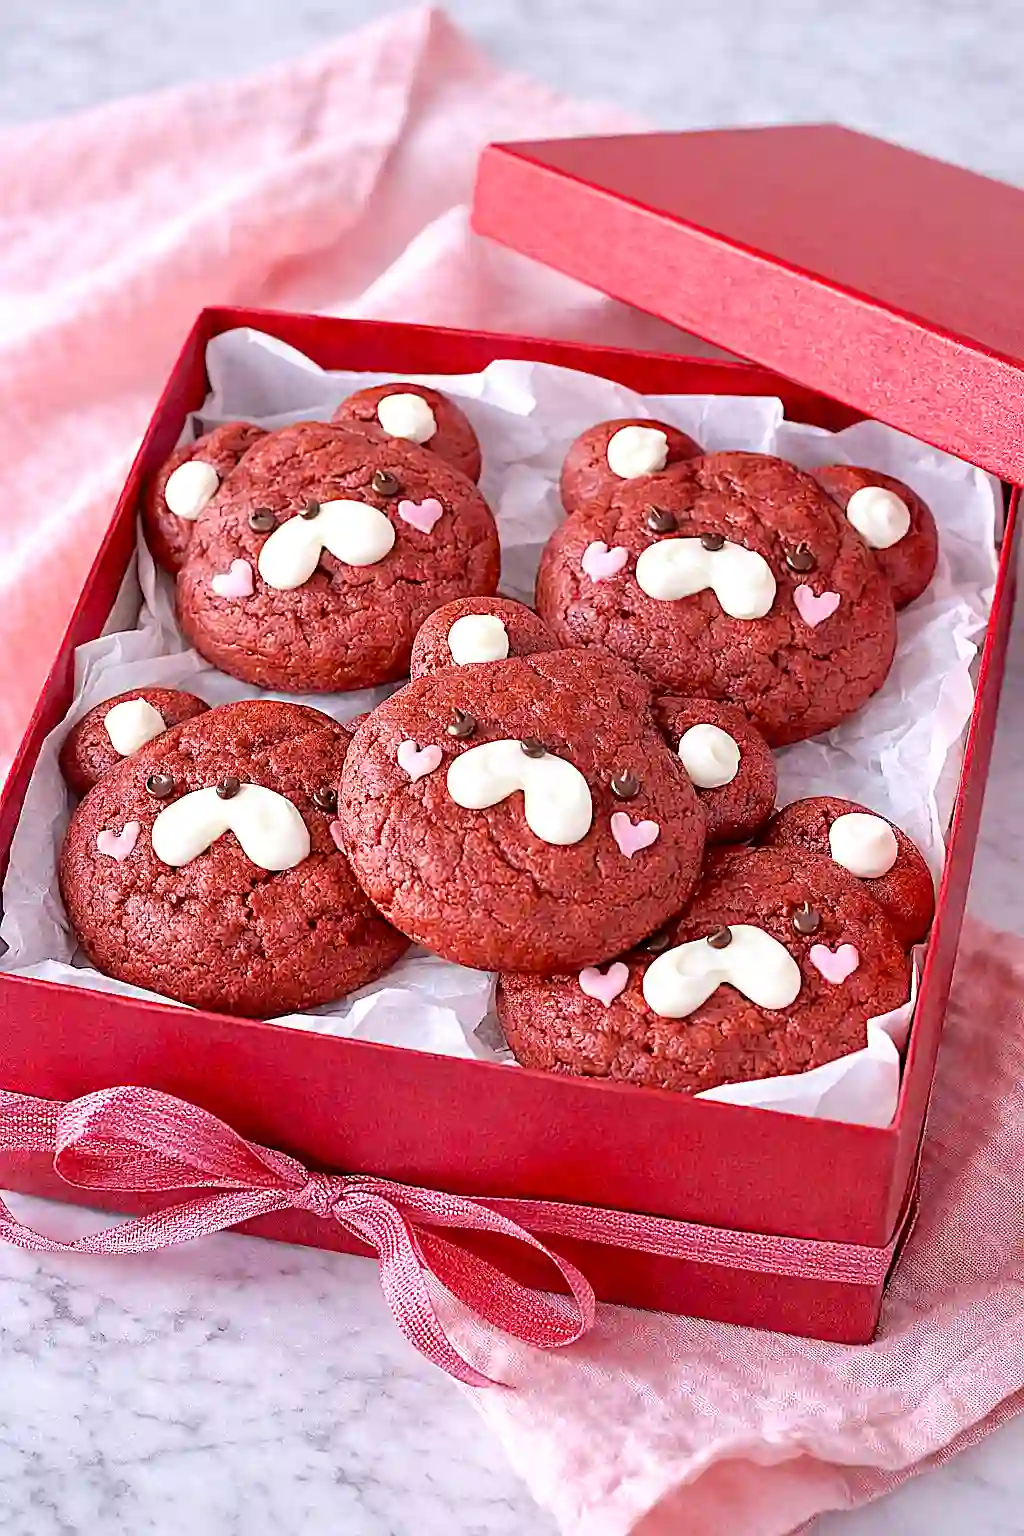
- Adorable presentation – These cute bear-shaped cookies are perfect for kids’ parties, Valentine’s Day, or any time you want to make someone smile.
- Classic red velvet flavor – You get that beloved red velvet taste in cookie form, with just the right hint of cocoa and a soft, chewy texture.
- Fun to decorate – The chocolate details let you get creative with the bear faces, making this a great baking project to do with kids.
- Ready in about an hour – From mixing to decorating, these cookies come together quickly enough for a weeknight treat or last-minute party contribution.
What Kind of Flour Should I Use?
All-purpose flour is your best bet for these red velvet bear cookies, and it’s probably what you already have in your pantry. You’ll want to measure it properly by spooning it into your measuring cup and leveling it off with a knife, rather than scooping directly from the bag, which can pack in too much flour and make your cookies dense. If you only have self-rising flour on hand, you’ll need to skip the baking soda, baking powder, and salt since those are already mixed in. Cake flour will work in a pinch too, though your cookies might turn out a bit more tender and delicate than the traditional chewy texture you’re going for.
Options for Substitutions
These adorable bear cookies are pretty forgiving when it comes to swaps:
- Unsalted butter: You can use salted butter if that’s what you have – just skip the added salt in the recipe to avoid over-salting your cookies.
- Brown sugar: If you’re out of brown sugar, mix 0.25 cup white sugar with 1 teaspoon of molasses. Or just use all white sugar, though your cookies will be slightly less chewy.
- White vinegar: Apple cider vinegar or lemon juice work just as well here. The acid helps activate the baking soda and gives that classic red velvet tang.
- Red food coloring: Gel food coloring gives you more control over the color intensity than liquid, but either works fine. Start with a small amount and add more until you get that signature red velvet shade.
- Milk chocolate and white chocolate: These are for decorating the bears, so you can use chocolate chips, candy melts, or even royal icing instead. Just make sure whatever you use can be piped or placed for the bear details.
- Vanilla essence: Vanilla extract works the same way – they’re interchangeable in this recipe.
Watch Out for These Mistakes While Baking
The biggest mistake when making these bear cookies is skipping the chilling step, which causes the dough to spread too much in the oven and turns your cute bears into flat blobs – make sure to chill for the full 20-30 minutes so the cookies hold their shape. Another common error is attaching the ears too firmly or pressing them down, when you should just gently place them on top of the dough balls so they naturally meld together during baking. Be careful not to overbake these cookies, as they should look slightly underdone when you pull them out at the 9-minute mark – they’ll continue cooking on the hot pan and firm up as they cool. When decorating, always use oil-based food coloring for the chocolate details instead of regular food coloring, which will cause the chocolate to seize up and become grainy and unusable.

What to Serve With Red Velvet Bear Cookies?
These adorable cookies are perfect with a cold glass of milk, which is honestly the best way to enjoy any cookie. If you’re serving them at a party or get-together, they pair nicely with hot chocolate or coffee for the adults. You could also set up a fun dessert spread with vanilla ice cream on the side, letting people make little cookie sandwiches if they want. For a birthday party or special occasion, arrange them on a platter with fresh strawberries and raspberries since the red color theme looks really nice together.
Storage Instructions
Store: Keep your red velvet bear cookies in an airtight container at room temperature for up to 5 days. Layer them with parchment paper if you’re stacking them so the decorations don’t smudge. They’ll stay soft and chewy if you toss a slice of bread in the container with them!
Freeze: These cookies freeze really well for up to 3 months. Just make sure they’re completely decorated and set before freezing. Place them in a single layer on a baking sheet to freeze first, then transfer to a freezer bag once they’re solid so the little bear faces stay perfect.
Thaw: When you want to enjoy your frozen cookies, just let them sit at room temperature for about 30 minutes. They’ll taste just as good as the day you made them, and the chocolate decorations will still look cute!
| Preparation Time | 45-55 minutes |
| Cooking Time | 10-15 minutes |
| Total Time | 55-70 minutes |
| Level of Difficulty | Medium |
| Servings | 24 cookies |
Estimated Nutrition
Estimated nutrition for the whole recipe (without optional ingredients):
- Calories: 1700-1850
- Protein: 19-22 g
- Fat: 75-85 g
- Carbohydrates: 230-250 g
We'll Pay You $5 to Try This Recipe!
Cook our recipe, snap some photos, and earn a $5 Amazon Gift Card. It's that simple!
Here's how:
- Make the recipe
- Take nice pictures of your final dish
- Fill out our quick form (2 minutes max!)
- Your $5 reward is on the way!
Ingredients
For the cookies:
- 1.75 cups all-purpose flour
- 3 tbsp cocoa powder
- 0.5 tsp baking soda
- 0.5 tsp baking powder
- 0.75 tsp salt
- 0.5 cup unsalted butter
- 0.25 cup sugar
- 0.25 cup brown sugar
- 1.25 tsp vanilla essence
- 1 tsp white vinegar
- 1 large egg
- red food coloring
For the decoration:
- 2 tbsp semi-sweet chocolate
- 4 tbsp white chocolate
- oil-based food coloring
Step 1: Prepare Dry Ingredients and Mise en Place
- 1.75 cups all-purpose flour
- 3 tbsp cocoa powder
- 0.5 tsp baking soda
- 0.5 tsp baking powder
- 0.75 tsp salt
Whisk together flour, cocoa powder, baking soda, baking powder, and salt in a medium bowl, breaking up any lumps in the cocoa powder.
Set aside.
Line two baking sheets with parchment paper and have them ready near your oven.
Measure out the chocolate pieces and have all your decorating tools prepared, as you’ll work quickly once cookies cool.
Step 2: Cream Butter and Sugars, Then Build Cookie Dough
- 0.5 cup unsalted butter
- 0.25 cup sugar
- 0.25 cup brown sugar
- 1.25 tsp vanilla essence
- 1 tsp white vinegar
- 1 large egg
- red food coloring
- dry ingredient mixture from Step 1
In a mixer or by hand, beat together the softened butter, sugar, and brown sugar until light and fluffy, about 2-3 minutes.
Add vanilla essence, white vinegar, egg, and red food coloring, mixing until fully combined and the color is even throughout—add more food coloring drop by drop if you want a deeper red hue.
Fold in the dry ingredient mixture from Step 1 using a spatula or mixer on low speed until just combined, being careful not to overmix.
Step 3: Chill Dough and Preheat Oven
Transfer the dough to the refrigerator and chill for 20-30 minutes—this makes the dough easier to shape and helps the cookies maintain their bear shape during baking.
While the dough chills, preheat your oven to 325°F and ensure your prepared baking sheets from Step 1 are ready to use.
Step 4: Shape Bear Bodies and Ears
- chilled dough from Step 2
Remove dough from fridge and roll 1½ tablespoons of dough into a ball for each bear’s body, placing them 3 inches apart on the prepared baking sheets.
Roll two small teaspoon-sized balls of dough for each bear’s ears and gently attach them to the top of each body ball, pressing lightly so they stick but remain distinct shapes.
Step 5: Bake Cookies Until Just Set
Bake for 9-11 minutes, until the cookies are set but still soft—they should look slightly underbaked in the center, as they’ll continue to cook slightly as they cool.
I like to pull them out when the edges just begin to darken slightly, which keeps the centers chewy and prevents the cocoa from becoming too bitter.
Step 6: Cool Cookies and Prepare for Decorating
- 2 tbsp semi-sweet chocolate
- 4 tbsp white chocolate
Let the cookies cool on the baking pan for 5-10 minutes until they’re set enough to handle, then transfer them to a wire cooling rack.
While they cool completely, gently melt the white chocolate and dark chocolate in separate small bowls (use a double boiler or microwave in 20-second intervals, stirring between each), and have a small brush or piping tool ready for detailed work.
Step 7: Decorate Bears with Chocolate and Coloring
- 2 tbsp semi-sweet chocolate
- 4 tbsp white chocolate
- oil-based food coloring
Using melted white chocolate, paint snouts (small circles on the front) and inner ear details on each bear.
Thin the melted dark chocolate and use it to draw eyes and noses with a small brush or toothpick.
For blush, mix a tiny amount of pink or red oil-based food coloring with white chocolate and brush small circles on the cheeks.
I recommend working in small batches and letting the white chocolate set between applications so details don’t smudge together.
Tasty Red Velvet Bear Cookies
Ingredients
For the cookies
- 1.75 cups all-purpose flour
- 3 tbsp cocoa powder
- 0.5 tsp baking soda
- 0.5 tsp baking powder
- 0.75 tsp salt
- 0.5 cup unsalted butter
- 0.25 cup sugar
- 0.25 cup brown sugar
- 1.25 tsp vanilla essence
- 1 tsp white vinegar
- 1 large egg
- red food coloring
For the decoration
- 2 tbsp semi-sweet chocolate
- 4 tbsp white chocolate
- oil-based food coloring
Instructions
- Whisk together flour, cocoa powder, baking soda, baking powder, and salt in a medium bowl, breaking up any lumps in the cocoa powder. Set aside. Line two baking sheets with parchment paper and have them ready near your oven. Measure out the chocolate pieces and have all your decorating tools prepared, as you'll work quickly once cookies cool.
- In a mixer or by hand, beat together the softened butter, sugar, and brown sugar until light and fluffy, about 2-3 minutes. Add vanilla essence, white vinegar, egg, and red food coloring, mixing until fully combined and the color is even throughout—add more food coloring drop by drop if you want a deeper red hue. Fold in the dry ingredient mixture from Step 1 using a spatula or mixer on low speed until just combined, being careful not to overmix.
- Transfer the dough to the refrigerator and chill for 20-30 minutes—this makes the dough easier to shape and helps the cookies maintain their bear shape during baking. While the dough chills, preheat your oven to 325°F and ensure your prepared baking sheets from Step 1 are ready to use.
- Remove dough from fridge and roll 1½ tablespoons of dough into a ball for each bear's body, placing them 3 inches apart on the prepared baking sheets. Roll two small teaspoon-sized balls of dough for each bear's ears and gently attach them to the top of each body ball, pressing lightly so they stick but remain distinct shapes.
- Bake for 9-11 minutes, until the cookies are set but still soft—they should look slightly underbaked in the center, as they'll continue to cook slightly as they cool. I like to pull them out when the edges just begin to darken slightly, which keeps the centers chewy and prevents the cocoa from becoming too bitter.
- Let the cookies cool on the baking pan for 5-10 minutes until they're set enough to handle, then transfer them to a wire cooling rack. While they cool completely, gently melt the white chocolate and dark chocolate in separate small bowls (use a double boiler or microwave in 20-second intervals, stirring between each), and have a small brush or piping tool ready for detailed work.
- Using melted white chocolate, paint snouts (small circles on the front) and inner ear details on each bear. Thin the melted dark chocolate and use it to draw eyes and noses with a small brush or toothpick. For blush, mix a tiny amount of pink or red oil-based food coloring with white chocolate and brush small circles on the cheeks. I recommend working in small batches and letting the white chocolate set between applications so details don't smudge together.
