I first tried a Japanese fruit tart at a small bakery during a trip to San Francisco. Growing up, desserts in our house meant boxed cake mix or slice-and-bake cookies. My mom wasn’t much of a baker, and anything “fancy” came from the grocery store.
It turns out making a Japanese fruit tart isn’t as complicated as those pristine bakery versions might suggest. While it does take a few steps, each one is pretty straightforward. The best part? You can customize it with whatever fruits are in season, and it always looks like you spent hours making it – even when you didn’t.
Why You’ll Love This Japanese Fruit Tart
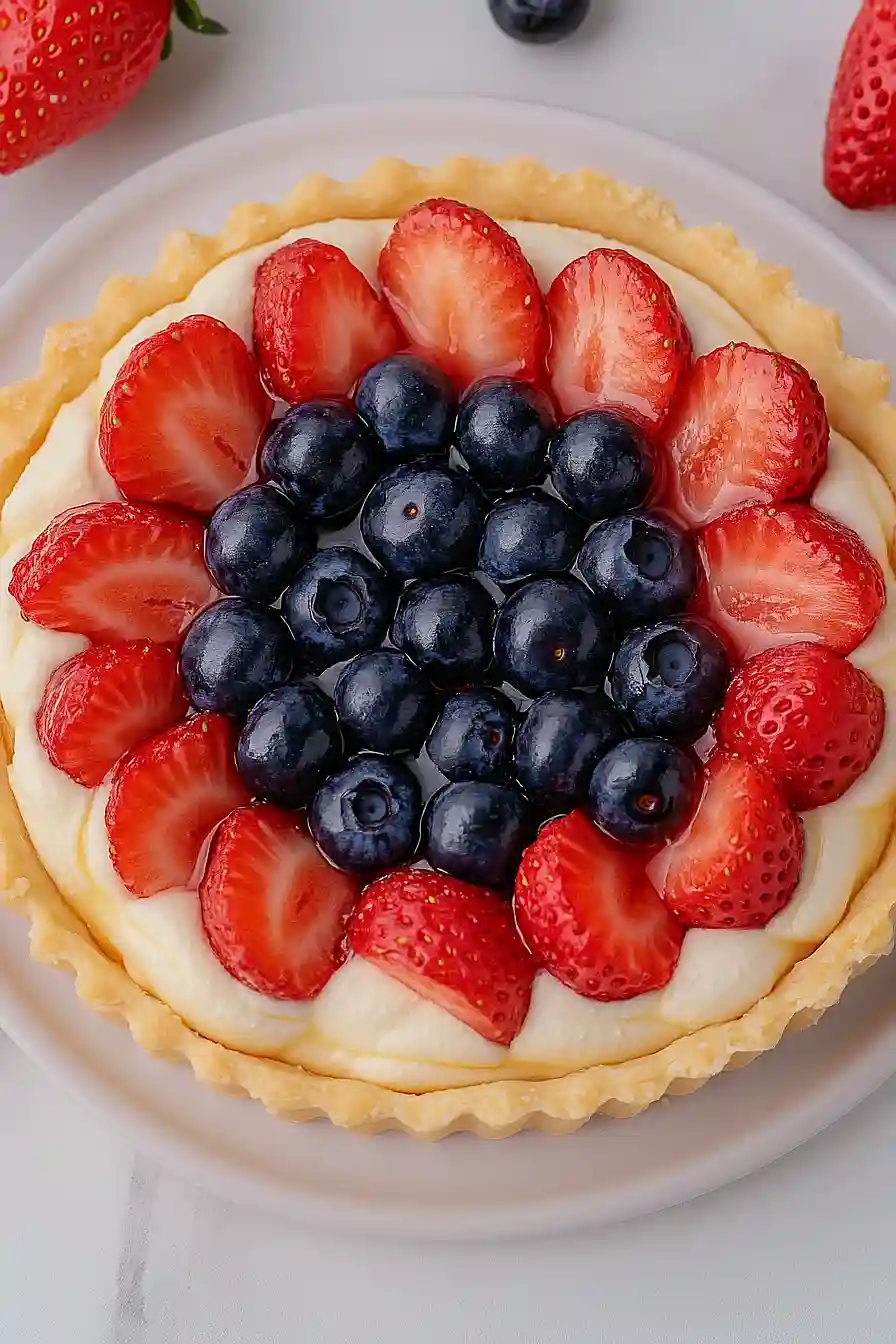
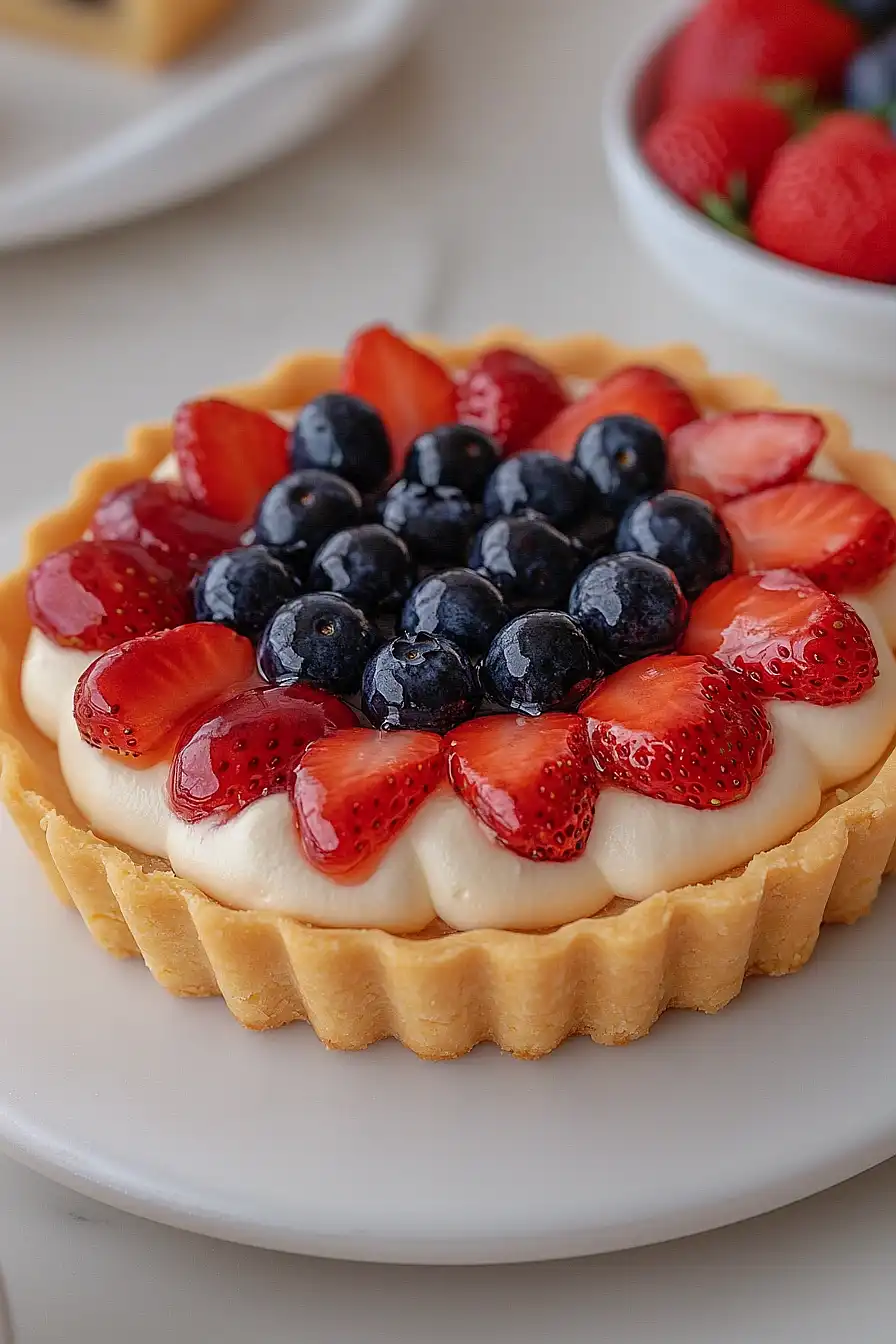
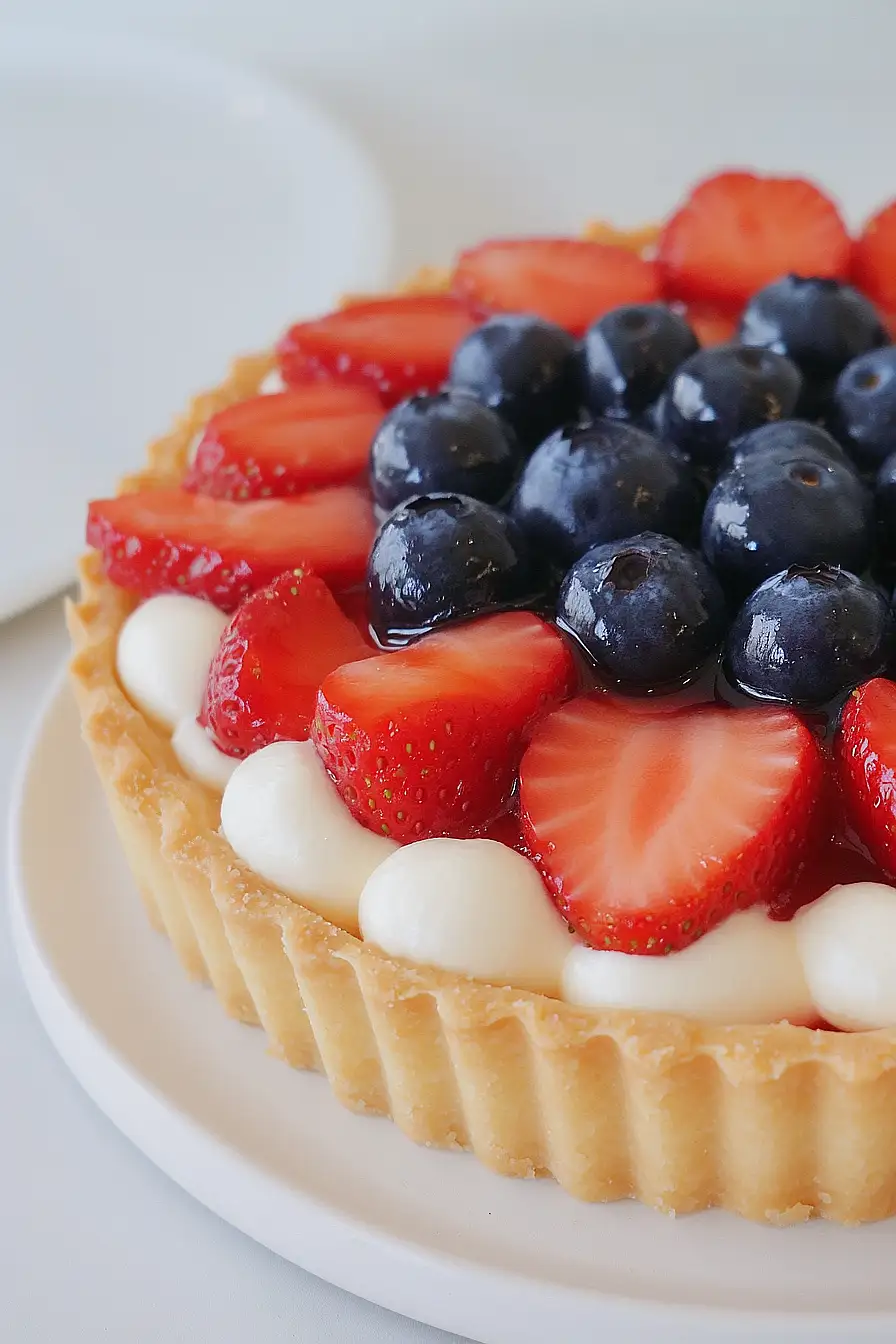
- Bakery-style dessert – You can create this beautiful Japanese pastry shop favorite right in your own kitchen, complete with silky custard cream and fresh fruits.
- Make-ahead friendly – Most components can be prepared in advance – make the crust and custard the day before, then assemble with fresh fruits when you’re ready to serve.
- Customizable toppings – While this recipe suggests strawberries and blueberries, you can use any seasonal fruits you love – from kiwis to peaches to mandarin oranges.
- Perfect for special occasions – This elegant dessert is ideal for birthdays, holidays, or when you want to impress guests with something that looks professional but is actually achievable at home.
What Kind of Fruit Should I Use?
Traditional Japanese fruit tarts typically feature fresh, seasonal fruits that are arranged in a beautiful pattern on top of the cream filling. While this recipe calls for strawberries and blueberries, you can really use any fruits that are fresh and in season. Some great alternatives include kiwi, mandarin oranges, peaches, or even fresh figs – just make sure whatever fruit you choose isn’t too wet or it might make your tart soggy. For the best results, pick fruits that are ripe but still firm, and try to choose pieces that are similar in size for that classic, neat appearance. If you’re using strawberries, look for bright red ones without any white or green patches, and smaller berries often work better for creating those pretty patterns on top.
Options for Substitutions
While some ingredients are essential for this classic Japanese fruit tart, there are several substitutions you can try:
- Plain Flour and Cake Flour: For plain flour, you can use all-purpose flour. If you don’t have cake flour, make your own by replacing 2 tablespoons of all-purpose flour with 2 tablespoons of cornstarch for each cup of flour needed.
- Fresh Milk: You can substitute with half-and-half or a mix of heavy cream and whole milk. Plant-based milks aren’t recommended as they might affect the custard’s texture.
- Heavy Cream: While heavy cream is best for the whipped topping, you could use whipping cream instead. Don’t substitute with half-and-half or milk as they won’t whip properly.
- Fruits: Feel free to swap strawberries and blueberries with other fresh fruits like kiwi, peaches, raspberries, or mandarin oranges. Just make sure they’re not too watery.
- Raspberry/Strawberry Jam: Any fruit jam works for the glaze – apricot jam is actually a common choice. You can also make a simple syrup with sugar and water if you’re out of jam.
- Liquor: The liquor is optional, but if using, you can try rum, brandy, or kirsch. For an alcohol-free version, use vanilla extract or simply skip it.
Watch Out for These Mistakes While Baking
The trickiest part of making a Japanese fruit tart is achieving the perfect pastry cream consistency – to avoid lumps, make sure to constantly whisk while cooking and strain the mixture through a fine-mesh sieve before cooling. The crust can quickly go from golden to burnt, so keep a close eye on it during the last few minutes of baking and remove it from the oven when it’s just turning light golden brown around the edges. When arranging fruits on top, pat them completely dry with paper towels first, as any excess moisture will make the cream runny and cause the fruits to slide around. For the best texture and flavor, allow the filled tart to chill in the refrigerator for at least 2 hours before serving, and brush the fruits with a thin layer of warmed jam to give them that characteristic glossy finish and prevent them from drying out.
What to Serve With Japanese Fruit Tart?
This elegant Japanese fruit tart pairs wonderfully with a hot cup of green tea or a creamy matcha latte to balance out the sweetness and create that perfect café-style experience at home. For a refreshing twist, try serving it with a scoop of vanilla ice cream or a dollop of lightly sweetened whipped cream on the side. If you’re hosting a dessert party, consider adding some extra fresh berries on the side – they’ll complement the fruits on top of the tart and give your guests options to mix and match flavors. Keep in mind that this tart is quite rich, so small portions alongside coffee or tea make for the perfect afternoon treat.
Storage Instructions
Keep Fresh: Once assembled, this Japanese fruit tart is best enjoyed within 24 hours. Keep it in the refrigerator, loosely covered with plastic wrap or in a cake container. The fresh fruits and cream are at their best when served cold and fresh!
Make Ahead: You can prepare the tart shell and pastry cream up to 2 days in advance – just keep them separate in the fridge. The tart shell stays crisp in an airtight container, and the pastry cream should be covered with plastic wrap directly on its surface to prevent a skin from forming.
Assembly Tips: For the best results, assemble your tart no more than 4 hours before serving. This keeps the crust crispy and the fruits looking fresh. If you need to transport it, keep it cool and level to maintain that picture-perfect appearance!
| Preparation Time | 60-90 minutes |
| Cooking Time | 40-50 minutes |
| Total Time | 100-140 minutes |
| Level of Difficulty | Medium |
Estimated Nutrition
Estimated nutrition for the whole recipe (without optional ingredients):
- Calories: 3000-3500
- Protein: 40-50 g
- Fat: 190-220 g
- Carbohydrates: 350-400 g
We'll Pay You $5 to Try This Recipe!
Cook our recipe, snap some photos, and earn a $5 Amazon Gift Card. It's that simple!
Here's how:
- Make the recipe
- Take nice pictures of your final dish
- Fill out our quick form (2 minutes max!)
- Your $5 reward is on the way!
Ingredients
For the pastry shell:
- 2 cups plain flour (250g)
- 1/2 cup + 1 tbsp unsalted butter, cubed (125g)
- 1 large egg, beaten
- 7 tbsp caster sugar (90g)
For the sponge layer:
- 2 large eggs, room temp
- 1/3 cup + 1 tbsp caster sugar (60g)
- 1/2 cup cake flour (60g)
- 1 tbsp unsalted butter, melted (20g)
- 2/3 fl oz hot water (20ml)
For the brushing syrup:
- 1/2 tbsp caster sugar
- 1 tsp liquor of choice (optional)
For the custard filling:
- 1 cup fresh milk (225ml)
- 1/3 cup caster sugar (60g)
- 3 egg yolks
- 2 tbsp cake flour (15g)
- 1 tbsp unsalted butter, melted (12.5g)
- 1 tbsp cornstarch (7.5g)
- Vanilla essence, to taste
For the whipped cream:
- 3/4 cup + 1 tbsp heavy cream (200ml)
- 1 tbsp caster sugar
- A few drops vanilla extract
- 1 tbsp liquor of choice (optional)
For the fruit and finish:
- 1 tbsp raspberry or strawberry jam
- About 15 strawberries, sliced
- Blueberries, as desired
Step 1: Prepare the Tart Crust Dough
- 2 cups plain flour (250g)
- 1/2 cup + 1 tbsp unsalted butter, cubed (125g)
- 7 tbsp caster sugar (90g)
- 1 large egg, beaten
Begin by massaging the cubed unsalted butter into the plain flour using your fingertips until the mixture has a breadcrumb-like texture.
Then stir in the caster sugar and beaten egg, kneading gently just until a soft dough ball forms.
Be careful not to overwork the dough to maintain a tender crust—just bring everything together until combined.
Step 2: Chill the Dough
Wrap the dough from Step 1 in cling film and place it in the refrigerator for at least one hour.
This helps the butter firm up and prevents the dough from shrinking during baking.
Chilling is one of my favorite tricks to ensure a flaky, tender pastry.
Step 3: Roll Out and Prepare the Tart Shell
On a lightly floured surface, roll the chilled dough from Step 2 to a thickness of about 5mm.
Carefully wrap the dough around your rolling pin and drape it over a tart case.
Gently press into the sides and trim the excess.
Cover the dough with parchment paper and fill with baking beans to blind bake.
Chill the prepared tart case for 15 minutes before baking.
Step 4: Bake the Tart Shell
Preheat your oven to 180°C.
Bake the tart shell from Step 3 for 15 minutes.
Remove the parchment paper and baking beans, then return to the oven for another 5 minutes or until the pastry is golden.
Allow the baked tart shell to cool completely before filling.
