Growing up, I never thought about making treats for our family dog. We just bought whatever was on sale at the grocery store. My kids were actually the ones who showed me how fun it could be to make homemade dog treats – they saw it on a kids’ baking show and wouldn’t stop asking until we tried it.
Turns out, making dog treats at home is surprisingly simple, and our pup goes crazy for them. These frozen yogurt and berry treats have become our go-to summer recipe. They’re perfect for hot days when our dog needs something cool, and I like knowing exactly what ingredients are going into them.
Why You’ll Love These Dog Treats
- Pet-safe ingredients – Made with just three natural ingredients you can feel good about giving to your furry friend – plain yogurt and fresh berries.
- Cost-effective – Making these treats at home costs much less than buying premium dog treats from the pet store, and you can make a big batch at once.
- No special equipment needed – All you need is a basic ice cube tray or silicone mold to create these frozen treats – no fancy kitchen gadgets required.
- Cooling summer treat – These frozen treats are perfect for keeping your pup cool and happy during hot summer days, while giving them a healthy snack they’ll love.
What Kind of Yogurt Should I Use?
When making treats for your furry friend, plain yogurt is the way to go – skip the flavored varieties since they often contain added sugars and artificial sweeteners that aren’t good for dogs. Regular or Greek yogurt both work well in this recipe, though Greek yogurt will give you a thicker, creamier final treat. Just make sure to check that your yogurt doesn’t contain xylitol (a sweetener that’s toxic to dogs). If you’re concerned about your pup’s dairy sensitivity, you can opt for non-fat yogurt, though full-fat varieties are perfectly fine too. For the best results, look for yogurt with live and active cultures, as these can provide some digestive benefits for your dog.
Options for Substitutions
These pup-friendly treats are super easy to customize with different ingredients:
- Plain yogurt: Make sure to stick with plain yogurt, but you can use Greek yogurt for a thicker treat. Just avoid any yogurt with artificial sweeteners as these can be harmful to dogs. If your pup is lactose intolerant, you can use plain coconut yogurt instead.
- Strawberries: Feel free to swap strawberries with other dog-safe fruits like diced watermelon, peeled apple chunks (no seeds), or mashed banana. Just remember to keep the pieces small for easy freezing.
- Blueberries: You can replace blueberries with other small fruits like raspberries or blackberries. If using larger fruits, make sure to chop them into blueberry-sized pieces. Remember that grapes and raisins are toxic to dogs, so never use those as substitutes.
Watch Out for These Mistakes While Making
The biggest mistake when making frozen dog treats is using flavored or sweetened yogurt, which can be harmful to your pup – always stick to plain, unsweetened yogurt, and preferably one that’s low-fat or non-fat.
When preparing the berries, make sure to chop them small enough for your dog’s size, as larger pieces can be a choking hazard, and avoid using frozen berries as they can be too hard on your dog’s teeth when combined with the frozen yogurt.
Before filling your molds, remember to let the yogurt mixture sit at room temperature for about 10 minutes to achieve a smoother consistency, and don’t overfill the molds as the mixture will expand slightly when frozen.
For the best texture and to prevent freezer burn, make sure to transfer the treats to an airtight container once they’re completely frozen, and they’ll stay fresh for up to 2 months.

What to Serve With Frozen Dog Treats?
These frozen yogurt treats are perfect for keeping your pup cool, but they’re best served alongside their regular meal schedule rather than as a complete snack replacement. I like to give these treats to my dog after a long walk or during playtime in the backyard when they need a refreshing reward. Since these are made with yogurt and berries, they pair really well with your dog’s usual dry food or as a special dessert after their dinner. Just remember to serve these treats in moderation – even though they’re made with healthy ingredients, they should only make up about 10% of your dog’s daily food intake.
Storage Instructions
Keep Frozen: These frozen yogurt dog treats need to stay in the freezer to maintain their shape and texture. Pop them into a freezer-safe container or zip-top bag, and they’ll stay good for up to 3 months. Your pup won’t mind if you make a big batch!
Portion: If you’ve made a larger batch, try separating the treats into smaller portions using separate containers or bags. This way, you can grab just what you need without having to thaw and refreeze the whole batch – perfect for keeping your furry friend’s treats fresh.
Serve: When it’s treat time, just grab one straight from the freezer and give it to your dog. No need to let it thaw – these treats are meant to be enjoyed frozen, especially on warm days! Remember to only serve one or two at a time, depending on your dog’s size.
| Preparation Time | 10-15 minutes |
| Cooking Time | 300-600 minutes |
| Total Time | 310-615 minutes |
| Level of Difficulty | Easy |
Estimated Nutrition
Estimated nutrition for the whole recipe (without optional ingredients):
- Calories: 200-250
- Protein: 8-12 g
- Fat: 3-5 g
- Carbohydrates: 35-40 g
Ingredients
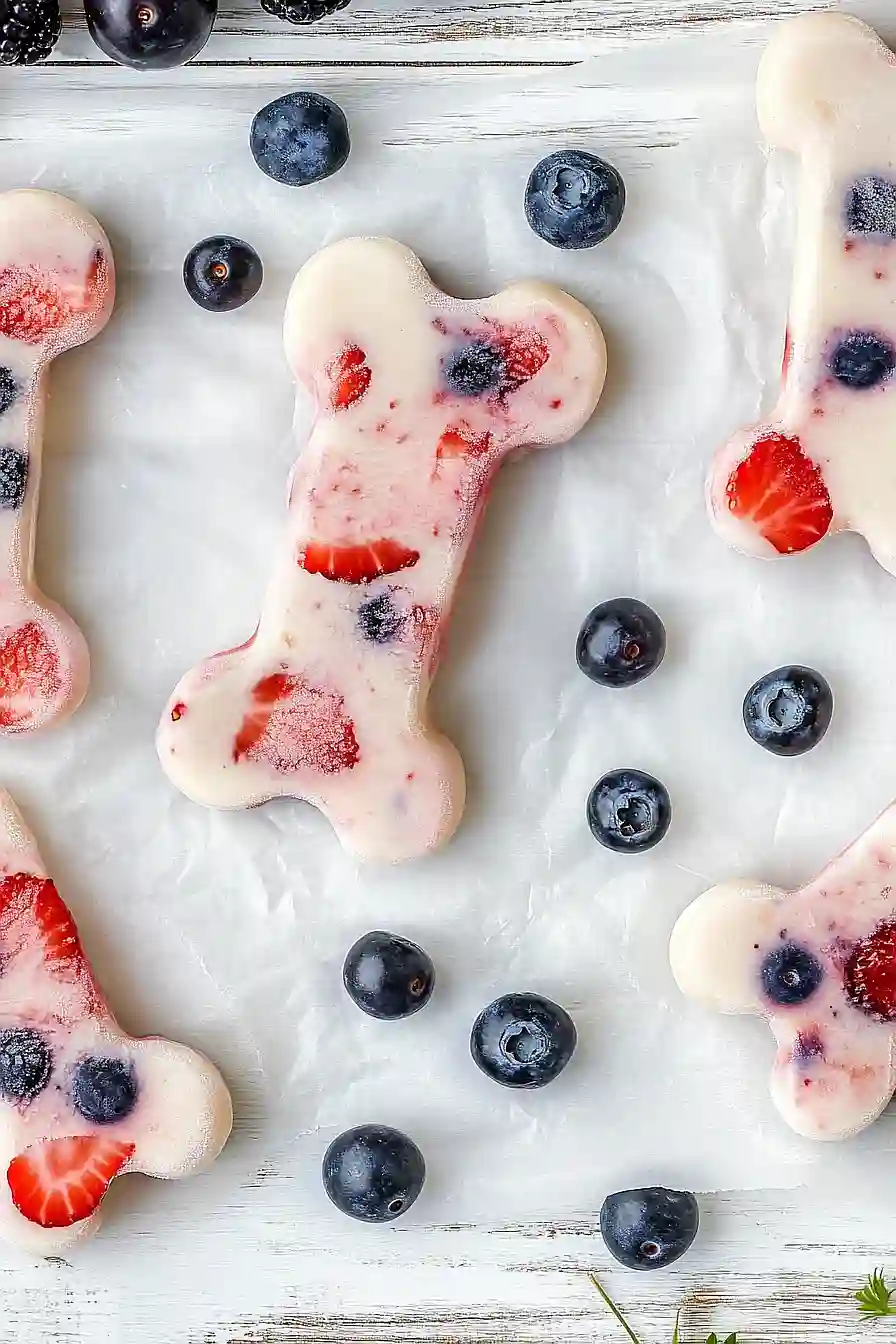
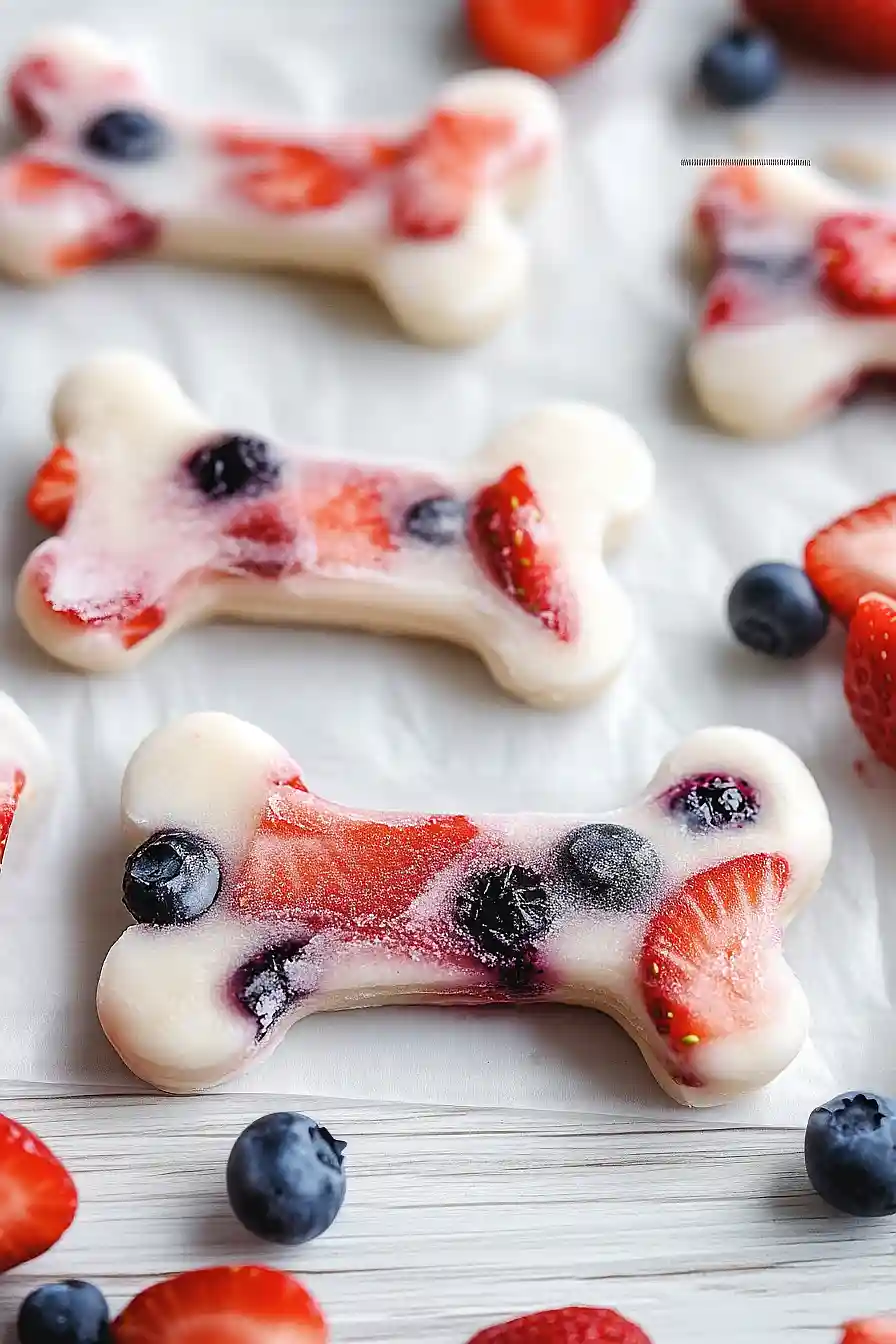
- 1 cup plain yogurt (225 g or 8 oz)
- 10 fresh strawberries, chopped
- 20 fresh blueberries
Step 1: Prepare the Mold
Take your dog treat mold or an ice cube tray and scatter in some strawberries and blueberries.
Distribute the fruits evenly across all sections of the mold.
The fruits provide a sweet, nutritious base for the treats.
Step 2: Add Yogurt to the Mold
Spoon yogurt over the fruit in each section of the mold.
Fill each section evenly, ensuring the fruit is covered.
Smooth the top with the back of a spoon to help level the yogurt.
Step 3: Eliminate Air Bubbles and Freeze
Gently tap the mold on the counter a few times to release any trapped air bubbles and ensure the mixture sets evenly.
Place the mold in the freezer and allow the treats to freeze for a minimum of 5 hours, or overnight if you have the time, for best results.
Step 4: Remove and Store the Treats
Once completely frozen, remove the mold from the freezer.
To release the treats, tap the mold on the counter.
If the treats don’t come out easily, briefly run the mold under warm water, then gently turn out the treats.
Store the frozen treats in the freezer for up to 3 months, keeping them fresh and ready for your pup to enjoy.
