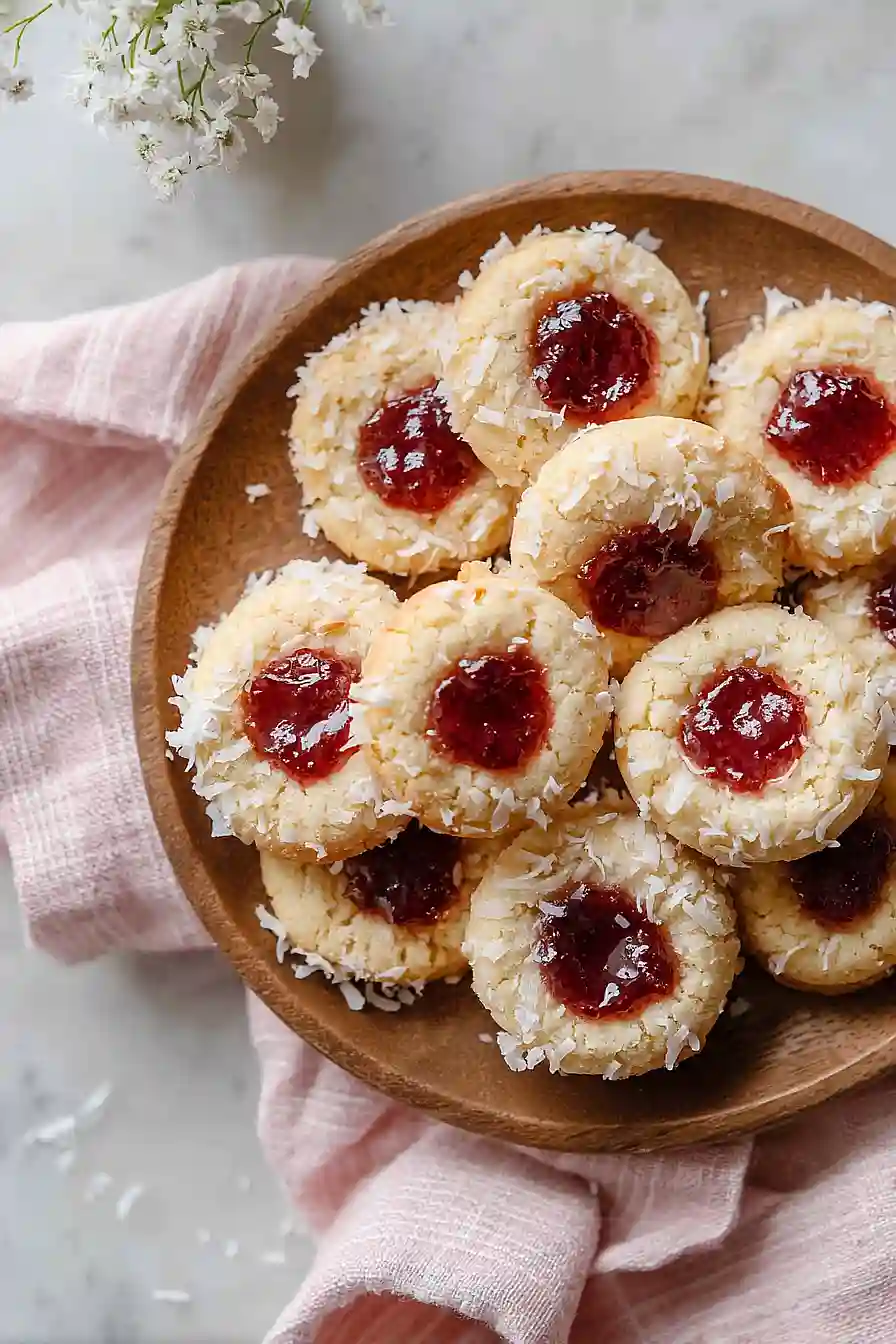
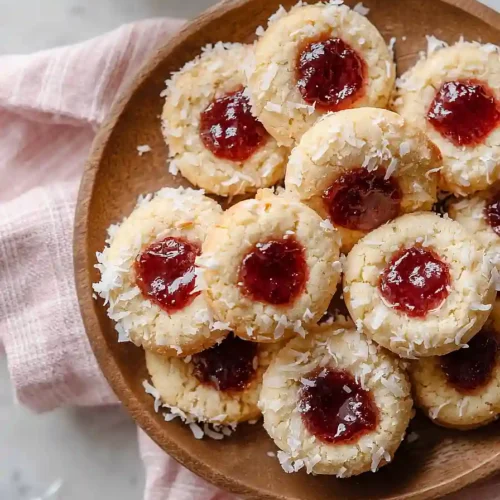
There’s something about thumbprint cookies that takes me right back to baking with my kids when they were little. They loved pressing their thumbs into the dough, and I loved how easy these cookies are to make. No fancy equipment needed, just your hands and a few simple ingredients.
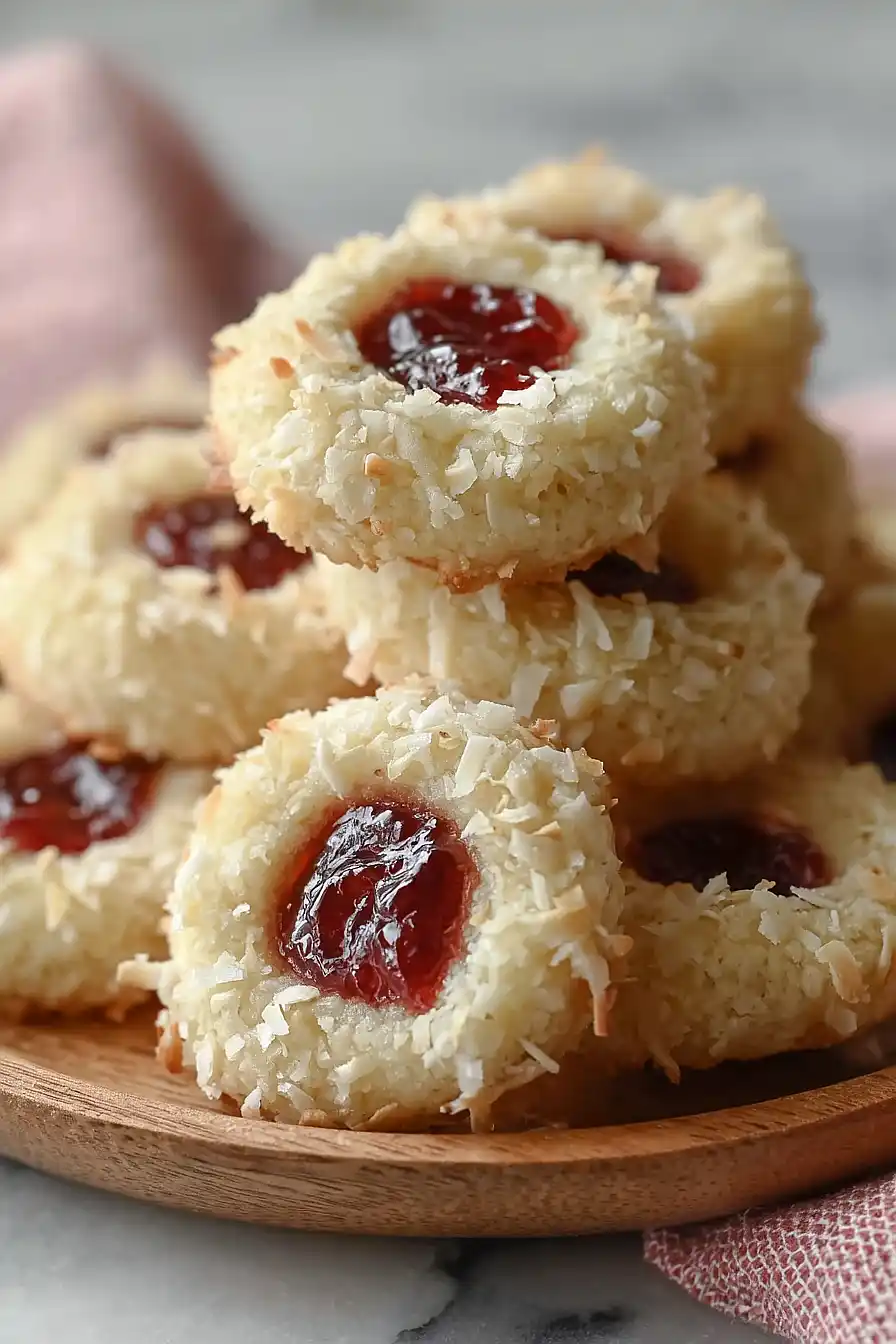
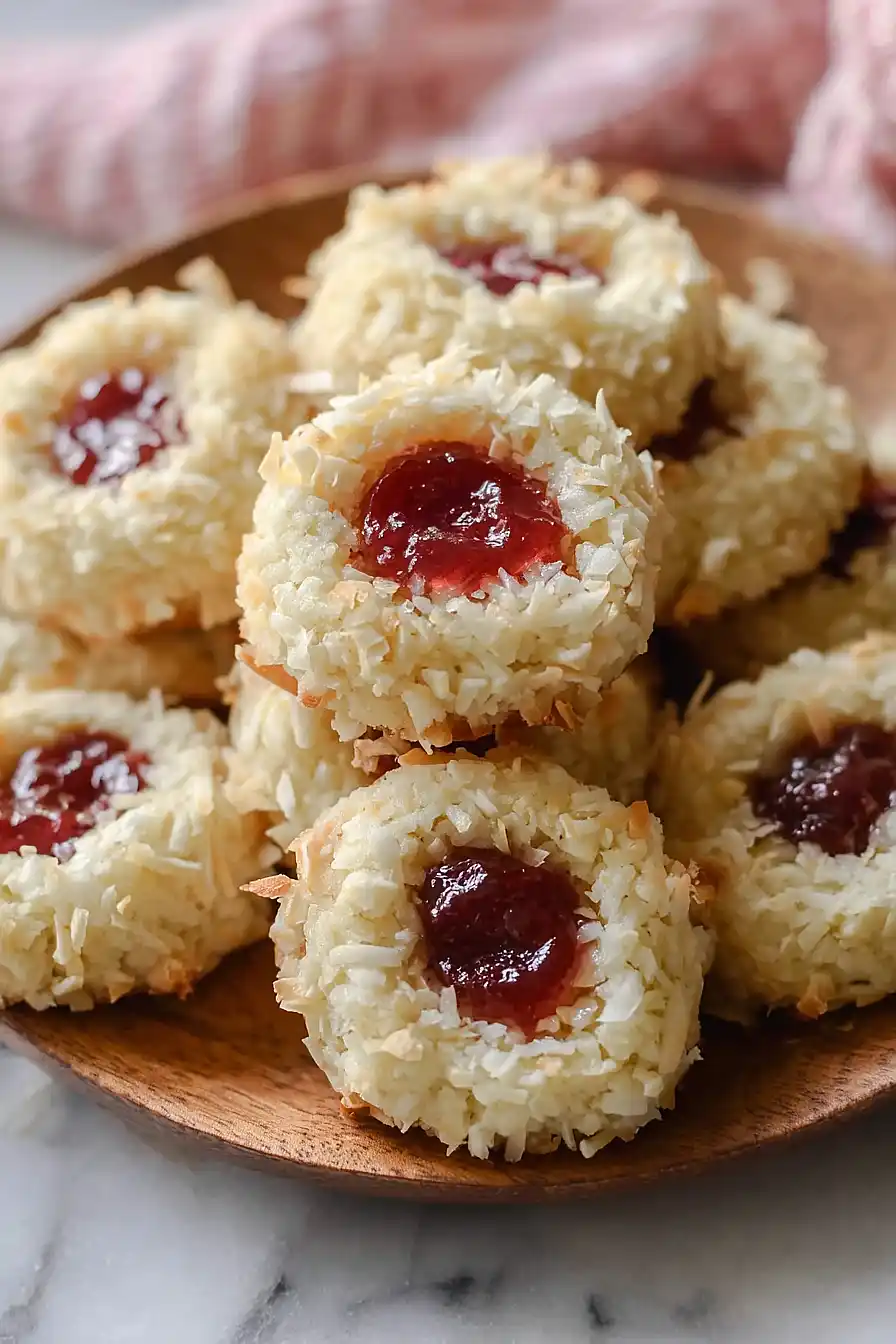
The combination of buttery cookie, crunchy coconut, and sweet jam is hard to beat. I like using coconut or apricot jam, but honestly, you can use whatever you have in your fridge. The toasted coconut adds a nice nutty flavor that makes these cookies feel a bit more special than your average thumbprint.
These cookies are perfect for holiday cookie exchanges or just because it’s Tuesday. They look fancy enough to impress, but they’re so simple that you can make them with your eyes half closed. And the best part? You probably have most of these ingredients in your pantry right now.
Why You’ll Love These Coconut Jam Thumbprint Cookies
- Quick and easy to make – These cookies come together in under an hour, making them perfect for last-minute gatherings or when you need a sweet treat fast.
- Simple ingredients – You probably have most of these pantry staples on hand already, so no special shopping trip required.
- Customizable flavors – Use your favorite jam to make these cookies your own – whether it’s classic strawberry, tangy raspberry, or something more adventurous like apricot or fig.
- Beautiful presentation – The coconut coating and colorful jam center make these cookies look bakery-worthy without any fancy decorating skills needed.
- Perfect for sharing – These bite-sized treats are ideal for cookie exchanges, holiday platters, or bringing to parties where you want to impress without spending all day in the kitchen.
What Kind of Jam Should I Use?
The beauty of thumbprint cookies is that you can use pretty much any jam you have in your pantry. Classic choices like strawberry, raspberry, or apricot jam work wonderfully and give you that traditional thumbprint cookie look and taste. If you want to get a little more creative, try fig preserves, lemon curd, or even Nutella for a chocolate twist. Just make sure whatever you choose is thick enough to stay put in the cookie’s indentation – runny jams might spread too much during baking. For the best flavor, go with a good quality jam since it’s really going to shine as the star of each cookie.
Options for Substitutions
These cookies are pretty straightforward, but here are some swaps you can make if needed:
- All purpose flour: You can use a 1:1 gluten-free flour blend if you need a gluten-free option. The texture might be slightly different, but the cookies will still turn out great.
- Unsalted butter: If you only have salted butter on hand, go ahead and use it – just skip the kosher salt in the recipe to avoid over-salting.
- Sweetened flaked coconut: Unsweetened coconut works too, though the coating won’t be quite as sweet. You can also use shredded coconut instead of flaked – it’ll just give you a finer texture on the outside.
- Jam: This is where you can really get creative! Try raspberry, strawberry, apricot, or even lemon curd. Nutella or dulce de leche work wonderfully too if you want something different from traditional jam.
- Egg wash: If you’re out of eggs, you can brush the cookies with a little milk or cream before rolling them in coconut. It won’t be quite as sticky, but it’ll still help the coconut adhere.
Watch Out for These Mistakes While Baking
The biggest mistake with thumbprint cookies is making the indentation too shallow, which causes the jam to overflow during baking – press your thumb down firmly and deep enough to create a well that can hold at least half a teaspoon of jam.
Another common error is adding the jam before baking, which can cause it to bubble over and burn, so always bake the cookies first for about 10 minutes, then add the jam and return them to the oven.
If your coconut is browning too quickly while the cookies are still pale, tent the baking sheet loosely with foil for the last few minutes of baking.
Make sure your butter is truly at room temperature (it should leave a slight indent when pressed) because cold butter won’t cream properly with the sugar, resulting in dense cookies instead of tender ones.
What to Serve With Coconut Jam Thumbprint Cookies?
These cookies are perfect alongside a hot cup of coffee or tea for an afternoon pick-me-up or after-dinner treat. I love serving them on a platter with other cookies during the holidays – they look beautiful mixed in with chocolate chip cookies, snickerdoodles, or sugar cookies. If you’re putting together a dessert spread, pair them with some fresh fruit like strawberries or raspberries that complement whatever jam you used in the cookies. They’re also great packed up in a tin as a homemade gift, especially during cookie exchange season.
Storage Instructions
Store: These thumbprint cookies keep really well in an airtight container at room temperature for up to a week. Just make sure the jam is completely set before stacking them, or use parchment paper between layers to keep them from sticking together.
Freeze: You can freeze these cookies for up to 3 months in a freezer-safe container. I like to freeze them before adding the jam, then thaw and fill them when I’m ready to serve. But if you’ve already added the jam, they’ll freeze just fine too.
Make Ahead: The cookie dough can be made ahead and refrigerated for up to 3 days before baking. You can also shape the cookies, make the thumbprints, and freeze them on a baking sheet before baking. Then bake straight from frozen, adding just a couple extra minutes to the baking time.
| Preparation Time | 20-30 minutes |
| Cooking Time | 18-25 minutes |
| Total Time | 38-55 minutes |
| Level of Difficulty | Medium |
Estimated Nutrition
Estimated nutrition for the whole recipe (without optional ingredients):
- Calories: 4100-4400
- Protein: 36-44 g
- Fat: 240-260 g
- Carbohydrates: 460-490 g
Ingredients
For the dough:
- 1 cup sugar
- 3.5 cups all-purpose flour (I use King Arthur all-purpose flour)
- 2 tsp vanilla extract (pure vanilla preferred for better flavor)
- 1/2 tsp kosher salt
- 1.5 cups unsalted butter (softened to room temperature)
For the egg wash:
- 1 egg (room temperature)
- 1 tbsp water
For assembly:
- 1/4 cup jam (any flavor, coconut or apricot recommended)
- 6 oz sweetened flaked coconut (toasted for deeper flavor and crunch)
Step 1: Prepare Mise en Place and Toast Coconut
- 6 oz sweetened flaked coconut
- 3.5 cups all-purpose flour
- 1/2 tsp kosher salt
Start by toasting the coconut in a dry skillet over medium heat, stirring frequently for 3-4 minutes until fragrant and lightly golden.
Transfer to a plate to cool—this deepens the flavor and gives the cookies better texture.
While the coconut toasts, sift together the flour and salt in a medium bowl, which aerates the flour and ensures even distribution of salt.
Measure out all remaining ingredients and set them within reach.
Step 2: Cream Butter and Sugar, Then Build the Dough
- 1.5 cups unsalted butter
- 1 cup sugar
- 2 tsp vanilla extract
- dry ingredient mixture from Step 1
Using an electric mixer, cream the softened butter and sugar together for 1-2 minutes until light and fluffy—this incorporates air and creates a tender cookie texture.
Add the vanilla extract and mix until combined.
Reduce the mixer to low speed and gradually add the dry ingredient mixture from Step 1, mixing just until a cohesive dough forms.
Don’t overmix, as this can develop gluten and make the cookies tough.
Step 3: Chill the Dough
- dough from Step 2
Shape the dough from Step 2 into a ball, flatten it into a 1-inch thick disk, and wrap it loosely.
Refrigerate for at least 30 minutes—this prevents the cookies from spreading too much during baking and makes them easier to handle.
While the dough chills, preheat your oven to 350°F and line your baking sheets with parchment paper.
Step 4: Shape, Coat, and Prepare Cookies for Baking
- chilled dough from Step 3
- 1 egg
- 1 tbsp water
- toasted coconut from Step 1
Scoop the chilled dough into 30 portions (about 1½ inches each) and roll each into a smooth ball between your palms.
Whisk together the egg and water to create an egg wash.
Dip each dough ball into the egg wash, then roll it in the toasted coconut from Step 1, coating all sides evenly.
Place the coated cookies on your prepared baking sheets, spacing them about 2 inches apart.
I like to leave a small gap between cookies because they spread slightly and we want room to press the thumbprints without them touching.
Step 5: Add Thumbprints and Bake
- prepared cookies from Step 4
- 1/4 cup jam
Using your thumb or the back of a small spoon, gently press an indent into the center of each cookie, being careful not to press all the way through to the bottom.
Fill each thumbprint with about ½ teaspoon of jam—don’t overfill, as the jam may spread during baking.
Bake for 18-20 minutes until the edges are light golden brown and the coconut is toasted.
The cookies should still feel slightly soft in the center when you remove them from the oven; they’ll continue to firm up as they cool.
Step 6: Cool and Finish
- baked cookies from Step 5
Allow the cookies to rest on the baking sheet for 2 minutes to set slightly, then transfer them to a wire cooling rack to cool completely.
This brief time on the pan allows them to firm up just enough to move without breaking, while finishing on the rack prevents them from becoming soggy on the bottom.
Quick Coconut Jam Thumbprint Cookies
Ingredients
For the dough:
- 1 cup sugar
- 3.5 cups all-purpose flour (I use King Arthur all-purpose flour)
- 2 tsp vanilla extract (pure vanilla preferred for better flavor)
- 1/2 tsp kosher salt
- 1.5 cups unsalted butter (softened to room temperature)
For the egg wash:
- 1 egg (room temperature)
- 1 tbsp water
For assembly:
- 1/4 cup jam (any flavor, coconut or apricot recommended)
- 6 oz sweetened flaked coconut (toasted for deeper flavor and crunch)
Instructions
- Start by toasting the coconut in a dry skillet over medium heat, stirring frequently for 3-4 minutes until fragrant and lightly golden. Transfer to a plate to cool—this deepens the flavor and gives the cookies better texture. While the coconut toasts, sift together the flour and salt in a medium bowl, which aerates the flour and ensures even distribution of salt. Measure out all remaining ingredients and set them within reach.
- Using an electric mixer, cream the softened butter and sugar together for 1-2 minutes until light and fluffy—this incorporates air and creates a tender cookie texture. Add the vanilla extract and mix until combined. Reduce the mixer to low speed and gradually add the dry ingredient mixture from Step 1, mixing just until a cohesive dough forms. Don't overmix, as this can develop gluten and make the cookies tough.
- Shape the dough from Step 2 into a ball, flatten it into a 1-inch thick disk, and wrap it loosely. Refrigerate for at least 30 minutes—this prevents the cookies from spreading too much during baking and makes them easier to handle. While the dough chills, preheat your oven to 350°F and line your baking sheets with parchment paper.
- Scoop the chilled dough into 30 portions (about 1½ inches each) and roll each into a smooth ball between your palms. Whisk together the egg and water to create an egg wash. Dip each dough ball into the egg wash, then roll it in the toasted coconut from Step 1, coating all sides evenly. Place the coated cookies on your prepared baking sheets, spacing them about 2 inches apart. I like to leave a small gap between cookies because they spread slightly and we want room to press the thumbprints without them touching.
- Using your thumb or the back of a small spoon, gently press an indent into the center of each cookie, being careful not to press all the way through to the bottom. Fill each thumbprint with about ½ teaspoon of jam—don't overfill, as the jam may spread during baking. Bake for 18-20 minutes until the edges are light golden brown and the coconut is toasted. The cookies should still feel slightly soft in the center when you remove them from the oven; they'll continue to firm up as they cool.
- Allow the cookies to rest on the baking sheet for 2 minutes to set slightly, then transfer them to a wire cooling rack to cool completely. This brief time on the pan allows them to firm up just enough to move without breaking, while finishing on the rack prevents them from becoming soggy on the bottom.
