Finding a dinner recipe that practically cooks itself while you’re at work or running errands is like hitting the jackpot. Between work schedules, after-school activities, and everything else life throws at you, the last thing you want is to spend an hour in the kitchen when dinnertime rolls around.
That’s where this crockpot taco chili comes in clutch: it’s packed with flavor, requires minimal prep work, and lets your slow cooker do all the heavy lifting while you go about your day.

Why You’ll Love This Taco Chili
- Set it and forget it – Just toss everything in your crockpot and let it simmer away while you handle your day. No babysitting required.
- Pantry-friendly ingredients – Most of these items are probably already sitting in your cupboard, making this an easy go-to when you need a quick meal solution.
- Hearty and filling – Packed with protein from the beef and beans, this chili keeps everyone satisfied and full for hours.
- Perfect for meal prep – This recipe makes plenty of servings and tastes even better the next day, so you can enjoy leftovers all week long.
- Kid-approved flavor – The familiar taco taste makes this an easy sell for picky eaters, and you can adjust the spice level to suit your family.
What Kind of Ground Beef Should I Use?
For this crockpot taco chili, you can use any ground beef you have on hand, though the fat content will affect the final result. I typically go with 85/15 ground beef because it has enough fat to keep the chili flavorful without being too greasy, and since you’re browning and draining it first, most of the excess fat gets removed anyway. If you want a leaner option, 90/10 works great too, though your chili might be slightly less rich. Ground turkey or chicken are also solid substitutes if you’re looking to cut down on red meat, just keep in mind they’ll give you a milder flavor overall.

Options for Substitutions
This taco chili is super forgiving when it comes to swaps and substitutions:
- Ground beef: You can easily swap ground beef for ground turkey, chicken, or pork. For a vegetarian version, try using extra beans or crumbled tempeh instead.
- Black beans and kidney beans: Feel free to mix and match your beans based on what you have. Pinto beans, white beans, or even chickpeas work great here. Just keep the total amount around 30 oz.
- Crushed tomatoes: Diced tomatoes or tomato sauce work just fine if that’s what you have in your pantry. You might want to add a splash more water if using tomato sauce since it’s thicker.
- Taco seasoning: No taco seasoning packet? Make your own with 1 tablespoon chili powder, 1 teaspoon cumin, 1 teaspoon paprika, and a pinch of cayenne pepper.
- Corn: Frozen corn works just as well as canned, and you can even use fresh corn cut off the cob if it’s in season.
- Salsa: Any salsa works here – mild, medium, or hot depending on your preference. You can also substitute with a can of diced tomatoes with green chilies for a similar effect.
Watch Out for These Mistakes While Cooking
The biggest mistake people make with crockpot chili is adding too much liquid at the start, which can leave you with a watery, soup-like consistency instead of a thick, hearty chili – start with just 1 cup of water and add more only if needed during the last hour of cooking.
Browning your ground beef properly before adding it to the crockpot makes a huge difference in flavor, so take the time to get a nice sear on the meat and drain off all the excess fat to avoid a greasy top layer.
Don’t skip seasoning at the end of cooking, as flavors can mellow out during the long simmer – taste your chili about 30 minutes before serving and adjust the salt, pepper, and taco seasoning as needed.
For the best texture, add your corn during the last hour of cooking rather than at the beginning, which keeps it from turning mushy and maintains a nice pop in every bite.
What to Serve With Crockpot Taco Chili?
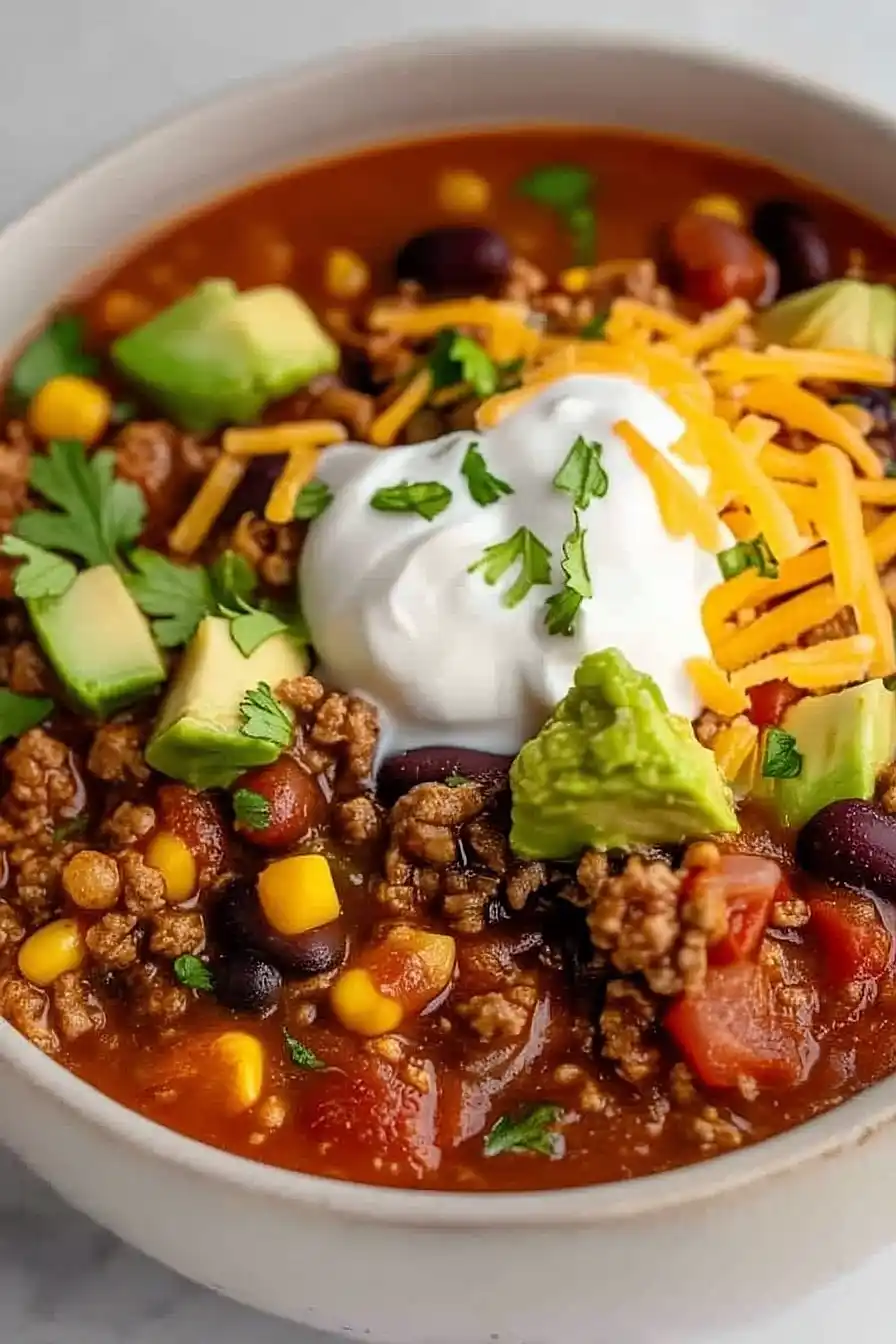
This hearty taco chili is perfect with a big pile of tortilla chips for scooping, or you can crumble them right on top for some crunch. I love setting out a toppings bar with shredded cheese, sour cream, diced avocado, sliced jalapeños, and chopped cilantro so everyone can customize their bowl. Cornbread or corn muffins are another great option since they’re slightly sweet and balance out the spicy, savory flavors of the chili. If you want to make it more filling, serve it over rice or use it as a topping for baked potatoes.
Storage Instructions
Store: This taco chili actually gets better after a day or two in the fridge! Store it in an airtight container for up to 5 days. The flavors really meld together nicely, making it perfect for meal prep throughout the week.
Freeze: Taco chili is one of those recipes that freezes like a dream. Let it cool completely, then portion it into freezer-safe containers or bags and freeze for up to 3 months. I like to freeze individual servings so I can grab just what I need for a quick lunch.
Reheat: Warm it up on the stovetop over medium heat, stirring occasionally until heated through. You can also microwave individual portions for 2-3 minutes, stirring halfway through. If it seems too thick after storing, just add a splash of water or broth to loosen it up.
| Preparation Time | 5-10 minutes |
| Cooking Time | 180-240 minutes |
| Total Time | 185-250 minutes |
| Level of Difficulty | Easy |
| Servings | 6 servings |
Estimated Nutrition
Estimated nutrition for the whole recipe (without optional ingredients):
- Calories: 1700-2000
- Protein: 110-130 g
- Fat: 50-65 g
- Carbohydrates: 190-220 g
Ingredients
- 1 tsp minced garlic (freshly minced for best flavor)
- 15 oz black beans (drained and rinsed)
- 1/2 cup salsa (mild or medium heat preferred)
- 2 cups water
- 1 lb ground beef (browned before adding)
- 1 tsp black pepper
- 28 oz crushed tomatoes (I use San Marzano)
- 15 oz kidney beans (drained and rinsed)
- 1 tsp salt
- 1/2 onion (diced into 1/4-inch pieces)
- 2 tbsp taco seasoning
- 1 cup corn (frozen or canned)
Step 1: Prepare Mise en Place and Brown the Beef
- 1/2 onion, diced
- 1 tsp minced garlic
- 1 lb ground beef
Dice the onion into 1/4-inch pieces and mince the garlic fresh—I find this makes a noticeable difference in the final flavor compared to pre-minced garlic.
In a skillet over medium-high heat, brown the ground beef, breaking it up as it cooks, until no pink remains (about 5-7 minutes).
Drain excess fat if needed, then set the cooked beef aside.
Drain and rinse both the black beans and kidney beans in a colander.
Step 2: Combine All Ingredients in the Crockpot
- browned ground beef from Step 1
- diced onion and garlic from Step 1
- 28 oz crushed tomatoes
- 1/2 cup salsa
- 2 cups water
- 15 oz black beans
- 15 oz kidney beans
- 1 cup corn
- 2 tbsp taco seasoning
- 1 tsp salt
- 1 tsp black pepper
Transfer the browned beef from Step 1 to your crockpot.
Add the diced onion and minced garlic, then pour in the crushed tomatoes, salsa, and water.
Stir in the drained black beans and kidney beans from Step 1, along with the corn.
Sprinkle the taco seasoning, salt, and black pepper over the mixture, and stir thoroughly until all ingredients are well combined and seasonings are evenly distributed throughout the liquid.
Step 3: Cook Low and Slow
Cover the crockpot and cook on low for 6-8 hours, or on high for 3-4 hours if you’re short on time.
I prefer the low setting because it allows the flavors to meld together more thoroughly and creates a richer, more developed taste.
Stir occasionally if you’re around, but this isn’t essential—the crockpot does most of the work for you.
Step 4: Serve and Garnish
Ladle the chili into bowls and serve hot with your choice of toppings.
This chili is forgiving and actually tastes even better the next day as flavors continue to develop, so don’t hesitate to make it ahead.

Mouthwatering Crockpot Taco Chili
Ingredients
- 1 tsp minced garlic (freshly minced for best flavor)
- 15 oz black beans (drained and rinsed)
- 1/2 cup salsa (mild or medium heat preferred)
- 2 cups water
- 1 lb ground beef (browned before adding)
- 1 tsp black pepper
- 28 oz crushed tomatoes (I use San Marzano)
- 15 oz kidney beans (drained and rinsed)
- 1 tsp salt
- 1/2 onion (diced into 1/4-inch pieces)
- 2 tbsp taco seasoning
- 1 cup corn (frozen or canned)
Instructions
- Dice the onion into 1/4-inch pieces and mince the garlic fresh—I find this makes a noticeable difference in the final flavor compared to pre-minced garlic. In a skillet over medium-high heat, brown the ground beef, breaking it up as it cooks, until no pink remains (about 5-7 minutes). Drain excess fat if needed, then set the cooked beef aside. Drain and rinse both the black beans and kidney beans in a colander.
- Transfer the browned beef from Step 1 to your crockpot. Add the diced onion and minced garlic, then pour in the crushed tomatoes, salsa, and water. Stir in the drained black beans and kidney beans from Step 1, along with the corn. Sprinkle the taco seasoning, salt, and black pepper over the mixture, and stir thoroughly until all ingredients are well combined and seasonings are evenly distributed throughout the liquid.
- Cover the crockpot and cook on low for 6-8 hours, or on high for 3-4 hours if you're short on time. I prefer the low setting because it allows the flavors to meld together more thoroughly and creates a richer, more developed taste. Stir occasionally if you're around, but this isn't essential—the crockpot does most of the work for you.
- Ladle the chili into bowls and serve hot with your choice of toppings. This chili is forgiving and actually tastes even better the next day as flavors continue to develop, so don't hesitate to make it ahead.
