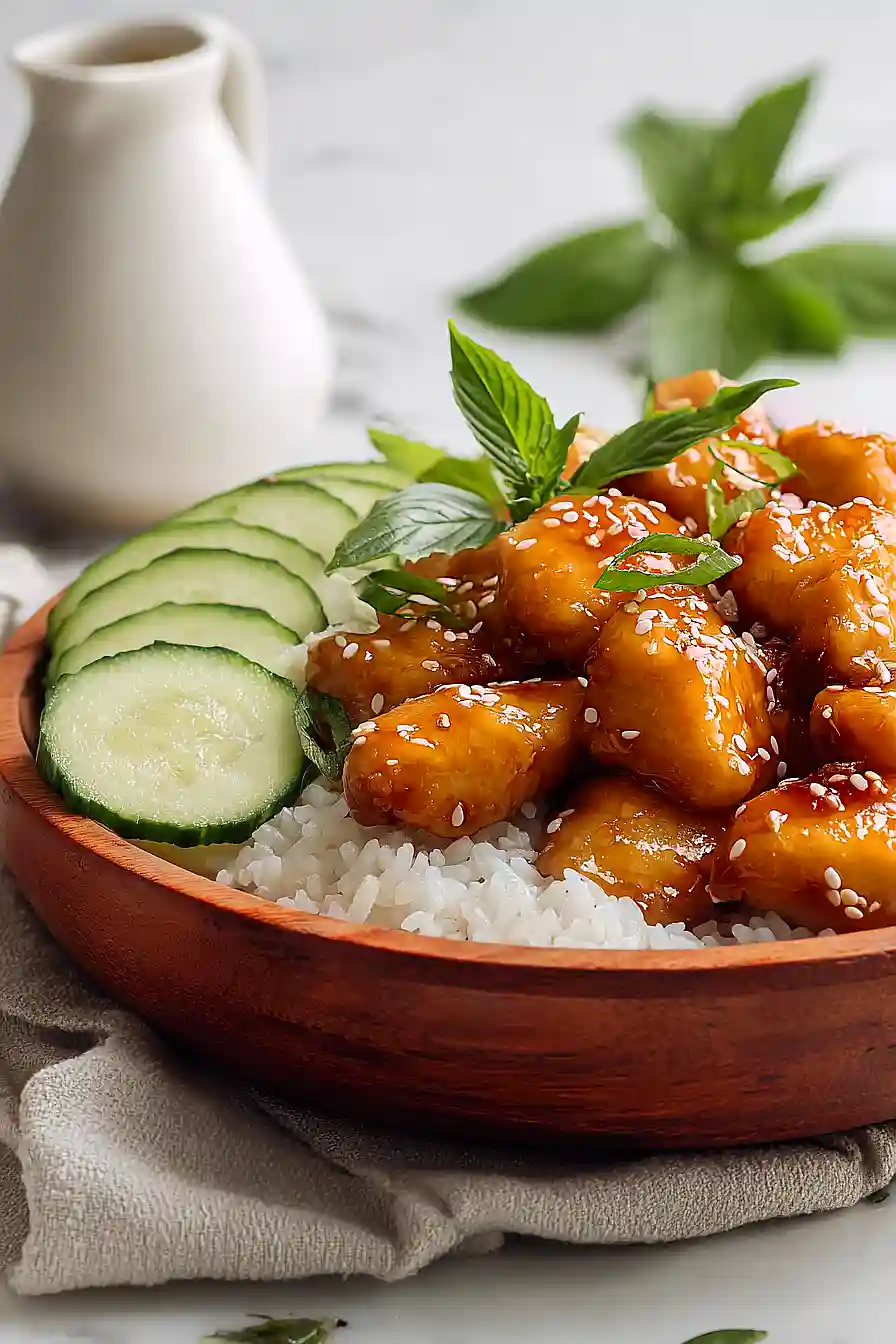
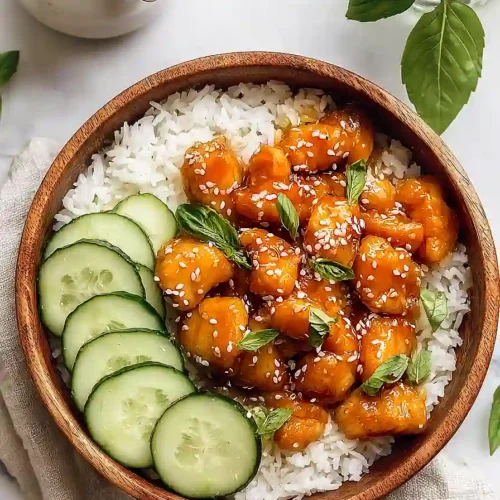
When I need dinner on the table fast but still want everyone excited about what we’re eating, I turn to these chicken bowls. They come together in about 30 minutes, which is perfect for those nights when soccer practice runs late or I just don’t feel like spending an hour in the kitchen. The honey garlic sauce is sweet and savory without being too complicated.
I started making these bowls a few years ago when I was looking for something that wasn’t the same old baked chicken. The sauce sticks to every piece of chicken, and there’s always enough left over to drizzle on your rice. My kids actually ask for this one by name, which never happens with chicken dinners.
You can serve these over rice, noodles, or even cauliflower rice if you’re going that route. I usually throw some broccoli or snap peas on the side and call it a complete meal. Easy cleanup, happy family, and leftovers that taste even better the next day.

Why You’ll Love These Honey Garlic Chicken Bowls
- Quick weeknight dinner – Ready in under 45 minutes, this recipe is perfect for busy evenings when you want something homemade without spending hours in the kitchen.
- Simple pantry ingredients – You probably already have most of these staples in your kitchen, making this an easy go-to meal without a special grocery trip.
- Sweet and savory flavor – The honey and garlic sauce creates that perfect balance everyone loves, coating tender chicken pieces in a sticky glaze that’s hard to resist.
- Meal prep friendly – Make a batch at the beginning of the week and you’ll have delicious lunches or dinners ready to go in minutes.
What Kind of Chicken Should I Use?
For this recipe, boneless, skinless chicken breasts are your best bet since they cook evenly and soak up that honey garlic sauce really well. If you want to save a bit of money, chicken thighs are a great alternative and they’ll actually stay a bit more tender and juicy during cooking. You can use fresh or frozen chicken, just make sure to thaw frozen chicken completely in the fridge before you start cooking. When picking out your chicken at the store, try to choose pieces that are similar in thickness so they all cook at the same rate.
Options for Substitutions
This recipe is pretty forgiving when it comes to swaps, so here are some options if you need them:
- Chicken breast: Chicken thighs work great here and actually stay more tender during cooking. You can also use pork chops or even firm tofu if you’re looking for a different protein. Just adjust cooking time accordingly – thighs need a few extra minutes.
- Honey: If you’re out of honey, try maple syrup or agave nectar. Brown sugar mixed with a tablespoon of water also works in a pinch, though the flavor will be slightly different.
- Soy sauce: Tamari is a great substitute if you need gluten-free, or coconut aminos for a soy-free option. You can also use low-sodium soy sauce if you’re watching your salt intake.
- Fresh garlic: In a pinch, you can use 1 1/2 teaspoons of garlic powder, but fresh garlic really makes this dish shine, so try to stick with it if possible.
- Flour: Cornstarch works as a coating substitute – use about 1/4 cup instead. For gluten-free, try rice flour or a gluten-free all-purpose blend using the same amount.
Watch Out for These Mistakes While Cooking
The biggest mistake when making honey garlic chicken is cooking the garlic too early or at too high heat, which causes it to burn and turn bitter – always add it after the chicken is nearly done and cook for just one minute until fragrant.
Another common error is not pounding the chicken breasts to an even thickness before cooking, which leads to thin parts drying out while thick parts stay undercooked, so use a meat mallet to flatten them to about 3/4 inch throughout.
When it comes to the sauce, many people add it too early and end up with burnt honey stuck to the pan, so make sure your chicken is fully cooked first, then add the honey mixture and let it simmer gently to thicken.
Finally, don’t skip letting the chicken rest for a few minutes after cooking – cutting into it immediately releases all the juices onto your cutting board instead of keeping them inside the meat where they belong.
What to Serve With Honey Garlic Chicken Bowls?
I love serving honey garlic chicken over a bed of white or brown rice to soak up all that sweet and savory sauce. Steamed broccoli or snap peas make a great side since they balance out the richness of the honey garlic glaze, and you can even toss them right in the bowl with everything else. If you want to add more veggies, try some sautéed bell peppers, shredded carrots, or edamame for extra color and crunch. A sprinkle of sesame seeds and sliced green onions on top makes the whole bowl look restaurant-quality without any extra effort.
Storage Instructions
Store: These chicken bowls are great for meal prep! Keep the chicken and sauce in an airtight container in the fridge for up to 4 days. If you’re planning to eat them throughout the week, I recommend storing the rice or veggies separately so everything stays fresh and doesn’t get mushy.
Freeze: The honey garlic chicken freezes really well for up to 3 months. Let it cool completely, then portion it out into freezer-safe containers or bags. Just leave out any fresh veggies or rice if you’re freezing, since those are better made fresh.
Reheat: Warm up your chicken in the microwave for 2-3 minutes, stirring halfway through, or heat it on the stove over medium heat until warmed through. Add a splash of water if the sauce seems too thick after reheating.
| Preparation Time | 10-15 minutes |
| Cooking Time | 15-30 minutes |
| Total Time | 25-45 minutes |
| Level of Difficulty | Easy |
| Servings | 4 servings |
Estimated Nutrition
Estimated nutrition for the whole recipe (without optional ingredients):
- Calories: 1200-1350
- Protein: 120-135 g
- Fat: 32-38 g
- Carbohydrates: 85-100 g
We'll Pay You $5 to Try This Recipe!
Cook our recipe, snap some photos, and earn a $5 Amazon Gift Card. It's that simple!
Here's how:
- Make the recipe
- Take nice pictures of your final dish
- Fill out our quick form (2 minutes max!)
- Your $5 reward is on the way!
Ingredients
For the chicken:
- 1.75 lb chicken breast (cut into 1-inch bite-sized cubes)
- 1/2 tsp salt
- 3/4 tsp pepper
- 1/2 cup flour (I always use King Arthur all-purpose flour)
- 3 tbsp olive oil
- 6 garlic cloves (freshly minced for best flavor)
For the sauce:
- 2/3 cup honey (I use Nature Nate’s for the best consistency)
- 1/4 cup water
- 3 tbsp soy sauce (I prefer Kikkoman for a balanced saltiness)
- 1/2 tsp grated fresh ginger
Step 1: Prep and Coat the Chicken
- 1.75 lb chicken breast, cut into 1-inch cubes
- 1/2 tsp salt
- 3/4 tsp pepper
- 1/2 cup flour
Cut the chicken breasts into 1-inch bite-sized cubes and place them in a bowl.
Season generously with salt and pepper, tossing to distribute evenly.
Spread the flour on a plate and coat each piece of chicken thoroughly, shaking off excess flour.
This light coating will create a golden exterior and help thicken the sauce naturally.
Set the coated chicken aside on a clean plate.
Step 2: Sear the Chicken Until Golden
- 3 tbsp olive oil
- coated chicken from Step 1
Heat the olive oil in a large skillet over medium-high heat until shimmering.
Working in batches if needed to avoid crowding, add the floured chicken pieces and cook for 6-8 minutes, stirring occasionally, until the chicken is golden brown on most sides and cooked through.
I find that letting each piece sit for a minute or two before stirring helps develop that beautiful color and slight crust.
Step 3: Build the Garlic Flavor
- 6 garlic cloves, freshly minced
Reduce heat to medium and add the freshly minced garlic to the pan with the chicken.
Cook for about 1 minute, stirring constantly, until fragrant.
The heat at this point should be gentle enough that the garlic softens and releases its aromatics without burning, which would make it bitter.
Step 4: Create and Add the Honey Garlic Sauce
- 2/3 cup honey
- 1/4 cup water
- 3 tbsp soy sauce
- 1/2 tsp grated fresh ginger
While the garlic cooks, whisk together the honey, water, soy sauce, and grated fresh ginger in a small bowl until well combined.
Pour this mixture into the pan with the chicken and garlic, stirring well to combine.
The sauce will begin to bubble gently as it heats and starts to coat the chicken pieces.
Step 5: Reduce and Thicken the Sauce
- sauce and chicken from Step 4
Bring the sauce to a gentle boil and let it bubble for 2-3 minutes, stirring frequently, until it reduces and thickens enough to coat the chicken.
The flour from coating the chicken will naturally help thicken the sauce, giving it a silky consistency without needing any cornstarch slurry.
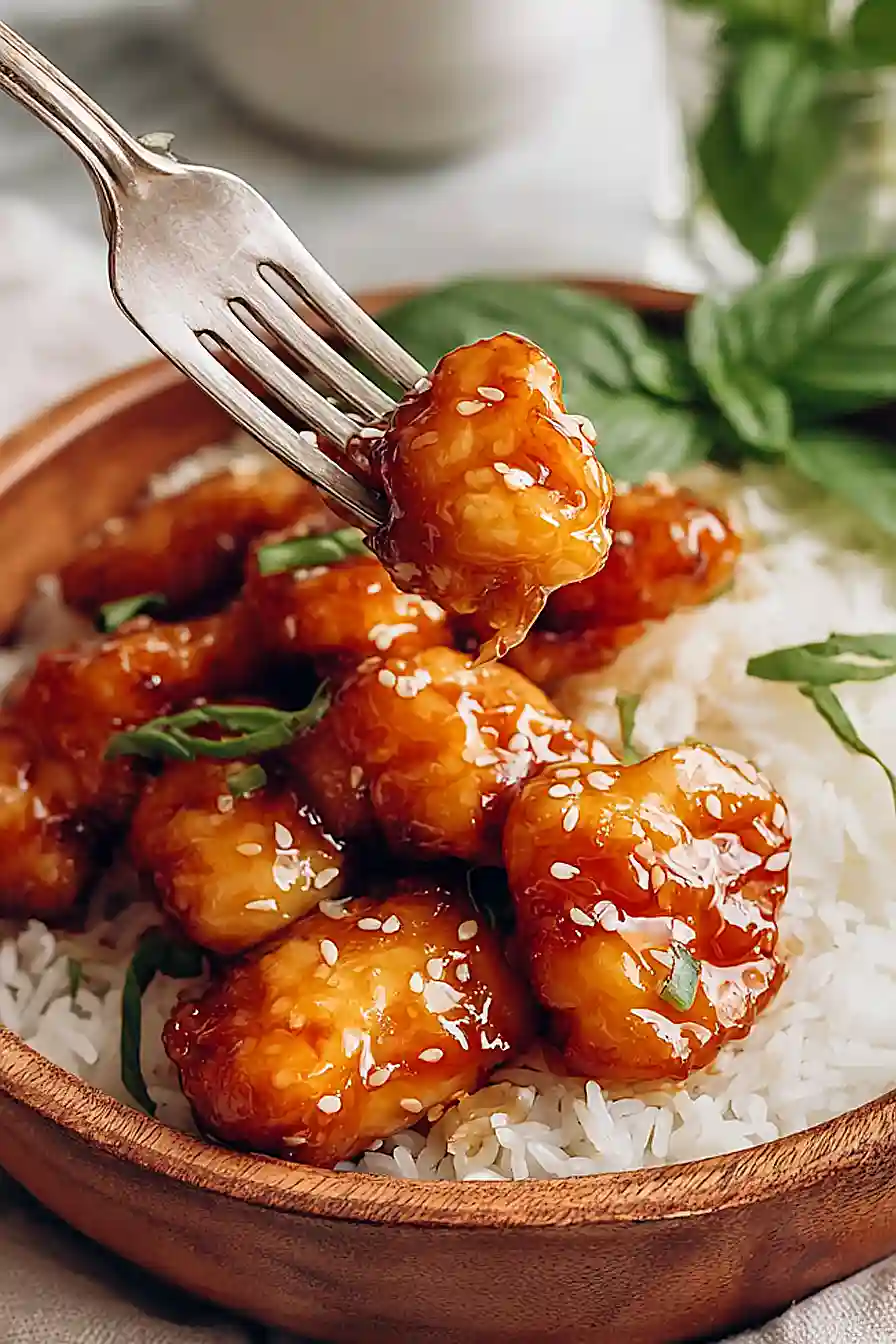
I like to cook it until the sauce is glossy and clings to each piece of chicken—you’ll know it’s ready when you can see it visibly thickening.
Step 6: Plate and Serve
- finished honey garlic chicken from Step 5
Remove the pan from heat and taste the sauce, adjusting seasoning if needed.
Divide the honey garlic chicken among bowls and serve over rice, with steamed vegetables on the side, or however you prefer.
The sauce is perfectly balanced and ready to enjoy immediately.
Irresistible Honey Garlic Chicken Bowls
Ingredients
For the chicken
- 1.75 lb chicken breast (cut into 1-inch bite-sized cubes)
- 1/2 tsp salt
- 3/4 tsp pepper
- 1/2 cup flour (I always use King Arthur all-purpose flour)
- 3 tbsp olive oil
- 6 garlic cloves (freshly minced for best flavor)
For the sauce
- 2/3 cup honey (I use Nature Nate's for the best consistency)
- 1/4 cup water
- 3 tbsp soy sauce (I prefer Kikkoman for a balanced saltiness)
- 1/2 tsp grated fresh ginger
Instructions
- Cut the chicken breasts into 1-inch bite-sized cubes and place them in a bowl. Season generously with salt and pepper, tossing to distribute evenly. Spread the flour on a plate and coat each piece of chicken thoroughly, shaking off excess flour. This light coating will create a golden exterior and help thicken the sauce naturally. Set the coated chicken aside on a clean plate.
- Heat the olive oil in a large skillet over medium-high heat until shimmering. Working in batches if needed to avoid crowding, add the floured chicken pieces and cook for 6-8 minutes, stirring occasionally, until the chicken is golden brown on most sides and cooked through. I find that letting each piece sit for a minute or two before stirring helps develop that beautiful color and slight crust.
- Reduce heat to medium and add the freshly minced garlic to the pan with the chicken. Cook for about 1 minute, stirring constantly, until fragrant. The heat at this point should be gentle enough that the garlic softens and releases its aromatics without burning, which would make it bitter.
- While the garlic cooks, whisk together the honey, water, soy sauce, and grated fresh ginger in a small bowl until well combined. Pour this mixture into the pan with the chicken and garlic, stirring well to combine. The sauce will begin to bubble gently as it heats and starts to coat the chicken pieces.
- Bring the sauce to a gentle boil and let it bubble for 2-3 minutes, stirring frequently, until it reduces and thickens enough to coat the chicken. The flour from coating the chicken will naturally help thicken the sauce, giving it a silky consistency without needing any cornstarch slurry. I like to cook it until the sauce is glossy and clings to each piece of chicken—you'll know it's ready when you can see it visibly thickening.
- Remove the pan from heat and taste the sauce, adjusting seasoning if needed. Divide the honey garlic chicken among bowls and serve over rice, with steamed vegetables on the side, or however you prefer. The sauce is perfectly balanced and ready to enjoy immediately.
