Here’s my go-to recipe for eggless brookies – a perfect blend of chewy chocolate chip cookies and fudgy brownies combined into one amazing treat. These two-in-one bars feature a rich brownie base topped with classic cookie dough, and the best part? No eggs needed!
I make these brookies at least once a month in our house, especially when my kids have friends over. They’re always the first dessert to disappear from the plate, and I love that I can whip them up even when I’m out of eggs.
Why You’ll Love These Brookies
- Egg-free friendly – Perfect for those with egg allergies or dietary restrictions – you won’t even miss the eggs in these rich, fudgy treats!
- Quick preparation – Ready in just 30 minutes from start to finish, making them perfect for last-minute dessert cravings or unexpected guests.
- Simple ingredients – Made with basic pantry staples you likely already have at home, no special ingredients needed besides the chocolate.
- Foolproof recipe – With straightforward measurements and easy-to-follow steps, these brookies turn out great even if you’re new to baking.
What Kind of Dark Chocolate Should I Use?
For brookies, you’ll want to reach for a good quality dark chocolate with around 50-70% cocoa content – this gives you the perfect balance of richness without being too bitter. Regular chocolate chips or baking chocolate will work, but using a bar of eating-quality dark chocolate will give you better melting properties and a smoother texture in your final product. When chopping your chocolate, aim for pieces that are roughly the same size so they’ll melt evenly when combined with the butter. If you’re shopping at the supermarket, brands like Ghirardelli, Lindt, or Callebaut are solid choices that won’t break the bank but will still give you great results.
Options for Substitutions
Need to make some swaps for this eggless treat? Here are some helpful substitutions:
- Dark chocolate: While high-quality dark chocolate gives the best results, you can use semi-sweet chocolate chips instead. Just avoid milk chocolate as it can make the brookies too sweet.
- Butter: You can swap butter with neutral-flavored oil or margarine in equal amounts. If using coconut oil, make sure it’s in its solid form.
- Corn starch: If you’re out of corn starch, use potato starch or arrowroot powder in the same amount. In a pinch, you can also use 2 extra teaspoons of plain flour.
- Plain flour: All-purpose flour works perfectly here. For a gluten-free version, use a 1:1 gluten-free flour blend that contains xanthan gum.
- Cocoa powder: Natural or Dutch-processed cocoa powder both work well. Just avoid hot chocolate powder as it contains sugar and other additives.
- Dark brown sugar: As mentioned in the recipe, you can use soft brown sugar or fine sugar instead. The color might be slightly lighter, but the taste will still be good.
Watch Out for These Mistakes While Baking
The biggest challenge when making eggless brookies is getting the right texture – using too much water can make them cakey instead of fudgy, so stick exactly to the 50ml measurement and avoid the temptation to add more liquid.
Temperature control is crucial when melting chocolate and butter – using too high heat or overheating can cause the mixture to become grainy and affect the final texture, so it’s best to use a double boiler or melt in 30-second intervals in the microwave.
Another common mistake is overbaking these treats – since there are no eggs, they’ll set differently than traditional brownies, so pull them from the oven when a toothpick inserted comes out with a few moist crumbs (not completely clean), as they’ll continue to set while cooling.
For the best results, let them cool completely in the pan before cutting – rushing this step can lead to crumbly, messy brookies instead of clean, beautiful squares.
What to Serve With Brookies?
These chocolate-cookie-brownie hybrids are perfect with a cold glass of milk, which helps balance out their rich chocolate flavor. If you’re feeling fancy, serve them slightly warm with a scoop of vanilla ice cream on top – the contrast between warm brookie and cold ice cream is so good! For a cozy afternoon treat, pair them with hot coffee or tea, and if you’re making them for dessert, add some fresh berries on the side to cut through the sweetness.
Storage Instructions
Keep Fresh: These eggless brookies stay good at room temperature for about 3-4 days when kept in an airtight container. Just place a piece of parchment paper between layers to prevent them from sticking together. They’ll maintain their nice texture, though they might get a bit softer after day 2.
Freeze: Want to save some for later? These brookies freeze really well for up to 2 months! Just wrap them individually in plastic wrap, then put them in a freezer bag. It’s like having a secret stash of chocolate goodness whenever you need it.
Thaw & Enjoy: When you’re ready to enjoy your frozen brookies, just take them out and let them thaw at room temperature for about an hour. If you like them slightly warm, pop them in the microwave for 10-15 seconds – they’ll taste almost like fresh-baked ones!
| Preparation Time | 15-20 minutes |
| Cooking Time | 8-10 minutes |
| Total Time | 23-30 minutes |
| Level of Difficulty | Easy |
Estimated Nutrition
Estimated nutrition for the whole recipe (without optional ingredients):
- Calories: 450-500
- Protein: 6-8 g
- Fat: 25-30 g
- Carbohydrates: 50-55 g
Ingredients
- 60 grams high-quality dark chocolate, chopped
- 30 grams butter
- 40 grams fine sugar
- 30 grams dark brown sugar (or substitute with soft brown or fine sugar)
- 50 ml water
- 60 grams plain flour
- 3.5 grams corn starch
- 15 grams cocoa powder
- 1/4 teaspoon baking powder
- 1/2 teaspoon vanilla essence
- Pinch of sea salt
- Chocolate chips (optional)
Step 1: Prepare Your Workspace
Pre-heat the oven to 180°C (356°F).
Line a baking sheet with parchment paper to prevent the cookies from sticking and ensure easy cleanup.
Step 2: Melt Butter and Chocolate
Melt the butter and chocolate together either in the microwave, checking every 30 seconds and stirring in between, or using the double-boiler method by placing a heat-proof bowl over a pot of simmering water.
Once fully melted and smooth, set aside to allow it to cool slightly.
Step 3: Make the Sugar Syrup
In a saucepan, stir the sugars and water together.
Place the pan on low heat, stirring regularly until the sugars have completely dissolved in the water.
Be sure to remove the saucepan from heat immediately once the sugars are dissolved.
Step 4: Combine Wet Ingredients
Whisk the warm sugar syrup into the warm melted chocolate mixture until everything is well combined.
This will form a rich, smooth base for your cookie batter.
Step 5: Incorporate Dry Ingredients
Sift in the dry ingredients — cocoa powder, baking powder, flour, and cornflour — into the chocolate mixture.
Gently fold them together until you achieve a thick, gooey brownie-like batter.
This step is crucial for avoiding lumps and ensuring a uniform texture.
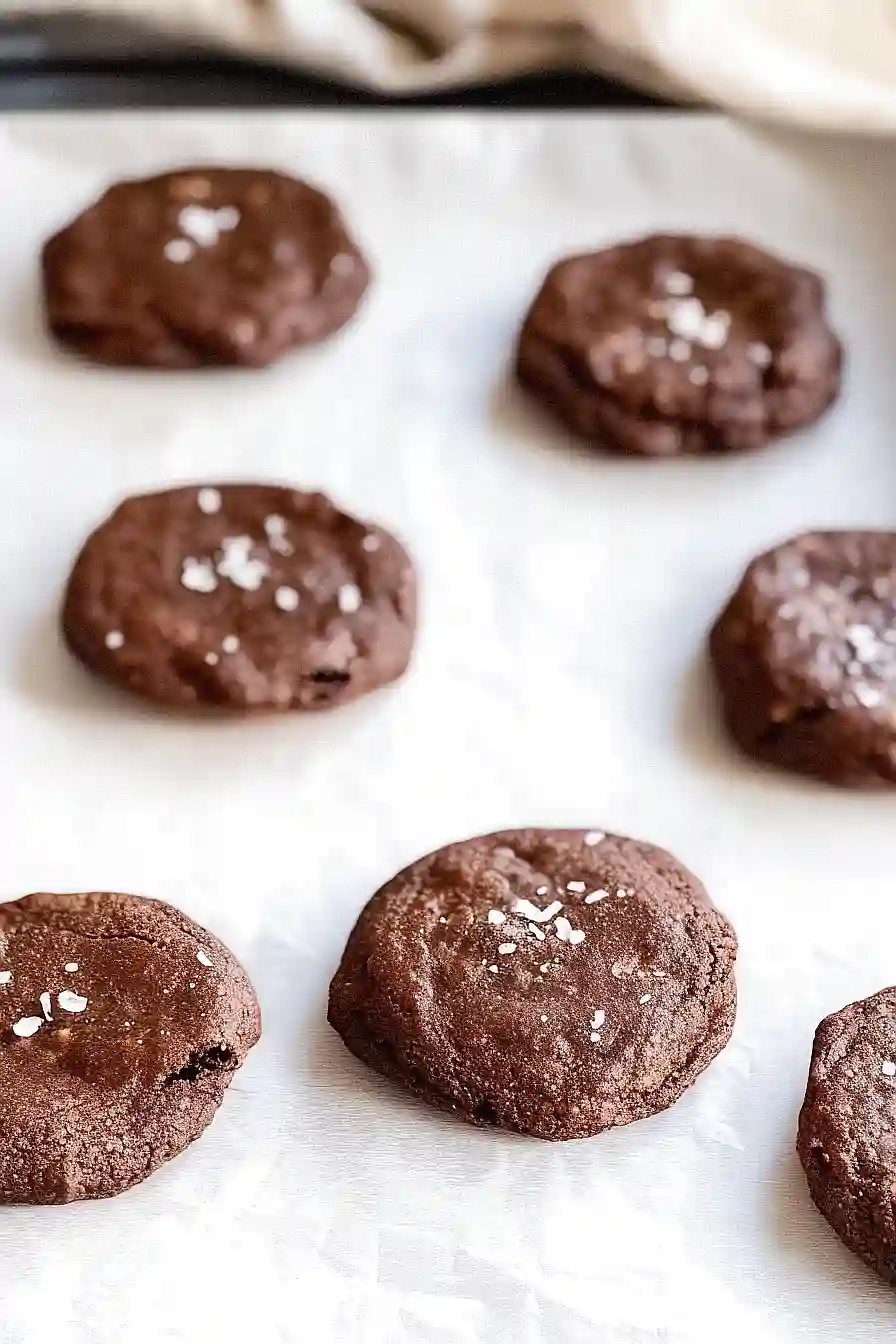
Step 6: Portion and Bake the Cookies
While the batter is still warm, quickly drop portions onto your prepared baking sheet.
For ease and consistency, use an ice cream scooper.
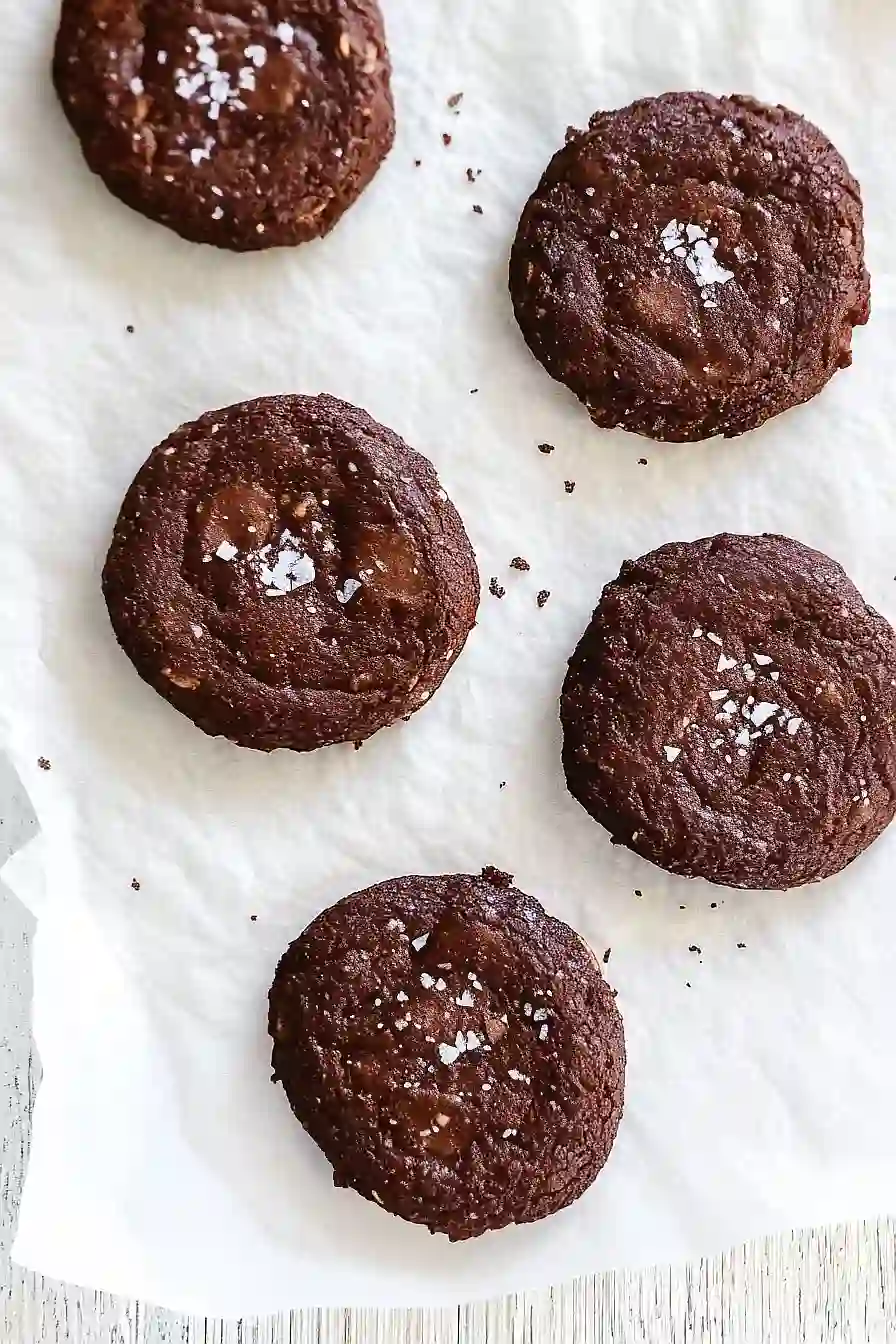
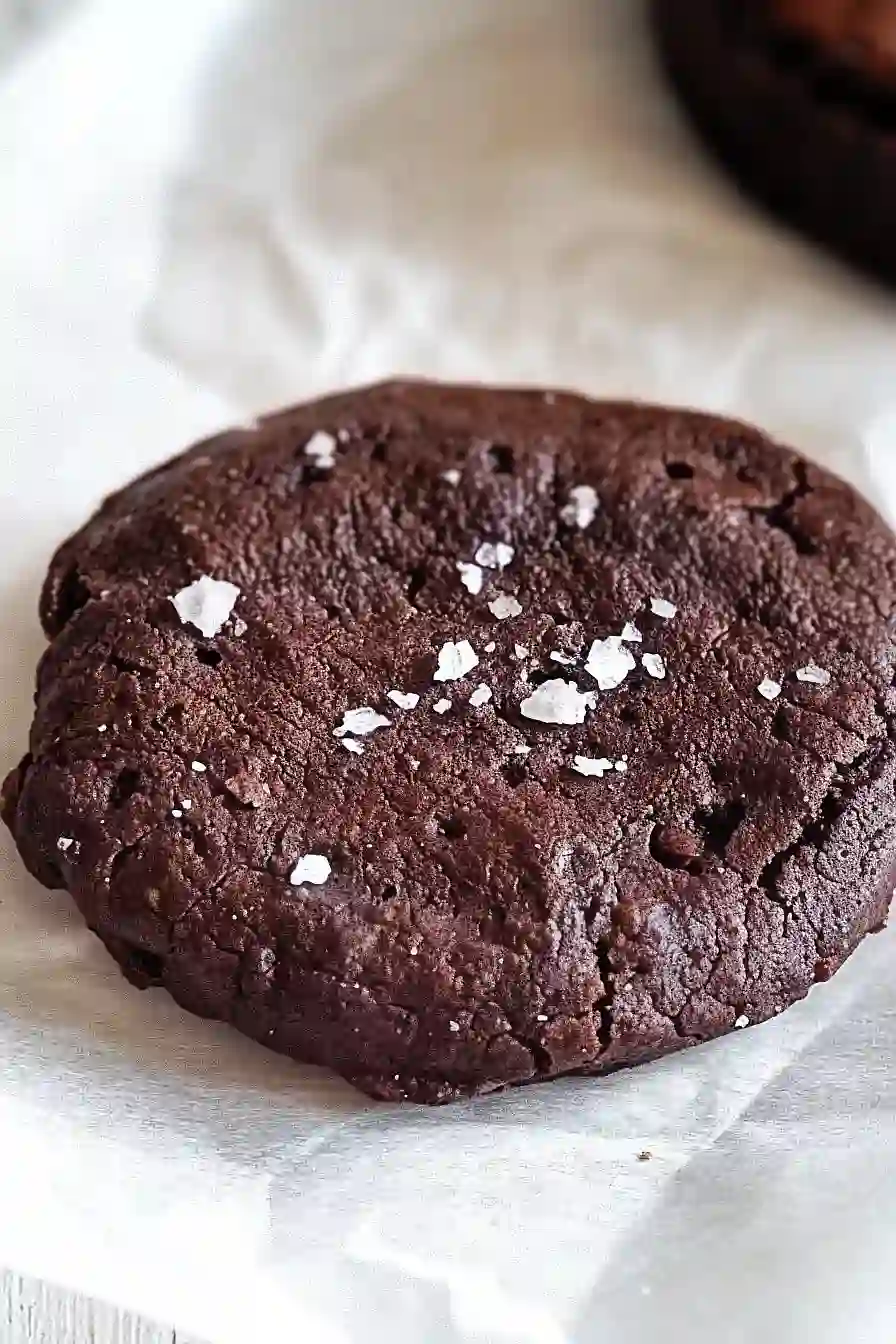
Sprinkle with sea salt or press some chocolate chips on top for added texture and flavor.
Bake the cookies in the preheated oven for 8-10 minutes until the edges are barely set and the tops have developed a shiny, slightly crinkly crust.
Step 7: Cool and Enjoy
Allow the cookies to cool on the baking sheet for 5-10 minutes before transferring them to a wire rack to cool down completely.
This helps them firm up while maintaining a delightful, fudgy interior.
Enjoy your delicious homemade chocolate cookies!
")
")