If you ask me, there’s nothing quite like homemade bread warming up the kitchen.
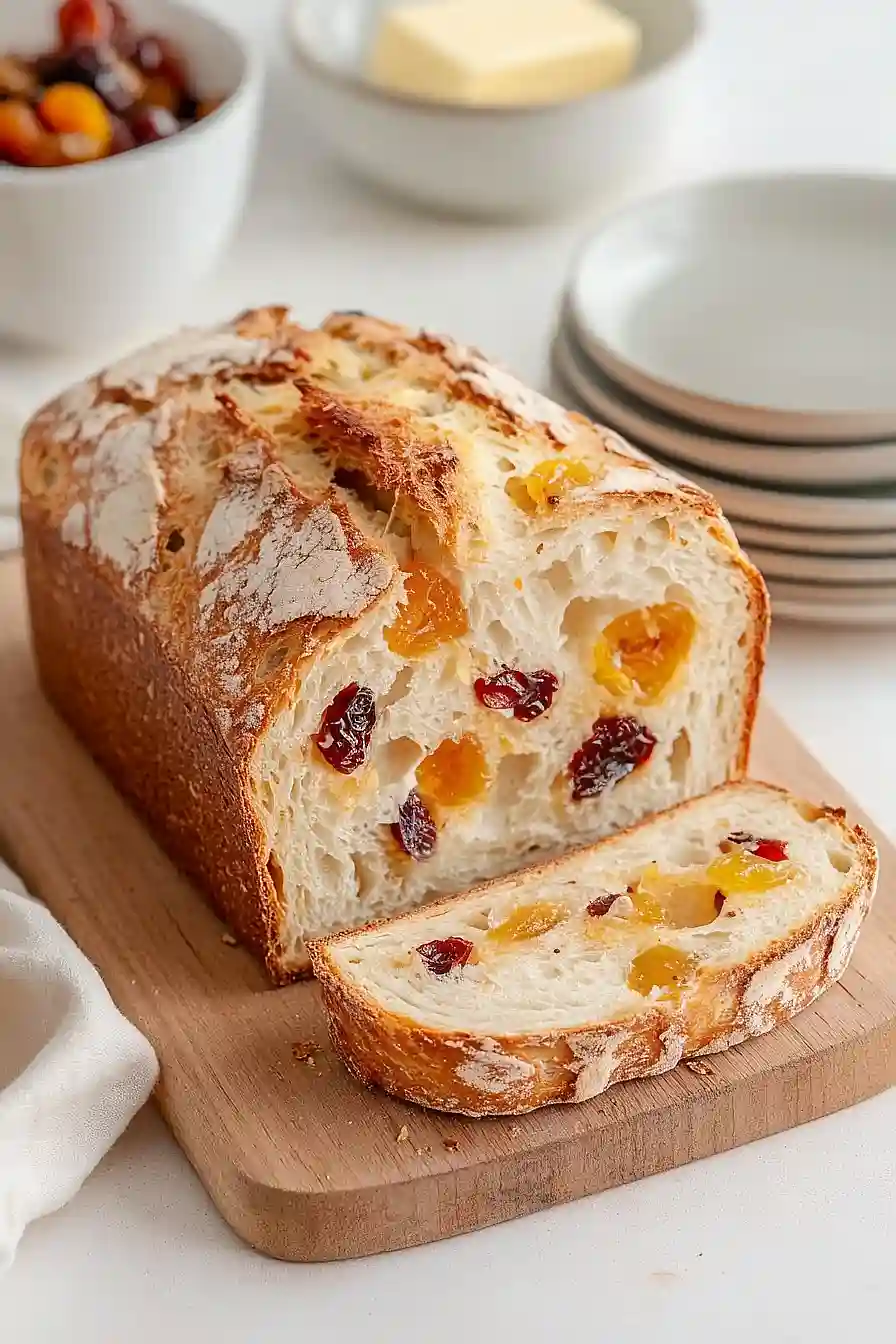
This sweet and satisfying apricot and raisin bread brings together two classic dried fruits in a soft, golden loaf. The chewy apricots and plump raisins add little bursts of natural sweetness throughout each slice.
It’s made with a simple yeast dough that rises to fluffy perfection, making your whole house smell like a cozy bakery. The fruits get folded in gently, creating swirls of color when you cut into the finished loaf.
It’s a family-friendly bread that works for breakfast, snacks, or even dessert – especially when you toast it and add a bit of butter.

Why You’ll Love This Apricot Raisin Bread
- Bakery-quality results – This bread has a perfect crusty exterior and soft interior that rivals what you’d find at an artisan bakery, but at a fraction of the cost.
- Minimal hands-on time – While the total time is long, most of it is just waiting for the dough to develop flavor – you’ll only spend about 15 minutes actively working with it.
- Perfect balance of flavors – The sweet apricots and raisins pair wonderfully with the nutty pecans, while the rye flour adds a subtle depth that makes this bread special.
- No special equipment needed – You don’t need a bread machine or stand mixer – just a bowl and your hands will do the job perfectly.
- Make-ahead friendly – The long fermentation time means you can start this bread one day and bake it the next, fitting it into your schedule.
What Kind of Dried Apricots Should I Use?
When shopping for dried apricots, you’ll typically find two main varieties in stores: bright orange ones and darker brown ones. The bright orange apricots have been treated with sulfur dioxide to preserve their color, while the darker brown ones are unsulfured and more natural. Both types work great in this bread, so the choice really comes down to personal preference. Just make sure your dried apricots are still soft and pliable – if they’re too hard, you can soak them in warm water for about 10 minutes before chopping. When chopping the apricots, try to keep the pieces fairly uniform in size (about the same size as the raisins) so they distribute evenly throughout your bread.

Options for Substitutions
This bread recipe is pretty flexible with its mix-ins, though some ingredients are key to getting that perfect loaf:
- Rye or whole wheat flour: You can swap this with all-purpose flour if needed, but you’ll miss out on some nutty flavor. Spelt flour or graham flour would work nicely too.
- Quick-rise yeast: Active dry yeast can be used instead – just double the amount and dissolve it in warm water first. Instant yeast works as a 1:1 replacement.
- Dried apricots: Try dried peaches, dried figs, or dried cranberries instead. Just chop them to about the same size as the original apricots.
- Raisins: Feel free to use any dried fruit like currants, chopped dates, or dried cherries. Just keep the total amount the same.
- Pecans: Walnuts or almonds make great substitutes. Just remember to toast them lightly like you would the pecans. You could even use a mix of different nuts.
- All-purpose flour: This is a must-keep ingredient – it’s the backbone of the bread. Bread flour can work but might make a chewier loaf. Don’t substitute with only whole grain flours as it will change the texture too much.
Watch Out for These Mistakes While Baking
The biggest challenge when making fruit and nut bread is getting the yeast activation right – using water that’s too hot (over 110°F) will kill the yeast, while too cold water won’t activate it properly, so aim for lukewarm water that feels comfortable on your wrist. Another common mistake is adding the dried fruit and nuts too early in the mixing process, which can tear the developing gluten strands – instead, fold them in gently after the first rise when the dough is more elastic. The timing of your rises is crucial – don’t rush them by placing the dough in too warm a spot, as this can lead to over-proofing and a collapsed loaf; instead, let it rise slowly at room temperature until doubled in size, which usually takes 2-3 hours for the first rise. For the best texture, avoid cutting into the bread right after it comes out of the oven – let it cool completely for at least an hour, allowing the crumb to set properly and making it easier to slice without squishing.
What to Serve With Apricot and Raisin Bread?
This fruit-studded bread is perfect for breakfast or afternoon tea, and there are so many tasty ways to enjoy it! Spread a warm slice with salted butter or cream cheese – both options let the sweetness of the apricots and raisins shine through. For breakfast, try serving it alongside some Greek yogurt with a drizzle of honey, or make it into French toast for a special weekend treat. If you’re hosting friends for coffee, serve thin slices with some good butter and a selection of jams – apricot jam is especially nice since it complements the dried fruit in the bread.
Storage Instructions
Keep Fresh: This fruit-filled bread stays fresh at room temperature for up to 3 days when wrapped well in plastic wrap or stored in a bread bag. The dried fruits help keep it moist longer than regular bread. For the best texture, store it cut-side down on a cutting board.
Freeze: If you want to keep it longer, slice the bread before freezing – this way you can grab just what you need. Wrap it tightly in plastic wrap, then aluminum foil, and pop it in the freezer for up to 3 months. The dried fruits and nuts freeze really well without changing texture.
Refresh: To bring back that fresh-baked taste, pop frozen slices directly in the toaster, or thaw the whole loaf at room temperature for about 2 hours. You can also warm it in a 350°F oven for 5-10 minutes to get that lovely crispy crust back.
| Preparation Time | 120-1440 minutes |
| Cooking Time | 25-30 minutes |
| Total Time | 145-1470 minutes |
| Level of Difficulty | Medium |
Estimated Nutrition
Estimated nutrition for the whole recipe (without optional ingredients):
- Calories: 3000-3500
- Protein: 60-70 g
- Fat: 150-170 g
- Carbohydrates: 450-500 g
Ingredients
- 2 cups all-purpose flour (240g)
- 1/4 cup rye or whole wheat flour (25g)
- 1 cup water (227g)
- 1/8 teaspoon quick-rise yeast
- 3 cups all-purpose flour (360g)
- 3/4 cup water (170g)
- 2 teaspoons table salt (12g)
- 1/8 teaspoon quick-rise yeast
- 3/4 cup chopped dried apricots (96g)
- 3/4 cup raisins (golden or dark) (113g)
- 1 1/2 cups pecans, chopped and lightly toasted (170g)
Step 1: Prepare the Biga
Begin by weighing your flour, or gently spooning it into a measuring cup, then sweeping off any excess.
In a medium-sized mixing bowl, combine all the biga ingredients.
Cover the bowl and set it aside for 12 to 24 hours.
The pre-ferment is ready when it has developed large holes, looks very puffy, and is domed in the center.
If the center has fallen, the pre-ferment is overripe but still usable; it will give your bread a slightly tangier flavor.
Step 2: Make the Dough
Combine the prepared biga, additional flour, water, salt, and yeast, mixing by hand, with a mixer, or using a bread machine, to form a smooth and supple dough.
Knead in the apricots, raisins, and pecans.
If using a bread machine, add them about 5 minutes before the end of the kneading cycle.
Once kneaded, transfer the bread into a lightly greased bowl or dough-rising bucket, cover it, and allow the dough to rise for 45 minutes.
Step 3: Perform the Fold Technique
After 45 minutes, uncover the bowl.
Use a bowl scraper or spatula to run down the inside far wall of the bowl, bringing the dough up from the bottom and folding it over on top of itself.
Turn the bowl 90° and repeat this fold three more times, for a total of four folds, turning the bowl after each fold.
Re-cover the bowl and let the dough rise for another 45 minutes before adding another fold.
Cover again, and let it rise for another 30 to 60 minutes until the dough is billowy.
Step 4: Shape the Loaves
Once risen, divide the dough into three pieces, each approximately 1 pound (454g).
Pre-shape the pieces into loose rounds, cover them, and let them rest for 15 minutes.
Then form the rounds into oval loaves, known as bâtards.
Cover the loaves with greased plastic wrap or a dough cover and let them rise for 1 hour until puffy.
Step 5: Refrigerate and Rest (Optional for Better Flavor)
For improved flavor, refrigerate the loaves, covered, for 4 hours or up to 16 hours.
Remove the loaves from the refrigerator and let them rest at room temperature, covered, for 25 to 30 minutes while preheating the oven.
Step 6: Preheat and Bake
If using a baking stone, preheat the oven to 475°F for at least 30 minutes.
For sheet pans, preheat the oven to 450°F.
Before baking, spritz the loaves with water or brush them with an egg white mixed with 2 tablespoons of water.
Use a lame or very sharp knife to score the loaves across the top.
If baking on a stone, place the loaves in the oven and immediately reduce the heat to 375°F.
If baking on sheet pans, wait 10 minutes after placing them in the oven, then reduce the heat to 375°F.
Bake the bread for 25 to 30 minutes until it’s dark brown.
Remove from the oven and cool on a wire rack.
Step 7: Store and Enjoy
Once cooled, store the bread well-wrapped at room temperature for up to 5 days or freeze it for up to 3 months.
Enjoy your homemade bread with a delicious tang and texture!
")
")