I used to buy all my dog treats from the store until our vet mentioned how easy it was to make them at home. Like many pet parents, I assumed homemade treats would be complicated or time-consuming. My first attempt was a complete disaster – the treats were so hard my dog nearly chipped a tooth!
That’s when I discovered that making chicken dog treats is actually pretty simple, and much cheaper than store-bought options. All you need is some basic ingredients and an oven. Plus, you know exactly what’s going into them, which gives me peace of mind when I see my pup’s tail wagging for his favorite snack.
Why You’ll Love These Chicken Dog Treats
- All-natural ingredients – Made with real chicken and sweet potato, you’ll know exactly what’s going into your pup’s treats – no preservatives or mystery ingredients here!
- Cost-effective – Making these treats at home costs less than buying premium dog treats from the store, and you can make a big batch to last several weeks.
- Quick preparation – These treats come together in just 30-40 minutes, making them a perfect weekend project that your dog will appreciate all week long.
- Human-grade ingredients – Using simple ingredients from your own kitchen means these treats are clean enough for human consumption – though they’re specially made for your four-legged friend!
What Kind of Chicken Should I Use?
For homemade dog treats, you can use any type of chicken you have on hand – breast meat, thighs, or even leftover rotisserie chicken will work great. If you’re cooking chicken specifically for this recipe, boneless skinless chicken breast is probably the easiest option since it’s lean and simple to prepare. Just make sure whatever chicken you use is plain – avoid any pieces that have been seasoned with garlic, onions, or heavy spices, as these aren’t good for dogs. You can either boil, bake, or steam the chicken until it’s fully cooked through, then chop it finely or give it a quick pulse in the food processor to make sure there aren’t any large chunks that could make the treats difficult to cut.
Options for Substitutions
Making these dog treats but need to switch things up? Here are some safe substitutions for your furry friend:
- Chicken: You can swap the chicken with cooked turkey, lean beef, or salmon. Just make sure it’s well-cooked and plain (no seasonings). If using fish, drain it well to avoid excess moisture.
- Sweet potato: Regular potato, pumpkin puree (plain, not pie filling), or mashed carrots work great as alternatives. Just make sure they’re well-cooked and mashed to a similar consistency.
- Whole wheat flour: Try oat flour, brown rice flour, or chickpea flour if your dog has wheat sensitivities. Keep in mind the dough might need a bit more or less water depending on which flour you choose.
- Eggs: If your dog has egg allergies, you can use 1/2 cup of unsweetened applesauce or 2 mashed bananas instead. The treats might be slightly more dense but will still be tasty for your pup.
Watch Out for These Mistakes While Baking
The biggest mistake when making homemade dog treats is using raw or undercooked chicken, which can be dangerous for your pup – always ensure the chicken is thoroughly cooked and cooled before mixing it with other ingredients.
Another common error is making the treats too thick, which can result in a crispy outside but doughy inside – aim for about 1/4 inch thickness when rolling out the dough, and use a fork to prick holes in each treat for even baking.
To keep these treats fresh longer, make sure they’re completely cool before storing, and watch for any excess moisture in the dough – if it’s too wet, gradually add small amounts of flour until you reach a workable consistency that holds its shape.
For extra safety and the perfect texture, bake these treats until they’re completely dry and crispy, which usually takes about 20-25 minutes, rotating the baking sheet halfway through to ensure even cooking.
What to Serve With Chicken Dog Treats?
Since these homemade chicken dog treats are already packed with protein and good nutrients, they work great as a standalone reward during training sessions or as special snacks throughout the day. You can pair them with your pup’s regular meal time, but remember to count them as part of their daily calorie intake. For an extra special moment, serve these treats alongside a fun activity like a puzzle toy or during a game of fetch – dogs love working for their rewards! If you’re feeling extra generous, you could offer these treats with a small dollop of plain, unsweetened pumpkin puree or a cube of cheese, just remember to keep portions in check.
Storage Instructions
Keep Fresh: These homemade chicken dog treats will stay good in an airtight container at room temperature for about 5-7 days. If you live in a humid climate, it’s better to keep them in the fridge where they’ll last up to 2 weeks – just make sure the container is sealed well to keep them crunchy!
Freeze: Want to make a big batch? These treats freeze really well! Just put them in a freezer bag or container and they’ll stay fresh for up to 3 months. Your pup won’t mind if they’re frozen – some dogs even prefer them that way!
Make Ahead: These treats are perfect for batch cooking. You can make a double batch and portion them out – keep some in your treat jar and freeze the rest. It’s such a time-saver, and you’ll always have healthy treats ready for your four-legged friend!
| Preparation Time | 15-20 minutes |
| Cooking Time | 15-20 minutes |
| Total Time | 30-40 minutes |
| Level of Difficulty | Easy |
Estimated Nutrition
Estimated nutrition for the whole recipe (without optional ingredients):
- Calories: 1300-1500
- Protein: 70-80 g
- Fat: 25-30 g
- Carbohydrates: 200-220 g
Ingredients
- 1 and a half cups chopped cooked chicken
- 1/2 cup of cooked sweet potato
- 1/3 cup water
- 2 large eggs
- 1 and a half cups whole wheat flour
Step 1: Preheat and Prepare Baking Sheet
Start by preheating your oven to 400°F (204°C).
Line an 11 x 17-inch cookie sheet with parchment paper to prevent sticking and make cleanup easier.
Step 2: Blend the Base Ingredients
In a food processor, blend together the chicken, sweet potato, water, and eggs until a smooth consistency is achieved.
If you don’t have a food processor, an immersion blender or regular blender can also be used to achieve similar results.
Step 3: Form the Dough
Transfer the blended mixture into a large bowl.
Add half of the flour and stir well until it’s combined.
Gradually add the remaining flour.
As the mixture thickens, you may need to knead the dough by hand to fully incorporate the flour.
The dough should be thick and workable.
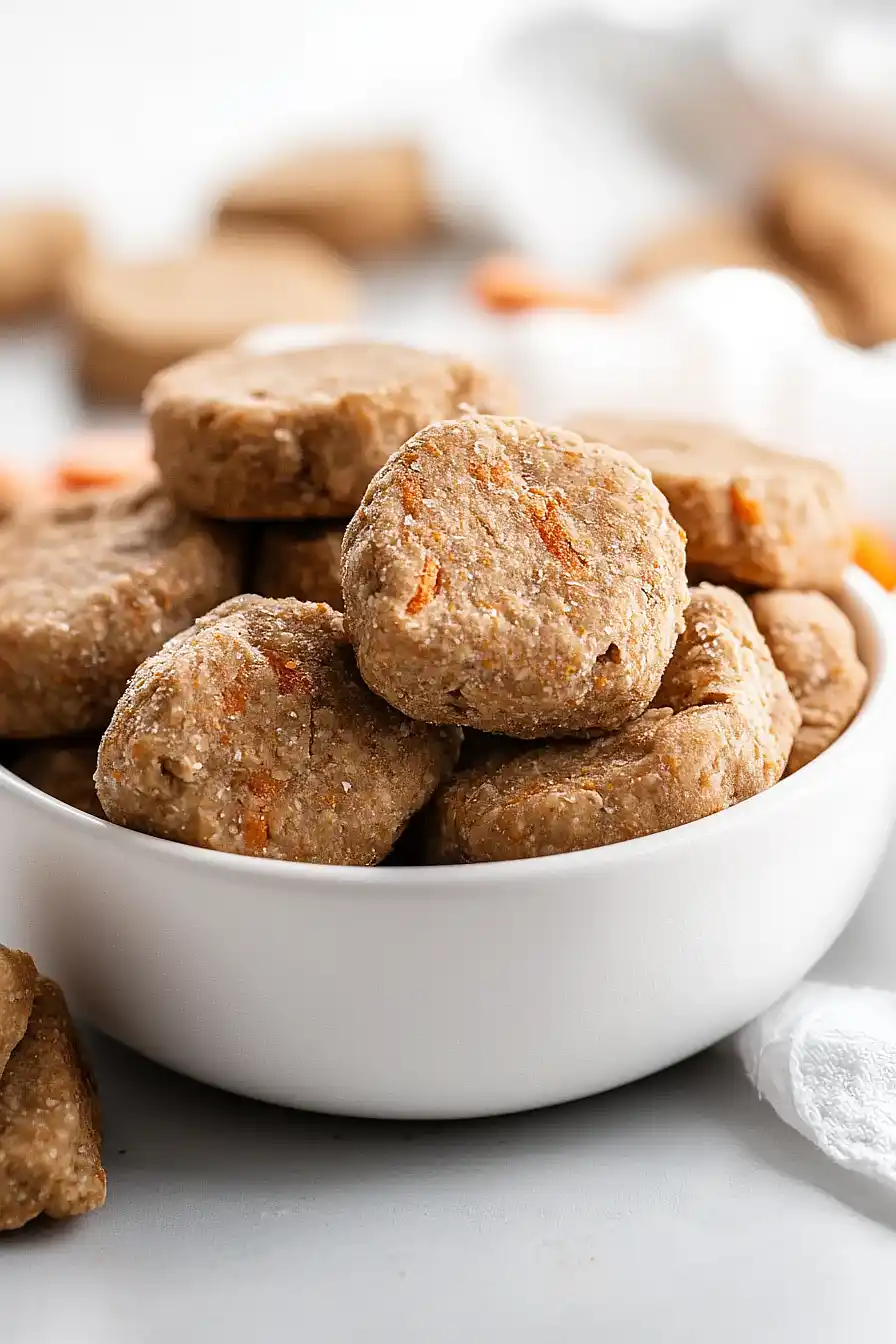
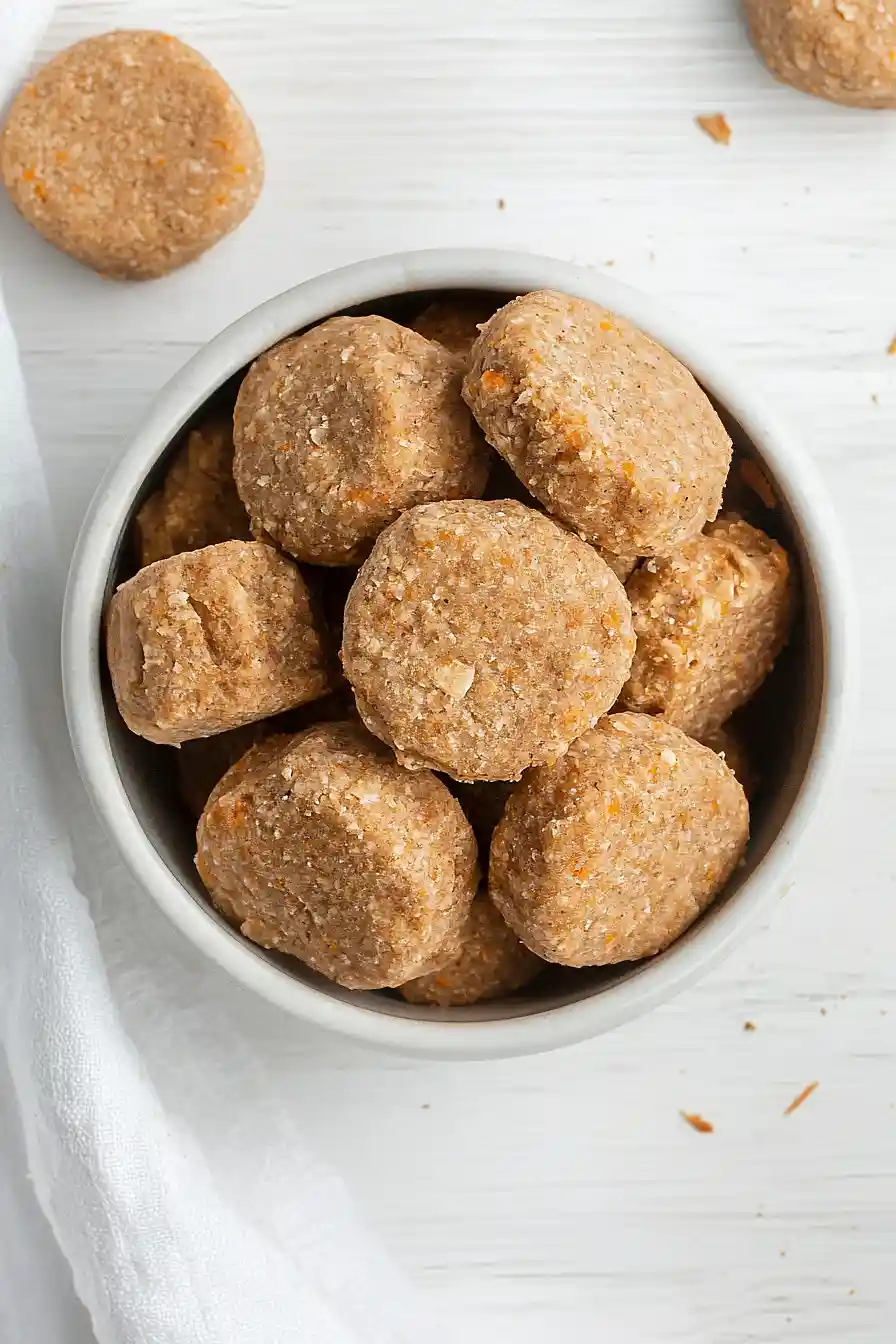
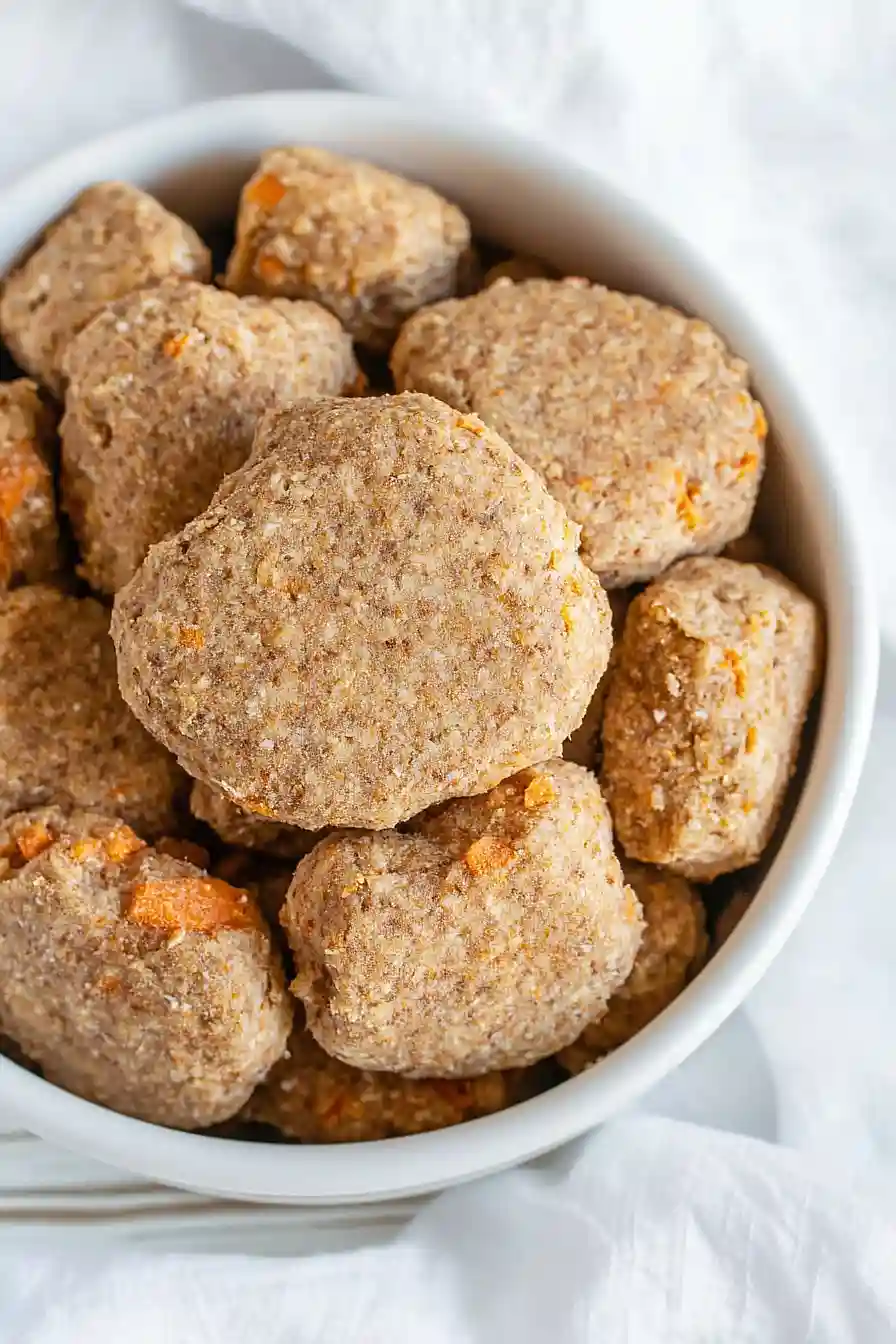
Step 4: Shape the Treats
Lightly flour your hands to prevent sticking.
Using a tablespoon or a small cookie scoop, scoop out portions of dough.
Roll each portion into a ball with your hands, then place it onto the prepared parchment paper.
Press down slightly to form a disc.
As these treats won’t spread while baking, feel free to place them close together.
The entire batch should yield around 60 treats.
Step 5: Bake and Cool the Treats
Bake the treats in your preheated oven for 15 to 20 minutes, or until they turn a golden brown color.
Once baked, remove them from the oven and allow them to cool completely on a wire rack.
This step is important to ensure the treats firm up properly.
Step 6: Store and Serve
After cooling, store the treats in the refrigerator to keep them fresh.
Enjoy these delightful treats at your leisure!
