There’s something about a strawberry tart that makes everyone smile. I’ve been making these for years, and they never fail to brighten up our family gatherings. The combination of fresh strawberries and buttery crust brings back memories of summer picnics and weekend baking sessions with my kids. But here’s the thing – you don’t need to be a pastry chef to make one that looks like it came from a bakery.
I love how this recipe breaks down into simple steps that anyone can follow. When strawberries are in season, I’ll make two or three of these tarts at a time. One for us, and the others for neighbors or friends who drop by. The best part? Most of the prep work can be done ahead of time, so you’re not stuck in the kitchen when you’d rather be chatting with your guests.
Whether you’re planning a special dessert or just want to make an ordinary day feel a bit more special, this strawberry tart is the answer. Trust me, once you see how easy it is, you’ll be making it on repeat.
Why You’ll Love This Strawberry Tart
- Make-ahead friendly – You can prepare the crust and filling separately ahead of time, then assemble when you’re ready to serve – perfect for busy bakers who like to plan ahead.
- Simple ingredients – Most of these ingredients are probably already in your kitchen, and fresh strawberries are easy to find at any grocery store or farmers market.
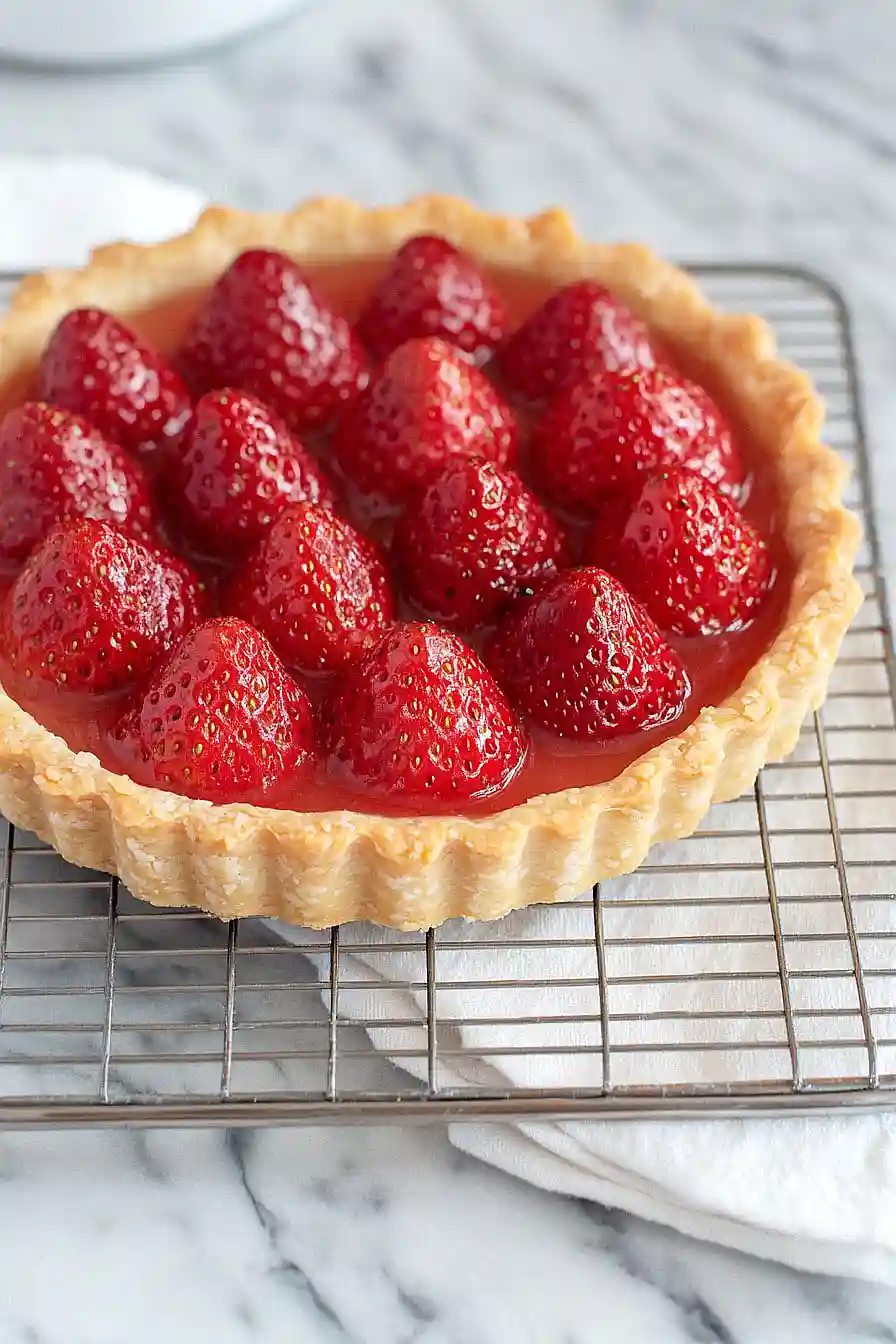
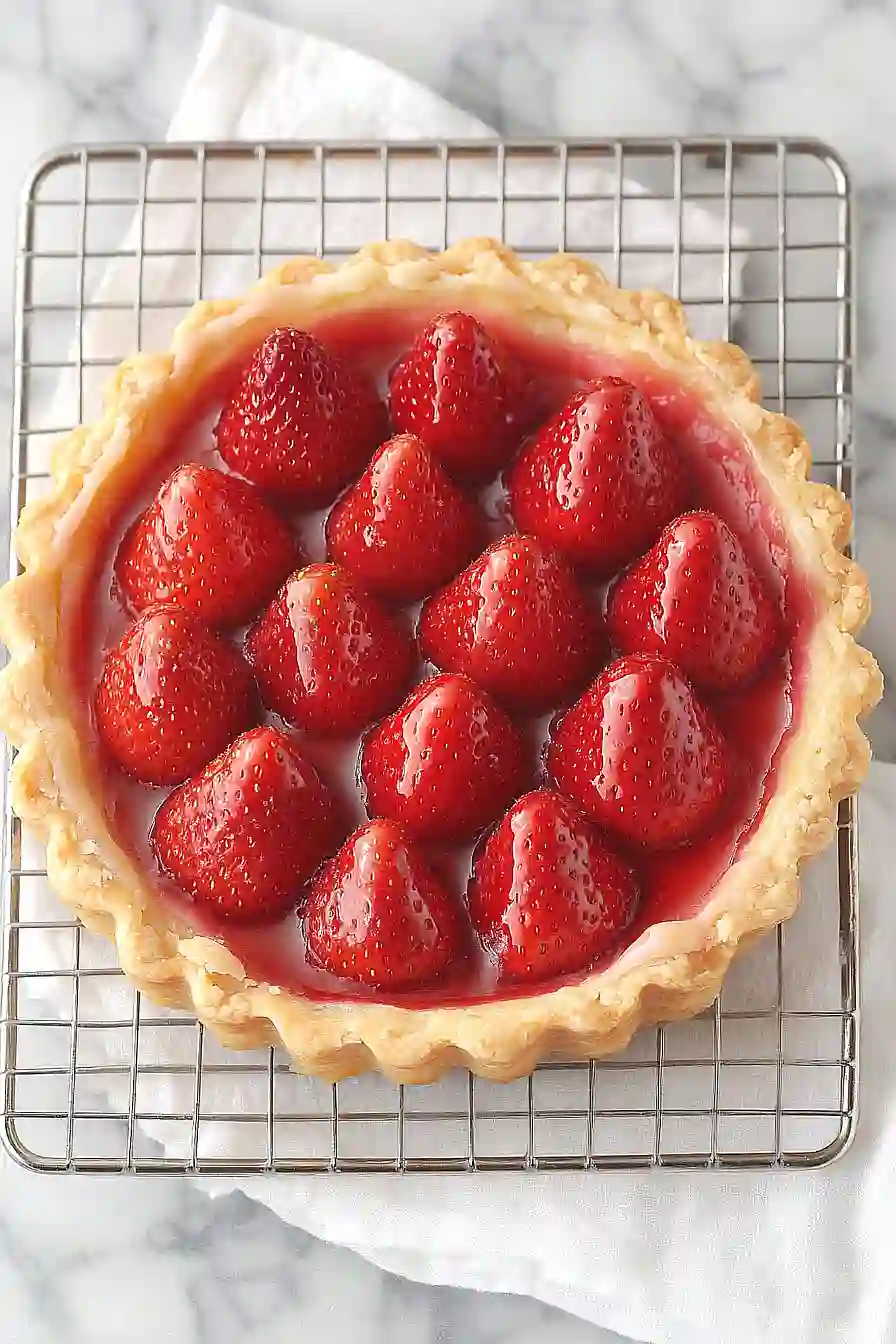
- Impressive presentation – The bright red strawberries arranged on creamy filling create a beautiful dessert that looks like it came from a fancy bakery – but you made it yourself!
- Classic flavor combination – The buttery crust paired with tangy cream cheese filling and sweet fresh strawberries creates that perfect balance of flavors everyone loves.
What Kind of Strawberries Should I Use?
For a strawberry tart, you’ll want to look for fresh, ripe strawberries that are bright red all the way to the stem, as these will give you the best flavor and visual appeal. Local, in-season berries are your best bet since they’re picked at peak ripeness, but grocery store strawberries will work too as long as they’re firm and free from soft spots or mold. If you’re shopping out of season, look for medium-sized berries rather than the super-large ones, as these tend to have better flavor. Before using them in your tart, make sure to wash them gently and pat them dry completely – any extra moisture can make your tart soggy.
Options for Substitutions
This tart recipe can be adapted with several ingredient swaps if needed:
- Plain flour: All-purpose flour works perfectly here, but you can try pastry flour for an even more tender crust. Just avoid bread flour as it has too much protein and will make the crust tough.
- Cream cheese: For the filling, mascarpone cheese makes a good substitute. You could also use ricotta cheese, but you’ll need to drain it first and might want to reduce the sour cream slightly as ricotta is wetter.
- Sour cream: Greek yogurt works great as a 1:1 replacement. Just make sure to use full-fat yogurt for the best texture.
- Fresh strawberries: While fresh strawberries are best, you can use other berries like raspberries, blackberries, or a mix. If using frozen berries, thaw and drain them well first to avoid a soggy tart.
- Red currant jam: Any clear fruit jam works for the glaze – try apricot, apple, or strawberry jam. Just warm it up with the water and strain if there are seeds or chunks.
- Lemon peel: Orange zest makes a nice alternative, or you can skip it altogether if you prefer. You could also add a drop of lemon extract instead.
Watch Out for These Mistakes While Baking
The success of your strawberry tart largely depends on the pastry temperature – working with warm butter or overhandling the dough will result in a tough, dense crust instead of the flaky, tender texture you’re after. For the best results, keep your butter frozen until the last minute, and chill the dough for at least an hour before rolling it out. Another common mistake is underbaking the crust – make sure to bake it until it’s golden brown, as a pale crust will become soggy once filled with the cream cheese mixture. When it comes to the filling, room temperature cream cheese is crucial – cold cream cheese will leave lumps in your filling no matter how long you beat it, so take it out of the fridge at least 2 hours before using. Finally, avoid arranging the strawberries on your tart too far in advance, as they’ll start releasing juices that can make your tart soggy – instead, add them just before serving and brush with jam glaze immediately to keep them fresh and glossy.

What to Serve With Strawberry Tart?
This sweet and creamy strawberry tart pairs perfectly with a few simple accompaniments that won’t overshadow its fresh flavors. A dollop of freshly whipped cream or a scoop of vanilla ice cream makes a wonderful addition, letting the tart remain the star of the show. For a morning or afternoon treat, serve it alongside a hot cup of coffee, tea, or even a cappuccino – the slight bitterness of the coffee creates a nice balance with the sweet tart. If you’re serving this for dessert after dinner, a small glass of dessert wine like Moscato or a late-harvest Riesling would make a lovely match.
Storage Instructions
Keep Fresh: Once you’ve assembled your strawberry tart, it’s best enjoyed within 24 hours. Keep it in the refrigerator, covered loosely with plastic wrap or in a cake container. The crust stays crisp and the strawberries maintain their fresh look this way.
Make Ahead: You can prepare the tart shell up to 2 days in advance – just keep it wrapped at room temperature. The cream cheese filling can be made 1 day ahead and stored in the fridge. I recommend adding the fresh strawberries and glaze just before serving for the prettiest presentation.
Preserve: While this tart is best fresh, you can keep any leftovers in the fridge for up to 3 days. The strawberries might release some juice over time, but it’ll still taste good! Just note that the crust might soften a bit each day.
| Preparation Time | 30-45 minutes |
| Cooking Time | 27-35 minutes |
| Total Time | 57-80 minutes |
| Level of Difficulty | Medium |
Estimated Nutrition
Estimated nutrition for the whole recipe (without optional ingredients):
- Calories: 1800-2000
- Protein: 20-25 g
- Fat: 100-120 g
- Carbohydrates: 220-240 g
Ingredients
- 2 cups plain flour
- 1/2 cup frozen butter, grated
- 1/4 cup granulated sugar
- 1 teaspoon salt
- 6 tablespoons ice-cold water (add gradually by the tablespoon)
- 8 ounces cream cheese at room temperature
- 2 tablespoons sour cream
- 4 tablespoons sugar
- 1 egg yolk
- 1/4 teaspoon salt
- 1 teaspoon vanilla extract
- 1/2 teaspoon grated lemon peel
- 1 pound fresh strawberries (sufficient to fill tart pans)
- 1/4 cup red currant jam (or substitute with apricot or seedless strawberry jam)
- 2 teaspoons water
Step 1: Prepare the Dough
Preheat your oven to 375 degrees F.
In a food processor, combine all the ingredients except for the water and pulse until crumbs form.
Gradually add water, one tablespoon at a time, while pulsing until the dough turns light yellow and begins to form a clump.
Step 2: Chill the Dough
Take the dough out of the food processor and form it into a ball.
Flatten the ball slightly, wrap it in plastic wrap, and refrigerate for at least 30 minutes.
This will help the dough firm up and make it easier to roll out.
Step 3: Roll and Pre-Bake the Crust
Once chilled, roll the dough out to about 1/8 inch thick, creating a circle that is approximately 1 1/2 inches bigger around than your tart pan.
Place the rolled dough into a removable bottom tart pan or pans, pressing it into the bottom and up the sides.
Trim any excess dough so it’s even with the top of the pan.
Use a fork to prick the bottom of the dough to prevent bubbling, then bake for 15-20 minutes until it begins to turn golden brown.
Allow the crust to cool before adding the filling.
Step 4: Prepare the Cream Cheese Filling
In a bowl, mix the cream cheese filling ingredients until smooth and creamy.
Pour the cream cheese filling into the cooled tart crust, spreading it so the mixture is about 1/2 inch thick.
Bake again for another 12-15 minutes until the filling is set and the crust is golden brown.
Allow the tart to cool.
Step 5: Add the Berry Topping
Once the tart has cooled, arrange berries over the cream cheese layer, starting from the middle and work outwards in a circular pattern.
This creates an attractive and even distribution of fruit.
Step 6: Glaze and Serve
In a saucepan, heat jam and a little water until it is slightly thickened, then cool slightly.
Brush this glaze over the berries to give them a shiny finish and add flavor.
Remove the tart from the pan and refrigerate until ready to serve, keeping it chilled for best texture and flavor.

Hey Emma, what size of tart pan did you use for this recipe?