Finding gluten-free treats that actually taste good can feel like searching for a needle in a haystack. Between the crumbly textures and odd aftertastes that plague many gluten-free desserts, it’s enough to make anyone miss their favorite wheat-based snacks – especially those classic fig cookies we all grew up with.
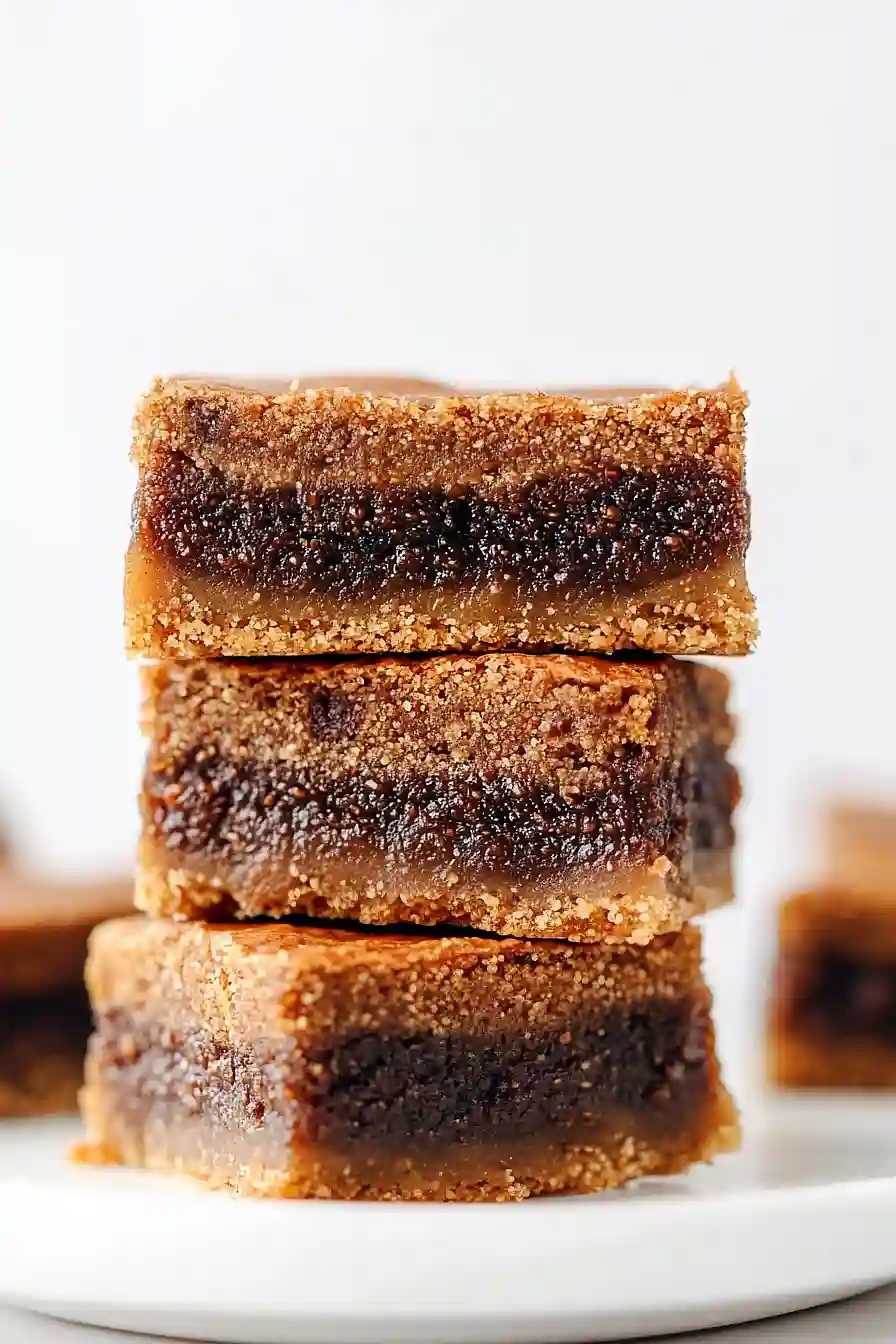
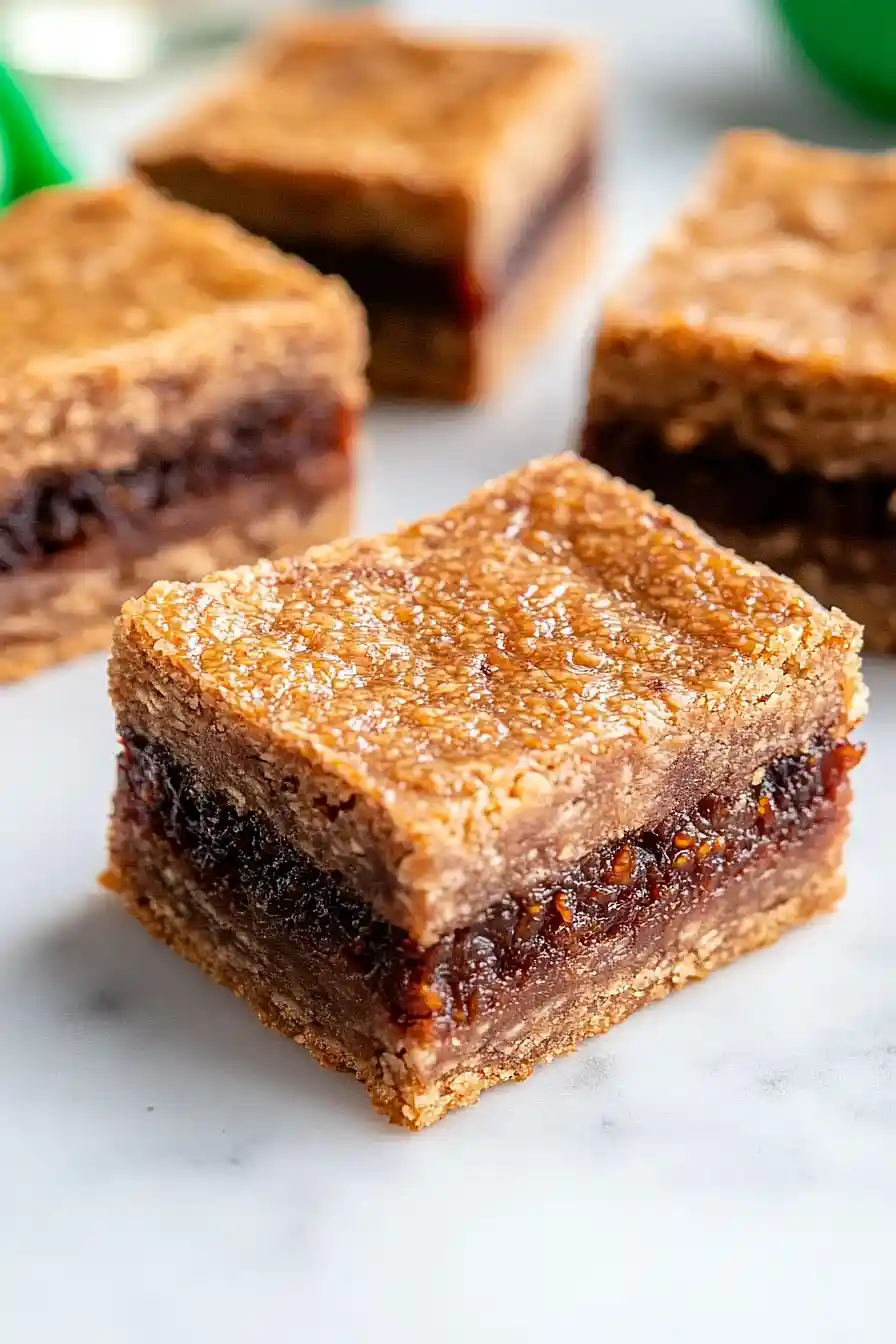
That’s why these homemade gluten-free fig bars are such a game-changer: they’re soft and chewy, packed with real fig flavor, and best of all, they taste just like the ones from the store (maybe even better!). Plus, they’re easy to make ahead and perfect for tucking into lunch boxes or enjoying with afternoon tea.
Why You’ll Love These Fig Bars
- Allergy-friendly – These treats are completely gluten-free and can be enjoyed by those with celiac disease or gluten sensitivity. They’re also nut-free when made with SunButter instead of traditional nut butters.
- Healthier alternative – Made with natural sweeteners like coconut sugar and wholesome ingredients, these fig bars are a better choice than store-bought versions filled with artificial ingredients and preservatives.
- Nostalgic taste – They taste just like the classic fig cookies you loved as a kid, but without any of the gluten or processed ingredients.
- Make-ahead friendly – These bars store well and are perfect for meal prep, lunch boxes, or keeping on hand for quick snacks throughout the week.
What Kind of Dried Figs Should I Use?
Mission figs are specifically called for in this recipe, but you’ve got some flexibility here if you need it. Mission figs are known for their dark purple-black skin and sweet, jammy interior that works perfectly in fig bars. If you can’t find mission figs, you can substitute Black Turkish figs or even Brown Turkish figs – they’ll give you a similar sweet flavor and sticky texture when cooked down. When shopping for dried figs, look for ones that are still somewhat soft and pliable, not rock hard. If your figs feel too dry, you can soak them in hot water for about 10 minutes before using them in the recipe to help them soften up and blend more easily.

Options for Substitutions
This gluten-free treat is pretty adaptable! Here are some helpful swaps you can try:
- Mission figs: If you can’t find mission figs, try using other dried figs like Turkish or Black Mission. In a pinch, you could even use dried dates or prunes, though this will change the flavor profile.
- Orange juice: Apple juice works well as a replacement, or try a mix of water and 2 tablespoons of lemon juice for a citrus kick.
- Gluten-free flour: While you need to stick with gluten-free flour for this recipe, you can use different brands or blends. Just make sure your blend contains xanthan gum – if it doesn’t, add 1/4 teaspoon to the recipe.
- Coconut sugar: Brown sugar works as a 1:1 replacement, or try maple sugar if you want to keep it less refined.
- SunButter: Any nut or seed butter will work here – try almond butter, cashew butter, or even tahini. Just make sure it’s well-stirred and at room temperature.
- Coconut oil: You can swap this with vegan butter or regular butter if you’re not dairy-free. Just make sure it’s softened to room temperature.
- Almond milk: Any plant-based milk will do – oat milk, soy milk, or coconut milk are all good options. Regular milk works too if you don’t need the recipe to be dairy-free.
Watch Out for These Mistakes While Baking
The trickiest part of making gluten-free fig bars is getting the right dough consistency – adding too much liquid can make it sticky and impossible to work with, so start with 2 tablespoons of almond milk and add more only if needed until the dough holds together but isn’t wet.
When cooking the fig filling, keep a close eye on it and stir frequently to prevent burning or sticking to the bottom of the pan – you want the figs to be soft and spreadable but not too runny, which typically takes about 15-20 minutes of simmering.
Temperature control is crucial when working with this dough – if it’s too warm it will be sticky and hard to handle, so chill it for at least 30 minutes before rolling, and if it starts to get too soft while you’re working with it, pop it back in the fridge for a few minutes.
For the best texture, let these bars cool completely before cutting them – trying to slice them while warm will result in a crumbly mess rather than clean, neat bars.
What to Serve With Fig Bars?
These homemade fig bars make a perfect afternoon snack, and they’re even better when paired with the right accompaniments! A warm cup of coffee or tea is my go-to choice – the slight bitterness of coffee particularly complements the natural sweetness of the figs. For a cozy breakfast setup, serve these bars alongside a glass of cold almond milk or your favorite dairy-free alternative. If you’re putting together a dessert platter, try adding some fresh fruit like sliced pears or apple wedges to create a nice balance of fresh and baked treats.
Storage Instructions
Keep Fresh: These homemade fig bars stay fresh in an airtight container at room temperature for up to 5 days. I like to place a piece of parchment paper between layers to prevent them from sticking together. If your kitchen is warm, you might want to keep them in the fridge where they’ll last for about a week.
Freeze: These fig bars are perfect for freezing! Place them in a freezer-safe container with parchment paper between layers and they’ll keep for up to 3 months. I often make a double batch just to have some ready in the freezer for unexpected guests or snack emergencies.
Thaw: When you’re ready to enjoy your frozen fig bars, just transfer them to the counter and let them thaw at room temperature for about 30-60 minutes. They’ll taste just as good as the day you made them! If you like them slightly warm, give them a quick 10-second zap in the microwave.
| Preparation Time | 20-30 minutes |
| Cooking Time | 40-45 minutes |
| Total Time | 4 hours 30 minutes |
| Level of Difficulty | Medium |
Estimated Nutrition
Estimated nutrition for the whole recipe (without optional ingredients):
- Calories: 2200-2500
- Protein: 20-25 g
- Fat: 110-120 g
- Carbohydrates: 300-320 g
We'll Pay You $5 to Try This Recipe!
Cook our recipe, snap some photos, and earn a $5 Amazon Gift Card. It's that simple!
Here's how:
- Make the recipe
- Take nice pictures of your final dish
- Fill out our quick form (2 minutes max!)
- Your $5 reward is on the way!
Ingredients
For the fig filling:
- 12 oz dried mission figs
- 1 cup water
- 1 cup orange juice
For the crust and topping:
- 1 1/2 cups gluten-free flour
- 3/4 cup coconut sugar
- 1/2 tsp baking powder
- 1/4 tsp salt
- 1/3 cup organic sunbutter
- 1/3 cup coconut oil
- 2 tsp vanilla extract
- 2 to 4 tbsp almond milk
Step 1: Prepare the Fig Filling
- 12 oz dried mission figs
- 1 cup water
- 1 cup orange juice
Remove the stems from the dried mission figs and slice each in half.
Add the figs to a medium saucepan along with the water and orange juice.
Bring the mixture to a boil over high heat, then reduce the heat to medium and simmer for about 15 minutes, or until the figs are softened.
Transfer the mixture to a food processor and process until you reach a jam-like consistency.
Set aside in the refrigerator to cool while you prepare the crust.
