Disclaimer: Our editors have used AI to create or enhance parts of this article. All content has been fact-checked by our team to ensure accuracy.
Fall cookies are something I start thinking about the second September hits. There’s just something about the combination of pumpkin and warm spices that makes everything feel cozy. But when you’re trying to avoid gluten, finding good fall cookies can be tricky. Most recipes end up dry or crumbly, which is honestly disappointing when you’re craving something soft and chewy.
That’s why I spent way too much time perfecting these gluten-free pumpkin spice cookies. I wanted something that tasted just like the regular version – no weird aftertaste or strange texture. The secret is using the right blend of gluten-free flour and not skipping the xanthan gum if your flour doesn’t already have it.
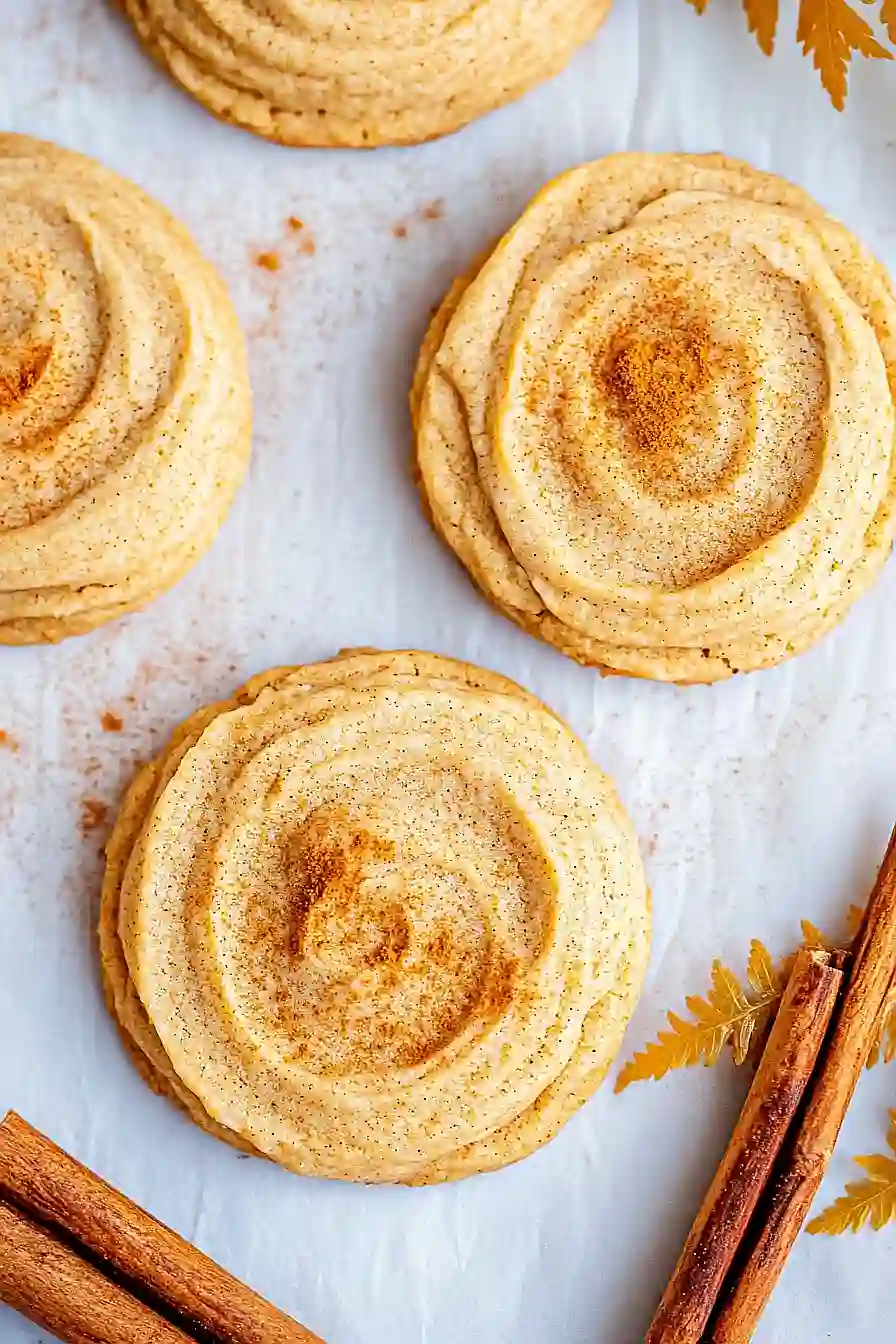
These cookies are soft, chewy, and packed with all those fall flavors you’re craving. Plus, they’re easy enough to make with the kids, which means I can get some help rolling the dough balls. Win-win.
Why You’ll Love These Gluten-Free Pumpkin Spice Cookies
- Gluten-free and dairy-free friendly – Made with cassava flour and tapioca starch instead of wheat flour, plus dairy-free alternatives, these cookies work perfectly for anyone with dietary restrictions without sacrificing taste.
- Natural sweetness – Sweetened with maple syrup and pumpkin puree instead of refined sugar, these cookies give you that cozy fall flavor while being a bit healthier than traditional cookies.
- Quick and easy – Ready in under 40 minutes from start to finish, these cookies are perfect when you need a fast fall treat for unexpected guests or a sudden craving.
- Perfect fall spice blend – The combination of cinnamon, nutmeg, ginger, and cloves creates that classic pumpkin spice flavor that makes your kitchen smell like autumn.
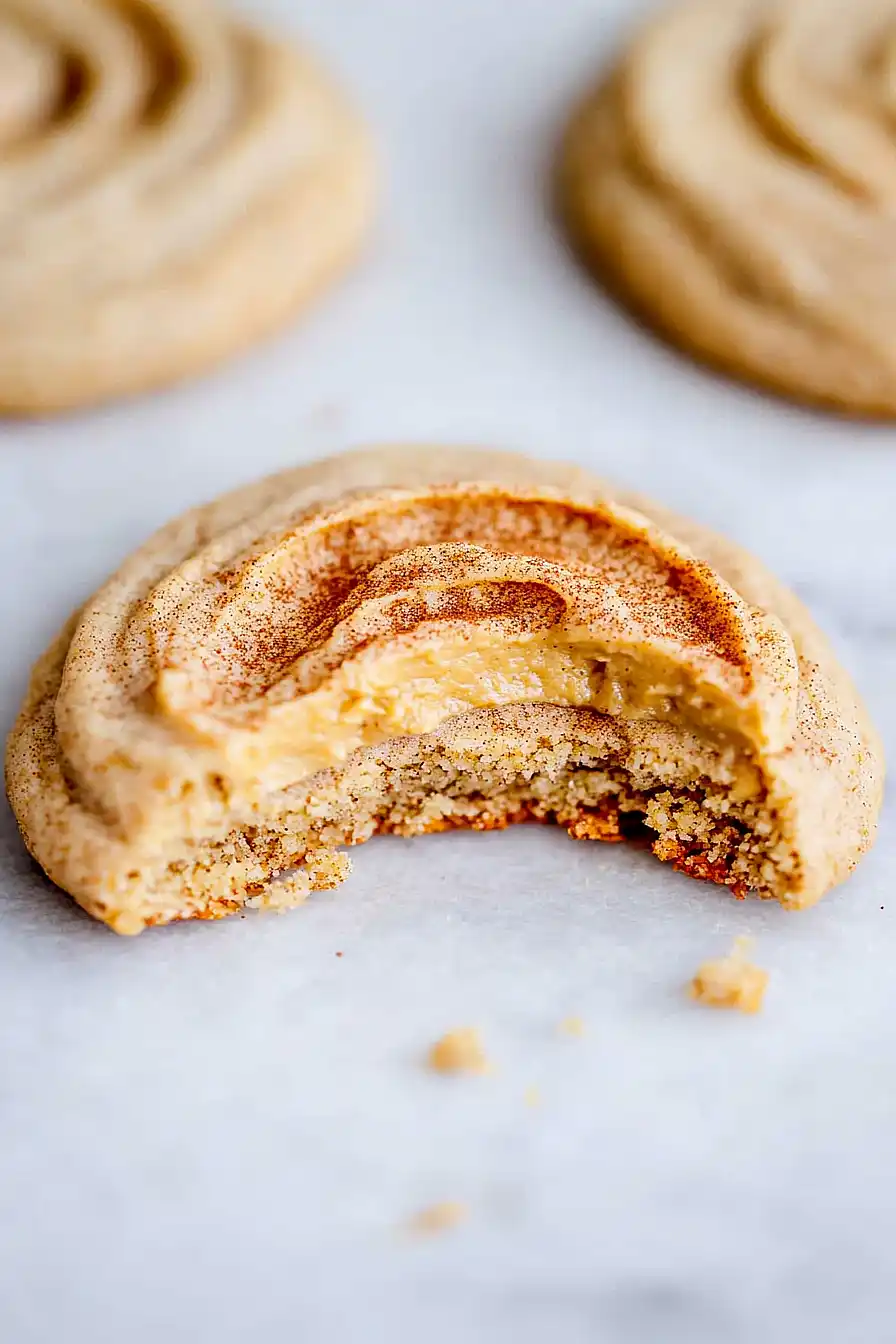
- Soft and chewy texture – The pumpkin puree and coconut oil keep these cookies moist and tender, giving you that perfect bite every time.
What Kind of Pumpkin Puree Should I Use?
For these cookies, you’ll want to use plain pumpkin puree, not pumpkin pie filling – there’s a big difference! Pumpkin pie filling already has spices and sugar added, which will throw off the balance of flavors in your cookies. Look for canned pumpkin puree that lists only pumpkin as the ingredient, or you can make your own by roasting and pureeing fresh pumpkin. If you’re using canned pumpkin, give it a quick stir before measuring since it can separate in the can. Make sure your pumpkin puree is at room temperature before mixing it into your dough – this helps everything combine more easily.
Options for Substitutions
This gluten-free recipe offers some room for swaps, though a few ingredients are key to getting the right texture:
- Cassava flour: This is pretty important for the cookie structure, but if you can’t find it, try almond flour (use 3/4 the amount) or a gluten-free flour blend. The texture will be slightly different but still tasty.
- Tapioca starch: You can swap this with arrowroot powder or cornstarch in equal amounts. These help give the cookies that nice chewy texture.
- Coconut oil: Any neutral oil works here – try avocado oil or melted vegan butter. If using solid vegan butter, make sure it’s at room temperature.
- Maple syrup: Agave nectar or brown rice syrup work well as substitutes. You could also use coconut nectar if you have it on hand.
- Dairy-free cream cheese: Regular cream cheese works if dairy isn’t an issue. Vegan butter or palm shortening are good alternatives too – just make sure they’re at room temperature for easy mixing.
- Pumpkin puree: Sweet potato puree or butternut squash puree work great here. Just make sure it’s smooth and not too watery.
- Spices: Feel free to adjust the spice blend to your taste. You can use pumpkin pie spice (about 1½ teaspoons total) instead of the individual spices if that’s what you have.
Watch Out for These Mistakes While Baking
The biggest mistake with gluten-free cookies is overmixing the dough, which can make your cookies tough and dense instead of tender – mix just until the ingredients come together and stop there.
Another common error is not measuring your cassava flour and tapioca starch correctly, so make sure to spoon them into your measuring cups and level off rather than scooping directly from the container, which can pack in too much flour and create dry, crumbly cookies.
Since gluten-free doughs behave differently than regular ones, avoid the temptation to add extra flour if the dough seems sticky – it’s supposed to be softer than traditional cookie dough, and chilling it for 30 minutes will make it much easier to handle.
Finally, watch your baking time closely since these cookies can go from perfectly done to overbaked in just a minute or two, and remember that they’ll continue cooking slightly on the hot pan even after you remove them from the oven.
What to Serve With Gluten-Free Pumpkin Spice Cookies?
These soft, spiced cookies are perfect with a warm cup of coffee or chai tea, especially on a cozy fall afternoon. I love pairing them with a glass of cold almond milk or oat milk for dunking, which really brings out all those warm spices like cinnamon and nutmeg. They also make a great dessert alongside a scoop of vanilla ice cream or even some whipped coconut cream if you’re keeping things dairy-free. For a fun fall treat, try serving them with hot apple cider or even crumbled over a bowl of vanilla yogurt for breakfast.
Storage Instructions
Keep Fresh: These pumpkin spice cookies stay soft and chewy when stored in an airtight container at room temperature for up to 5 days. I like to place a piece of parchment paper between layers to keep them from sticking together, especially if they have any frosting or glaze on top.
Freeze: You can freeze these cookies for up to 3 months in a freezer-safe container or bag. I often make a double batch during fall and freeze half for later when I’m craving that cozy pumpkin spice flavor. Just make sure they’re completely cooled before freezing.
Thaw: When you’re ready to enjoy frozen cookies, simply let them sit at room temperature for about 20-30 minutes. They’ll taste just as good as when they were fresh! If you want them slightly warm, you can pop them in a 300°F oven for just a few minutes.
| Preparation Time | 15-25 minutes |
| Cooking Time | 11-15 minutes |
| Total Time | 26-40 minutes |
| Level of Difficulty | Medium |
Estimated Nutrition
Estimated nutrition for the whole recipe (without optional ingredients):
- Calories: 1000-1150
- Protein: 2-4 g
- Fat: 38-44 g
- Carbohydrates: 180-210 g
Ingredients
For the cookies:
- 1/2 cup plus 2 tbsp cassava flour
- 1/4 cup tapioca flour
- 1/4 tsp baking soda
- 1/4 tsp fine salt
- 1 tsp ground cinnamon
- 1/4 tsp nutmeg
- 1/4 tsp ground ginger
- 1/4 tsp ground cloves
- 1/4 cup melted coconut oil
- 1/4 cup maple syrup
- 1 tsp vanilla extract
For the pumpkin icing:
- 1/2 cup dairy-free cream cheese, palm shortening or vegan butter
- 1/2 cup plus 2 tbsp tapioca flour
- 1/2 tsp ground cinnamon
- 1/4 cup pumpkin puree
- 1/4 cup plus 2 tbsp maple syrup
- 1 tsp vanilla extract
- Pinch of sea salt
Step 1: Preheat Oven and Prepare Dry Ingredients
- 1/2 cup plus 2 tbsp cassava flour
- 1/4 cup tapioca flour
- 1/4 tsp baking soda
- 1/4 tsp fine salt
- 1 tsp ground cinnamon
- 1/4 tsp nutmeg
- 1/4 tsp ground ginger
- 1/4 tsp ground cloves
Preheat your oven to 350°F (175°C).
In a large bowl, combine the cassava flour, tapioca flour, baking soda, fine salt, ground cinnamon, nutmeg, ginger, and ground cloves.
Mix the dry ingredients thoroughly to ensure all the spices and leavening agents are evenly distributed.
Step 2: Finish Dough and Chill
- 1/4 cup melted coconut oil
- 1/4 cup maple syrup
- 1 tsp vanilla extract
- dough from Step 1
Make a well in the center of the dry mixture and add melted coconut oil, maple syrup, and vanilla extract.
Mix until well combined, then use your hands to bring the dough together.
Place the dough between two pieces of parchment paper and roll it into a rectangle about 1/4-inch thick.
Transfer the rolled dough into the refrigerator to chill for 5-7 minutes.
Chilling makes it easier to cut out shapes later.
I always find chilled dough is much easier to work with—no sticking!
Step 3: Cut Out and Bake Cookies
- chilled dough from Step 2
Remove the chilled dough from the refrigerator.
Use your favorite cookie cutter shapes to cut out cookies.
Transfer the cookies, along with the parchment paper, to a large baking sheet.
Bake them on the middle rack of the oven for about 11 minutes, or until just set but not browned.
After baking, allow the cookies to cool completely on the baking sheet before removing them—otherwise, they will break apart.
Step 4: Prepare Pumpkin Cinnamon Icing
- 1/2 cup dairy-free cream cheese, palm shortening or vegan butter
- 1/2 cup plus 2 tbsp tapioca flour
- 1/2 tsp ground cinnamon
- 1/4 cup pumpkin puree
- 1/4 cup plus 2 tbsp maple syrup
- 1 tsp vanilla extract
- pinch of sea salt
Meanwhile, prepare the icing.
In a stand mixer or food processor, combine the room-temperature dairy-free cream cheese, palm shortening, or vegan butter with the tapioca flour, ground cinnamon, pumpkin puree, maple syrup, vanilla extract, and a pinch of sea salt.
Whisk or pulse until well combined.
If you prefer a thicker frosting, add a bit more tapioca flour to achieve your desired consistency.
For extra depth of flavor, I sometimes add a dash more cinnamon at this stage.
Step 5: Ice and Decorate Cookies
- baked and cooled cookies from Step 3
- icing from Step 4
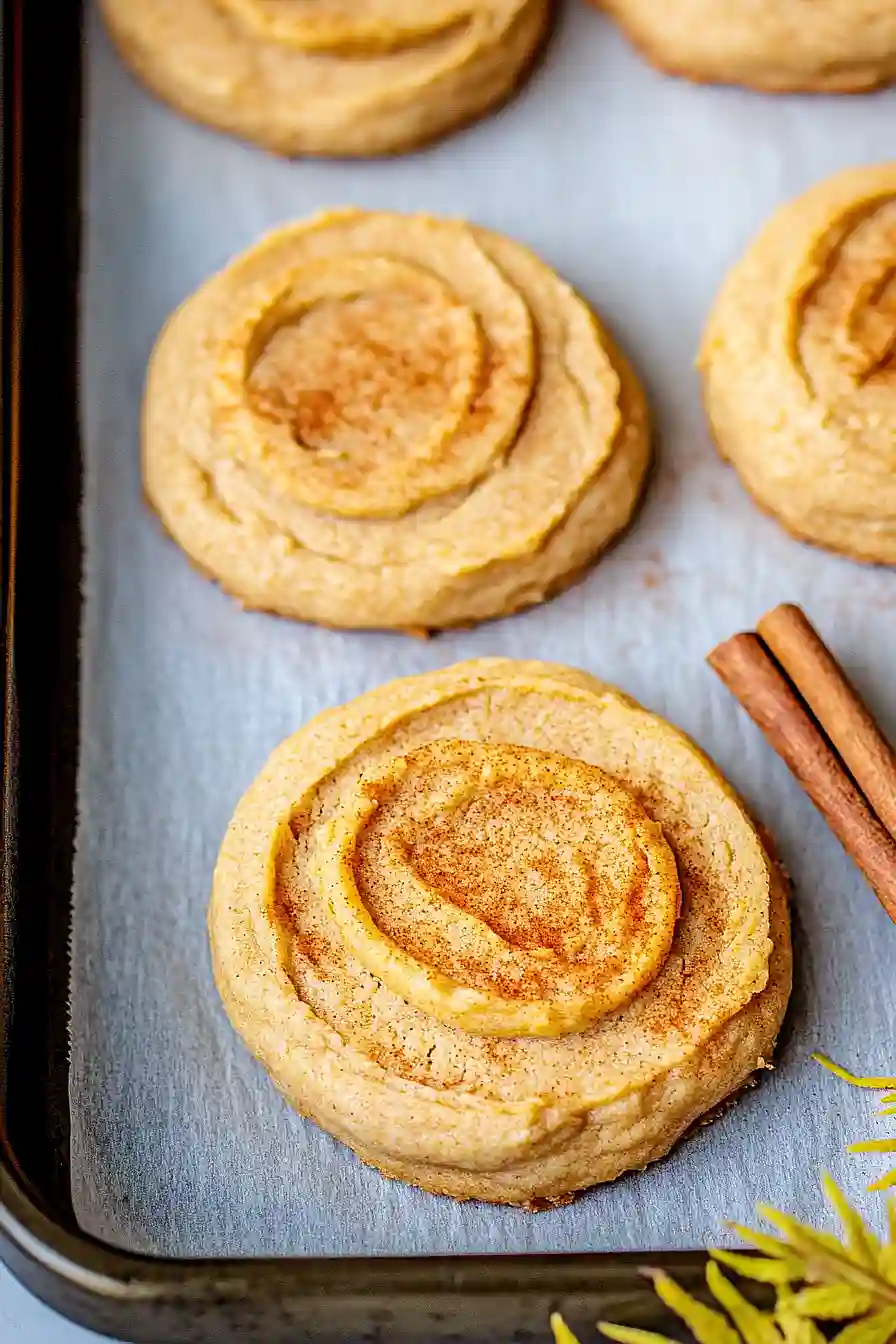
Once the cookies are completely cool, use a spoon to add a dollop of icing (from Step 4) to each cookie and spread lightly.
If desired, sprinkle extra cinnamon or cinnamon sugar on top for a festive finish.
Frosting the cookies only once fully cooled helps the icing stay neat and set beautifully.
