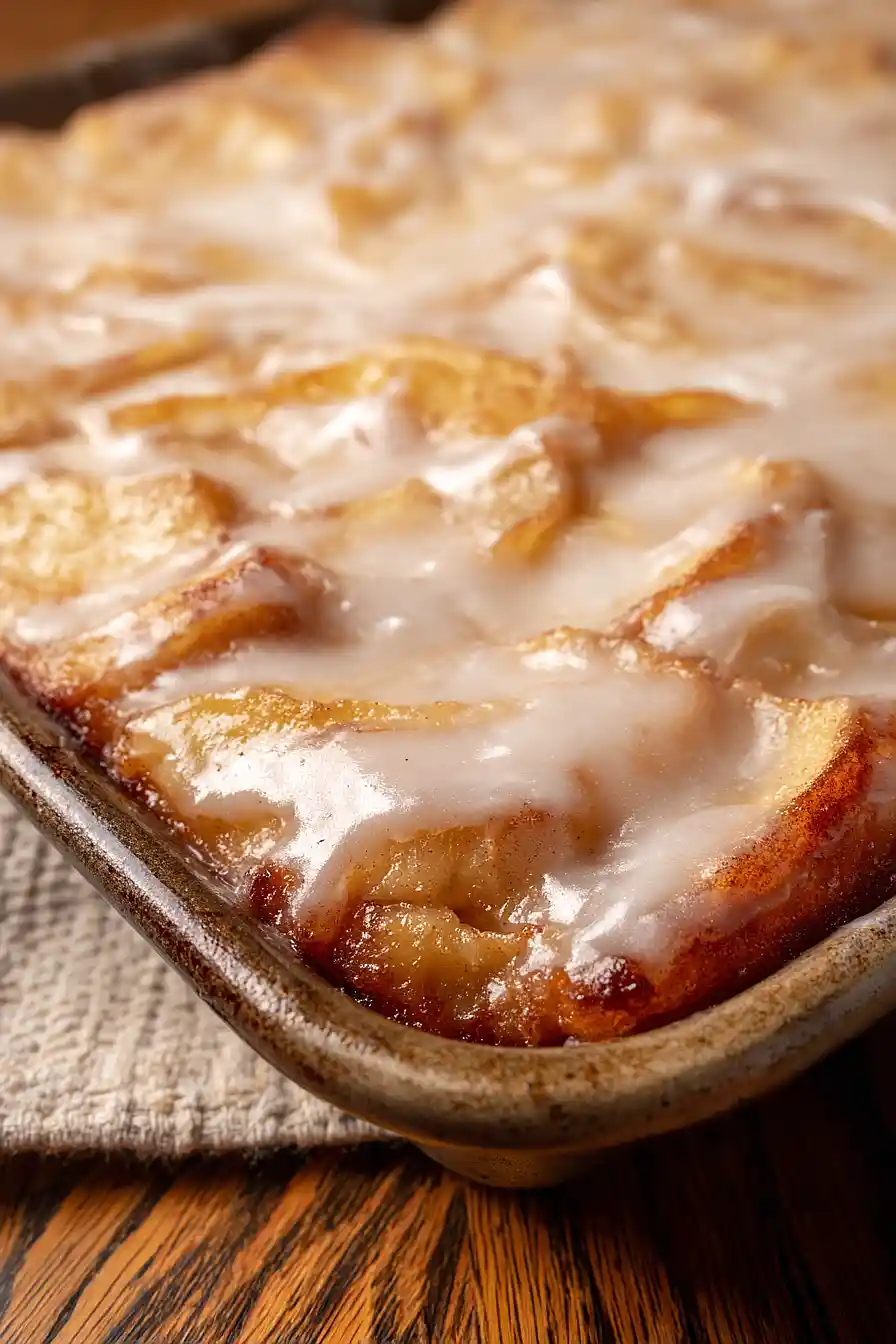
Here is my go-to recipe for Chicago-style apple slices, with tender apple wedges covered in a sweet, cinnamon-sugar coating and baked until golden brown.
These apple slices are always a hit when I need a quick dessert that’s not too fancy. They’re easier than making a whole pie, but still give you those warm fall flavors everyone loves. Perfect with a scoop of vanilla ice cream!
Why You’ll Love These Chicago-Style Apple Slices
- Easy shortcut with canned filling – Using store-bought apple pie filling saves you tons of prep time without sacrificing any of that classic apple flavor we all crave.
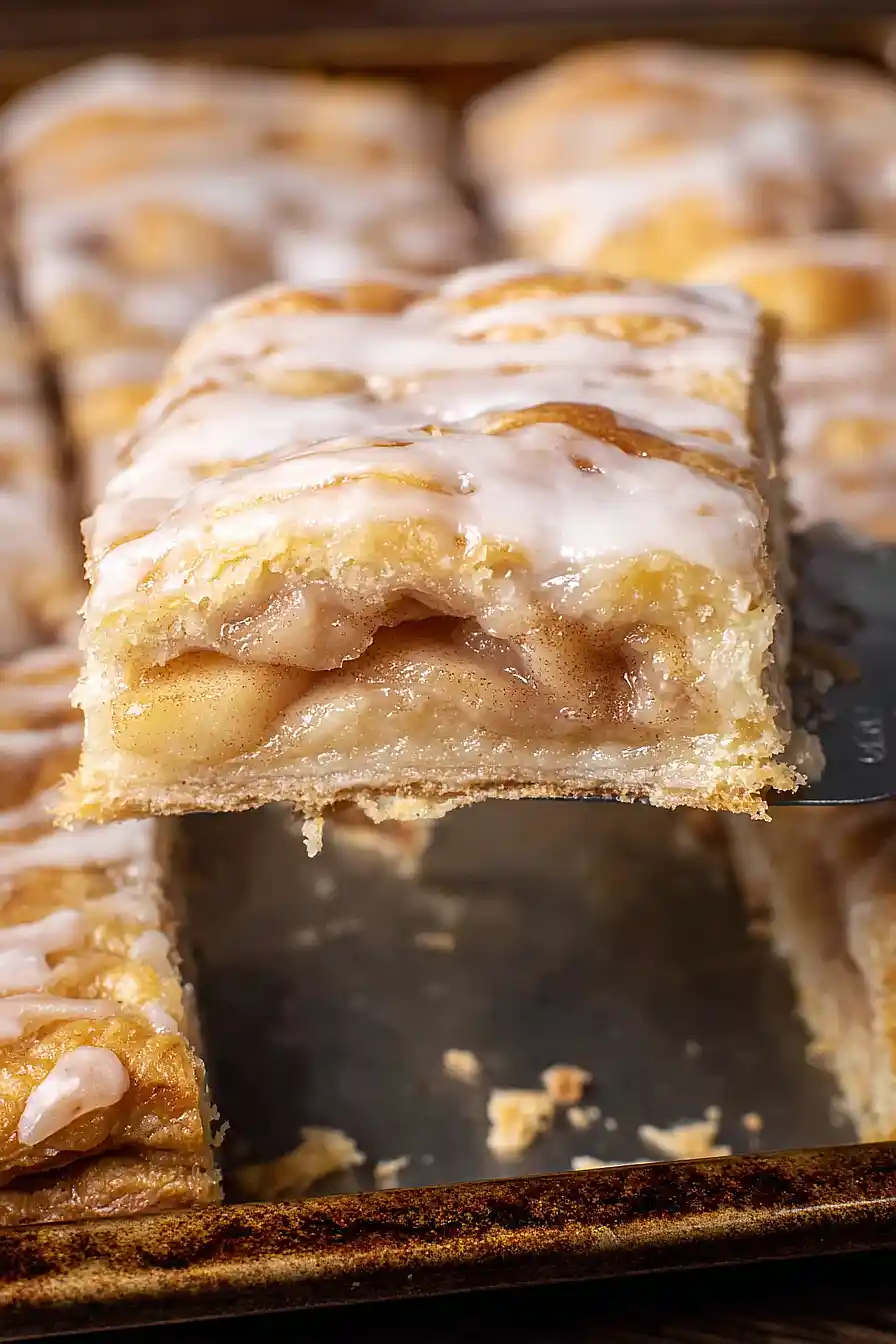
- Perfect for feeding a crowd – These bar-style treats are way easier to serve than individual pies, making them ideal for potlucks, bake sales, or family gatherings.
- Buttery, flaky crust – The homemade pastry creates those crispy, golden layers that make each bite absolutely satisfying.
- Sweet glaze finish – That simple powdered sugar glaze on top adds just the right amount of sweetness and makes them look bakery-worthy.
- Make-ahead friendly – These apple slices actually taste even better the next day, so you can bake them ahead of time for stress-free entertaining.
What Kind of Apples Should I Use?
While this recipe calls for canned apple pie filling, you can absolutely make your own with fresh apples if you prefer. Granny Smith apples are the classic choice since they hold their shape well during baking and provide that perfect tart flavor that balances the sweet pastry. Honeycrisp and Braeburn apples also work great if you want something a bit sweeter. If you’re using canned filling, look for one that has good-sized apple pieces rather than mushy bits – it’ll give you better texture in your finished slices. Just make sure whatever apples you choose aren’t too soft, or they’ll turn to mush when baked.
Options for Substitutions
This recipe is pretty forgiving when it comes to swaps, so here are some options if you need to make substitutions:
- All-purpose flour: You can use pastry flour for a more tender crust, but don’t substitute with cake flour as it won’t give you the structure you need for this pastry.
- Unsalted butter: If you only have salted butter, just reduce the salt in the recipe by half. You can also use shortening or lard for the pastry, though butter gives the best flavor.
- Apple pie filling: Fresh apples work great too! Use about 6-8 medium apples (like Granny Smith or Honeycrisp), peel and slice them, then toss with 1/2 cup sugar, 2 tablespoons flour, and 1 teaspoon cinnamon.
- Whole milk: Any milk will work here – 2%, skim, or even heavy cream. You can also use half-and-half for a richer glaze.
- Powdered sugar: In a pinch, you can make your own by blending 1 cup granulated sugar with 1 tablespoon cornstarch in a food processor until fine and powdery.
Watch Out for These Mistakes While Baking
The biggest mistake when making Chicago-style apple slices is overworking the dough, which leads to tough, chewy pastry instead of the flaky layers you want – mix just until the dough comes together and handle it as little as possible.
Another common error is using warm butter, so make sure your butter stays cold throughout the process by chilling it beforehand and even popping the dough back in the fridge if it gets too soft while rolling.
Don’t skip draining excess liquid from your apple filling, as too much moisture will make the bottom crust soggy and prevent it from baking properly.
Finally, resist the urge to cut into these beauties right away – letting them cool for at least 30 minutes allows the filling to set up and makes for much cleaner slices that won’t fall apart on your plate.

What to Serve With Chicago-Style Apple Slices?
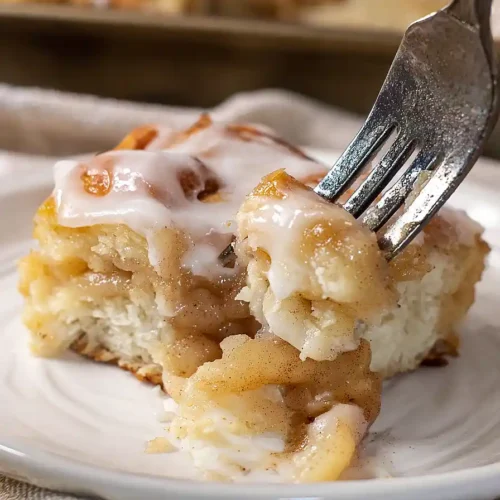
These sweet apple slices are perfect on their own, but they really shine when served with a scoop of vanilla ice cream or a dollop of fresh whipped cream. I love pairing them with a hot cup of coffee or spiced cider, especially during fall when the flavors just feel right together. If you’re serving them for dessert, try adding a drizzle of caramel sauce or a sprinkle of cinnamon for extra warmth. They also make a great addition to a brunch spread alongside other pastries and fresh fruit.
Storage Instructions
Keep Fresh: These apple slices are best stored covered at room temperature for up to 3 days. The pastry stays nice and crisp this way, and you don’t have to worry about the glaze getting weird in the fridge. Just cover them loosely with foil or plastic wrap.
Refrigerate: If you need to keep them longer, pop them in the fridge for up to a week in an airtight container. The pastry might lose some of its crispness, but they’ll still taste great. Let them come to room temperature before serving for the best flavor.
Make Ahead: You can totally make these a day ahead for parties or gatherings. Just wait to add the glaze until you’re ready to serve, since it looks prettier when it’s fresh. Store the unglazed slices covered, then drizzle the glaze right before your guests arrive.
| Preparation Time | 30-45 minutes |
| Cooking Time | 40-50 minutes |
| Total Time | 70-95 minutes |
| Level of Difficulty | Medium |
Estimated Nutrition
Estimated nutrition for the whole recipe (without optional ingredients):
- Calories: 4100-4400
- Protein: 26-32 g
- Fat: 165-180 g
- Carbohydrates: 630-670 g
Ingredients
For the pastry crust:
- 4 cups plain flour
- 1 tbsp white sugar
- 1 tsp salt
- 1 1/4 cups unsalted butter, cold (2 1/2 sticks)
- 1/2 cup ice-cold water, plus extra if needed
For the apple filling:
- 4 cups prepared apple pie filling
For the glaze:
- 1 cup confectioners’ sugar
- 2 tbsp unsalted butter, at room temperature
- 1 tsp vanilla extract
- 2 tbsp whole milk
Step 1: Prepare the Pie Dough
- 4 cups plain flour
- 1 tbsp white sugar
- 1 tsp salt
- 1 1/4 cups unsalted butter, cold (2 1/2 sticks)
- 1/2 cup ice-cold water, plus extra if needed
In a large bowl, combine the flour, white sugar, and salt.
Grate in the cold unsalted butter using a cheese grater, working in batches to prevent the butter from softening—if needed, chill the butter between grating.
Toss the grated butter into the flour mixture as you go.
(Alternatively, cube or slice the butter and cut it in using a pastry blender or two forks.) Create a well in the center and add 1/2 cup ice-cold water, mixing quickly with a fork.
Drizzle in extra cold water, 2 tablespoons at a time, until the dough just holds together and isn’t sticky.
You should still see small pieces of butter throughout the dough, which is key for flakiness.
Step 2: Chill and Prepare the Dough for Baking
Turn the dough onto a lightly floured work surface and knead quickly and gently to bring it together.
Divide the dough in half and flatten each half into a 1-inch thick rectangle.
Wrap each piece in plastic wrap and chill in the refrigerator for at least 30 minutes.
I always chill my pie dough to help relax the gluten and keep the layers super flaky.
Step 3: Assemble the Pie
- pie dough from Step 2
- 4 cups prepared apple pie filling
- plain flour (for dusting, from Step 1)
Preheat your oven to 400°F.
Lightly dust your work surface with flour, then roll out one dough rectangle to fit a 9×13-inch jelly roll pan.
Press the rolled dough into the bottom of the pan.
Spread the prepared apple pie filling evenly over the crust.
Roll out the second dough rectangle and place it on top of the filling.
You may use a rolling pin to help transfer the dough.
Pinch the edges together lightly, and cut a few vents in the top crust to allow steam to escape.
Step 4: Bake the Pie
Bake the assembled pie in the preheated oven for about 40 minutes, rotating the pan halfway through baking, until the crust is golden brown.
Once baked, remove the pie from the oven and place it on a wire rack to cool completely before glazing.
Step 5: Make and Apply the Glaze
- 1 cup confectioners’ sugar
- 2 tbsp unsalted butter, at room temperature
- 1 tsp vanilla extract
- 2 tbsp whole milk
Beat the confectioners’ sugar, room temperature butter, vanilla extract, and whole milk together in a bowl until smooth and creamy.
Once the pie has cooled, spread the glaze evenly over the top crust.
Allow the glaze to set and harden.
Then, slice the pie into squares and serve.
For a little extra flavor, I sometimes add a pinch of cinnamon or a squeeze of lemon juice to the glaze.
Easy Chicago-Style Apple Slices
Ingredients
For the pastry crust:
- 4 cups plain flour
- 1 tbsp white sugar
- 1 tsp salt
- 1 1/4 cups unsalted butter, cold (2 1/2 sticks)
- 1/2 cup ice-cold water, plus extra if needed
For the apple filling:
- 4 cups prepared apple pie filling
For the glaze:
- 1 cup confectioners’ sugar
- 2 tbsp unsalted butter, at room temperature
- 1 tsp vanilla extract
- 2 tbsp whole milk
Instructions
- In a large bowl, combine the flour, white sugar, and salt. Grate in the cold unsalted butter using a cheese grater, working in batches to prevent the butter from softening—if needed, chill the butter between grating. Toss the grated butter into the flour mixture as you go. (Alternatively, cube or slice the butter and cut it in using a pastry blender or two forks.) Create a well in the center and add 1/2 cup ice-cold water, mixing quickly with a fork. Drizzle in extra cold water, 2 tablespoons at a time, until the dough just holds together and isn’t sticky. You should still see small pieces of butter throughout the dough, which is key for flakiness.
- Turn the dough onto a lightly floured work surface and knead quickly and gently to bring it together. Divide the dough in half and flatten each half into a 1-inch thick rectangle. Wrap each piece in plastic wrap and chill in the refrigerator for at least 30 minutes. I always chill my pie dough to help relax the gluten and keep the layers super flaky.
- Preheat your oven to 400°F. Lightly dust your work surface with flour, then roll out one dough rectangle to fit a 9x13-inch jelly roll pan. Press the rolled dough into the bottom of the pan. Spread the prepared apple pie filling evenly over the crust. Roll out the second dough rectangle and place it on top of the filling. You may use a rolling pin to help transfer the dough. Pinch the edges together lightly, and cut a few vents in the top crust to allow steam to escape.
- Bake the assembled pie in the preheated oven for about 40 minutes, rotating the pan halfway through baking, until the crust is golden brown. Once baked, remove the pie from the oven and place it on a wire rack to cool completely before glazing.
- Beat the confectioners’ sugar, room temperature butter, vanilla extract, and whole milk together in a bowl until smooth and creamy. Once the pie has cooled, spread the glaze evenly over the top crust. Allow the glaze to set and harden. Then, slice the pie into squares and serve. For a little extra flavor, I sometimes add a pinch of cinnamon or a squeeze of lemon juice to the glaze.
