There’s something so fun about cake balls – they’re like little bites of happiness that make everyone smile. I started making these lemon ones when my kids asked for “fancy” treats for a school bake sale, and now they’re our go-to dessert for parties and gatherings. The best part? They’re not nearly as complicated as they look.
These lemon cake balls are perfect when you want something sweet but not too heavy. I usually make them ahead of time and keep them in the fridge, which means less stress when company’s coming over. Plus, they’re small enough that you can have just one (or maybe two… who’s counting?) without feeling guilty.
Whether you’re new to making cake balls or you’ve rolled hundreds before, this lemon version is really straightforward. And if you’re worried about making them look perfect – don’t be! That’s what sprinkles are for, and honestly, they taste just as good even if they’re not Instagram-worthy.
Why You’ll Love These Cake Balls
- No-bake prep – Starting with a pre-baked cake means you’re already halfway there – just mix, roll, and dip to create these sweet treats.
- Make-ahead friendly – These cake balls can be made in advance and stored in the fridge, perfect for parties or when you need a quick dessert on hand.
- Simple ingredients – With just 6 basic ingredients, you can transform a regular lemon cake into these irresistible bite-sized treats.
- Perfect for sharing – These portable, portion-controlled treats are ideal for parties, potlucks, or gifting to friends and family.
What Kind of White Chocolate Should I Use?
For cake balls, melting wafers are your best friend since they’re specifically made for coating and dipping. While Ghirardelli is mentioned in the recipe, other brands like Wilton Candy Melts or Merckens will work just as well. Regular white chocolate chips aren’t the best choice here since they often contain additives that can make them seize up or become grainy when melted. If you’re working with melting wafers, you won’t need to add any shortening or oil to thin them out – they’re ready to go as is. Just remember to melt them slowly using short bursts in the microwave or a double boiler to prevent overheating, which can make your chocolate thick and unusable.
Options for Substitutions
Need to make some swaps? Here are some helpful substitutions for this recipe:
- Lemon cake: You can start with any boxed lemon cake mix or homemade recipe. In a pinch, vanilla cake with added lemon zest and extract works too!
- White chocolate melting wafers: While Ghirardelli is recommended, any good quality melting wafers will work. Regular white chocolate chips can be used but may need a teaspoon of coconut oil to thin them out for better coating. Avoid using almond bark as it won’t give you the same smooth finish.
- Salted butter: Unsalted butter works fine – just add a tiny pinch of salt. You can also use margarine, though the texture might be slightly different.
- Lemon juice: Fresh lemon juice is best, but bottled works too. You could also use 1 tablespoon of lemon extract for a stronger flavor.
- Vanilla extract: Feel free to skip the vanilla or replace it with almond extract for a different flavor profile. Just use half the amount if choosing almond extract as it’s stronger.
Watch Out for These Mistakes While Making
The biggest challenge when making cake balls is getting the right consistency in your mixture – crumbling your cake too finely can make the mixture too dense and paste-like, while not breaking it down enough will result in balls that fall apart.
Temperature control is crucial when working with white chocolate – overheating will cause it to become grainy and unusable, so heat it in 30-second intervals, stirring between each, and keep it around 90°F for the smoothest coating.
One common error is rushing the chilling process – your cake balls need at least 2 hours in the refrigerator (or 30 minutes in the freezer) before dipping, otherwise they’ll fall apart in the melted chocolate, and make sure to only take out a few balls at a time while dipping to keep them firm.
For the best texture and appearance, avoid making your cake balls too large (about 1-inch diameter is perfect), and tap off excess chocolate gently against the side of the bowl rather than shaking the ball, which can create air bubbles or cause the coating to crack.
What to Serve With Lemon Cake Balls?
These sweet little lemon cake balls are perfect for serving at parties or afternoon tea gatherings! They pair wonderfully with hot beverages like Earl Grey tea, which brings out the citrus notes, or a smooth cup of coffee to balance the sweetness. For a fun dessert spread, try placing them alongside fresh berries or other bite-sized treats like chocolate-covered strawberries or macarons. If you’re serving these at a party, I like to set up a drink station with both hot and iced tea options – the cold drinks are especially refreshing with these treats during warmer months.
Storage Instructions
Keep Fresh: These lemon cake balls stay perfectly fresh in an airtight container in the fridge for up to a week. I like to place them in a single layer, or if stacking is necessary, put a piece of parchment paper between layers to prevent them from sticking together.
Freeze: Want to make these ahead? Place the finished cake balls in a freezer-safe container, separating layers with parchment paper, and they’ll keep in the freezer for up to 3 months. This is super handy when you need a quick treat for unexpected guests!
Thaw: When you’re ready to enjoy your frozen cake balls, just transfer them to the fridge and let them thaw overnight. Once thawed, let them sit at room temperature for about 15-20 minutes before serving – this helps the white chocolate coating taste its best.
| Preparation Time | 20-30 minutes |
| Cooking Time | 5-10 minutes |
| Chilling Time | 30-60 minutes |
| Total Time | 55-100 minutes |
| Level of Difficulty | Easy |
Estimated Nutrition
Estimated nutrition for the whole recipe (without optional ingredients):
- Calories: 3000-3500
- Protein: 40-50 g
- Fat: 150-180 g
- Carbohydrates: 450-500 g
Ingredients
- 1 baked lemon cake (9×13 pan size)
- 1 cup confectioners’ sugar
- 1/4 cup salted butter, softened
- 1 1/2 tsp vanilla extract
- 2 tbsp freshly squeezed lemon juice
- 2 to 3 cups ghirardelli white chocolate melting wafers
Step 1: Prepare the Lemon Frosting
- 1 cup confectioners’ sugar
- 1/4 cup salted butter, softened
- 1 1/2 tsp vanilla extract
- 2 tbsp freshly squeezed lemon juice
In a large bowl, combine the confectioners’ sugar, softened salted butter, vanilla extract, and freshly squeezed lemon juice.
Beat the mixture on medium speed until it becomes smooth and creamy.
Once the frosting is ready, set the bowl aside for the next step.
Step 2: Crumble the Baked Lemon Cake
- 1 baked lemon cake (9×13 pan size)
Remove the baked lemon cake from its pan and break it apart by hand or using a fork until the cake is reduced to a fine crumble.
This provides the base texture for the cake truffles.
Step 3: Mix Cake and Frosting to Form Dough
- crumbled lemon cake (from Step 2)
- lemon frosting (from Step 1)
Gradually add the lemon frosting (from Step 1) into the crumbled cake (from Step 2), mixing well after each addition.
Continue to stir until the mixture is evenly moistened and forms a pliable, dough-like consistency.
Step 4: Shape and Chill the Cake Balls
- cake-frosting mixture (from Step 3)
Using a spoon or portion scoop, shape the combined mixture into balls about 1 1/2 to 2 inches in diameter, based on your preference.
Place the shaped balls onto a plate or bowl.
Cover and chill them in the freezer for about 30 minutes or refrigerate for 1 hour, until the cake balls become firm.
I find that freezing makes them easier to dip in chocolate later.
Step 5: Melt the White Chocolate
- 2 to 3 cups Ghirardelli white chocolate melting wafers
Place the white chocolate melting wafers in a microwave-safe bowl.
Melt them in 30-second increments, stirring thoroughly after each interval, until the chocolate is smooth and fully melted.
Be careful not to overheat the chocolate; melting it slowly ensures a glossy finish.
Step 6: Dip and Finish the Cake Truffles
- firm cake balls (from Step 4)
- melted white chocolate (from Step 5)
Remove the chilled cake balls (from Step 4) from the freezer.
Using a fork or spoon, dip each ball into the melted white chocolate (from Step 5), coating it completely.
Place each dipped truffle onto parchment paper to set.
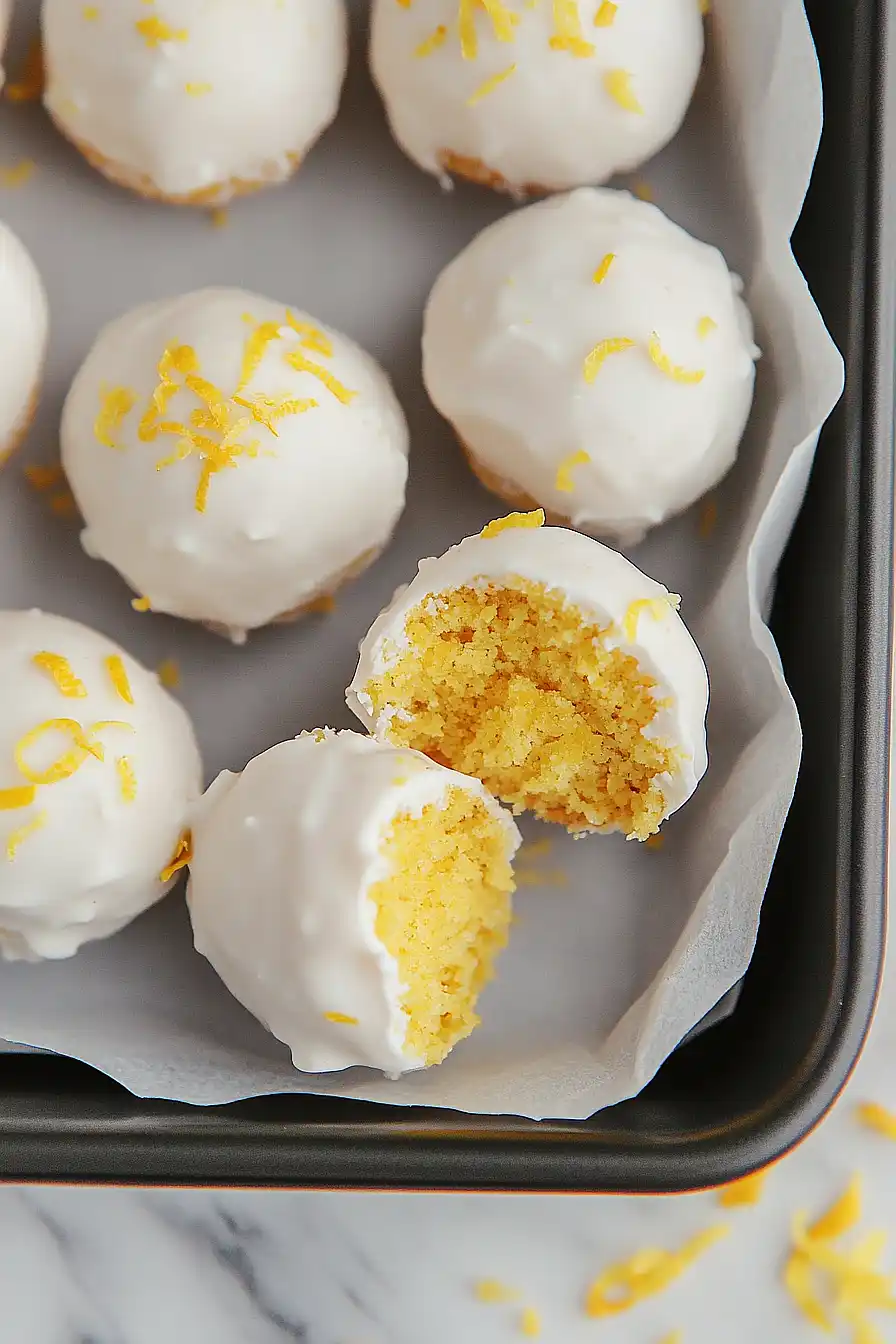
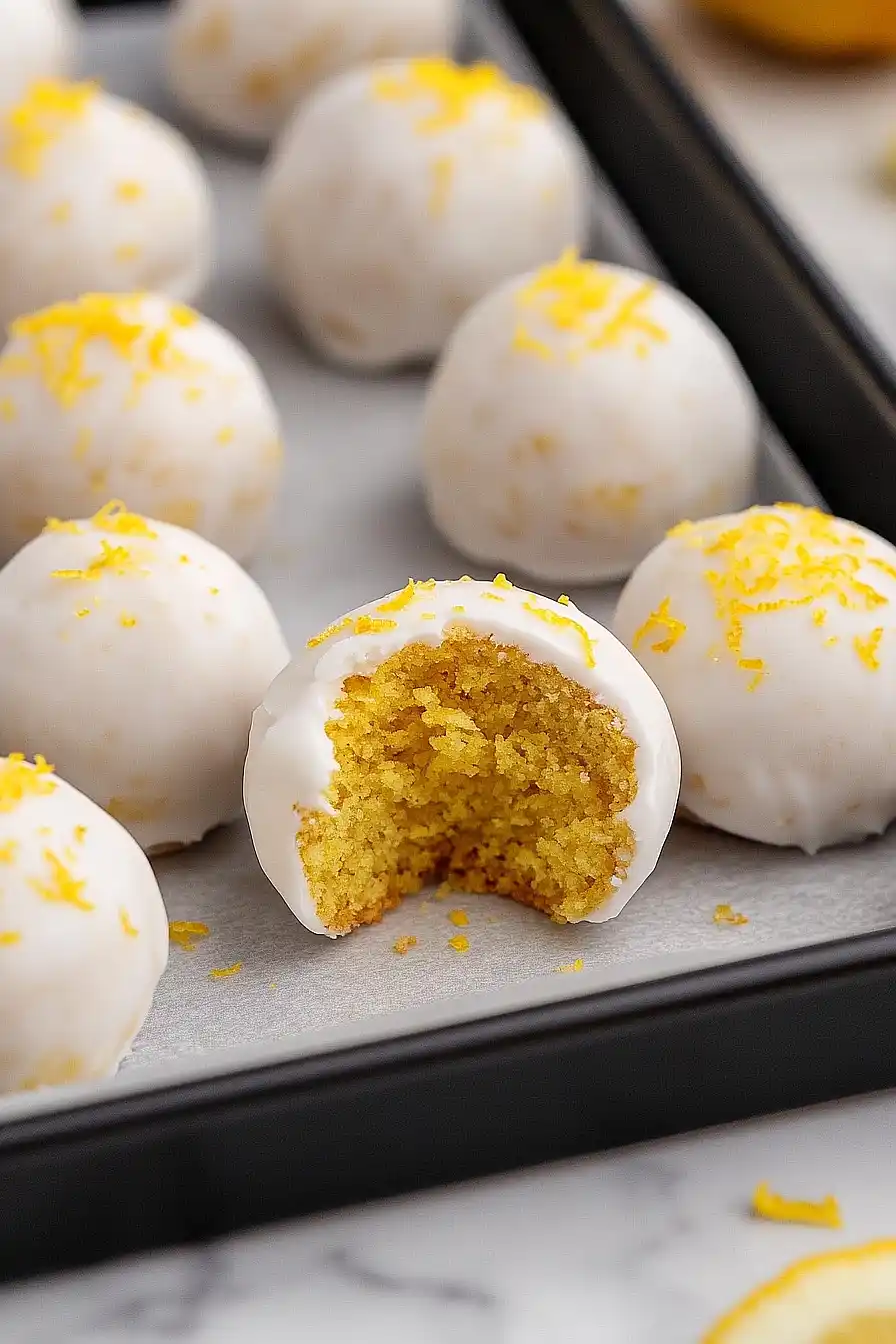
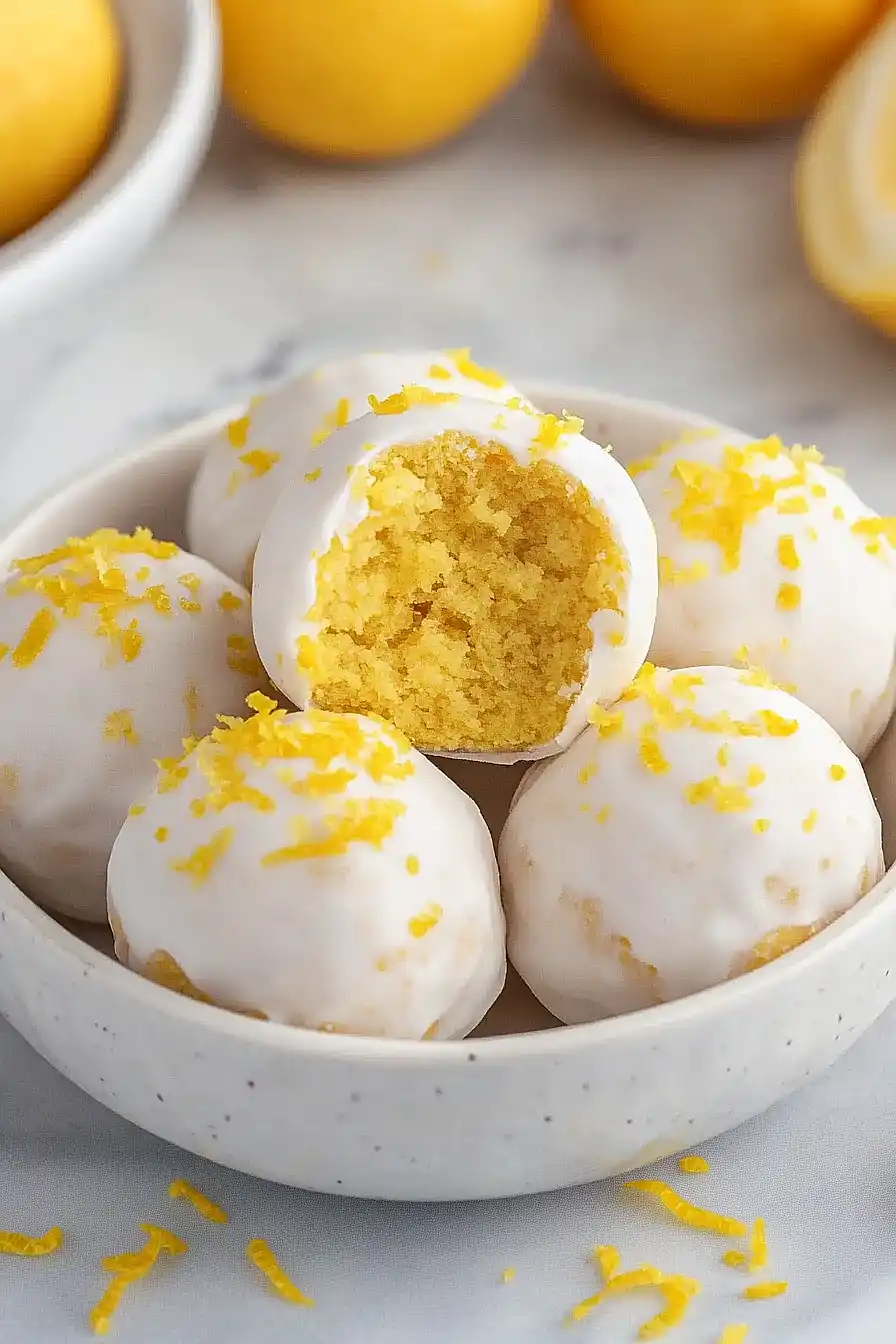
If you’d like to add sprinkles or toppings, do so before the chocolate sets.
Let the truffles sit until the chocolate is dry.
Store in an airtight container for freshness.
For an extra pop of lemon flavor, I sometimes zest a little fresh lemon over the truffles before the chocolate hardens.
")
")