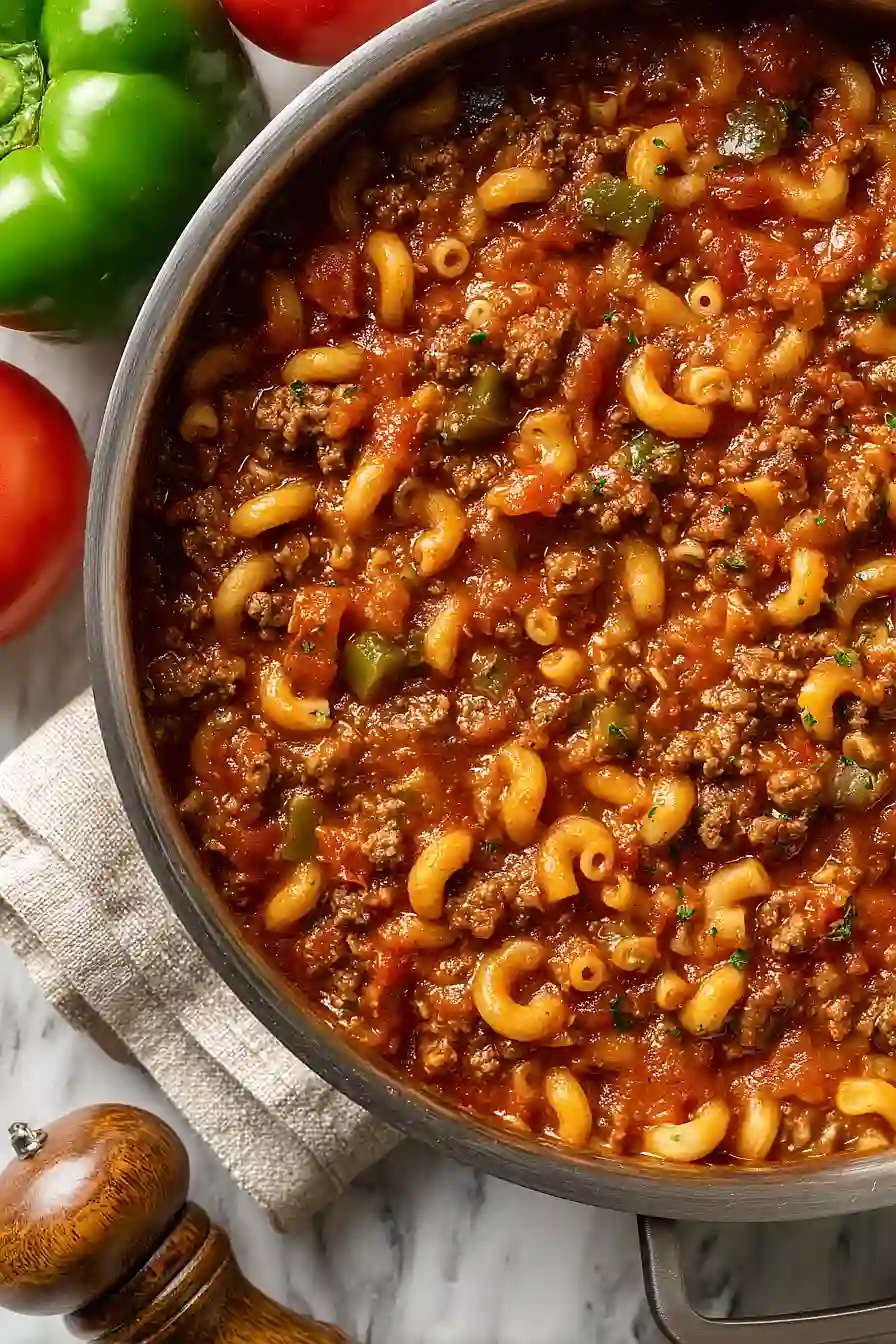
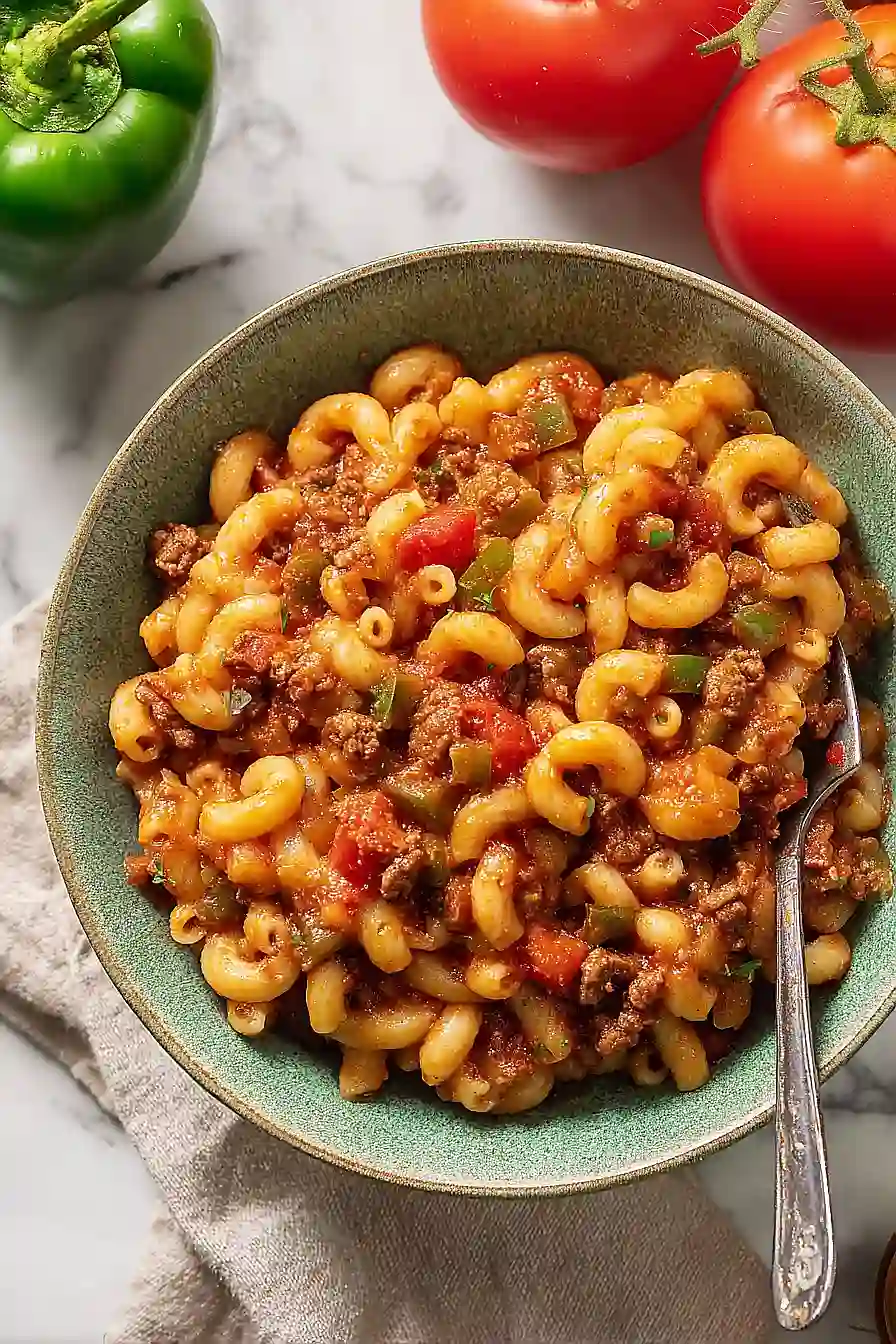
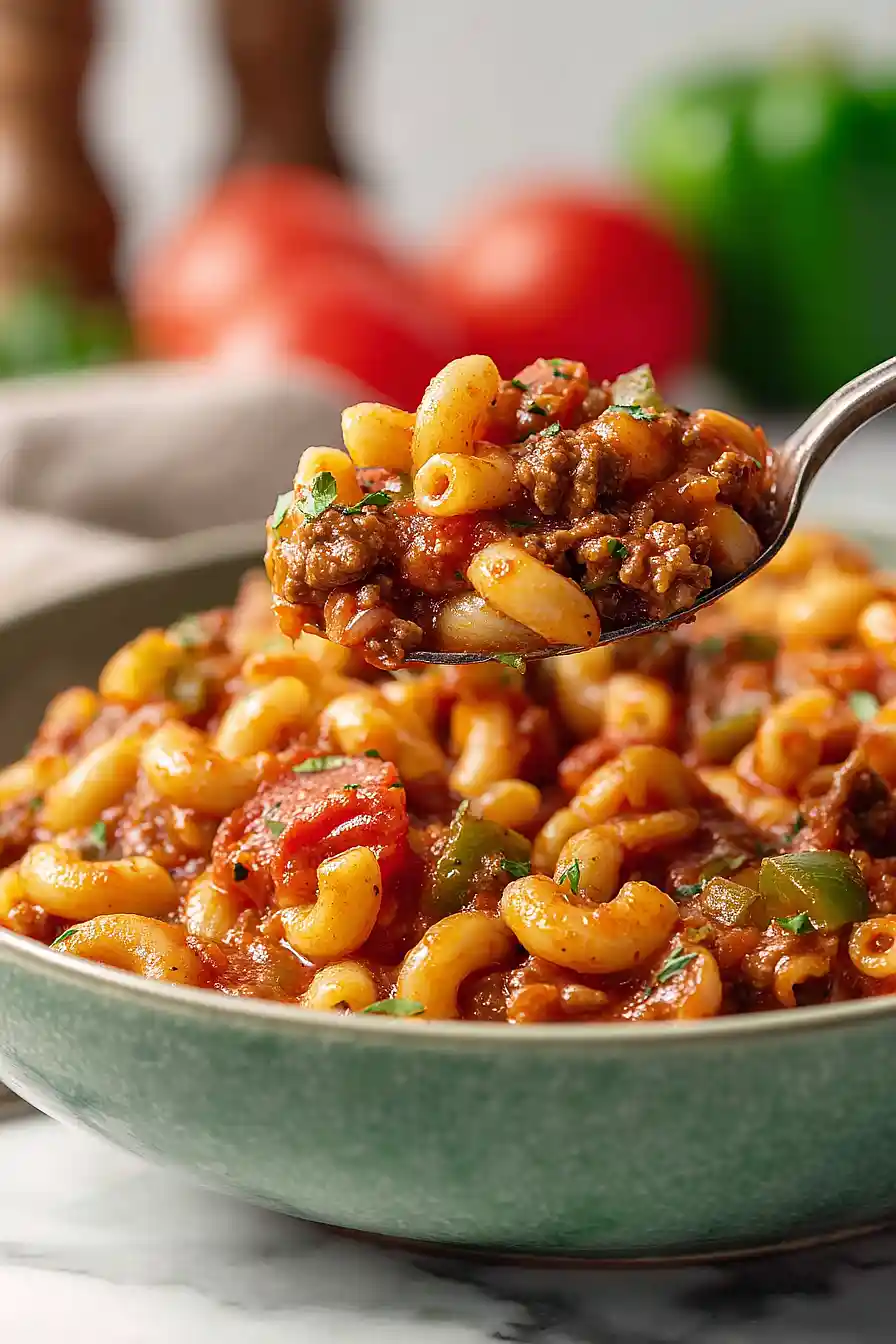
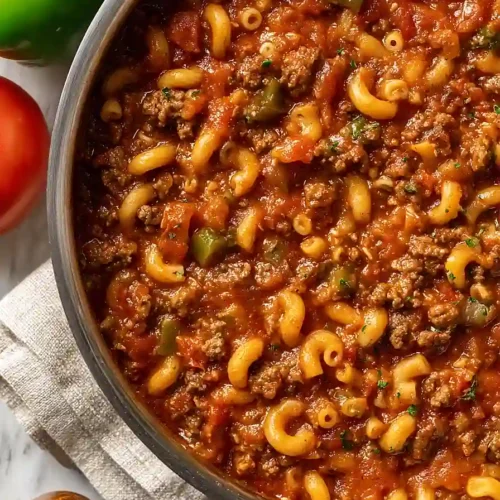
Here is my favorite old fashioned venison goulash recipe, with tender ground venison, tomatoes, bell peppers, and elbow pasta all simmered together in a rich, savory tomato sauce with plenty of Italian seasoning.
This goulash is my family’s go-to comfort meal on busy weeknights. I love that it all cooks in one pot, and the leftovers taste even better the next day. Plus, it’s a great way to use up ground venison from hunting season!
Why You’ll Love This Venison Goulash
- Quick weeknight dinner – This goulash comes together in under 45 minutes, making it perfect for busy evenings when you need something hearty on the table fast.
- One-pot meal – Everything cooks in a single pot, including the pasta, which means less cleanup and more time to relax after dinner.
- Great way to use venison – If you have ground venison in your freezer, this recipe is a tasty way to enjoy it without any gamey flavor coming through.
- Budget-friendly comfort food – Using simple pantry staples and ground meat, this filling dish feeds a crowd without breaking the bank.
- Kid-approved – The cheesy, tomatoey pasta is the kind of comforting meal that even picky eaters will happily dig into.
What Kind of Venison Should I Use?
Ground venison is the star of this goulash, and you’ve got a few options depending on what you have available. If you’re a hunter or know someone who is, freshly ground venison from deer you’ve processed yourself is always great, but store-bought ground venison works just as well. Some ground venison comes mixed with a bit of pork or beef fat to add moisture since venison is naturally very lean, and that’s actually a good thing for this recipe since it keeps the goulash from being too dry. If you’re using pure ground venison with no added fat, you might want to add a tablespoon of olive oil to the pan when browning to prevent sticking. You can also substitute ground beef if venison isn’t available, though you’ll lose that slightly gamey, rich flavor that makes this dish special.
Options for Substitutions
This goulash is pretty forgiving when it comes to swapping ingredients:
- Ground venison: If you don’t have venison, ground beef works perfectly here. You can also try ground turkey or a mix of beef and pork. Keep in mind that venison is leaner, so if using fattier meat, you might want to drain some grease after browning.
- Green bell pepper: Any color bell pepper works – red, yellow, or orange will add a slightly sweeter flavor. You can also use a combination of colors if that’s what you have on hand.
- Stewed tomatoes: Diced tomatoes or crushed tomatoes can replace stewed tomatoes without any issues. If using diced, the texture will be slightly chunkier, which some folks actually prefer.
- Elbow pasta: Feel free to use whatever small pasta shape you have – shells, rotini, penne, or even broken spaghetti will work. Just keep the cooking time in mind as different shapes may need a minute or two more or less.
- Cheddar cheese: Monterey Jack, Colby, or even mozzarella make good substitutes. You can also skip the cheese entirely if you’re watching dairy intake.
- Italian seasoning: No Italian seasoning? Mix together equal parts dried basil, oregano, and thyme. You can also add a pinch of rosemary if you have it.
Watch Out for These Mistakes While Cooking
The biggest mistake when cooking venison goulash is not draining enough fat after browning the meat, which can leave your dish greasy – venison is lean, but any fat it does have can taste gamey, so be thorough with draining.
Adding the pasta too early or not stirring frequently enough during the final simmer will cause it to stick to the bottom of the pot and burn, so set a timer and give it a good stir every few minutes.
Since venison cooks faster than beef and can turn tough if overcooked, avoid browning it on high heat for too long – medium-high heat for just 5 minutes is plenty to get it cooked through without drying it out.
Finally, resist the urge to skip the 5-minute resting period at the end, as this allows the cheese to melt completely and the flavors to come together instead of having a watery, separated sauce.
What to Serve With Venison Goulash?
This hearty venison goulash is a complete meal on its own, but I love serving it with a side of garlic bread or buttered dinner rolls to soak up all that rich tomato sauce. A simple side salad with ranch or Italian dressing adds a nice fresh crunch that balances out the richness of the dish. If you’re feeding a crowd, consider setting out some extra shredded cheddar cheese and sour cream on the side so everyone can customize their bowl. For a cozy dinner, pair it with some steamed green beans or roasted broccoli to round out the meal.
Storage Instructions
Store: This goulash keeps really well in the fridge for up to 4 days in an airtight container. The flavors actually get better as it sits, so it’s perfect for making ahead for busy weeknights. Just know that the pasta will soak up more liquid over time, so you might want to add a splash of water when reheating.
Freeze: You can freeze this goulash for up to 3 months in freezer-safe containers or bags. I like to portion it out into individual servings so I can grab just what I need. Let it thaw in the fridge overnight before reheating for best results.
Reheat: Warm it up on the stovetop over medium-low heat, stirring occasionally and adding a bit of water or broth if it seems dry. You can also microwave individual portions for 2-3 minutes, stirring halfway through. Top with fresh cheddar cheese after reheating for the best cheesy finish.
| Preparation Time | 10-15 minutes |
| Cooking Time | 25-30 minutes |
| Total Time | 35-45 minutes |
| Level of Difficulty | Easy |
| Servings | 7 servings |
Estimated Nutrition
Estimated nutrition for the whole recipe (without optional ingredients):
- Calories: 2850-3200
- Protein: 170-200 g
- Fat: 75-95 g
- Carbohydrates: 310-340 g
Ingredients
For the goulash:
- 2 lb ground venison
- 1/2 yellow onion (diced into 1/2-inch pieces)
- 1 green bell pepper (chopped into 1/2-inch chunks)
- 5 garlic cloves (minced)
- 30 oz tomato sauce (I use Hunt’s for the best consistency)
- 30 oz stewed tomatoes
- 2.5 cups water
- 2 tbsp Worcestershire sauce (I prefer Lea & Perrins for a deeper savory flavor)
- 2 tbsp Italian seasoning
- 2 tsp salt
- 1.5 tsp black pepper
- 1/2 tsp smoked paprika
- 1/2 tsp sugar
- 3 cups elbow pasta
For the finish:
- 1.25 cups medium cheddar (freshly shredded for a smoother melt)
Step 1: Brown the Venison and Build the Flavor Base
- 2 lb ground venison
- 1/2 yellow onion, diced into 1/2-inch pieces
- 1 green bell pepper, chopped into 1/2-inch chunks
- 5 garlic cloves, minced
In a large pot or Dutch oven over medium-high heat, add the ground venison and cook for 3-4 minutes, breaking it up with a spoon as it browns.
Once the venison is mostly cooked through and beginning to brown, add the diced onion, chopped bell pepper, and minced garlic.
Continue cooking for another 2-3 minutes, stirring occasionally, until the vegetables soften slightly and the garlic becomes fragrant.
This initial browning develops deep, savory flavors that form the foundation of the goulash.
Step 2: Drain Excess Fat and Add the Liquid Base
- 30 oz tomato sauce
- 30 oz stewed tomatoes
- 2.5 cups water
- 2 tbsp Worcestershire sauce
- 2 tbsp Italian seasoning
- 2 tsp salt
- 1.5 tsp black pepper
- 1/2 tsp smoked paprika
- 1/2 tsp sugar
Carefully pour off and discard any excess rendered fat from the pot—venison can be leaner than beef, but you’ll still want to remove any significant grease to keep the dish from becoming overly heavy.
Return the pot to medium heat and pour in the tomato sauce, stewed tomatoes, and water.
Add the Worcestershire sauce, Italian seasoning, salt, black pepper, smoked paprika, and sugar.
Stir well to combine all ingredients, making sure the seasonings are evenly distributed throughout the liquid.
Step 3: Simmer the Sauce to Meld Flavors
Bring the mixture to a simmer, then reduce the heat to medium-low and cover the pot.
Let it simmer undisturbed for 10 minutes.
This resting period allows the venison’s flavors to marry with the tomatoes and seasonings, creating a more cohesive sauce.
I find that this brief simmer makes a noticeable difference in the depth of flavor compared to rushing straight to adding the pasta.
Step 4: Cook the Pasta in the Sauce
- 3 cups elbow pasta
Add the elbow pasta directly to the simmering goulash mixture.
Stir well to break up any clumps and ensure the pasta is submerged in the sauce.
The pasta will absorb the flavors as it cooks, creating a more integrated dish than if you cooked it separately.
Simmer uncovered for 10-15 minutes, stirring frequently (every 2-3 minutes) to prevent sticking and ensure even cooking.
The pasta should be tender but not mushy when finished.
Step 5: Finish with Cheese and Rest
- 1.25 cups medium cheddar, freshly shredded
Once the pasta is cooked through, remove the pot from heat.
Add the freshly shredded cheddar cheese and stir until completely melted and incorporated—the residual heat will melt it smoothly without requiring additional cooking.
I recommend using freshly shredded cheese rather than pre-shredded varieties, as it melts much more evenly and creates a creamier texture.
Cover the pot and let it rest for 5 minutes before serving.
This resting time allows the flavors to settle and helps the dish achieve its final consistency.
Comforting Old Fashioned Venison Goulash
Ingredients
For the goulash::
- 2 lb ground venison
- 1/2 yellow onion (diced into 1/2-inch pieces)
- 1 green bell pepper (chopped into 1/2-inch chunks)
- 5 garlic cloves (minced)
- 30 oz tomato sauce (I use Hunt's for the best consistency)
- 30 oz stewed tomatoes
- 2.5 cups water
- 2 tbsp Worcestershire sauce (I prefer Lea & Perrins for a deeper savory flavor)
- 2 tbsp Italian seasoning
- 2 tsp salt
- 1.5 tsp black pepper
- 1/2 tsp smoked paprika
- 1/2 tsp sugar
- 3 cups elbow pasta
For the finish::
- 1.25 cups medium cheddar (freshly shredded for a smoother melt)
Instructions
- In a large pot or Dutch oven over medium-high heat, add the ground venison and cook for 3-4 minutes, breaking it up with a spoon as it browns. Once the venison is mostly cooked through and beginning to brown, add the diced onion, chopped bell pepper, and minced garlic. Continue cooking for another 2-3 minutes, stirring occasionally, until the vegetables soften slightly and the garlic becomes fragrant. This initial browning develops deep, savory flavors that form the foundation of the goulash.
- Carefully pour off and discard any excess rendered fat from the pot—venison can be leaner than beef, but you'll still want to remove any significant grease to keep the dish from becoming overly heavy. Return the pot to medium heat and pour in the tomato sauce, stewed tomatoes, and water. Add the Worcestershire sauce, Italian seasoning, salt, black pepper, smoked paprika, and sugar. Stir well to combine all ingredients, making sure the seasonings are evenly distributed throughout the liquid.
- Bring the mixture to a simmer, then reduce the heat to medium-low and cover the pot. Let it simmer undisturbed for 10 minutes. This resting period allows the venison's flavors to marry with the tomatoes and seasonings, creating a more cohesive sauce. I find that this brief simmer makes a noticeable difference in the depth of flavor compared to rushing straight to adding the pasta.
- Add the elbow pasta directly to the simmering goulash mixture. Stir well to break up any clumps and ensure the pasta is submerged in the sauce. The pasta will absorb the flavors as it cooks, creating a more integrated dish than if you cooked it separately. Simmer uncovered for 10-15 minutes, stirring frequently (every 2-3 minutes) to prevent sticking and ensure even cooking. The pasta should be tender but not mushy when finished.
- Once the pasta is cooked through, remove the pot from heat. Add the freshly shredded cheddar cheese and stir until completely melted and incorporated—the residual heat will melt it smoothly without requiring additional cooking. I recommend using freshly shredded cheese rather than pre-shredded varieties, as it melts much more evenly and creates a creamier texture. Cover the pot and let it rest for 5 minutes before serving. This resting time allows the flavors to settle and helps the dish achieve its final consistency.
