When you’re craving red velvet cake but don’t want to commit to baking an entire layer cake, or when you’re cooking for just one or two people, you might think you’re out of luck. After all, most dessert recipes make huge batches that leave you with leftovers for days, and let’s be honest, not everyone has the willpower to resist eating warm cookies straight from the oven.
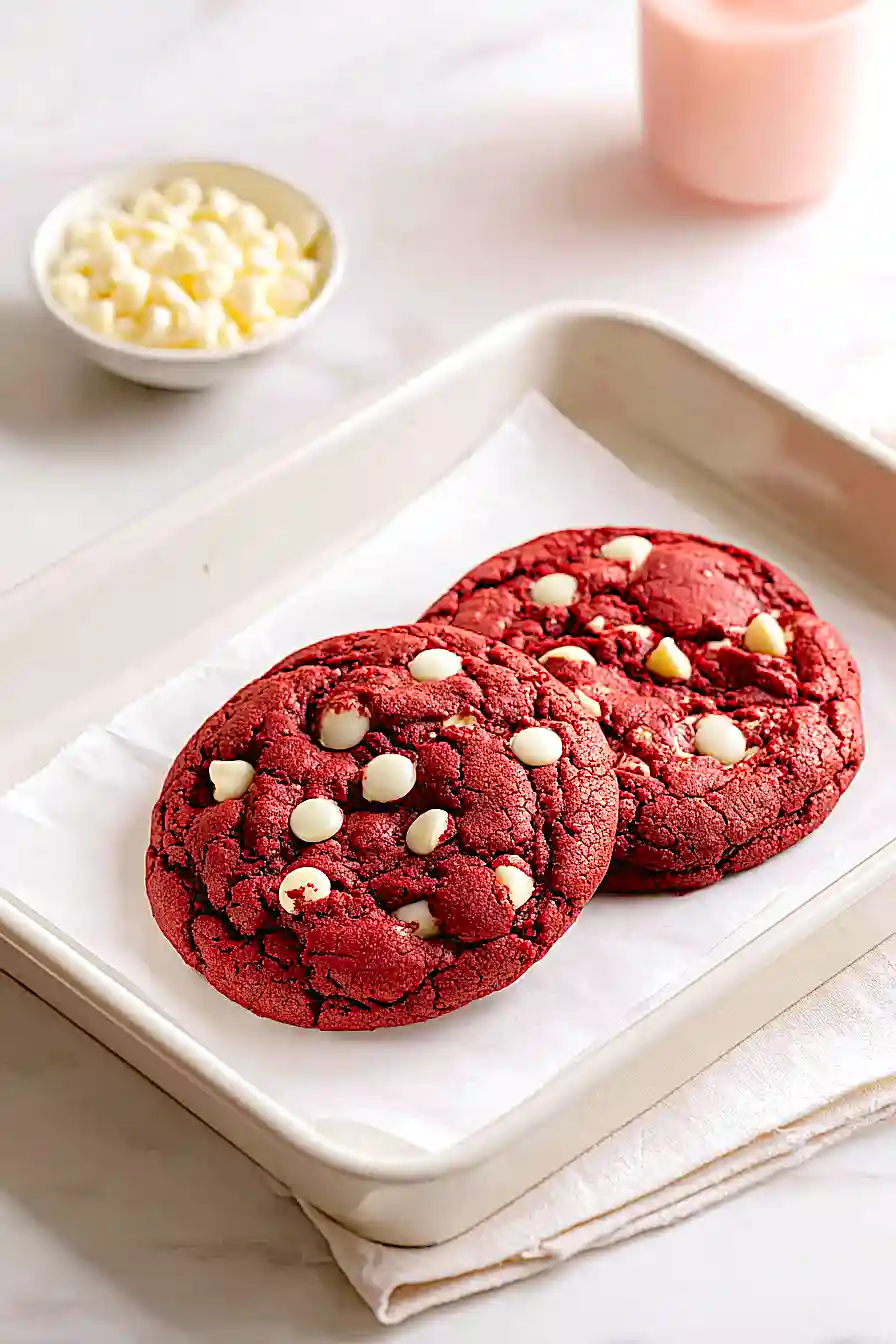
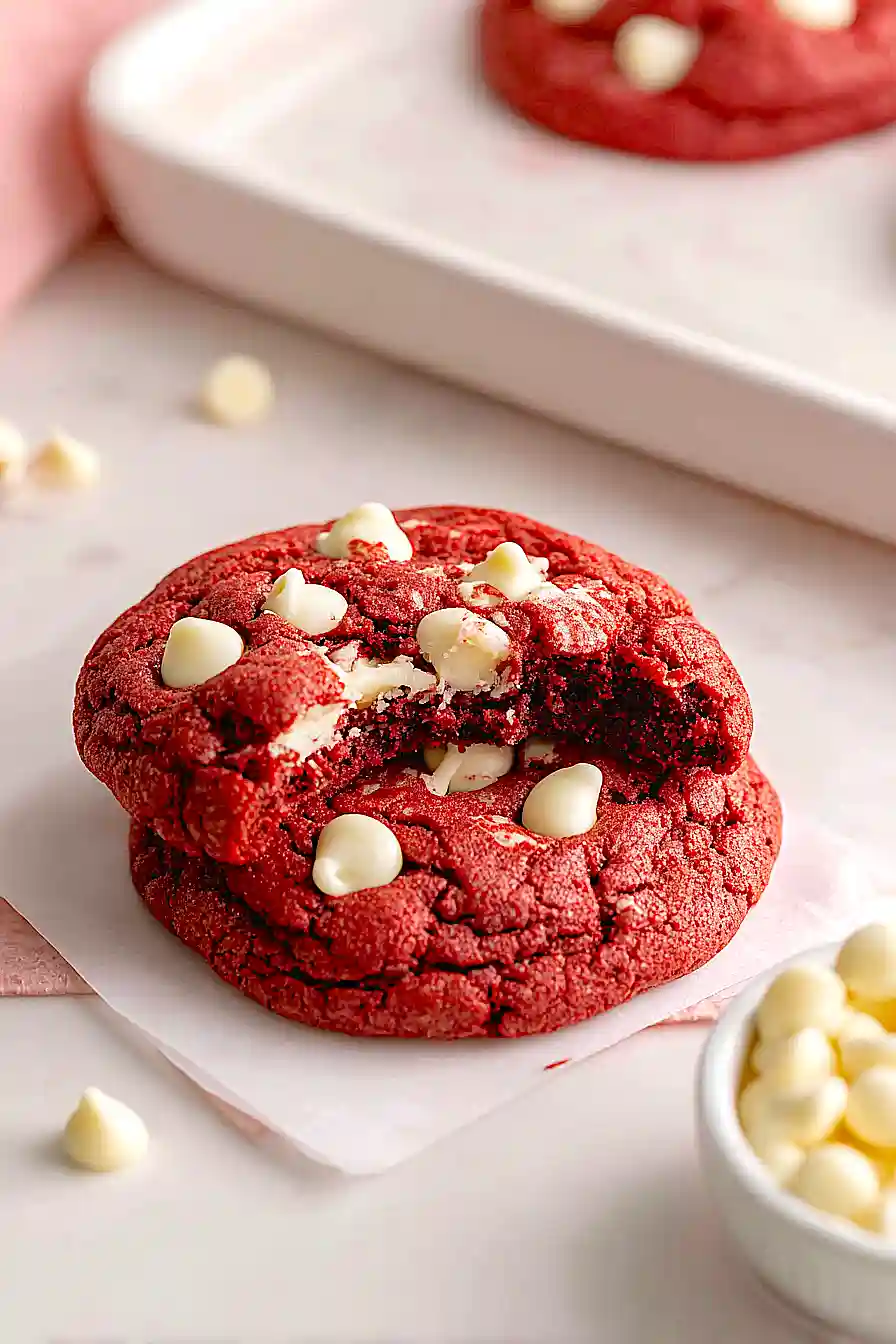
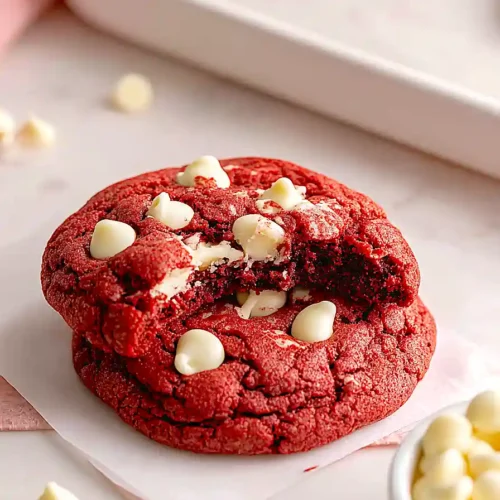
That’s where these small batch red velvet cookies come in handy: they make just enough to satisfy your sweet tooth without overloading your kitchen with extras, they’re ready in under 30 minutes, and they pack all that classic red velvet flavor into a soft, chewy cookie studded with white chocolate chips.
Why You’ll Love These Red Velvet Cookies
- Small batch recipe – This recipe makes just a few cookies, so you can satisfy your sweet tooth without having dozens of cookies tempting you all week long.
- Quick and easy – Ready in under an hour, these cookies come together fast with simple mixing and minimal cleanup.
- Perfect for one or two – No need to make a huge batch when you’re craving something sweet. This is ideal for solo baking or sharing with just one other person.
- Classic flavor combination – The hint of cocoa paired with sweet white chocolate chips gives you that signature red velvet taste everyone loves.
What Kind of Cocoa Powder Should I Use?
For red velvet cookies, you can use either natural or Dutch-process cocoa powder, though natural cocoa powder is the traditional choice. Natural cocoa has a lighter, more acidic flavor that pairs well with the subtle chocolate taste red velvet is known for – you don’t want the chocolate to overpower everything else. Dutch-process cocoa is darker and richer, so if you use it, your cookies will have a deeper chocolate flavor and might look a bit darker even with the red food coloring. Since this recipe only calls for a tablespoon of cocoa, either type will work just fine, so feel free to use whatever you have in your pantry.

Options for Substitutions
This small batch recipe is pretty forgiving when it comes to swaps:
- Butter: You can use margarine or coconut oil if needed, though butter gives the best flavor. Make sure whatever you use is softened to room temperature.
- Brown sugar: If you’re out of brown sugar, mix 3 tablespoons of white sugar with about 1/2 teaspoon of molasses. Or just use all white sugar – your cookies will be slightly less chewy but still tasty.
- Egg yolk: Since this recipe only needs the yolk, save the white for another use. In a pinch, you can use 1 tablespoon of sour cream or Greek yogurt instead.
- Red food coloring: The red color is what makes these red velvet, but you can skip it if you don’t have any on hand. You’ll end up with chocolate cookies instead, which are still delicious.
- White chocolate chips: Feel free to swap these with milk chocolate chips, dark chocolate chips, or even cream cheese chips if you want that classic red velvet pairing.
- Cocoa powder: Regular unsweetened cocoa powder works best here. Don’t substitute with hot cocoa mix as it contains sugar and will throw off the recipe.
Watch Out for These Mistakes While Baking
The biggest mistake with red velvet cookies is skipping the chilling step, which leads to cookies that spread too thin and lose their shape – those 10-15 minutes in the fridge are crucial for getting thick, chewy cookies instead of flat, crispy ones.
Another common error is overbaking, so pull them out when the edges are just set but the centers still look slightly underdone, as they’ll continue cooking on the hot baking sheet during that 10-minute cooling time.
Don’t go overboard with the red food coloring thinking more will make them brighter – too much can actually affect the taste and texture, so stick to those 6 drops or add just one or two more if needed.
Finally, make sure your butter is softened but not melted, since melted butter will cause the cookies to spread too much and lose that perfect texture you’re looking for.
What to Serve With Red Velvet Cookies?
These red velvet cookies are perfect on their own, but they really shine when paired with a cold glass of milk for dunking. If you’re serving them for a special occasion or dessert spread, try setting them out alongside vanilla ice cream or whipped cream for an extra indulgent treat. They also pair nicely with hot coffee or hot chocolate, especially during the colder months. Since this is a small batch recipe, they make a great personal treat or a sweet addition to a dessert board with fresh berries and other bite-sized sweets.
Storage Instructions
Store: Keep your red velvet cookies in an airtight container at room temperature for up to 5 days. They’ll stay soft and chewy if you toss a slice of bread in the container with them, which helps maintain moisture.
Freeze: These cookies freeze really well for up to 3 months. Just stack them with parchment paper in between and pop them in a freezer bag. You can also freeze the dough as individual balls and bake them fresh whenever a cookie craving hits.
Enjoy: Frozen cookies thaw quickly at room temperature in about 20 minutes, or you can warm them in the microwave for just 10-15 seconds for that fresh-baked feel. If you froze the dough, bake straight from frozen and add an extra minute or two to the baking time.
| Preparation Time | 20-30 minutes |
| Cooking Time | 10-15 minutes |
| Total Time | 40-60 minutes |
| Level of Difficulty | Easy |
| Servings | 2 cookies |
Estimated Nutrition
Estimated nutrition for the whole recipe (without optional ingredients):
- Calories: 500-600
- Protein: 5-7 g
- Fat: 26-32 g
- Carbohydrates: 65-75 g
We'll Pay You $5 to Try This Recipe!
Cook our recipe, snap some photos, and earn a $5 Amazon Gift Card. It's that simple!
Here's how:
- Make the recipe
- Take nice pictures of your final dish
- Fill out our quick form (2 minutes max!)
- Your $5 reward is on the way!
Ingredients
- 3 tbsp unsalted butter
- 4 tbsp brown sugar
- 1.5 tbsp sugar
- 1 egg yolk (room temperature, about 70°F)
- 3/4 tsp vanilla extract
- 6 drops red food coloring
- 5.5 tbsp all-purpose flour
- 1 tbsp cocoa powder
- 1/4 tsp baking soda
- 1/8 tsp salt
- 1/4 cup white chocolate chips
Step 1: Prepare Your Workspace and Preheat
Heat your oven to 350°F and line a baking sheet with parchment paper.
This small batch makes just two large cookies, so you won’t need much space.
Having everything ready before you start mixing ensures you can work efficiently without interruptions.
Step 2: Cream Butter and Sugars with Wet Ingredients
- 3 tbsp unsalted butter
- 4 tbsp brown sugar
- 1.5 tbsp sugar
- 1 egg yolk
- 3/4 tsp vanilla extract
- 6 drops red food coloring
In a bowl, combine the softened unsalted butter, brown sugar, and sugar.
Mix until well combined and slightly fluffy, about 1-2 minutes.
Add the room-temperature egg yolk, vanilla extract, and red food coloring, stirring until the mixture is smooth and evenly colored.
The room-temperature egg yolk is important—it incorporates more smoothly and creates a better texture.
I like to add the food coloring gradually and mix well to ensure an even, vibrant red color throughout.
Step 3: Mix Dry Ingredients and Combine
- 5.5 tbsp all-purpose flour
- 1 tbsp cocoa powder
- 1/4 tsp baking soda
- 1/8 tsp salt
- 1/4 cup white chocolate chips
- wet ingredient mixture from Step 2
In a small separate bowl, whisk together the all-purpose flour, cocoa powder, baking soda, and salt.
Add this dry mixture to the wet ingredients from Step 2 and stir until just combined—don’t overmix, as this keeps the cookies tender.
Fold in the white chocolate chips last.
The cocoa powder gives these cookies their signature red velvet flavor without making them taste like pure chocolate.
Step 4: Chill and Shape the Dough
- dough from Step 3
Refrigerate the dough for 10-15 minutes until it’s firm enough to handle.
This helps the cookies hold their shape and develop better flavor.
After chilling, divide the dough in half and gently form each portion into a ball.
Place the two balls on your prepared baking sheet, spacing them a few inches apart since they’ll spread slightly as they bake.
Step 5: Bake and Cool
Bake for 11-13 minutes, until the edges are set but the centers still look slightly underbaked—they’ll continue cooking as they cool.
Remove from the oven and let the cookies rest on the baking sheet for 10 minutes; I find this prevents them from breaking apart when you transfer them.
After cooling on the sheet, you can move them to a wire rack or plate to cool completely.
These cookies are best enjoyed while still slightly warm with a cold glass of milk.
Classic Small Batch Red Velvet Cookies
Ingredients
- 3 tbsp unsalted butter
- 4 tbsp brown sugar
- 1.5 tbsp sugar
- 1 egg yolk (room temperature, about 70°F)
- 3/4 tsp vanilla extract
- 6 drops red food coloring
- 5.5 tbsp all-purpose flour
- 1 tbsp cocoa powder
- 1/4 tsp baking soda
- 1/8 tsp salt
- 1/4 cup white chocolate chips
Instructions
- Heat your oven to 350°F and line a baking sheet with parchment paper. This small batch makes just two large cookies, so you won't need much space. Having everything ready before you start mixing ensures you can work efficiently without interruptions.
- In a bowl, combine the softened unsalted butter, brown sugar, and sugar. Mix until well combined and slightly fluffy, about 1-2 minutes. Add the room-temperature egg yolk, vanilla extract, and red food coloring, stirring until the mixture is smooth and evenly colored. The room-temperature egg yolk is important—it incorporates more smoothly and creates a better texture. I like to add the food coloring gradually and mix well to ensure an even, vibrant red color throughout.
- In a small separate bowl, whisk together the all-purpose flour, cocoa powder, baking soda, and salt. Add this dry mixture to the wet ingredients from Step 2 and stir until just combined—don't overmix, as this keeps the cookies tender. Fold in the white chocolate chips last. The cocoa powder gives these cookies their signature red velvet flavor without making them taste like pure chocolate.
- Refrigerate the dough for 10-15 minutes until it's firm enough to handle. This helps the cookies hold their shape and develop better flavor. After chilling, divide the dough in half and gently form each portion into a ball. Place the two balls on your prepared baking sheet, spacing them a few inches apart since they'll spread slightly as they bake.
- Bake for 11-13 minutes, until the edges are set but the centers still look slightly underbaked—they'll continue cooking as they cool. Remove from the oven and let the cookies rest on the baking sheet for 10 minutes; I find this prevents them from breaking apart when you transfer them. After cooling on the sheet, you can move them to a wire rack or plate to cool completely. These cookies are best enjoyed while still slightly warm with a cold glass of milk.
